


Make It With Wool Contest Entry: Coat & Dress
I joined ASG during Covid, having been motivated by a rediscovered ASG flyer. I had been given the flyer some years prior at the ASG booth at the Sewing and Stitchery Expo in Puyallup, WA where I had been wearing my WA State winning Make it With Wool (MIWW) garment and was approached by the chapter President who strongly recommended I join. Covid’s isolation gave me the impetus to seek out an avenue to engage with others sharing a common interest. The Silverdale, WA chapter was the perfect fit and I joined 3 Neighborhood Groups and soon was Zoom meeting with a fabulous and talented community of sewists.
It Started With Wool
 My primary interest is garment sewing, especially with wool fabric and fibers. Wool is a wonderful fabric and fiber to create with. I crochet, knit, felt, needle felt and sew with wool. The wool coat and dress described in this article were specifically made for this year’s Make it With Wool contest, an annual competition that promotes the beauty and versatility of wool by showcasing wool’s unique qualities in a variety of garment designs and details.
Inspiration: A tribute
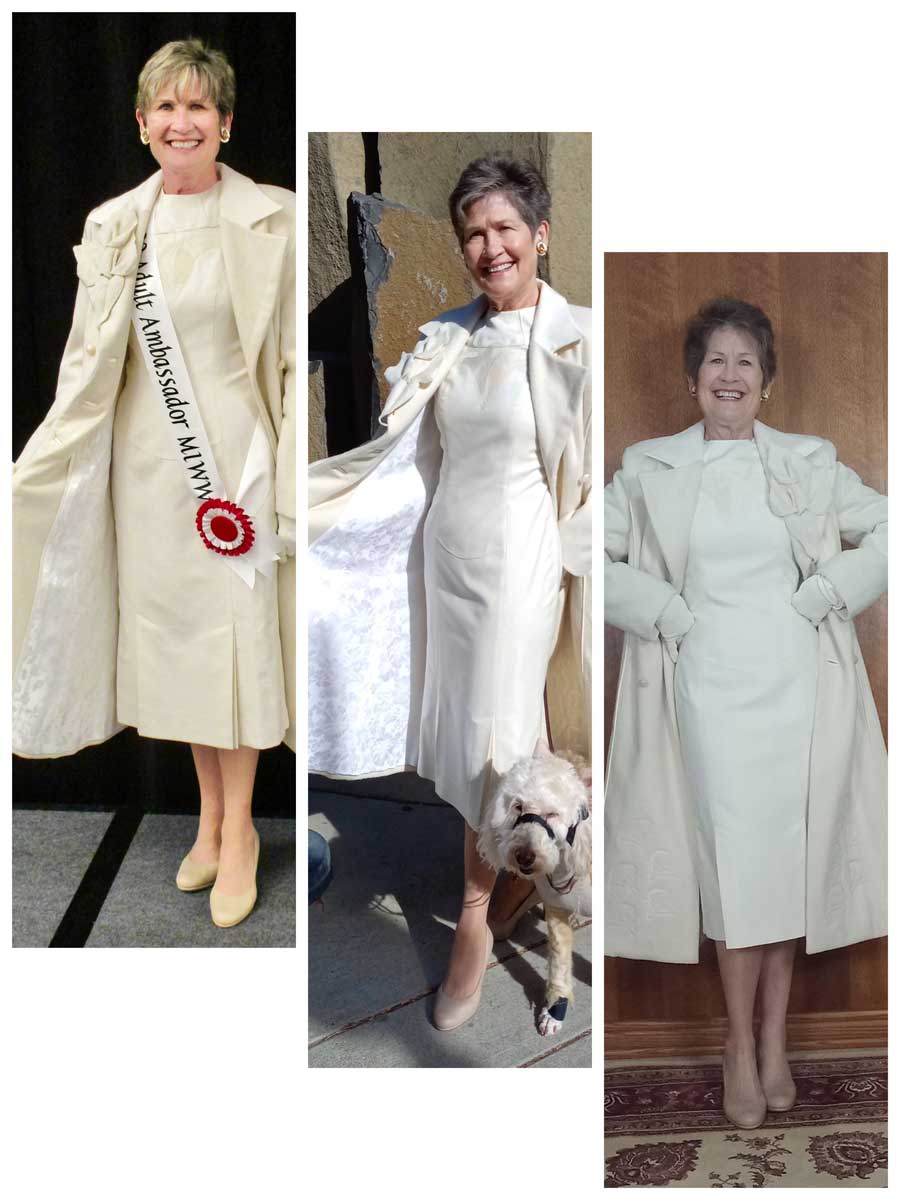
The inspiration for the coat came from the beautiful coat created by designer Gabriela Hearst and worn by Jill Biden at the inaugural ball. The classic double breasted princess seam design, color, and theme set the foundation for the vision of the coat. Taking this example, a Vogue pattern (7144) was selected with a similar design.
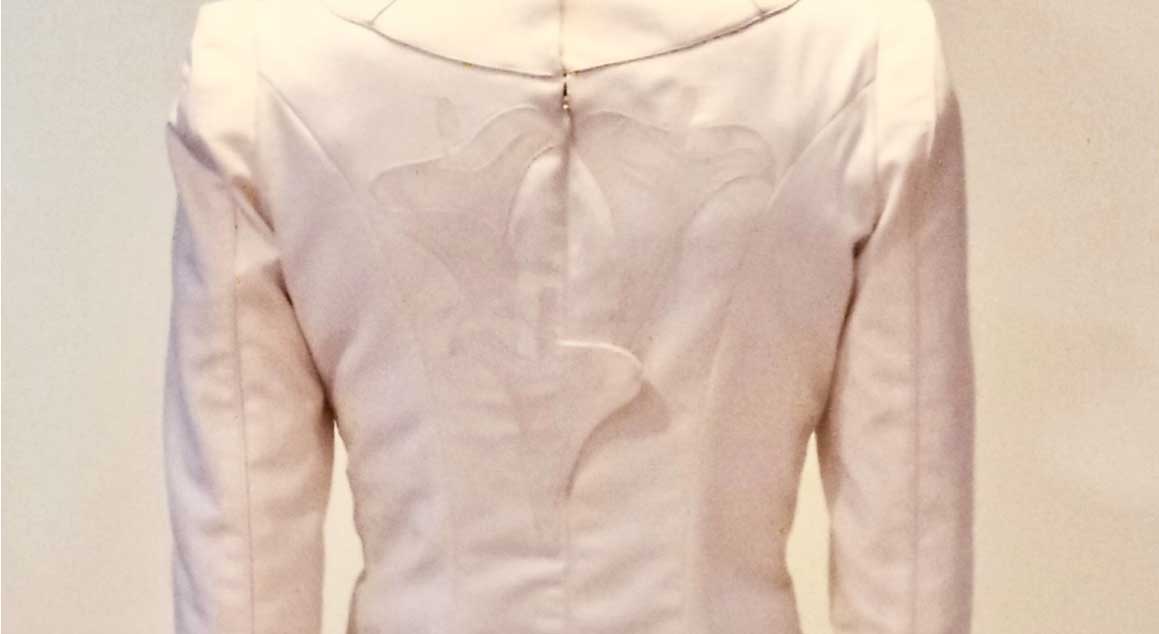
The coat and dress feature varying design details and a variety of calla lily embellishments, a symbol of both sympathy and promise. The garments hoped to recognize and give tribute to the loss of so many to Covid and the promise of recovery by all the heroic efforts of our first responders, medical personnel and caregivers.
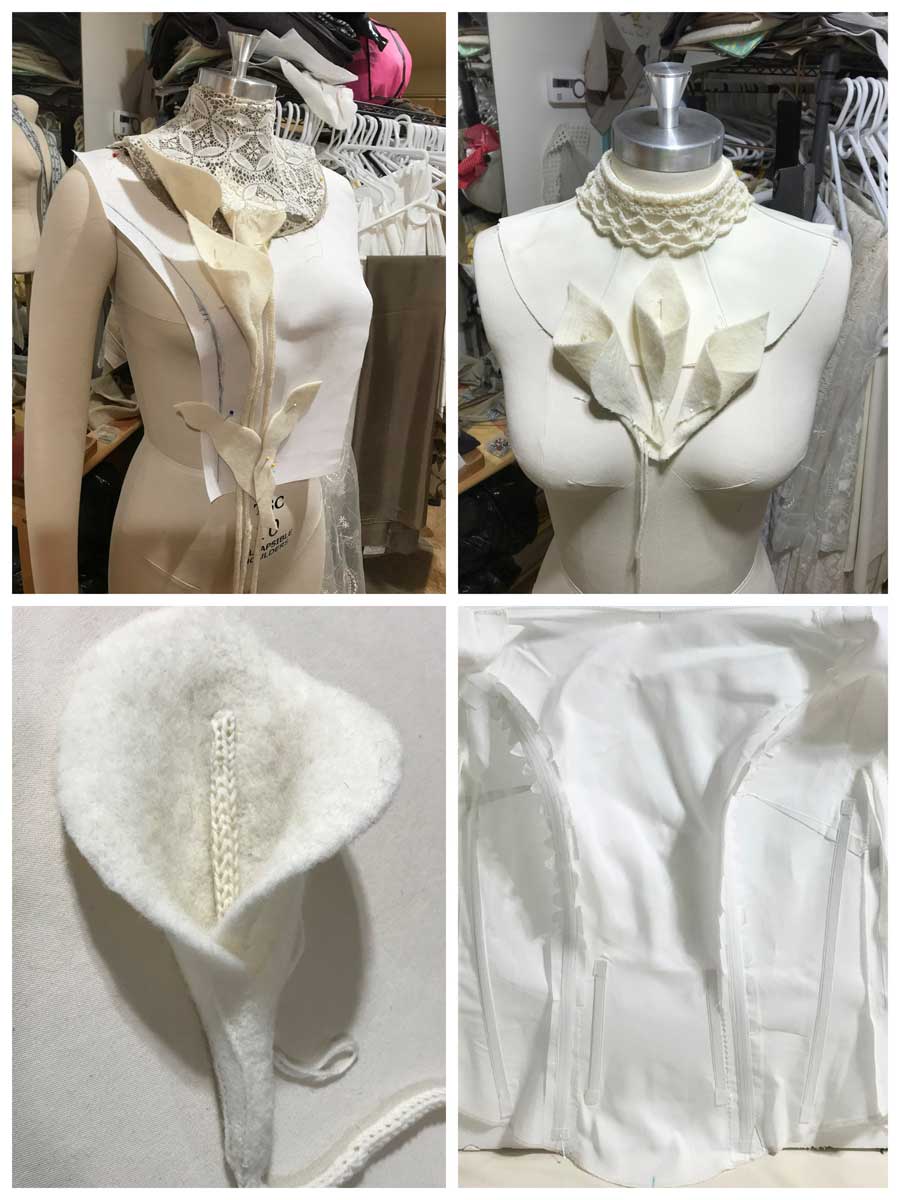
The decisions in bringing those details together into a coordinated and cohesive ensemble required exploring and experimenting with possible options. The process started with inspiration, settling on a detail, and then producing samples to determine their appropriate application in the garment. Many samples were prepared that never made their way into the final garment: boned interfaced bodice support, a lace collar, crocheted collar, a beaded crochet collar, felted calla lily, knitted cording, bobbin embroidery to name a few.
Making the Coat
Felting the Wool
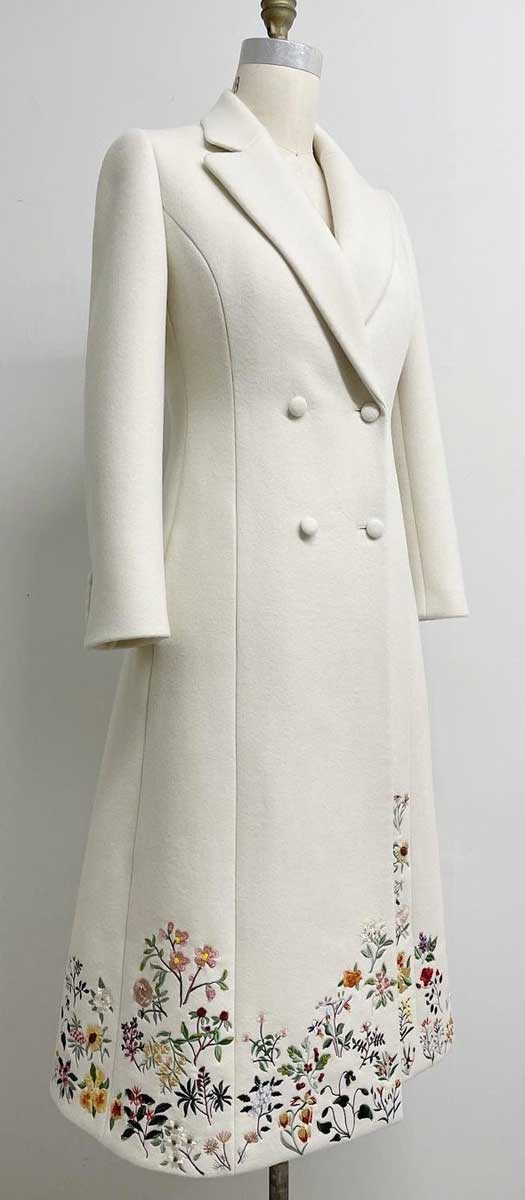
The calla lilies embroidered on the coat are an original graphic, digitized, and designed to repeat the pattern along the hem and upper back. The calla lilies on the coat’s lapel were created from felted worsted wool, sewn, shaped and hardened to closely match the specie’s flowers and leaf. The spadix, the center detail, was knitted with wool yarn, it’s stable shape made possible by utilizing feather quills from my geese. The 100% wool coat fabric was machine felted in several 2 yard batches. To lessen the fabric’s distortion and stretch during the machine felting (top loader only), the 2 yard fabric pieces are zig-zag stitched along the cut edge into a cylinder. Several pairs of flip flops aid the agitation. The smallest hot water setting is selected and a very small amount of wool fabric soap as well as baking soda is added to the tub. Three cycles are generally required to get the desired thickness and degree of felting. The spin cycle is stopped each time to again lessen distorting the fabric. The fabric was then air dried and shaped to accept the pattern layout.
Decorative Elements
The silk piping accents the princess seams and aids in the shaping and fit of the coat. The brocade lining is edged with a binding of the same silk fabric adding interest and detailing to the coat. A calla lily silver charm was added at the inside collar to further the theme of the coat. The coat hem was weighted at the front opening and at the back vent to result in a better hang at these openings. Bound button holes were used to add interest and a favored technique for quality garments. Vintage dome shank buttons adorn the double breasted closure. A valuable couture technique outlined in Claire Shaeffer’s new book, Couture Tailoring, A Construction Guide to Women’s Jackets was used to secure the non-buttoning shank buttons, resulting in their holding firmly and not flopping. The upper lapel fabric matches the fabric of the accompanying dress. The many details and embellishments are subtle, requiring closer examination and appreciation for their added value to the harmony and cohesion of the coat.
Making the Dress
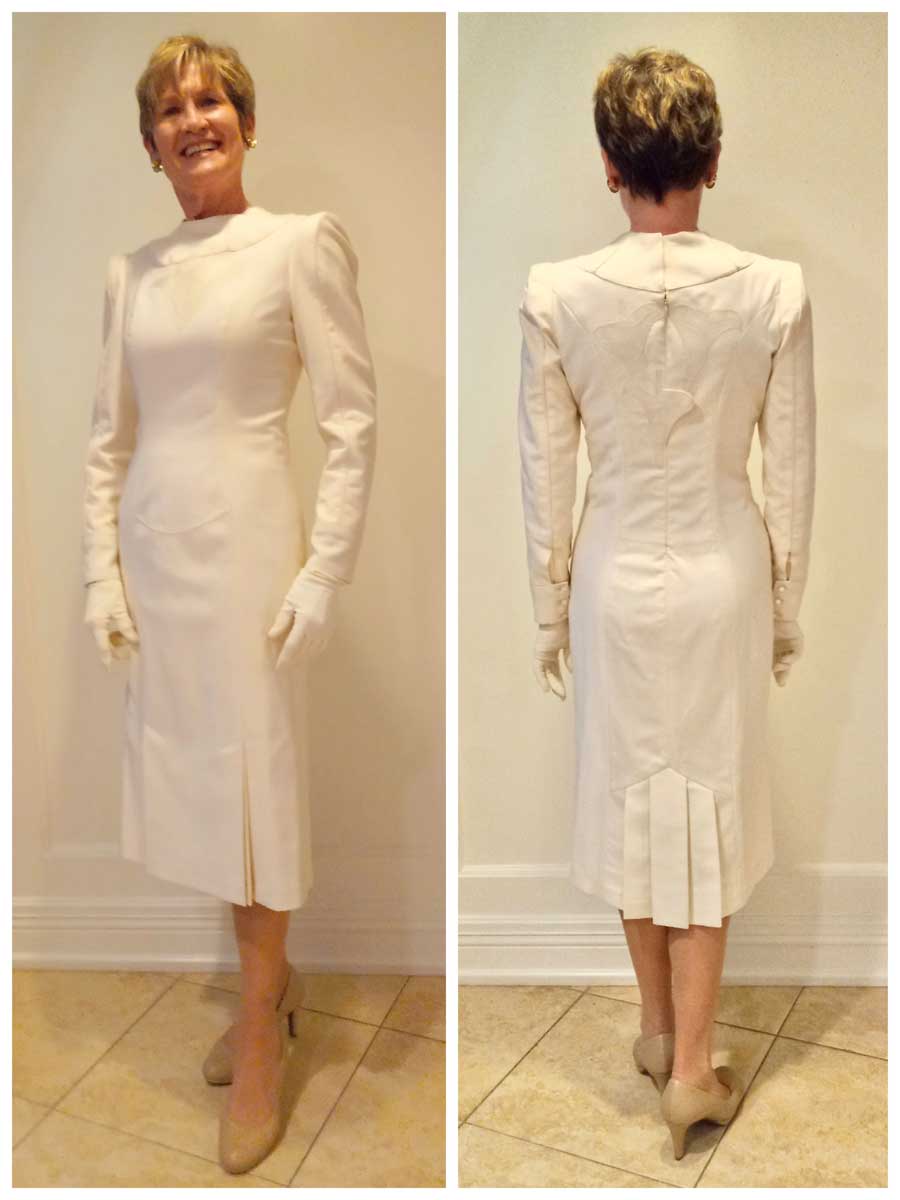
The dress is my original design. The coat required a fitted dress to comfortably adhere to its silhouette. The bodice was the starting point. I find that for my body type, princess seams to be more conducive to a good fit. The bodice has a dropped waist to promote a more vertical line. I envisioned a simple but elegant silhouette with subtle intricate embellishments and design details. The dress is 100% Italian Super 150 Double Faced wool. In a self drafted design that required repeated fittings and numerous handlings, the off-white color of the fabric proved challenging to keep from soiling.
Sleeves
The extended cap sleeves were a new detail I wanted to incorporate into the original design. They required precise drafting and fitting to the bodice, since nearly no ease is offered in the sleeve cap. The grain and hang of the sleeve and their precise rotation in the armscye was critical for a proper fit. The 2-piece sleeve seams are also piped, accentuating the detail and adding structural support. A sleeve head was used between the sleeve cap and the extension.
Pleats
The front reverse pleats and the back “skirt pleats” were added to allow more movement while still maintaining the dress silhouette. They provided a subtle interest and animation in the carry of the dress.
Appliqué
The piped and 7-piece collar brings attention to the neck line and invites inspection of the subtly appliquéd 4-piece calla lilies below. The 4 piece appliqué is fashioned after a stained glass design. The appliqués are layered and applied on both the front and back bodice. The calla lilies appliquéd on the back bodice span the invisible zipper, requiring both sides of the exposed appliqué be finished. A clear plastic snap securely holds the tip of the calla lily in place once the zipper is closed.
Underlining
The dress is underlined with cotton voile. BIG MISTAKE! Normally, I use silk organza as an underlining but because the fashion fabric was so lightweight, I wanted more structure to support the bodice and front and back panels. Both the cotton and wool fabrics were washed prior to their laying out and cutting. The issue was the added shrinkage of the cotton underlining when the dress seams were pressed. It resulted in the wool fabric hanging or bagging between the vertical seams. The fix required removing all vertical seams, lessening the cotton voile seam allowances to remove the pull and bagging of the wool fabric. Removing all attachments of the cotton voile to the dress hem resulted in a smoother panel and seam. It was a major remake while being major lesson learned. The dress is now fully lined with silk charmeuse. The lining has a 3″ hem and is attached with thread chains to the same seam in the dress.
The final dress design was a progression and evolution of its details. The individual details, the piping, the extended cap sleeves, the front inverted and back skirt pleats, the pieced and piped collar, the buttoned cuffs, the calla lily appliqués and their extension over the invisible zipper all coalesced into a cohesive and harmonious well fitting dress.
The Contest
The coat and dress ensemble won at the Make It With Wool National Adult Division competition that was held January 20-23, 2022 in San Diego, CA. Twenty one state contestants competed in the contest. The top 6 placings were:
Adult Winner – Kim Vogley, Washington
Adult 2nd place – Becky Piette, Wisconsin
Adult 3rd place – Kelsey Clear, Michigan
Adult 4th place – Brenda Richardson, Arizona
Adult 5th place – Erin Hyde, Florida
Adult 6th place – Diane Spain, Oregon
Learn more about Make It with Wool at https://makeitwithwool.com/welcome
~Kim Vogley, ASG Silverdale, WA Chapter
Pressing Matters: Choosing the Right Iron
Next to your sewing machine, your iron may be the most important item in your sewing room. Look for features that fit your sewing needs.
Auto shut-off
Some sewers love it, others loathe it—that “feature” that turns your iron off when it’s not used for a certain period of time. Shut-off times vary up to 15 minutes of non-use. Although designed as a safety feature, there are many irons without this option if you find it an annoyance.
Warming Ways
Some irons have dials, others have digital read-outs to tell you actual ironing temps, but still others list only fabric/fiber names, like cotton, silk or wool to indicate a safe temperature setting. A few brands offer only dots or arrowheads to indicate temperature ranges. Choose a brand with an indicator that works best for what you want to know.
Bottoms Up
You may never have given it a thought, but if you research irons, you’ll find aluminum, stainless and ceramic soleplates available. Some also offer a non-stick coating—ideal if you do a lot of fusing.
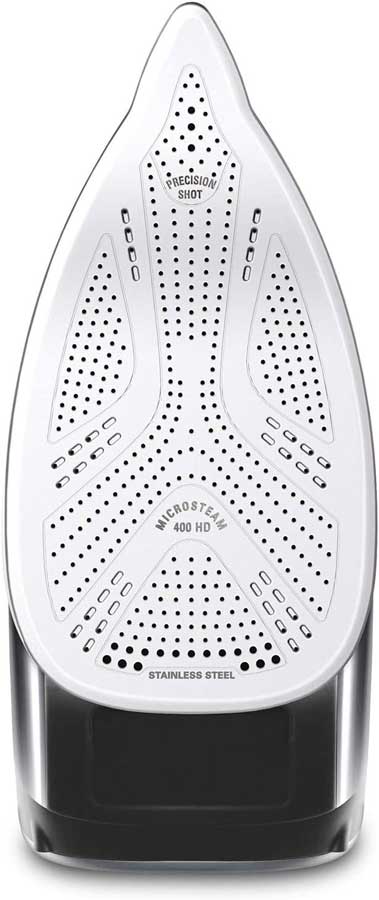
Depending on the type of sewing you do, the number of steam holes in the soleplate may be important. You can get more than 400, like in the Rowenta DW8270 Pro Master 1750 Watt X-CEL Steam Iron with 400 Hole HD Profile Soleplate pictured to the right, all the way down to less than 50, depending on the brand and model. If you do a lot of tailoring, look for a higher number of steam holes with many near the iron’s point.
The soleplate shape is also a consideration as some irons are very pointed with a space for detail pressing, while others are more rounded for more general use.
Hefty, Hefty, Hefty
Most home irons fall in the 1- to 5-pound range for weight. For tailoring, heavier is better as more pressure is applied to shape the fabric during construction.
Steamy Situations
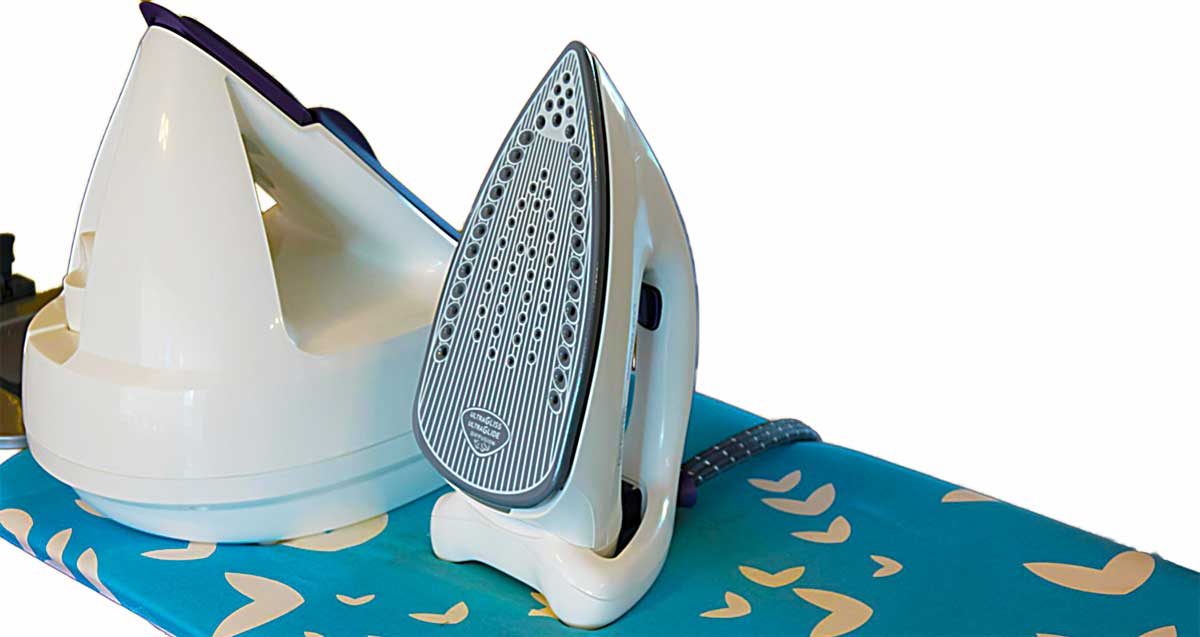
 Sewists (and most quilters) love steam, and it comes in various forms. Some irons offer only a single steam setting, others offer adjustable steam–from bursts to continuous—depending on your needs. Irons should also offer a dry setting for those fabrics that can be damaged by water or for use with some fusible products. Some irons steam only in a horizontal position, while others can also steam in a vertical position.
If you like convenience, look for a removable water tank to take directly to the faucet for filling. A transparent tank lets you keep tabs on the amount of water in the iron and know when a refill is needed. Check the size of the water tank, as smaller capacity reservoirs require more frequent filling, especially if you’re using a lot of steam.
In addition to steam, some irons offer a misting or spray feature to allow for a bit of extra moisture in certain pressing situations—especially helpful for shaping fabrics and removing wrinkles.
Fill ‘er Up!
Note what type of water the iron requires. Many simply take tap water, but others require distilled water. There may be regional differences, depending on the water where you live. Using hard water can lead to a build-up of residue in the tank (or on your sewing project) and clogged steam vents, so check for a self-cleaning feature.
It’s a good idea to empty the water in your iron if you’re not going to be using it for a while to help prevent mineral build-up in the tank.
Plugging In
Think about where you’ll be ironing and check the cord length—they can be up to 12 feet long. Some irons offer a retractable cord for easier storage. Iron cord positions can be fixed or they can pivot for convenience of both left- and right-handed users. Cordless models are also available with a charging base, but keep in mind that the head has to be returned to the base frequently to reheat itself.
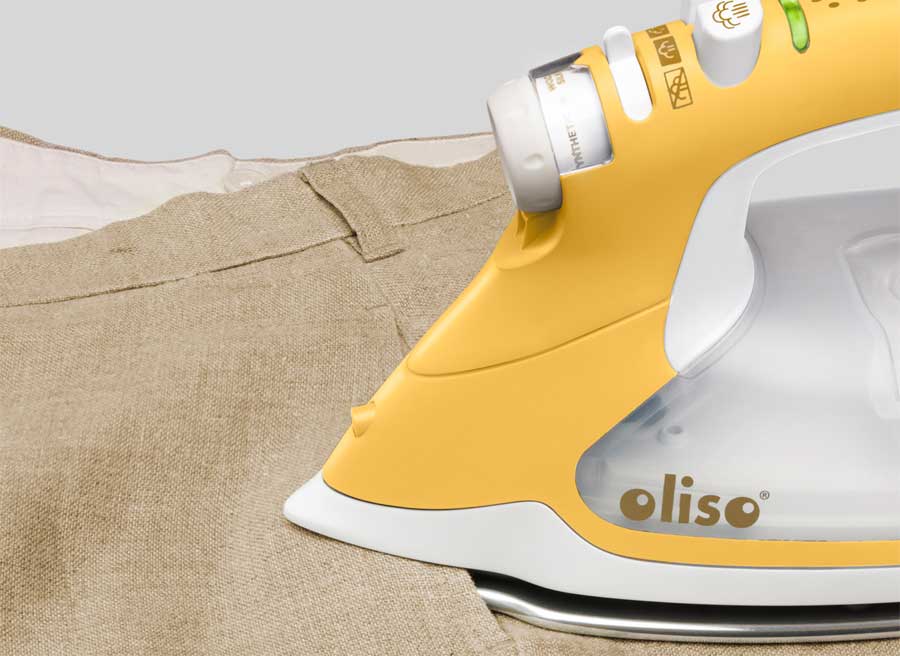
Sit-ups
Most irons sit vertically on their heel when not in use, but one brand {Oliso photo) has “legs” that raise it off the ironing surface when not in use, so there’s no need to set it upright. When you hold the handle, it lowers itself for use.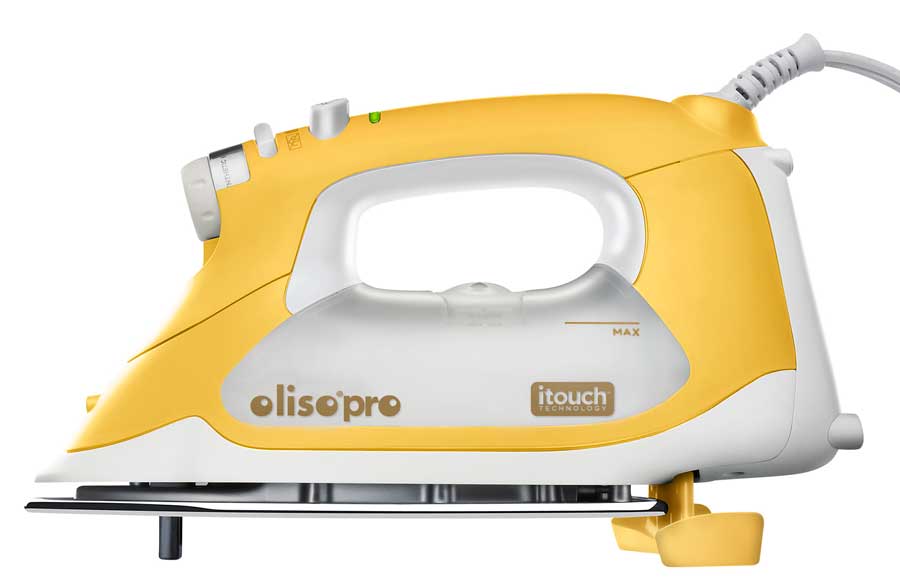
Liking it Hot
It’s important to let any iron fully heat up before using it. If you don’t, it may spit water onto your project. Some irons fully heat in 30 seconds, other take as long as 10 minutes. There may be a beeper or a light to indicate when the desired temperature is reached.
~Linda Griepentrog
Linda is the owner of G Wiz Creative Services and she does writing, editing and designing for companies in the sewing, crafting and quilting industries. In addition, she escorts fabric shopping tours to Hong Kong. She lives at the Oregon Coast with her husband Keith, and two dogs, Yohnuh and Abby. Contact her at gwizdesigns@aol.com.
Make-It: Faux-Leather Trimmed Canvas Beach Bag (preview)
 Here’s a simple canvas bag to take you into summer, yet is versatile enough to use the rest of the year as well! The basic 16″ x 14″ canvas bag, trimmed with faux leather, can be customized to create a bag that perfectly suits you. Add an embroidered monogram, spell out a child’s name with colorful fabric paints, or stencil pastel sea shells on off-white canvas to personalize the bag. (A)
Faux leather trim adds a classy touch and is far easier to sew than real leather. It’s also durable, doesn’t crack easily, and is fade and stain resistant.
Read more (requires member login)
The complete version of this article is available on the ASG Members Only blog.
CLICK HERE to read the full article. Not a member? Join online!
Sewing Q&A
Welcome to this edition of sewing questions and answers:
Lightbox
Q. How do I use a light box?
A. Light boxes are handy additions to a sewing room and they can be used to trace appliqué patterns onto fusible web, trace pattern pieces for altering, draw embroidery designs onto a garment, check placement of paper piecing components and anytime you need to see through your pattern or fabric. You can also use a light box to draw right onto the fabric surface allowing you to fill in the design with paint or crayons/colored pencils designed for use on fabric.
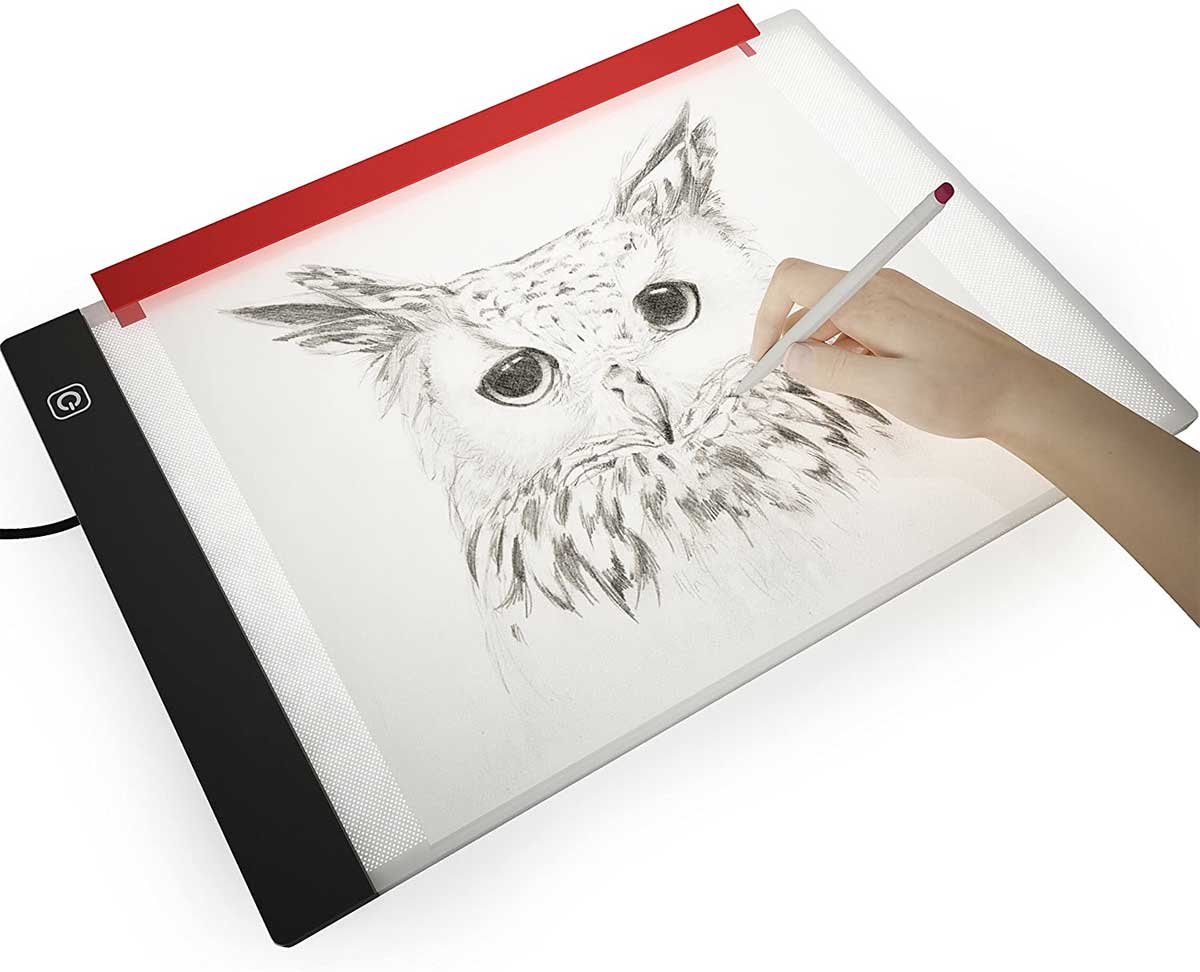
If you’re purchasing a light box, be sure to get one large enough for the kind of tasks you expect to do with it and check the brightness, as some come with multiple light settings. Also, note the cord length in relation to where you plan to use it and the closest outlet.
Elastic
Q. I have trouble threading elastic through casings, as it seems to get hung up on the seam allowances and then gets stalled. How can I fix this?
A. There are a few options to fix this hang-up. The easiest way is to trim the seam allowances to 1/8” within the casing area, that eliminates the excess seam allowance fabric blocking your elastic end coming through the casing. Another way is to be sure the seam allowances are pressed open within the casing area and then stitch them down. The stitching is hidden in the finished elasticized area. A quick third way to solve this dilemma is to fuse the seam allowances open within the casing area, eliminating any chance for a collision as elastic is being threaded through. All of these options also make for a flatter casing.
Buckram
Q. A friend told me about buckram for stiffening the bottom of some bags I’m making. What is it?
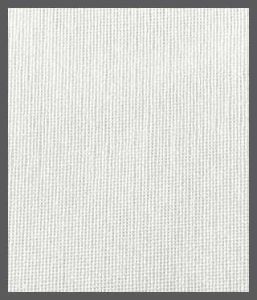
A. Buckram is a stiff, usually cotton, fabric that’s been soaked in sizing or glue to make it incredibly rigid. This woven fabric is available in different weights, depending on the intended use. It’s available in sew-in or fusible variations, and as yardage, as well as pre-cut bands. The pre-cut bands are used in the top of curtains and drapes to support rings or grommets. Buckram is often used in millinery work and for theater costuming when shaping is needed. Fashion sewers often use buckram in the bottom of handbags and totes as it’s the stiffest fabric available for support. Simply cut the shape of your bag bottom and sew or fuse the buckram in place for stability. If buckram isn’t available, substitute heavy/stiff craft interfacing or plastic canvas for the same purpose. One note–buckram is not machine washable and really shouldn’t be hand washed either, as moisture can cause it to soften and shrink.
Interfacing
Q. I have trouble fusing interfacing, as it sometimes shows the imprint of the iron steam holes. What am I doing wrong?
A. When you fuse interfacing to fabric, it’s important that the entire surface is evenly covered with heat, pressure and sometimes moisture. Be sure to read the instructions that come with your brand of interfacing. It’s important to fuse one area at a time, then pick up the iron, move to the next section and overlap the first area. Each section requires holding the iron in place for the requisite amount of time for proper fusing.
When steam hole imprints are visible on the fabric surface, the cause is often that the iron was held in one place too long without any overlap as you cover the remaining surface of the piece. Or, it could also be that the brand of interfacing you’re using requires a dry iron for fusing, not steam, and thus the imprinting can be avoided. Some interfacing directions recommend using a press cloth to protect the fabric surface as well.
~Linda Griepentrog
Linda is the owner of G Wiz Creative Services and she does writing, editing and designing for companies in the sewing, crafting and quilting industries. In addition, she escorts fabric shopping tours to Hong Kong. She lives at the Oregon Coast with her husband Keith, and two dogs, Yohnuh and Abby. Contact her at gwizdesigns@aol.com.
- « Previous Page
- 1
- …
- 36
- 37
- 38
- 39
- 40
- …
- 71
- Next Page »
