American Sewing Guild (ASG)

Visit our blog Visit the ASG Facebook page Visit ASG on Pinterest Visit ASG's YouTube channel Visit ASG on Instagram
  • Home
  • Join ASG
    • Join Online
    • Chapter Locations
    • Member Benefits
    • Member Brochure
    • Join by Mail
  • Conference & Education
  • Resources
    • Contests & Awards
    • Giving Back
    • Hall of Fame
    • Links
    • Travel and Tours
    • Measurement Chart
  • Shop
    • ASG Store
    • Chapter Products
    • Video Resources
  • Blog
  • About
    • About Us
    • Donate to ASG
    • ASG Sensitivity Statement
    • FAQ’s
    • Start a Chapter
  • Contact
  • Member Login
    • Login First!
    • Members Only
    • Leadership Only
    • Website FAQ’s
    • Logout
  •  

July 2, 2021

Beyond the Basics: Serger Accessory Feet

If you use your serger only for finishing seams and you never change the foot, you could be missing a world of opportunities for other fun sewing adventures.

Cording FootLike your conventional machine, many sergers have accessory, or special-function feet available for a variety of stitching tasks. It’s important to know what feet you might have already included with your serger, so check the manual and any accessory boxes first. Then, do a little research with your dealer to see what other feet might be available. In addition to the brand-name feet, sometimes generic feet may fit your model.

If you’re shopping for specialty feet, you’ll need to know your serger’s model number, whether it takes screw-on or snap-on feet, and any stitch width limitations. Also, note that some tension adjustments might be needed when using some specialty feet, so be sure you’re comfortable with that.

Let’s take a look at a few available options, keeping in mind that all feet may not be available for all brands and models of sergers, and names may be slightly different between brands.

These feet were made for serging

Elasticator/Tape Foot

This handy foot not only helps guide elastic for you, but it also stretches it as you sew. Most feet allow you to adjust the amount of stretch, as it varies by the type of elastic. This foot is ideal for sewing lingerie, swimwear and athletic garments of all sorts. Note the elastic widths compatible with the foot, as some have a wider range than others. The foot can either serge over the elastic, or along one edge depending on the position adjustment.

Elasticator foot, image courtesy of Bernina

Blindstitch Foot

If you love making invisible hems by machine, but you hate guessing exactly where the fold should go and where the needle should be, this foot is for you, as it has an adjustable guide to keep things consistent as you stitch the hem in place. It guides the fold and can cut the extending edge in one pass for a neat hem on many fabrics. Note that serger blind hems work best on knits and other textured fabrics.

Blindhem foot, image courtesy of Bernina

Beading and Sequin Foot

Beaded edges are a piece of cake with this foot as it guides strings of beads or sequins along the edge of garments, bridal veils, etc. as it stitches them in place. Invisible thread works well with this foot for a no-see application.

Beading & sequin foot, image courtesy of Bernina

Beading & sequin foot, image courtesy of Bernina

Piping Foot

Who doesn’t love a beautifully piped seam? This foot is a slam dunk for both making the piping and inserting it into a seam. Note that there is a maximum diameter for the piping to fit the foot groove, so double check before purchasing. Some brands offer multiple sizes of piping feet to accommodate different cord sizes.

Piping foot, image courtesy of Bernina

Piping foot

Gathering Foot

Whether you’re ruffling sheer fabric or adding a ruffle to a flat fabric piece, this foot is helpful for both functions. Most are adjustable so you can control the gathering fullness while you finish the fabric edges at the same time.

Gathering foot, image courtesy of Bernina

Wavy Edge Foot

If you’re into dance costuming, eveningwear or bridalwear, this may be a must-have foot for you. There’s a hole to guide clear fishing line or wire so you can serge over it to create undulating edges, from smaller lettuce edging to full-on giant waves. It saves having to hold and guide the line on your own to be sure that the serging encases it without any nicks.

Lace/Trim Foot

No more trim wrestling needed with this foot, as the built-in guide places flat lace or trim along the edge with aplomb, allowing you to serge it in place. It’s adjustable for precise placement.

Clear Foot

Nothing beats a clear view no matter what you’re serging, and many brands offer a clear foot for better visibility with general serging.

All photos courtesy of Bernina. Used with permission


~Linda Griepentrog

Linda is the owner of G Wiz Creative Services and she does writing, editing and designing for companies in the sewing, crafting and quilting industries. In addition, she escorts fabric shopping tours to Hong Kong. She lives at the Oregon Coast with her husband Keith, and two dogs, Yohnuh and Abby. Contact her at .

Did you enjoy this article?
Are you an ASG member?
This field is for validation purposes and should be left unchanged.

Tagged With: serger feet, serging

June 18, 2021

Is Your SewJo Languishing?

What is a languishing sewjo you ask? I recently read articles in both the New York Times and NPR about this new condition. It’s apparently a real thing that isn’t depression but is a lingering state of “meh.” When I read it, I immediately thought – YES! This validates what I have been feeling!

My sewing room has been largely silent the past year. I just haven’t been able to muster up the enthusiasm and sense of sewing adventure I have come to enjoy for so many years. Where did it go? I have forced myself through making a shirt, a dress, and a quilt top since June 2020 — only 3 projects in the past year! I have been seeing reports of so many of our members sewing up a storm during their COVID quarantine life and, honestly, I have responded with mixed feelings of jealousy and guilt. I have wondered what is wrong with me.

dark sewing room

Life changed for everyone this past year. While my details differ from yours, the element of changed life is common to all. My husband recently commented that he hopes I get back to sewing one day. Ouch! That felt like a punch in the gut. Don’t get me wrong, my husband is my biggest fan and supporter so I wasn’t offended, but the reality of his statement is what punched my gut.

So now what?

Clearly, I am a work in progress so I can’t title this part as 5 steps to an Exciting Sewing Life. Instead, I can share where my journey is taking me.

Happy womanI decided to take a few steps that I hope will re-ignite the enthusiastic passion I have felt for sewing and that I miss and started exploring some new sewing adventures. For years I have loved being almost exclusively a garment sewist. Since pandemic quarantine life, I can’t seem to get excited about making clothes, so I’m going to try a few different things.

  • I want to finish up the last part of quilting a Bar Chart quilt top. Just finishing something will be energizing!
  • I have made several purses before, but when I saw the new Barbara purse pattern and kit from Sallie Tomato, I felt that old surge of enthusiasm. I purchased the kit, and it is on my cutting table to start right after I finish that quilt.
  • I recently learned about scrappy applique quilting by Shannon Brinkley and the artistic twist on quilting intrigues me. Maybe that will be the next thing I try

Appointment calendar imageI also decided to make a few sewing appointments with myself. If I schedule some time to dedicate to this craft I have loved so much, I am bound to experience those dopamine hits it has given me all those times before. But I have also promised myself a lot of grace as I reclaim what feels a little bit lost at the moment. No more jealousy — just appreciation for what others create. No more guilt — just patience as I explore what sewing adventures await while I gently reacquainted myself with my sewing room.

If the past year has been a season of incredible sewing, I salute you and appreciate what you have shown and shared. It has reminded me of all the possibilities! But if you slipped into a languishing sewjo as I did, I hope sharing my reality has given you space to think about how you might head back to your sewing room and reclaim the passion for sewing we have all shared. I can’t wait to see where we go!


~Sheryl Belson

Did you enjoy this article?
Are you an ASG member?
This field is for validation purposes and should be left unchanged.

Tagged With: getting back to sewing, languishing, sewing

June 13, 2021

Sewing Basics: Sewing Machine Terms

It’s National Sewing Machine Day! Spend 17 minutes with us in this video and learn about 6 different parts of your sewing machine. Want to learn more? If you aren’t a member already, we hope you’ll consider joining ASG — we would love to meet and sew with you!


~Sheryl Belson

Did you enjoy this article?
Are you an ASG member?
This field is for validation purposes and should be left unchanged.

Tagged With: bobbin, feed dog, hand wheel, presser foot, sewing machine, thread spool

June 4, 2021

Selvages: On the Edge

What is the selvage?

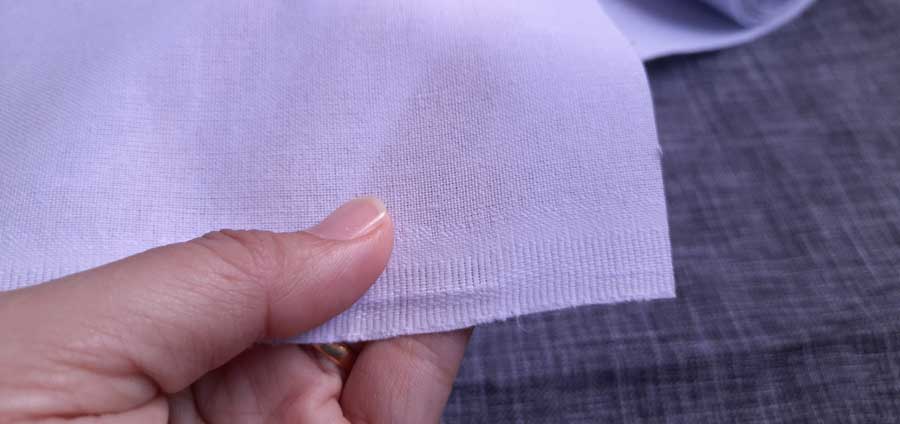
Selvages are the edges of woven fabrics—the place where the weft (crosswise) threads turn around to form the next row during the weaving process. Some selvages are thicker than the fabric itself, as often there are more threads per inch at the edges to help keep the edges straight during the weaving process.

Think of your fabric’s selvage as its DNA, with important information about it you may need to know.

Selvages may be the same color as the fabric, or they may be a contrast. Interestingly, contrast threads are sometimes woven in the selvages. On some velvets and velveteens, you may see metallic threads along the edges.

On high quality and imported fabrics, sometimes the requisite information like fiber content and country of origin is actually woven into the selvage in a contrasting thread color.

Selvages information
Image used with permission from Marcy Tilton

Selvages are not always straight—they can be fringed or looped, depending on the type of loom used and the finishing processes.

On fabric like denim where the warp (lengthwise) threads are a different color than the crosswise threads, the selvages may be totally different looking than the fabric body itself.

Information, please

You can find a variety of information bits on most selvages, but some have none. Look for the brand name, the designer’s name and sometimes the fiber content and/or care instructions, like “dry clean only.” You may also find the date the fabric design was copyrighted, and on printed fabrics, you may see lots of colored dots or shapes along the edge. These fun indicators tell how many different color screens were used in the printing process of the particular fabric.

  • Some selvage edges include the website for the fabric brand or a social media reference. Designers have even been know to add an inspirational message on the selvage.
  • In addition, home décor fabrics may show an indication of the repeat of the pattern, and sometimes an arrow showing which direction is up in the patterning.

Saving Selvages

Because of their tighter weave, the selvages may shrink differently from the fabric itself, so many people just cut the selvages off before cutting out the project.

While you can certainly trim and toss them, you can also use them creatively. If your project has a straight seam edge, you can cut it on the selvage to avoid raveling and perhaps add a decorative touch to the seam edge. A pant leg seam or a loose fitting, straight-cut jacket would be two great places to cut on the selvage for pre-finished seam allowances. Selvages are also a great edge for pockets or straight hems, either exposed for interest, or just as an edge finish.

Using the selvage on denim

Trimmed selvages are often used to stabilize a stretchy area—like a shoulder seam in a knit T-shirt. Lightweight woven selvages, like silk organza, are ideal for this use, as they’re sheer and don’t add a lot of bulk as they span the seamline. Interesting cut-off selvages can also be “reapplied” to an area as a decorative trim, often combined with ribbons, braids or decorative stitching. Fun selvages are also great to insert as a flat piping.

Selvages (with some attached fabric width) can also be used for bindings or garment ties.

Selvage pillow
C&T Publishing

Quilting Ideas

If you’re a quilter, perhaps you keep all your cotton selvages for other projects. It’s easy to strip piece them together on a lightweight backing to make quilt blocks or other projects. When you trim the selvage, leave at least ¼” beyond the actual selvage and use that for joining. Layer the strips one edge over the other and zigzag the edges in place through the backing until you fill the space needed.

Tennis shoes made with selvage edges

Crafting Ideas

For crafting, trimmed selvages are ideal for decoupaging onto projects—like basic tennies {photo}, picture frames, boxes, vases, etc. Just overlap the raw edge portion and seal with the medium.


Holey Moley

What are those holes along the selvage? They’re called tenter holes and they’re used to hold the fabric to a frame during the printing and finishing processes.

tenter holes


~Linda Griepentrog
Linda is the owner of G Wiz Creative Services and she does writing, editing and designing for companies in the sewing, crafting and quilting industries. In addition, she escorts fabric shopping tours to Hong Kong. She lives at the Oregon Coast with her husband Keith, and two dogs, Yohnuh and Abby. Contact her at .

Did you enjoy this article?
Are you an ASG member?
This field is for validation purposes and should be left unchanged.

Tagged With: fabric, selvage edge, tenter

May 21, 2021

Can I sew that? Cork, Leather, and Wood

Once you venture into the world of sewing and get comfortable with some of the basics, it is amazing to discover, like the popular Dr. Seuss book says – “Oh the places you will go!” Many an adventurous sewist has explored sewing on what some may consider unconventional things. As an example, take a look at the interview we did with Olivia Mears. She has used many unconventional items, like Taco Bell sauce packets and gift wrap, in her sewing. But there are certainly fewer unconventional items to sew with that will still feed your adventurous spirit. In this article, we will look at cork. leather, and wood.

Cork tree
Cork Tree

Cork

Cork is a sustainable, natural product that is harvested from Cork Oak trees. When the trees are 25 years old (they can live up to 200 years!), the bark can be harvested and the tree regenerates until the next harvest in about 9 years. The harvested cork is processed by drying, boiling then gluing it to a backing before rolling it for distribution. Cork can be used for all sorts of projects, like handbags, pouches, and wallets. It holds its shape and is quite durable. And it’s surprisingly easy to sew on your home sewing machine with just a few helpful tips.

  • Scissors or a rotary cutter both cut cork easily.
  • Use a polyester thread.
  • Use a size 80-90 universal or embroidery needle. If the layers are thick, try an 80-90 leather or denim needle.
  • Use a Teflon or a walking foot to help move the cork smoothly through the machine.
  • It is best to test sew with a ‘fabric sandwich’ before you start. Make your fabric sandwich with the same layers you will sew in your project. The best time to make any needle or tension adjustments is before you get to your actual project.
  • Lengthen your stitch length to about 3–4 to avoid perforating the cork too much. And topstitching should be lengthened even more to about 5-5.50.
  • To prevent holes in your cork, it is best to use sewing clips. Pins can be used inside the seam allowance, but clips usually work much better.
  • Double-sided tape or glue is helpful to hold small pieces in place. Just avoid sewing through the tape or it may make your needle sticky and may cause skipped stitches.
  • If you do have to unpick, try to re-sew into the same holes.

Jessica from Sallie Tomato made this 6-minute video with some great info about cork and how to get started with it.


Leather

Leather handbagLeather, made from animal hides or skins, comes from various animal hides, such as cows, crocodiles, pigs, even stingrays. Leather is durable, wrinkle-resistant, and will take on a different look/feel based on the type of animal, grade, and treatment. Sewing with leather may seem daunting, but with only a few tips, you can successfully make everything from bags, garments, and home dec.

Here are a few to get you started.

  • Use a leather needle. The heavier the leather, the heavier the needle.
  • Sew with 100% polyester thread. Over time, leather eats natural fiber threads like cotton.
  • Home sewing machines can sew up to about 2 oz leather. Heavier leather may be too dense for your machine.
  • Use a Teflon foot, roller foot or, walking foot to sew more smoothly.
  • As with cork, lengthen your stitches to about 3–4 to avoid perforating the leather too much. And topstitching should be lengthened even more to about 5-5.50.
  • Leather has no grain! Layout your pattern any way you wish. But watch for blemishes and ripples and avoid using them in a visible area.
  • Always use a rotary cutter or Exacto knife to cut leather. Scissors can mar the cut edge.
  • Trace the pattern pieces on the wrong side of the leather then cut out on the traced lines. Since you can’t pin the piece down, it is difficult to cut around the piece itself.
  • Remember that dyed leather will bleed onto fabric. If you are making a garment, this must be considered. According to Peggy Sagers, you can wash your leather to remove some of the dye and reduce or eliminate the bleed when cleaning later. If making an all-leather garment (like a vest or jacket), you will want to line it to prevent color bleed on whatever you wear under the leather garment.

Sewing leather

For those of you who love to do machine embroidery, don’t skip leather as one of your options. Watch this 2015 video in the Members Only section for a simple starter project with lots of helpful tips. (You must be logged into ASG account before clicking the link so you go straight into the video).


Wood

Embroidery on woodIf the idea of sewing with leather didn’t scare you off, you may be adventurous enough to try sewing on wood. No, you probably won’t be making a dress or a pair of pants from wood, but it can be used to make interesting accents, ornaments, box tops, home decor pieces, etc. And it certainly will be intriguing to show off at your next Neighborhood Group show-and-tell!

To help you venture “into the woods,” you need a few tips.

  • Choose a very thin wood such as 1/32″ veneer. Balsa is an ideal choice. You can usually find it at a hobby store where they sell model airplane-making supplies. You may be able to stitch on wood up to 1/8″ thick and in some instances soft woods that are 1/4″ thick, depending on the stitch.
  • Use an adhesive stabilizer on the back to help prevent splitting. If both sides will show, use a removable stabilizer, otherwise just leave the extra layer in place.
  • For thinner woods, use a small needle (75/11) to avoid leaving big holes and splintered areas around the stitches. Use a larger needle for thicker wood.
  • Use longer than normal stitches to avoid perforations and subsequent breaking.
  • If using a decorative stitch, select stitches that don’t re-enter the same hole during sewing. If you can adjust the speed of your machine, change it to slower than normal to avoid heat build-up at the needle.
  • Always test-stitch on wood scraps before starting your project. Just like in fabric, the wood grain direction can influence the appearance and stability of your project.

You can also embroider on wood with openwork designs. Simply secure the wood in the hoop with an adhesive stabilizer or temporary spray adhesive. Use a hoop larger than the wood section to avoid bending it and to keep it flat while stitching. To see an example of embroidery on wood, watch this presentation published in 2015 in our Members Only area. (You must be logged into ASG account before clicking the link so you go straight into the video).

Embroidery on wood

So, now it’s your turn!

Venture out into a new area and try one of these materials in your next project. We would love to see your results! Share them by emailing them to me at . If we get enough input, maybe we can do a follow-up story of all “the places you will go!”


~Sheryl Belson

Did you enjoy this article?
Are you an ASG member?
This field is for validation purposes and should be left unchanged.

Tagged With: sewing cork, sewing leather, sewing wood

  • « Previous Page
  • 1
  • …
  • 37
  • 38
  • 39
  • 40
  • 41
  • …
  • 63
  • Next Page »

Become a Member

Join the only national organization dedicated to Advancing Sewing as an Art and Life Skill.

Join Now button

Blog Article Categories

  • ASG Conference
  • Chapter Stories
  • Embroidery
  • Fitting
  • Learn to Sew
  • National Sewing Month
  • Products, Books, & Patterns
  • Projects
  • Quilting
  • Sewing
  • Sewing Techniques
  • Sewing Tips
  • Sewing Tours
  • Videos
  • Disclaimer
  • Privacy Policy

American Sewing Guild
National Headquarters
9660 Hillcroft, Suite 230
Houston TX 77096
713-729-3000 | 713-721-9230 Fax
www.ASG.org

ASG wordcloud - education, conference, discounts, videos, special offers, tours and more

Copyright © 1998–2025 · American Sewing Guild · All Rights Reserved