American Sewing Guild (ASG)

Visit our blog Visit the ASG Facebook page Visit ASG on Pinterest Visit ASG's YouTube channel Visit ASG on Instagram
  • Home
  • Join ASG
    • Join Online
    • Chapter Locations
    • Member Benefits
    • Member Brochure
    • Join by Mail
  • Conference & Education
  • Resources
    • Contests & Awards
    • Giving Back
    • Hall of Fame
    • Links
    • Travel and Tours
    • Measurement Chart
  • Shop
    • ASG Store
    • Chapter Products
    • Video Resources
  • Blog
  • About
    • About Us
    • Donate to ASG
    • ASG Sensitivity Statement
    • FAQ’s
    • Start a Chapter
  • Contact
  • Member Login
    • Login First!
    • Members Only
    • Leadership Only
    • Website FAQ’s
    • Logout
  •  

February 7, 2020

Machine Needles: What’s the Point?

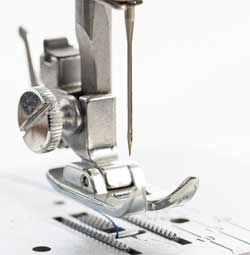
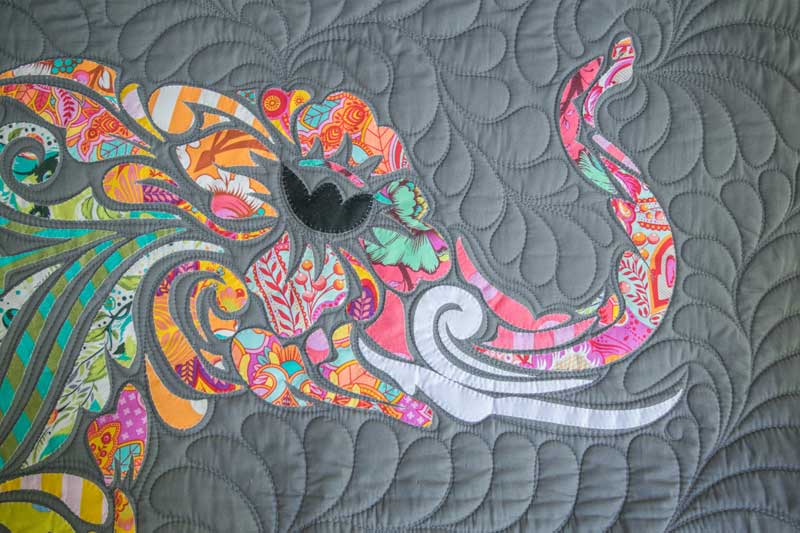
The needle you use in your sewing machine can make the difference between perfection and a disaster. Use the wrong needle, a damaged needle or a worn needle and you could end up with broken threads, holes, uneven stitches, puckers and possibly even permanently damaged fabric. To keep your seams straight and your collars curvy, there are several points to successful stitching.

Check first

Check for any special requirements for your specific machine. For the most part, standard sewing machine needles can be used in any sewing machine. However, differences may be found in some machines like sergers, embroidery machines and some brands which could require a special needle.

Size matters

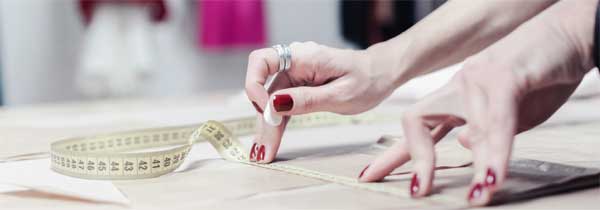
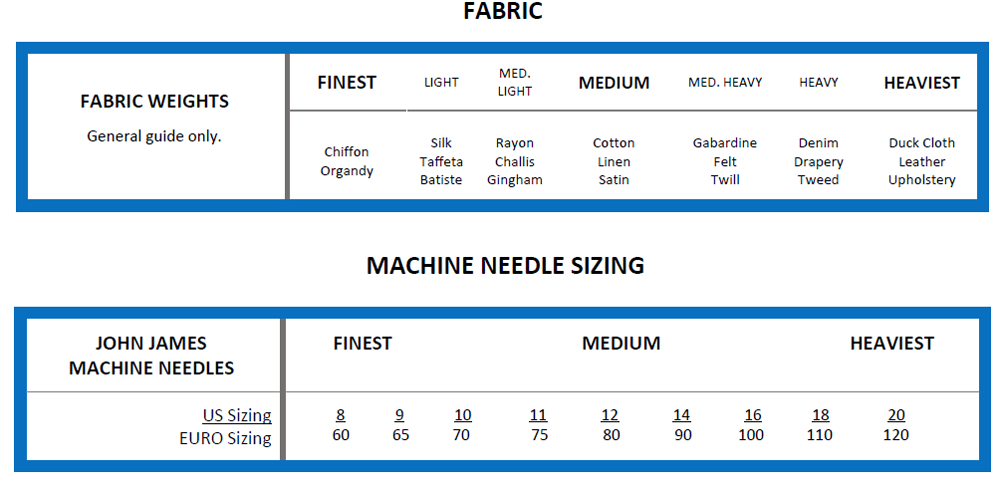
Needle size is the numeric representation of the diameter of the blade. Note that when you see needle sizes, they are labeled with two numbers, separated by a slash (65/9, 80/12, etc.). This refers to EURO metric sizing (in millimeters) and the comparable US sizing. The following chart from Colonial Needle describes the fabric weights and the size of needle that are appropriate for each project.

Information reprinted with permission from the Colonial Needle Company
ASG Members receive a 20% discount. See the Special Offers page in Members Only.

Download the Colonial Needle machine needle resource guide.

Let’s Get to the Point

  • There are 3 basic General Purpose needle types. Universal needles are usually used in knits and wovens. Ball points are great for knits. Finally, Sharps/Microtex are used in finely woven fabrics.
  • Specialty needles are available for use in denim, leather, embroidery, metallic (for use with metallic threads), quilting, twin, triple, stretch and more. Check out this Guideline for an extensive list of needle types, sizes and their uses.

Needle Tips

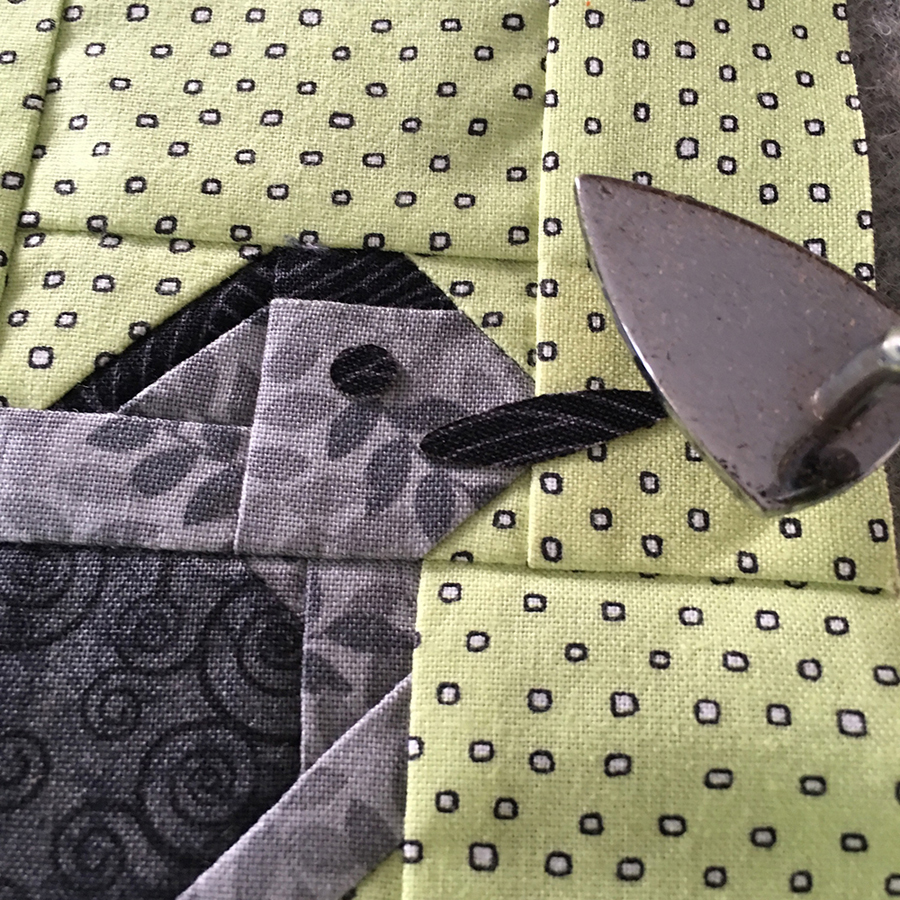
  • For best results, needles should be replaced every 6-8 hours of sewing time.
  • If you hit a pin, even if the needle seems okay, it’s safer to replace it.
  • Needle breakage could mean that the needle size is too small for the type or thickness of fabric you are using. In this case, try changing to a larger needle size.
  • When you are sewing, allow the feed dogs to draw your fabric along. Use a light touch with your hands to guide the fabric rather than pushing or pulling, which could cause your needle to bend and break.

Stock up

It can be frustrating to not be able to start — or finish — a project because you don’t have the correct needle or don’t have a replacement,  so make sure to keep a good supply of your favorite needles on hand. ASG members can take advantage of a 20% discount on needles, notions, thimbles, thread, jewelry and more at Colonial Needle by visiting the Special Offers section of ASG.org


~Janice Blasko, webgoddess for ASG

Tagged With: sewing machine needles, sewing tips

January 31, 2020

A Cut Above: Laser Cut Designs

If you’re a quilter, perhaps cutting out all those tiny precise pieces for your appliqué work might not be one of your favorite tasks—you’d rather get going to complete the design. I sure feel that way, and alas, someone heard my plea.

Laser Cut Quilts

Recent advances in the quilting realm have brought us the advent of laser-cut designs. Whether it’s an intricate appliqué motif with zillions of pieces, or a more traditionally pieced work, precision cutting is key to fit and the overall look.

And, as an added bonus, the fabrics have been pre-selected for you, so there’s no scrambling to find just the right piece for your design. Appliqué pieces are pre-fused as well.


Did you know? Laser cutting has been used for years in the ready-to-wear industry where garments are cut in production quantities. It provides superior accuracy for factory sewing.


How does it work?

Laser Cut Quilts

For appliqué designs, fabrics are backed with the fusible web prior to cutting, so when you get the pieces in your kit, they’re ready to have the backing paper peeled off and the designs fused in place. But, how do you know where to put them? There’s a printed guide for the pieces, so pretty foolproof.

When you get the kit, simply open the pattern placement guide and either trace it onto your base fabric if it’s a dark color, or if it’s a light color, position the fabric over the guide and you’ll be able to see the lines through it. A light box or sunny window is helpful when tracing onto dark colors.

Laser Cut Quilts

Place your marked base fabric onto a pressing surface, peel off the backing paper on each piece and position it in place on the background. It’s akin to completing a jigsaw puzzle. If you have trouble peeling off the backing paper, use a pin to get it started at one edge.

Pressing Matters

Hummingbird Highway

When all the pieces are positioned, follow the manufacturer’s instructions to fuse them in place. If you don’t have a large enough pressing surface for the entire design, fuse one section at a time. Be careful—if you’ve marked with a heat-sensitive pen, don’t remove markings in an area you haven’t fused yet. Using a small craft iron can be handy, as it’s easier to secure tiny corners and work in small areas at a time.

Some companies recommend using a pressing cloth when securing pieces to protect the iron from errant fusible. Press both sides of the design to fully secure the pieces.

Finishing Touches

Once all the pieces are fused in place, your design work is completed. There’s no need to stitch around each piece (unless you really want to). Just move on to adding borders, quilting and binding. Easy peasy!


Building Bridges: Sometimes small and delicate pieces are connected to either larger fabric pieces or to a fabric frame to keep them from getting damaged, so they appear not fully cut. If that’s the case and you get pieces with bridges, simply carefully cut the connection points away from the larger base fabric to create the piece size/shape needed for your design.


Pieced Designs

Hummingbird Highway

Some laser cut kits are not for appliqué, but for traditional piecing instead. The accuracy of laser cutting ensures that the pieces will fit together with precision.

With these types of kits, there will be a guide included showing a piece number and shape, and both will be referenced in the assembly directions. There may even be a notch into the seam allowance to indicate the upper edge of the piece in the construction process.

Laser-cut pieced designs may also include some fusible-backed pieces for features appliquéd on the surface, like animal eyes, feet, etc.


~Linda Griepentrog Linda is the owner of G Wiz Creative Services and she does writing, editing and designing for companies in the sewing, crafting and quilting industries. In addition, she escorts fabric shopping tours to Hong Kong. She lives at the Oregon Coast with her husband Keith, and two dogs, Yohnuh and Abby. Contact her at .

Tagged With: laser cut fabric, quilt, quilting

January 24, 2020

Tailoring Tricks, Part 2

Fusibles

Stack of interfacings

Fusible interfacings are de rigueur for today’s tailoring aficionados. They are easy to apply and a great option for building structure and shape into a tailored garment without laborious hand stitching.

Types of Fusibles

  • Wovens have lengthwise and crosswise threads that make them stable in both directions. If they’re cut on the bias, they offer some stretch and draping, like on a jacket roll line or lapel. Hair canvas, a type of woven interfacing, is often used in tailored garments to build shape.
  • Knits offer built-in stretch for shaping and draping, and can also be used to back an entire garment section to add body to fabrics like loosely woven bouclés or lightweight wool flannels.
  • Non-wovens are crisp and paper-like, and generally aren’t used in tailoring projects since they offer no draping or molding attributes. They’re better saved for craft projects.

Note that each type of interfacing is available in several weights, from light to heavy, and should be chosen to match the weight of the garment fabric.

More than one type of interfacing is often used in a single tailored garment. For example, a lightweight knit might be used to back a jacket front and back, while fusible hair canvas is applied over it in the upper shoulder and lapel areas. A heavier weight bias-cut woven may be used in a collar stand area, over hair canvas applied directly to the entire collar. The choices depend on the end result you’re looking for—soft and drapable to firm and supported. Always test before you fuse!

Preshrinking

Preshrink all interfacings, as later shrinkage can ruin your garment. Simply fold the interfacing and submerge it in warm water for 30 minutes, then hang or lie flat to dry. Do not press fusible interfacing.

Cutting

Your pattern guide should tell you where to use interfacing and may have separate pattern pieces for cutting it. Common places to add stability are the garment back to support the shoulder, armscye and neck areas; on facings (behind buttonholes) and lapels, in sleeve hems, sleeve caps, and on collars, cuffs and pockets. Depending on the interfacing weight, you may want to trim it out of the seam allowances and/or darts to help reduce bulk.

Fusing

One side of fusible interfacing has adhesive dots on it, and the opposite side does not. It’s important that you place the interfacing with the adhesive side against the fabric wrong side. Once fused, the interfacing and fabric behave as one entity as far as drape, handling and sewability are concerned.

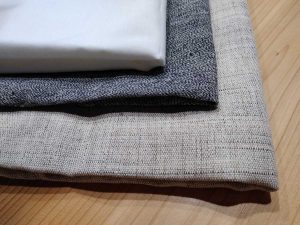
Different types/brands of interfacings require different fusing techniques, so be sure to read the label. Some require steam, others dry heat, while still others specify a damp press cloth. Note the fusing time and iron temperature for proper adherence.

To begin fusing, choose a flat pressing surface and smooth the interfacing onto the companion fabric piece wrong side. Be sure to press, not iron the pieces in place: Pressing is a lifting motion, while ironing is sliding the iron along the surface. To fuse properly, hold the iron in one place for the specified amount of time, then lift it and move to the next area, overlapping the first section slightly. Repeat to cover the entire garment area for complete fusing.

Always allow the fused garment sections to cool before moving them from the pressing surface. If you move them while warm, it can affect adhesion and cause distortion.

For smaller garment pieces, like collars and cuffs, it’s easier to fuse an entire fabric section and then cut out the pieces than it is to try and match up small cut pieces of interfacing with pre-cut garment sections.

Once all the interfacing pieces are fused to their matching garment sections, transfer the pattern markings to the interfacing layer and move forward with construction.


~Linda Griepentrog
Linda is the owner of G Wiz Creative Services and she does writing, editing and designing for companies in the sewing, crafting and quilting industries. In addition, she escorts fabric shopping tours to Hong Kong. She lives at the Oregon Coast with her husband Keith, and two dogs, Yohnuh and Abby. Contact her at .

Tagged With: fusibles, sewing, tailoring

January 3, 2020

Tailoring Tricks, Part 1

So, you want to tailor a coat or jacket, but you’re not sure what that involves, but willing to take the leap.

There are basically two types of tailoring: traditional work with tedious hand stitching or fusible tailoring where you let technology do the “stitching” for you. While the former is worthy of the effort, most first-time tailoring adventures are successfully done with fusible techniques.

Choose Wisely!

  • Measuring the shoulder length on a jacket
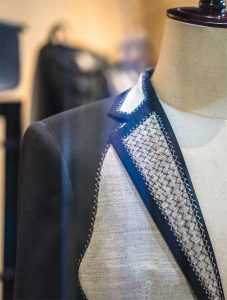
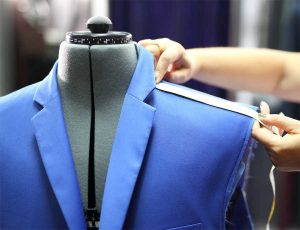
Wool or a wool blend is the best choice for a tailored garment, as it’s easily shaped with steam and good pressing techniques. Preshrink your wool selection prior to sewing—easily done by asking your dry cleaner to steam press it for you, though some wools are washable, so check the label first.
  • Select quality interfacings. A woven hair canvas type is ideal for jacket or coat lapels and collars, and to stabilize some hem edges. Different weights are available to match up with the fabric weight, and it’s available in fusible for a quick application. It’s also available in sew-in if you prefer to hand stitch. Preshrink the interfacing by soaking in warm water for 30 minutes and lying flat to dry.
  • Lining helps tailored garments hold their shape during repeated wearings, and it covers up the inside construction detailing. A satin-finish lining makes it easy to get the garment on and off over sweaters or other garments.
  • Look for great fasteners for your tailored garment—beautiful buttons, fun snaps or hooks are ideal choices. Make your selection before starting the garment as it affects the closure construction, like the size of buttonholes or reinforcement needed for novelty closures.
  • In addition to conventional thread for construction of your project, you may want to select a heavier weight for topstitching, either in a matching color or contrast, depending on the desired look.

Pattern Picks

  • All major and many independent companies offer patterns for tailored garments. Coat and jacket patterns are made to fit over other garments, so purchase your usual size. Because wool or other tailoring fabrics can be costly, it’s best to test-fit the garment pattern before cutting your fashion fabric. Tissue-fit or make a muslin and note any fitting changes needed on the final pattern.
  • Follow the pattern guidesheet for cutting, but if the layout allows, cut 1” seam allowances on side and under the arm seams, just to allow for adjustment if needed to accommodate thicker fabric. Be sure to use the “with nap” layout to avoid obvious shading on the finished garment. If the fabric is very thick, cut out single-layer pieces, remembering to flip the pattern for a right and left side.
  • Transfer all markings to the cut pieces using chalk, removable marker or thread tailor tacks. If you can’t tell the right from the wrong side, mark them for consistency.
  • If your wool is lightweight, staystitch any bias and curved edges to avoid them stretching during handling. This line of regular-length stitching is done just barely inside the seam line so it doesn’t show in the finished garment.

Marking fabric

Pressing Matters

  • You’ll be doing a lot of pressing as you construct a tailored garment, as that’s part of the shaping process. Use steam to help shape the wool—either the steam setting on your iron, or a dry iron with a damp press cloth. Do not press wool with a dry iron alone. Test-press some scraps to see which works best for your fabric, as some wools can develop an unsightly shine if pressed directly with the iron.
  • Because of the bulk, it’s best to press seams open, unless the garment style dictates pressing to one side and topstitching to make a sporty mock flat-felled seam.

~Linda Griepentrog
Linda is the owner of G Wiz Creative Services and she does writing, editing and designing for companies in the sewing, crafting and quilting industries. In addition, she escorts fabric shopping tours to Hong Kong. She lives at the Oregon Coast with her husband Keith, and two dogs, Yohnuh and Abby. Contact her at .

Tagged With: sewing, tailoring, wool

December 20, 2019

Stash Busting: Take UFO’s Off the Radar

We all have a stash of projects in drawers, on shelves and in containers that have been started but never quite crossed the finish line. ASG member, Hope Wright, had a stash of UFO’s and a plan and now she’s sharing her tips and hints on how an online challenge in 2011 inspired her to finish an unprecedented 926 projects. (Yes, 926!)

Here’s Hope’s story…

Sewing fills my days. Not to mention the living room, bedroom and closetsSort, Sort, Sort

I first started in 2011 during a challenge from an on-line group.  Attempting to use only “from my stash,” I first gathered all the projects I had already started in to one place.  I then sorted them by estimating how long it would take to finish each project. The first group were projects that would take just an hour to finish. Next came projects that could be done in an evening after work. Finally, projects I could do on a Saturday.

By using this system, I have completed 926 projects to date. I do add projects to my stash, but I try very hard to finish everything I think I can complete in an evening or on a Saturday morning.  Longer projects still await!

Organize

Organize your kits, stash and tools in some way that makes sense to you, or at least gather them together so you can find them.  For me, I have most of my tools  and gadgets in a bookcase in my sewing room.

Try organizing your projects by type of material, where to work, time it will take to complete, color, expense, etc.  Group projects that are repetitive. For example, cut out several projects in one session and make your own kits.

Get rid of anything you have no desire or need to finish. Take that group and consider if someone else may want it for their UFO stash.  I’ve given several boxes of supplies to a school art program.  Remember, it’s also okay to just put it in the trash!

Make Three Lists

  1. Projects to get to this coming year.
  2. Projects, ideas, and stash in storage. This includes actual kits you have and ideas to do “someday” – or as one person said, her Craft Retirement Account.
  3. Projects completed. It is great to see what you’ve accomplished!

Categorize Active Projects

An important function for me is that I always actively work on 3 projects at any one time, with 3 to 9 more in line so I never have “down” time. Everything else remains stored away; anything more than 12 is simply too overwhelming.  My active projects are categorized by where I can do them:

  • Something to do at home, but can’t be done in front of the TV (such as using the cutting table or sewing machine). These are often things I do on the weekend rather than after work. Many projects then move to the next category.
  • Something I can work on while listening to TV, such as pressing, hand sewing, or embroidery. Some projects then move to the next category.
  • Something I can do in a waiting room, meeting, or traveling. These projects are easy to stop at any point, small to pack or carry, do not require extra light, magnification, or a table to spread out.  I always have a project in a tote bag with all supplies to be able to work on it.  I nearly always keep one in the car.

Projects with Deadlines

I work on anything with a deadline first, even if I have a lot of time.  It is much better to finish something six months early than a day late. Between all my clubs and church, I do a dozen or more programs and deadline projects during a year. I put them first on my “to do” list on January 1 and indicate the deadline.

Finally, I also look at promises already made before I agree to do something more.  I try to finish Christmas gifts before Thanksgiving week so I can enjoy holiday parties. Since most groups have their programs planned a year at a time, I know I will start working in December on programs for the coming year. I will seldom start anything else until they are done. Find what works for you to take those UFO’s off your radar!


~© Hope Wright, ASG Member

Tagged With: sewing, sewing tip, Sewing UFO's

  • « Previous Page
  • 1
  • …
  • 47
  • 48
  • 49
  • 50
  • 51
  • …
  • 63
  • Next Page »

Become a Member

Join the only national organization dedicated to Advancing Sewing as an Art and Life Skill.

Join Now button

Blog Article Categories

  • ASG Conference
  • Chapter Stories
  • Embroidery
  • Fitting
  • Learn to Sew
  • National Sewing Month
  • Products, Books, & Patterns
  • Projects
  • Quilting
  • Sewing
  • Sewing Techniques
  • Sewing Tips
  • Sewing Tours
  • Videos
  • Disclaimer
  • Privacy Policy

American Sewing Guild
National Headquarters
9660 Hillcroft, Suite 230
Houston TX 77096
713-729-3000 | 713-721-9230 Fax
www.ASG.org

ASG wordcloud - education, conference, discounts, videos, special offers, tours and more

Copyright © 1998–2025 · American Sewing Guild · All Rights Reserved