American Sewing Guild (ASG)

Visit our blog Visit the ASG Facebook page Visit ASG on Pinterest Visit ASG's YouTube channel Visit ASG on Instagram
  • Home
  • Join ASG
    • Join Online
    • Chapter Locations
    • Member Benefits
    • Member Brochure
    • Join by Mail
  • Education & Classes
  • Resources
    • Contests & Awards
    • Giving Back
    • Hall of Fame
    • Travel and Tours
    • Measurement Chart
  • Shop
    • ASG Store
    • Chapter Products
    • Video Resources
  • Blog
  • About
    • About Us
    • Donate to ASG
    • ASG Sensitivity Statement
    • FAQ’s
    • Start a Chapter
  • Contact
  • Member Login
    • Login First!
    • Members Only
    • Leadership Only
    • Website FAQ’s
    • Logout
  •  

August 14, 2026

Sleeve Setting

Whether you’re a beginner or an experienced sewer, sleeves can be a little intimidating—whose idea was it to try and fit a rounded curve into an armhole anyway?
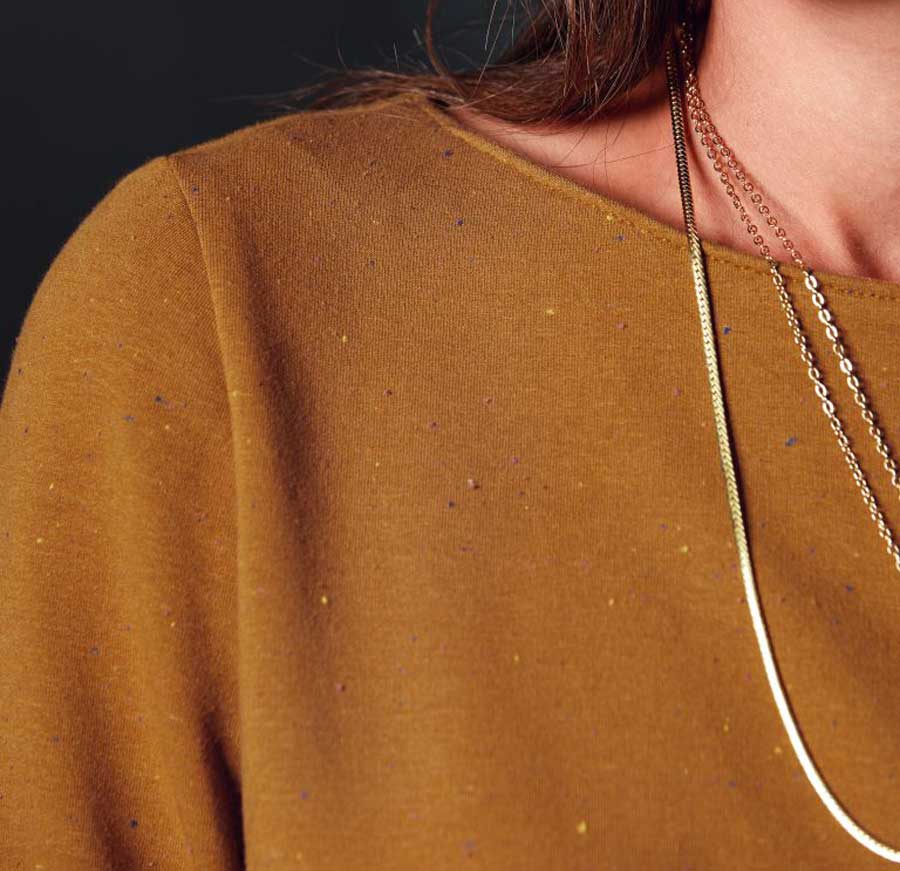
Sleeve image

No matter what type of garment you’re creating—from coat to T-shirt—you’ll likely be facing one of two types of sleeves: either one with a rounded cap or one with a flat cap. (Raglan is another type of sleeve, but requires a different insertion method.)

Rounded caps are found in more tailored and fitted garments and are commonly called set-in sleeves, while flat caps (aka shirt sleeves) are found in more sporty garments, menswear and kids’ clothes, and getting them into your garment requires different strategies.
Flat cap sleeve

Set-in Sleeves

The shape of a rounded sleeve cap allows for ease to fit over the shoulder curve and upper arm area. If you measure the seamline of the garment and you measure the seamline of the upper sleeve, you’ll find that the sleeve is longer. That means you’ll need to ease the fullness into the smaller garment opening.

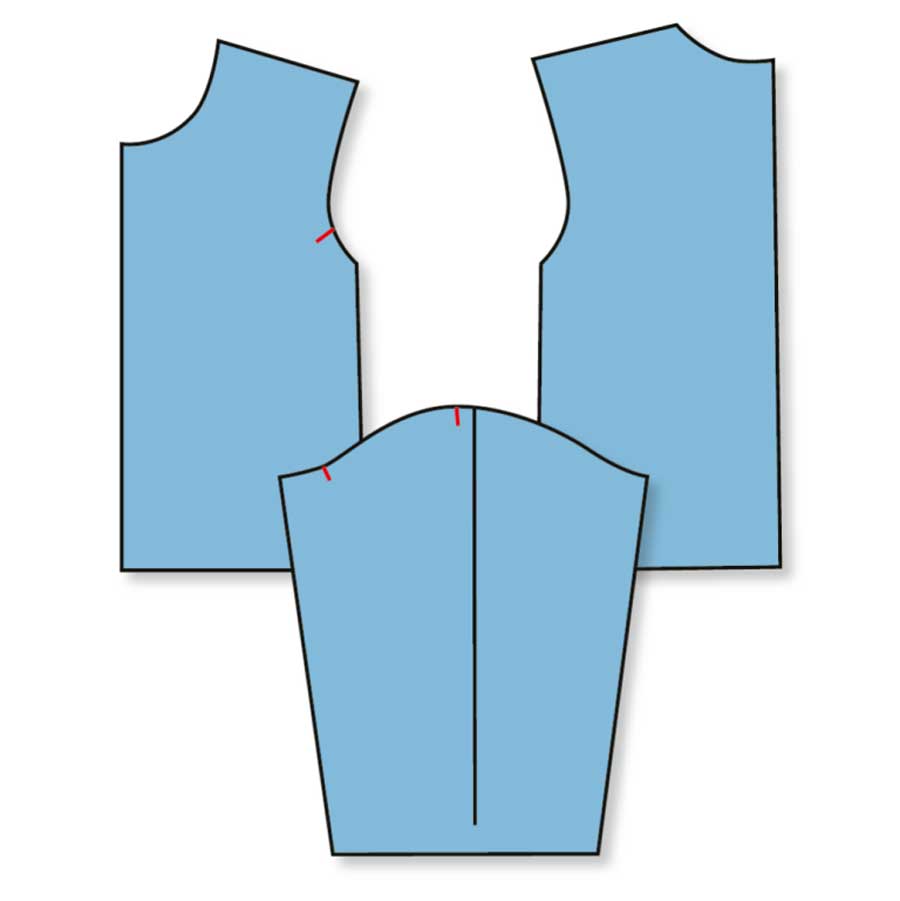
A rounded sleeve cap has important pattern markings—at the shoulder and part way along the sleeve cap both front and back, including placement notches. These are key for distributing the ease.
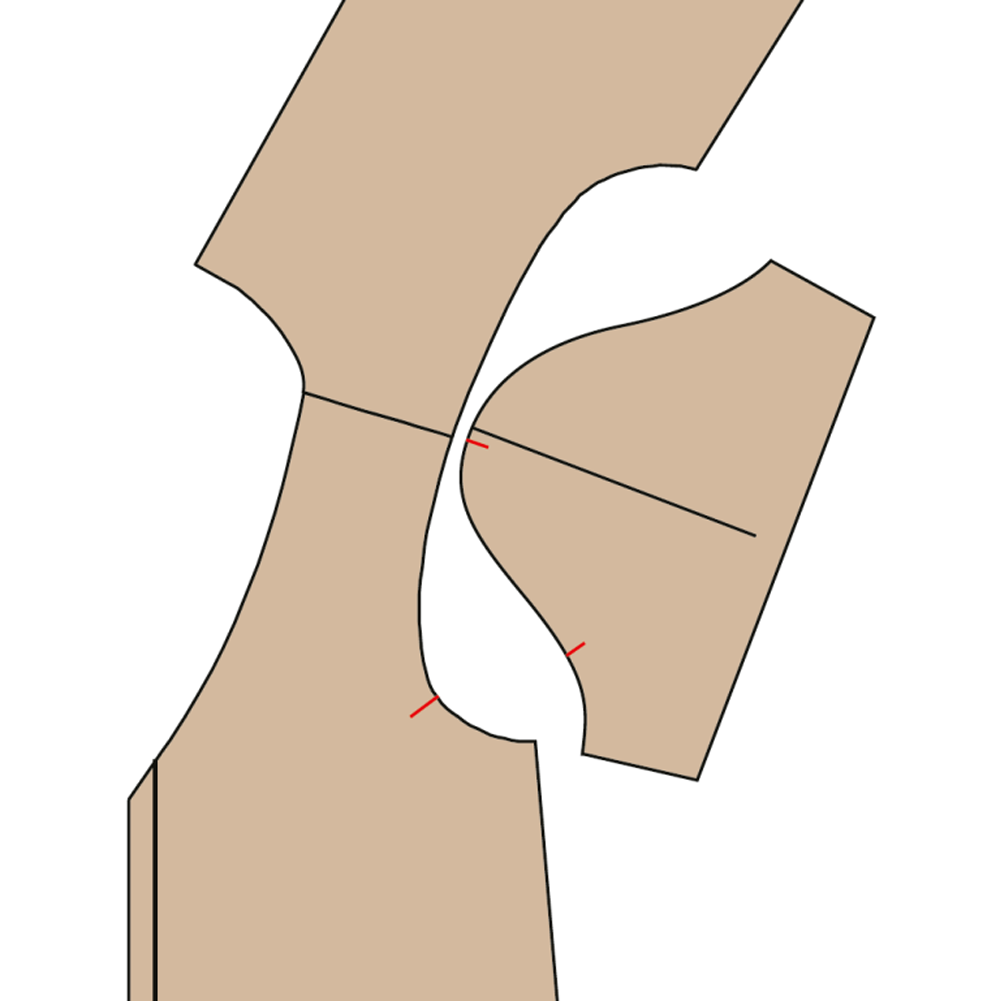
Rounded cap sleeve with markings

The area below the armhole notches on the sleeve should fit the armhole itself with no ease, as the ease area is concentrated at the top portion of the sleeve, above the notches.

To evenly distribute the sleeve cap ease, stitch a line of basting length stitches 1/8” inside and outside the seamline from notch to notch—do not backstitch, but instead leave the thread tails long enough to pull.
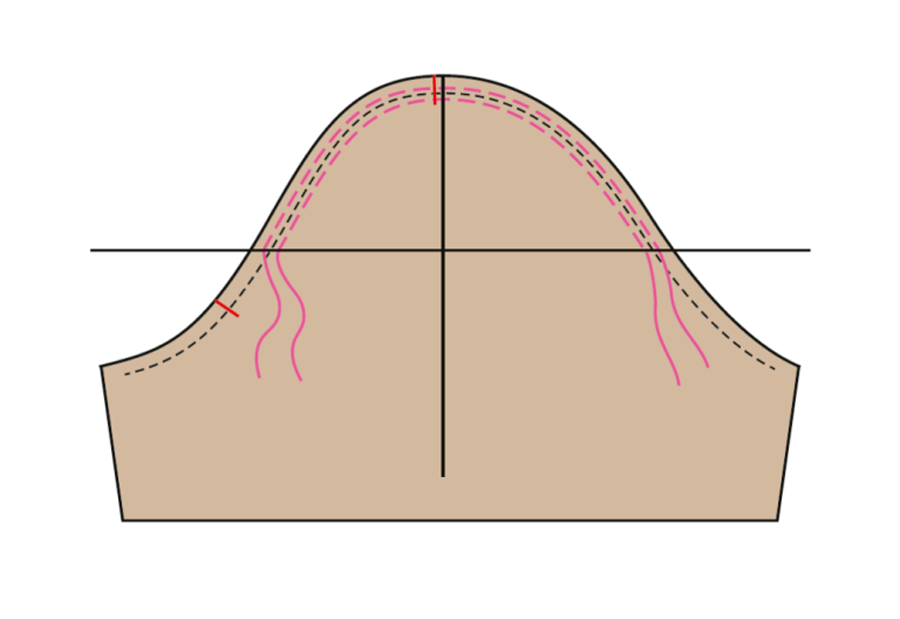
Ease lines

The first step in insertion is to sew the underarm sleeve seam and the corresponding garment shoulder and underarm seam, and press both open. With right sides together, place the sleeve inside the armhole opening and pin at the notches, seamline, shoulder point and corresponding markings on the cap. Gently pull on the bobbin threads of the ease line to fit the sleeve to the armhole size, working from the notch area to the shoulder.
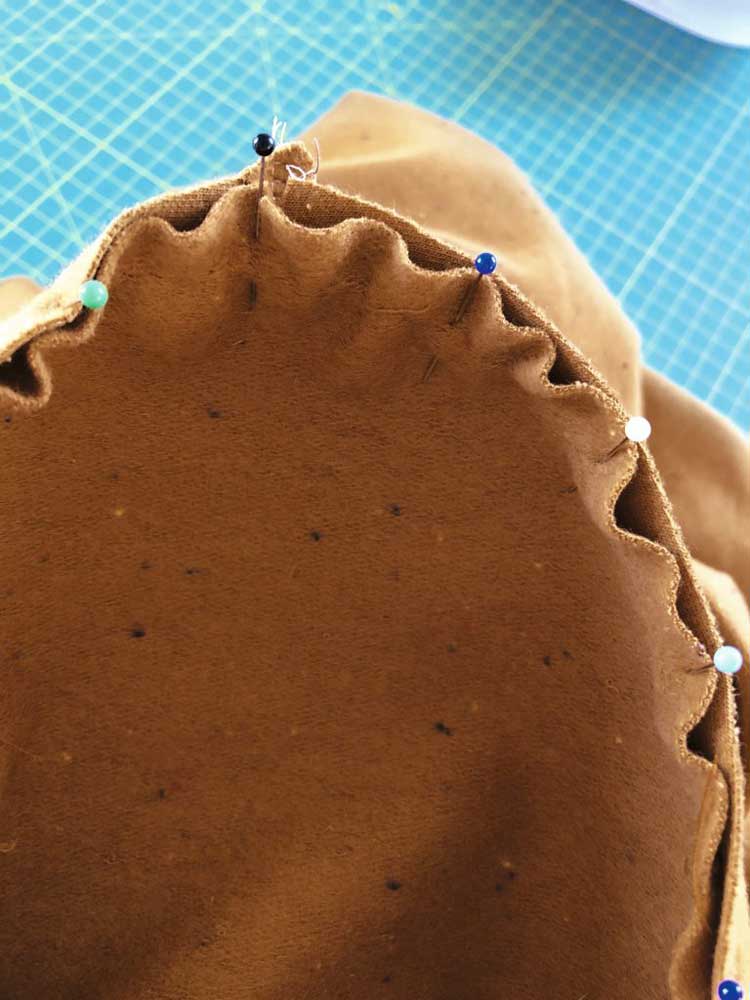
If your machine has a free-arm, this is the place to use it, as the sleeve opening can fit over it for easier access.

Beginning at the underarm seam, stitch the sleeve in place adjusting the ease as needed to fit and being careful to avoid any puckers. Sew with the sleeve side up to control the ease.

Reinforce the lower armhole with a second line of stitching ¼” inside the seamline. Trim the seam allowances below the notches, but leave the seam allowances intact in the cap area to fill out the sleeve head. Push the upper sleeve seam allowances toward the sleeve, but don’t press this area as it will flatten, eliminating the ease you just carefully created. Remove any visible basting.

If you’re working on a tailored garment with a two-piece sleeve, follow the pattern guidesheet to sew the undersleeve to the top sleeve before inserting it into the garment.

Flat Sleeve Insertion

Shirt sleeves have the same markings as their set-in cousins—notches front and back, a shoulder marking and often some intermediate marks as well. This type of sleeve is put in prior to sewing the garment side seams and sleeve underarm seam. No ease line is necessary for this type of sleeve—simply match the notches and other marks, right sides together, and stitch with the sleeve side up.
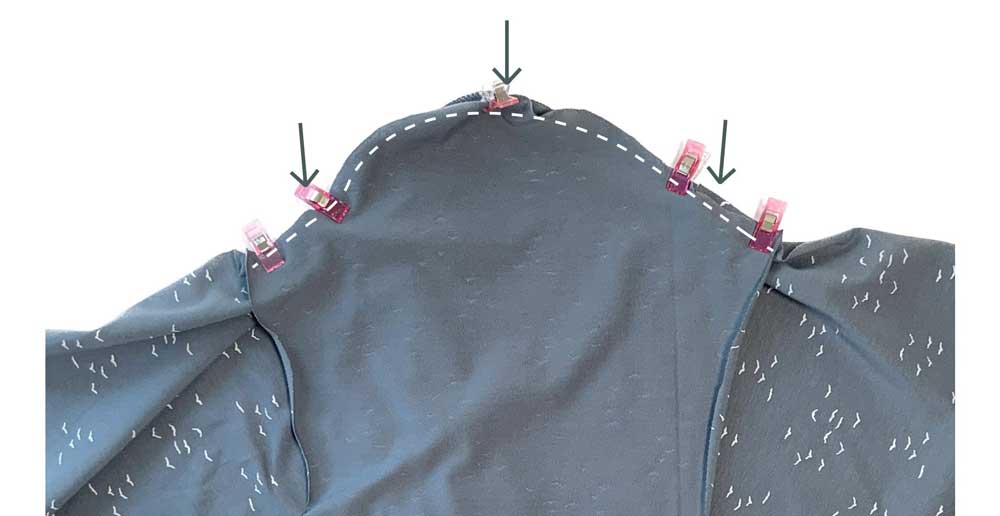
Flat cap sleeve, ready to sew

Shirt sleeves can easily be inserted with a serger or conventional machine. If you choose the latter, sew a second line of stitching, either zigzag or straight just inside the seamline and trim off the extra seam allowance.

With right sides together, match the garment underarm seams, hemline and sleeve hem, then sew the seam continuously. Finish and trim as for the sleeve cap area.
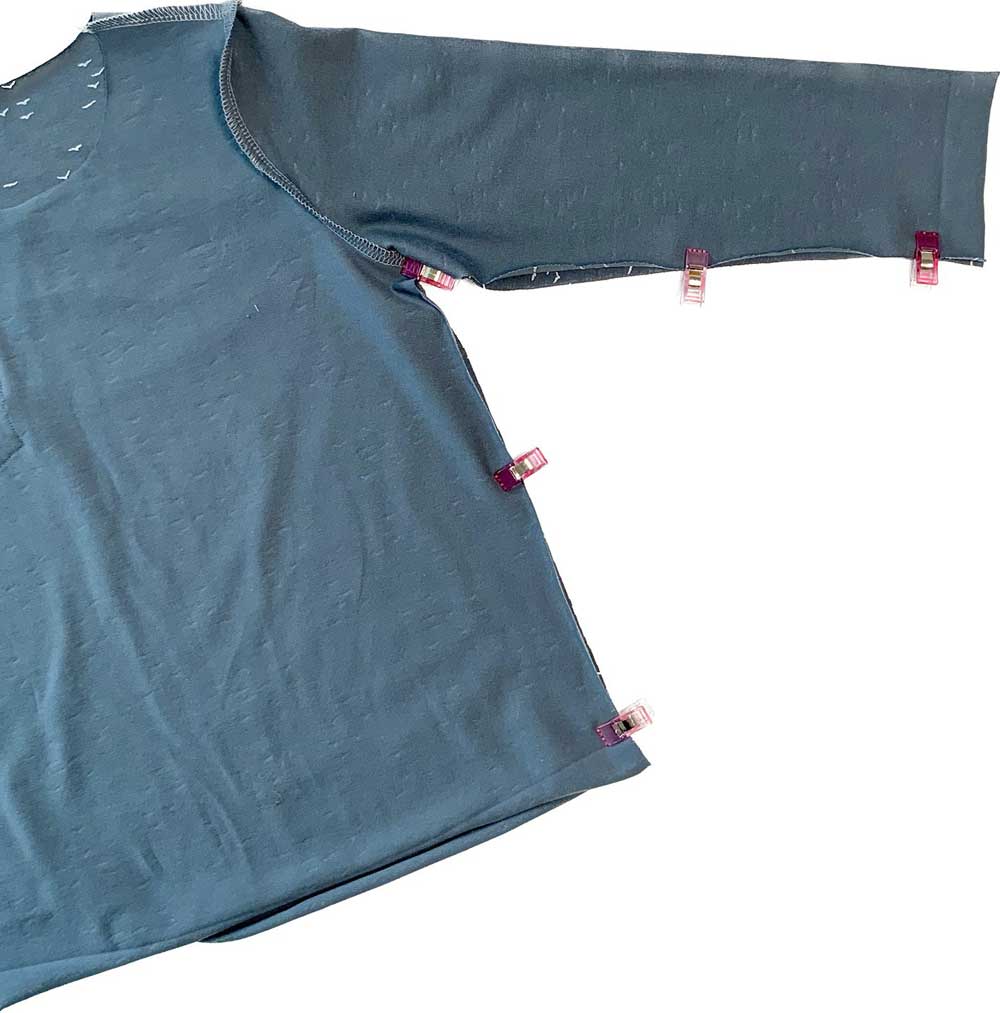
Flat cap sleeve side seam

All images provided courtesy of Bernina


~Linda Griepentrog is the owner of G Wiz Creative Services and she does writing, editing and designing for companies in the sewing, crafting and quilting industries. In addition, she escorts fabric shopping tours to Hong Kong. She lives at the Oregon Coast with her husband Keith, and three dogs, Yohnuh, Abby, and Lizzie. Contact her at gwizdesigns@aol.com.
Tagged With: garment sewing, sewing tips, sleeves

May 22, 2026

Blanket Stitch

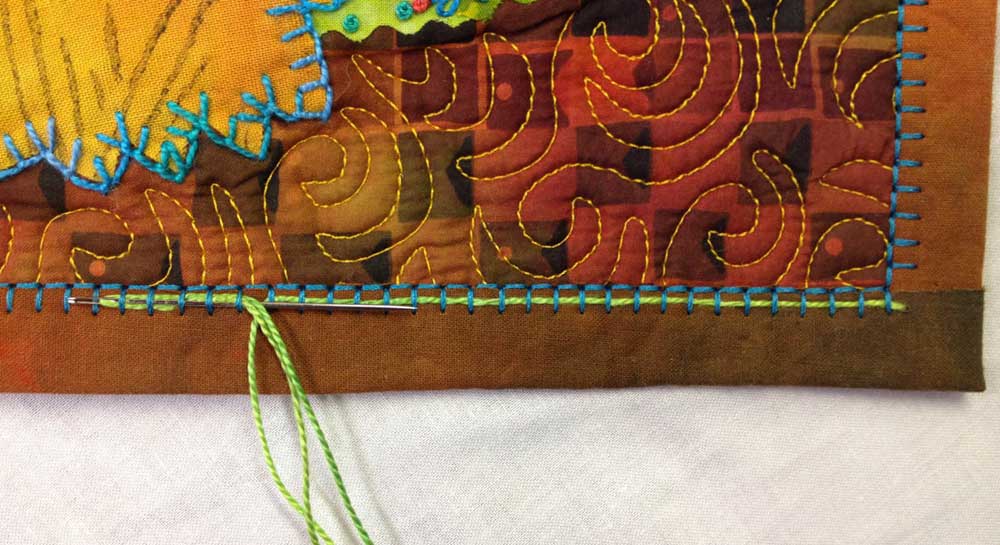
Originally used as an edge finish on heavy wool blankets (hence the name), this aptly named stitch is much more versatile. It can be used for many decorative applications and stitches out quickly and evenly, mimicking hand stitches with the same moniker.

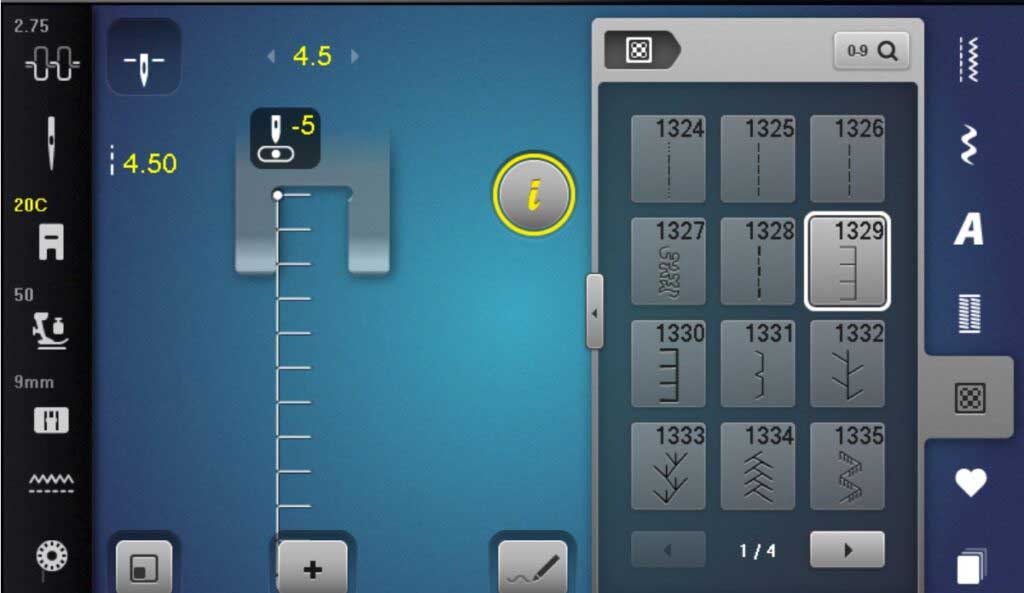
A blanket stitch can be recognized by its two distinct directions—a vertical stitch and a
‘bite” stitch perpendicular to the vertical stitch, forming a distinct right angle. The bite stitch is actually two stitches—one to the left and one to the right to return the needle to the vertical stitch positioning.

The stitch is adjustable in both length (the space between the bites) and width (the reach of the bite to the left). You can have wide bites close together, narrow bites further apart or any combination of the two. If your machine has any kind of software adjustments, you can even change individual stitches (length, width and stitch angle) for a more eclectic hand-stitched look.

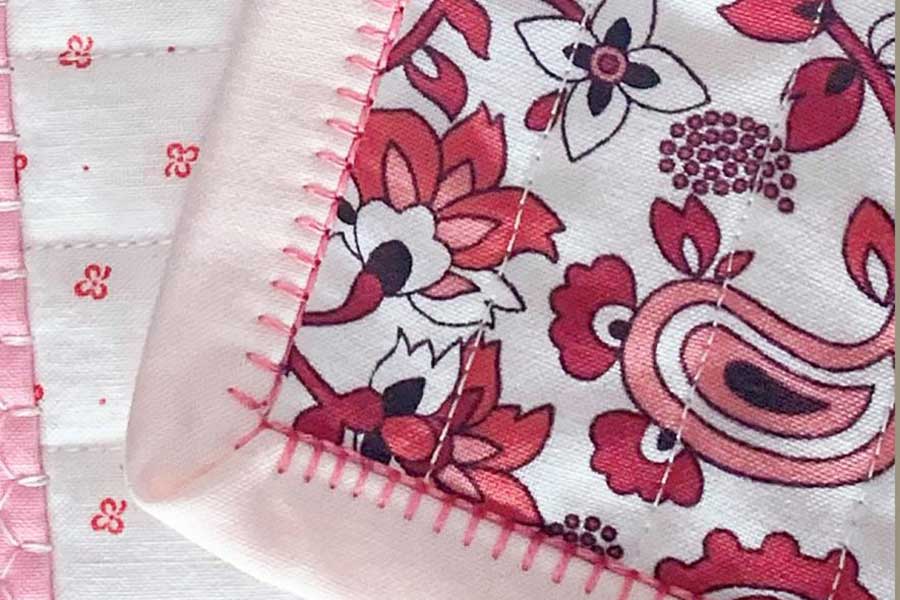
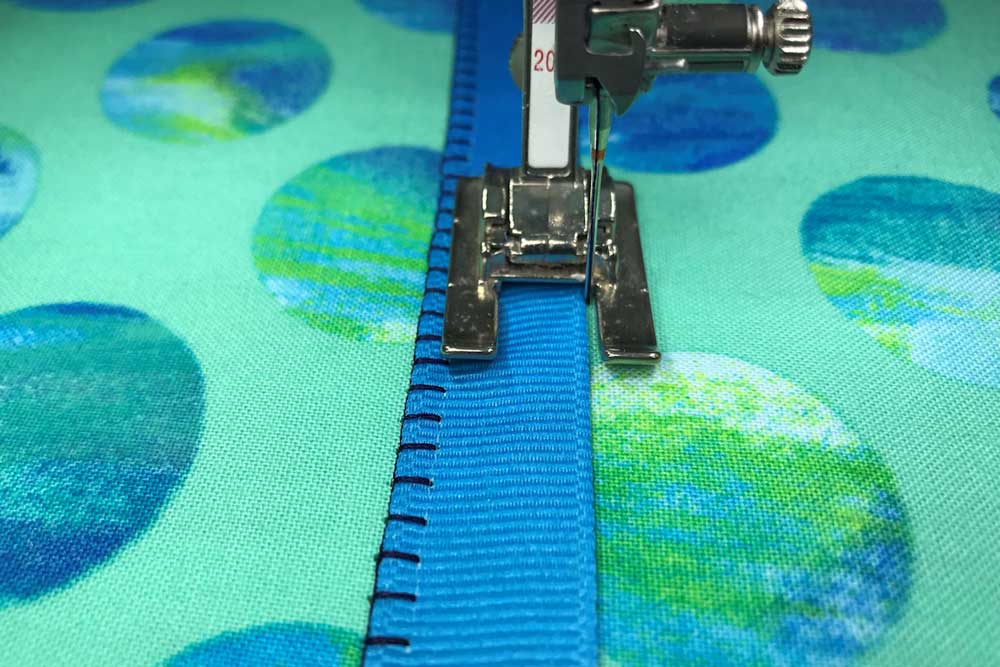
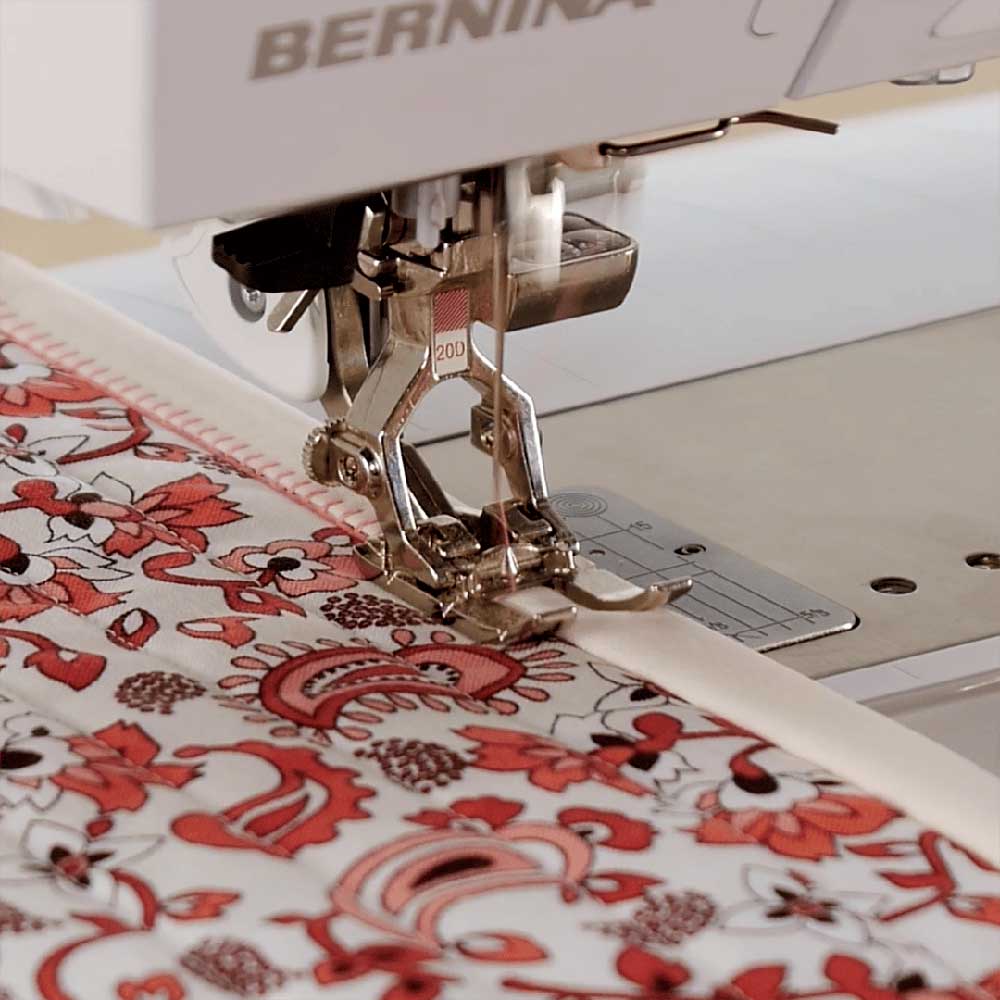
While used most frequently for appliqué (both raw edge and turned), the blanket stitch can also be used as an edge finish on both single- and double-layer edges. It can also be used to accent seams, pockets and hems, and to apply trims such as ribbon, binding and bias tape.

Machine Set-up

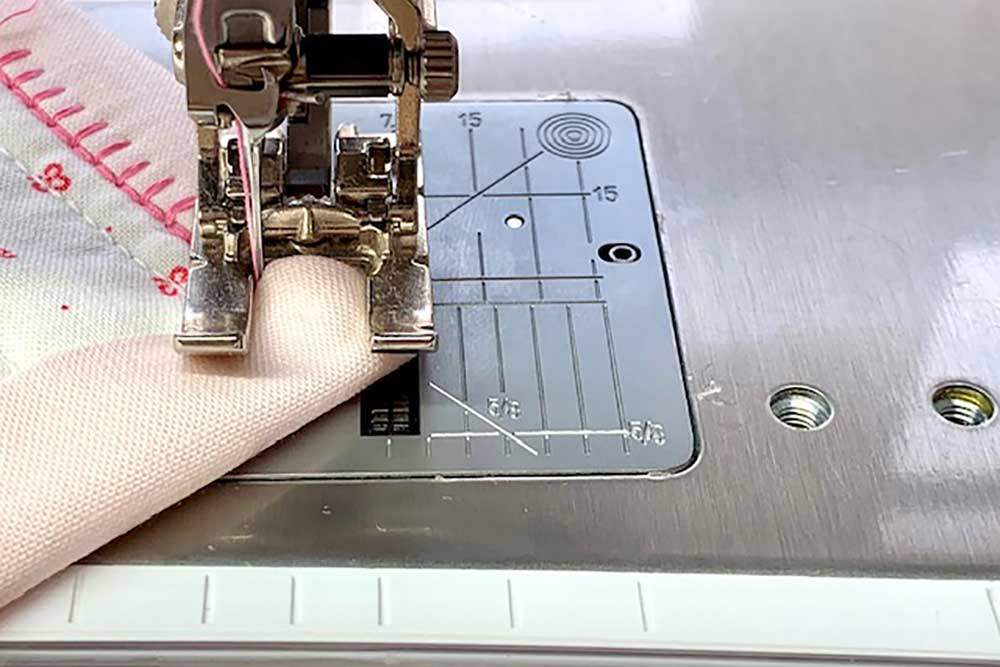
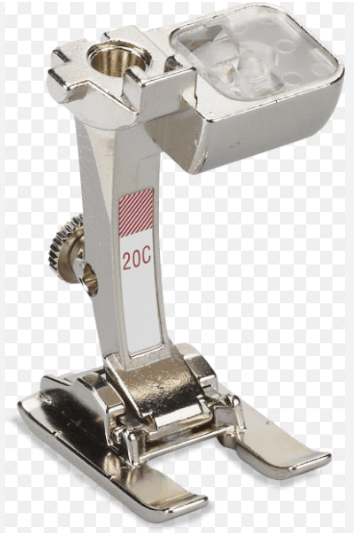
Open-toe foot

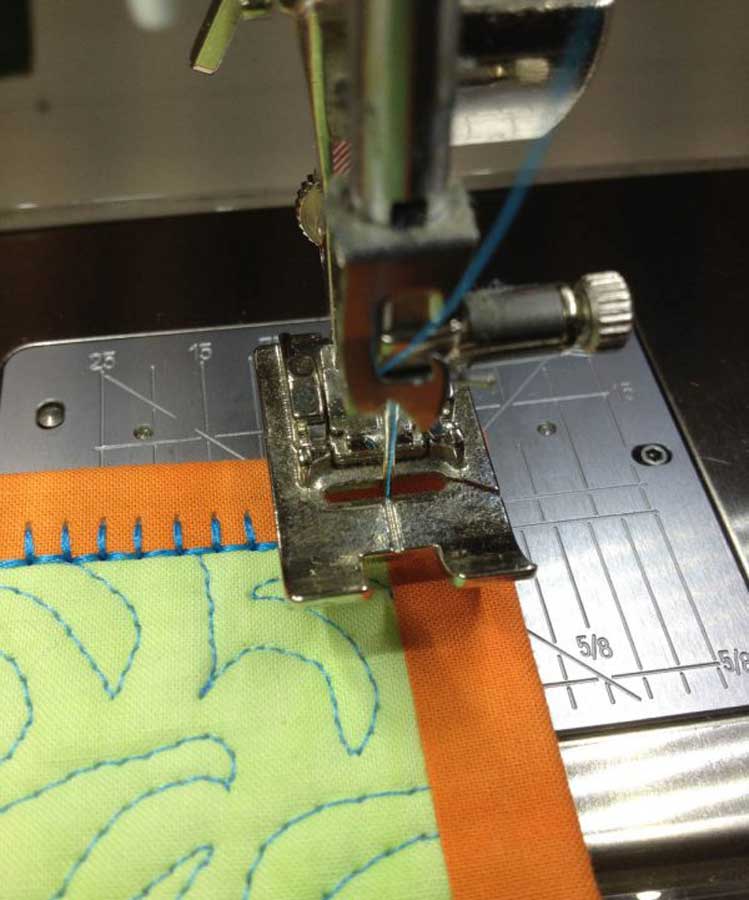
It’s important to select an open-toe foot when using the blanket stitch, as visibility is critical for precise placement. If you’re machine has one, choose an open-toe foot that can also use the dual-feed function for even feeding.

Part of the fun of the blanket stitch is that the look can vary greatly, depending on the type of thread you choose. You can use it with monofilament for an invisible appearance, regular sewing weight thread, or with any number of decorative threads, including wool for a hand-stitched look.

The type of thread you choose and your fabric type will determine the kind and size of the needle needed for perfect stitching. It’s important that the needle eye is large enough not to shred the thread since it’s entering and exiting the same needle hole during the stitch formation.

Apply binding

Blanket Stitch Tips

  • If your project has corners, curves or points, use the needle-down function if you have it to keep the stitch from shifting as you pivot around the shape.
  • Setting the machine needle position to the right or left also helps with visibility and allows the presser foot edge to be used as a guide for stitching.
  • If your machine has mirror-imaging functions, it’s possible to reset the bite portion to form in the opposite direction, depending on your comfort level with the stitch.
  • Your project may require a stabilizer underneath to avoid puckering if the fabric is lightweight.
  • Always stitch a test sample to adjust the stitch settings before beginning the project.

Appliqué

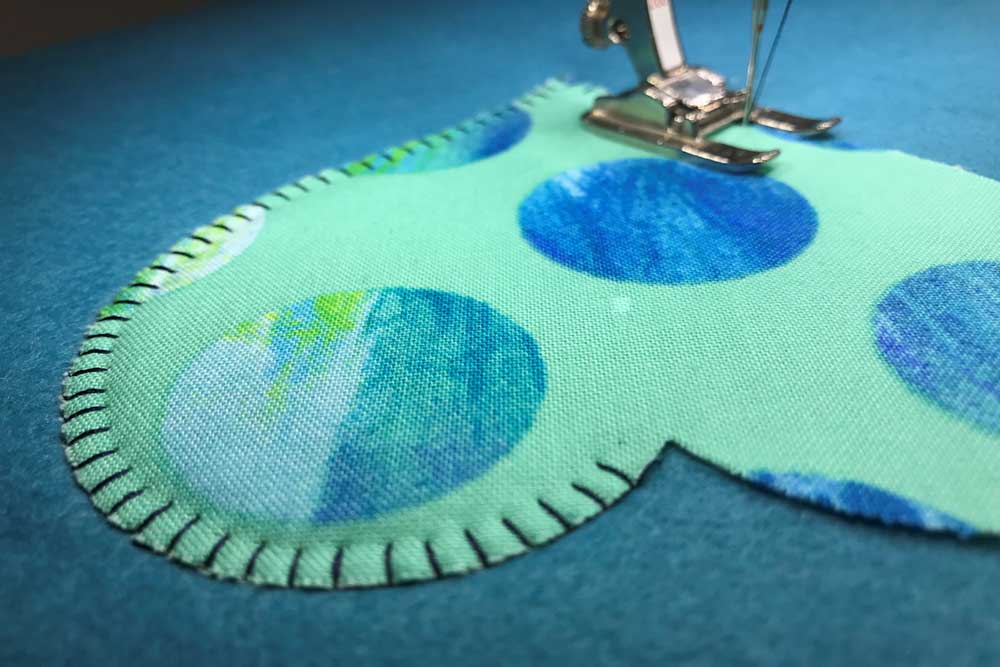
The easiest way to appliqué with a blanket stitch is to secure the appliqué shape in place first using fusible web. That prevents any shifting during the edge-stitching process. Fuse the entire shape or just the edges, or optionally, use a light touch of fabric glue under the edges.

Using the blanket stitch for appliqué creates a neat finish to either a raw or turned edge. The vertical portion of the stitch can rest along the appliqué edge or actually be on it, depending on the desired finished look. Most commonly, it trails along the edge with the bite piercing the appliqué fabric.

At the corner of an appliqué, stop on the vertical stitch side of the stitch with the needle down in the fabric. Lift the presser foot and pivot at the angle needed for the corner. If it’s a right angle, you can then begin stitching again on the adjacent side. If it’s not a right angle or you prefer a diagonal cornering stitch, then pivot accordingly.

Right angle pivot at the corner
Pivot diagonally at the corner
Diagonal corner stitch

When appliquéing curves, you may need to pivot repeatedly around the curve edges to avoid stitches at odd angles if you try to stitch continuously. Each time, simply leave the needle tip in the fabric and pivot slightly to keep the stitches aligned.

Pivot evenly around curves

Added Pizazz

Because the blanket stitch bite is a single stitch in each direction, it can also be used as a channel to add other fiber embellishments after stitching, like yarn or beads, and they’re securely held in place.

Add other embellishments under the blanket stitch

All images compliments of Bernina


~Linda Griepentrog is the owner of G Wiz Creative Services and she does writing, editing and designing for companies in the sewing, crafting and quilting industries. In addition, she escorts fabric shopping tours to Hong Kong. She lives at the Oregon Coast with her husband Keith, and three dogs, Yohnuh, Abby, and Lizzie. Contact her at gwizdesigns@aol.com.
 

Tagged With: blanket stitch, machine stitches, sewing tips

July 7, 2023

Sewing Q&A: Cutting Mats, Chain Sewing, & Elastic Thread

Rotary Cutting Mat

Q: What’s the easiest way to clean my rotary cutting mat?

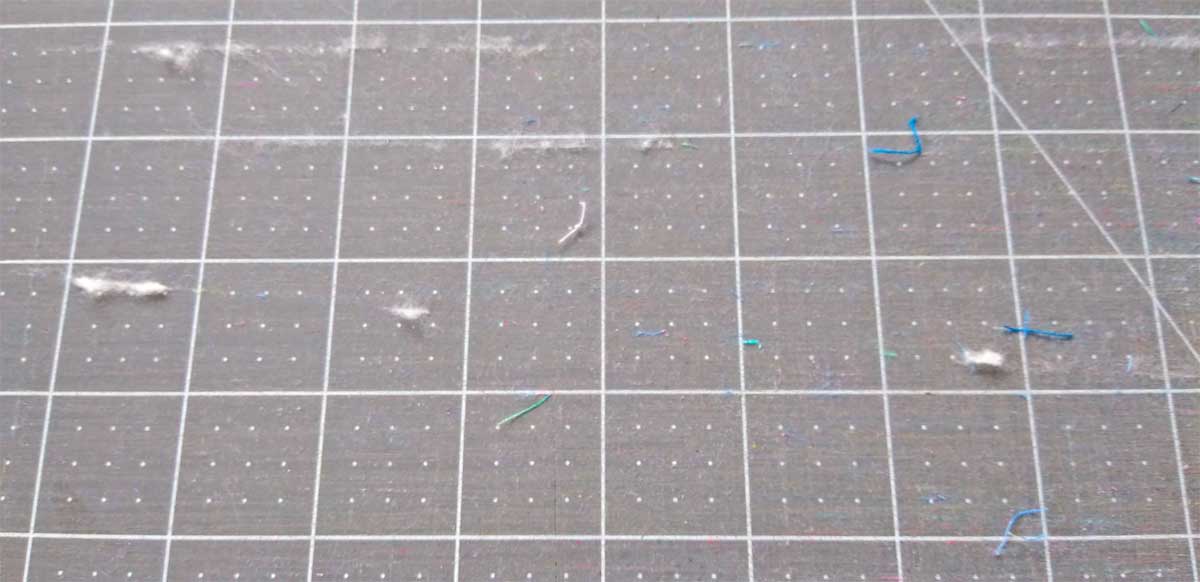
A: Cutting mats harbor lint as you cut various fabrics and some fabrics are worse than others for their shedding capabilities. If you’re cutting something linty, like fleece or fur, be sure to use a soft brush and clean the mat immediately after use. An art eraser, soft dish scrubber or an adhesive lint remover can also be used to get fibers out of the cutting line grooves. But don’t stop there…

Cleaning a cutting mat

To give your mat a thorough “spa” cleaning, fill your bathtub with enough room temperature water to cover the bottom of the tub, and add ¼ cup of white vinegar. Let the mat soak for 15-20 minutes, then add a bit of dish soap to the mix. Use a small, soft brush to scrub the mat and lather it up. Rinse the mat in cool water and dry with a towel or lay it flat to air dry.

Tempting as it might be, don’t use hot water for this cleanse, and don’t let your mat dry in direct sun, as both will cause the mat to warp. Once a cutting mat is warped, it cannot be made flat again.

Taking good care of your cutting mat will prolong its life and that of your rotary cutter blade as well.

Chain Sewing

Q: I’ve heard the term chain sewing a lot from my quilting friends—what does it mean and can I do it with garment sewing too?

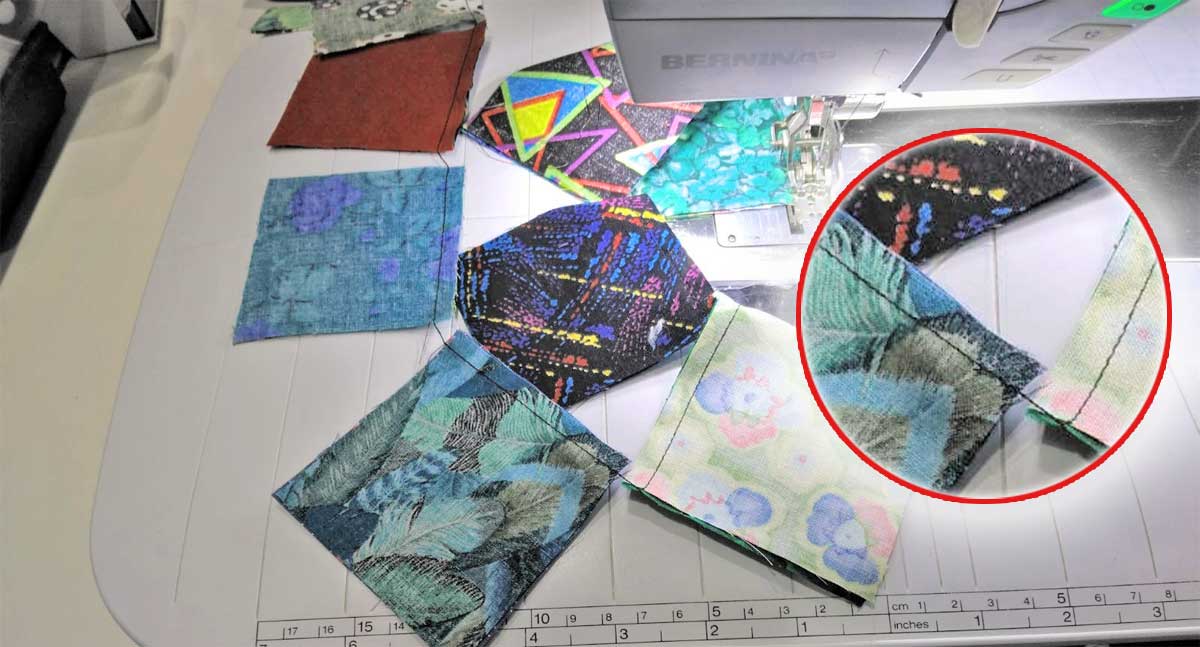
A: Chain sewing means that once you’ve sewn a seam, you simply feed in the next thing to be sewn, without clipping the threads between pieces. For example, if you’re sewing together multiple quilt blocks, sew all the like pieces together continuously. Chain stitching is a real timesaver, and it also saves thread, as you’re not stopping after each piece to clip threads and pulling out new thread ends before you start the next piece.

When you’re done sewing together a quantity of pieces, clip them apart.

Chainstitch examples

Chain stitching can absolutely be done with garment sewing or other projects as well. In fact, it’s kind of a game to see how far you can go without stopping to clip threads. When sewing a garment, fuse any interfacings to all pieces prior to sewing, then, depending on the style, you may be able to continuously sew the armhole facing shoulder and/or underarm seams, followed by the garment shoulder seams and side and/or center seams, neckline facing seams and skirt side seams, all before stopping. If your garment has sleeves, feed in the underarm seams as well.

Rule of thumb for chain sewing is never cross another seam without pressing it first.

Chain sewing is really quite satisfying to see a mound of pieces quickly piling up behind your presser foot. If you’re making multiples of the same item (cheerleader outfits, band uniforms, etc.), factory style chain sewing is much quicker than sewing each project from start to finish before starting the next.

Elastic Thread

Q: I used elastic thread in my bobbin to shirr a top, but it didn’t pull up as much as I thought it would and my top is too big. Did I do something wrong, and is there any way to fix it?

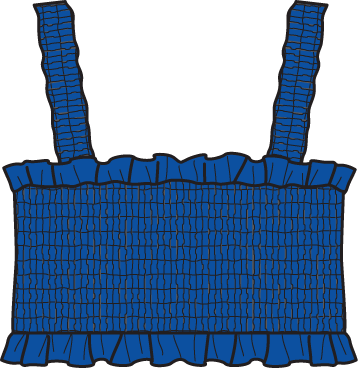
Smocked top using eleastic threadA: Elastic thread differs from brand to brand with its elasticity and recovery, so it’s really important to do test stitching on the actual project fabric before beginning your garment. Top tension may need to be adjusted, and/or the stitch length to get the shirring effect you want.

Since your stitching is already done, there are a couple of possible solutions: First, steam the shirred area from the wrong and/or right side. Most elastic threads will shrink a goodly amount from the steam. Don’t actually press on the elastic or the fabric, just hover the iron and steam. If that doesn’t draw it up sufficiently, find the end of each stitching line and pull up the elastic. When it’s the right size, knot the thread end or stitch over it several times within the seamline. Repeat for each row separately. If you didn’t stop stitching at the end of the rows, but instead turned to stitch the next row, use a large pin to pull up the elastic thread as if it were separate rows for the same effect.


~Linda Griepentrog is the owner of G Wiz Creative Services and she does writing, editing and designing for companies in the sewing, crafting and quilting industries. In addition, she escorts fabric shopping tours to Hong Kong. She lives at the Oregon Coast with her husband Keith, and three dogs, Yohnuh, Abby, and Lizzie. Contact her at gwizdesigns@aol.com.
This field is for validation purposes and should be left unchanged.
Did you enjoy this article?
Are you an ASG member?

Tagged With: sewing tips

February 18, 2022

Sewing Projects: Making Multiples

Do you showcase your DIY projects at craft sales or bazaars, make things for charity, or make dozens of handmade items for gifts? No matter what time of year, making multiples of the same or similar item can be simple and quick with a few helpful hints.

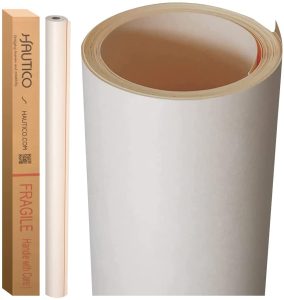
Tagboard on Amazon (affiliate link; we may earn a small commission on your purchase)

Streamline your pattern. If you’re making lots of hats, for example, create a tagboard pattern you can trace around. Not only does this save wear and tear (and shredding) of tissue paper patterns, but it’s more accurate for cutting. It doesn’t matter if the fabric colors are the same, as long as it’s the same item being cut.

Simplify the design. Depending on the project, you may be able to change up the design a bit to save time. For example, instead of creating tedious narrow hems on something, could you bind the edges with bias tape instead? Instead of finishing seams, like on a gift bag, could you add a simple lining to hide seams and add a bit more body?

Rotary cut multiple layers. Depending on the project and the fabric, you may be able to stack fabrics and cut six or so layers at one time with a good rotary cutter.

Choose a neutral thread. If you’re making lots of items in different colors, avoid constantly changing threads by using a neutral. White, off-white or light gray work for seaming light colors, and navy, black or dark gray blend with dark colors. If your project has topstitching, you may want to use thread to match the fabric, in which case, stack up similar colors and do the matching stitching at one time.

Bundle components. If your project requires elastic, for example, pre-cut the number of lengths needed before you start construction. When it’s time to insert the elastic, it’s ready to go, without have to go back and cut for each project.

Fuse fast. Think fusible interfacing if your project requires more body. You can fuse fabric prior to cutting out pieces to avoid having to tediously match up cut edges.

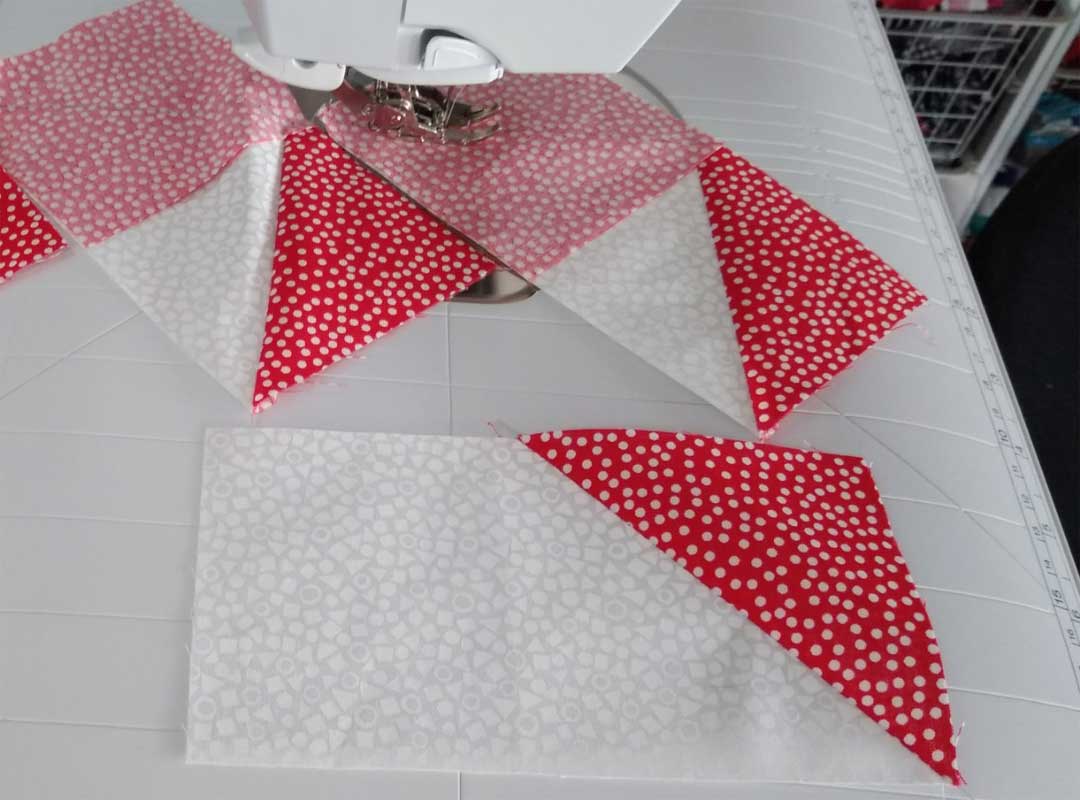
Chain sew. Continuous sewing is a technique borrowed from factories and involves sewing as many things as possible without cutting the thread. Simply feed in the next item and go, letting completed units trail out the back of the machine. Not only do you save thread, but also a lot of time. Once a task is done, simply clip apart all the pieces and move onto the next step.

Chain sewing—how far can you go without cutting the thread?


Sew without pins. Take a lesson from factory workers and learn to sew without pins. The task of stopping to remove pins as you approach them takes time and slows your speedy construction methods used for sewing multiples.

If you’re bored making the same item, play a game. It makes the time go faster if you challenge yourself to accomplish a certain task within a time frame. For example, if you finish x quantity of y task by 1pm, you can reward yourself with a break and a cup of your favorite beverage. (Warning: Do not drink alcoholic beverages while sewing.)

Plan ahead. Sew together small components—like ties, drawstrings, etc.—prior to constructing the item. For example, if you’re mass-producing aprons, make all the neck ties and waistline ties first before it’s time to attach them. If you’re making dozens of fleece hats, make all the pompoms first and they’re ready when you get to sewing the seam that includes them.

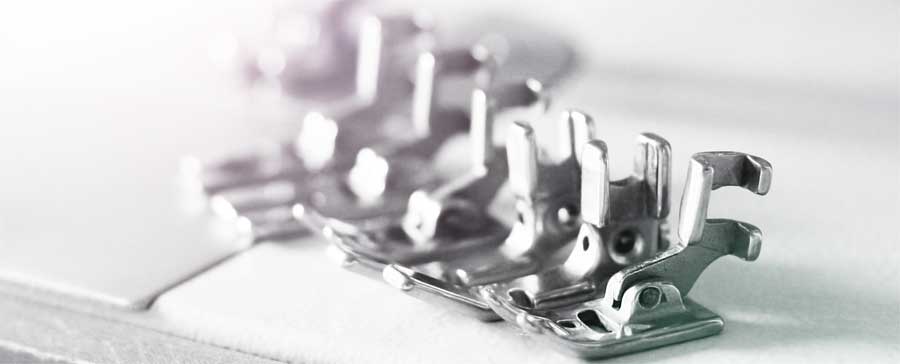
Don’t hesitate to invest. If you’re going to be doing a lot of sewing of similar items, think about what sewing machine attachments might help make your task easier. Depending on the project, you may find it’s a serious timesaver to invest in a bias binding attachment, edgestitch foot or perhaps a narrow hemming foot. If your machine doesn’t come with one, perhaps a ¼”-foot would help keep seamlines on the straight and narrow. Check with your dealer to see if there’s a machine accessory to help with specific tasks you’re facing that could speed up your work.

machine feet

Keep it clean. Sewing multiples can add a lot of lint to your sewing machine bobbin area and feed dogs. Be sure to regularly brush out those areas for trouble-free sewing.

Hand MadeAdd an ID. If you’re a prolific crafter who sells your wares, it’s always good to add a bit of professionalism to your projects with labels or tags. It’s easy to create and print tags from the computer, as there are several templates available online. Add your business name if you have one, or simply your contact information in case someone wants to purchase another similar item. Care instructions may be noted as well, and if the project comes in different sizes, indicate the size on the tag too.


~Linda Griepentrog

Linda is the owner of G Wiz Creative Services and she does writing, editing and designing for companies in the sewing, crafting and quilting industries. In addition, she escorts fabric shopping tours to Hong Kong. She lives at the Oregon Coast with her husband Keith, and two dogs, Yohnuh and Abby. Contact her at gwizdesigns@aol.com.
This field is for validation purposes and should be left unchanged.
Did you enjoy this article?
Are you an ASG member?

Tagged With: sewing business, sewing project, sewing tip, sewing tips

May 15, 2020

Basic Sewing Tools: Marking Tools

Help! I’ve marked my fabric and I can’t get it out!

No matter what you are sewing, you often need to find a way to mark key points on the fabric. You might need to mark stitching lines for darts, placement for pleats, buttonholes, or pockets. But nothing is more heartbreaking than to find that the marks have made a permanent home on the fabric and become center stage in your final project.

Top priority is always to choose the right marking tool that will do its job and leave when it’s done. This article will remind you of a few options to select from to achieve that result. But since we all occasionally need a little help when we fall, it is also important to have a few ideas in your arsenal for what to do when those marks refuse to leave when you want them to.

So, here we go. Let’s start with a few marking options, complete with strong points and weak points, for you to consider. Then we will wrap up with a few ideas to help you save the day if one of them results in a “fall” you have trouble getting up from.

Regardless of which marking tool you use, the most important thing you need to know is test, test test!

Frixion Pens

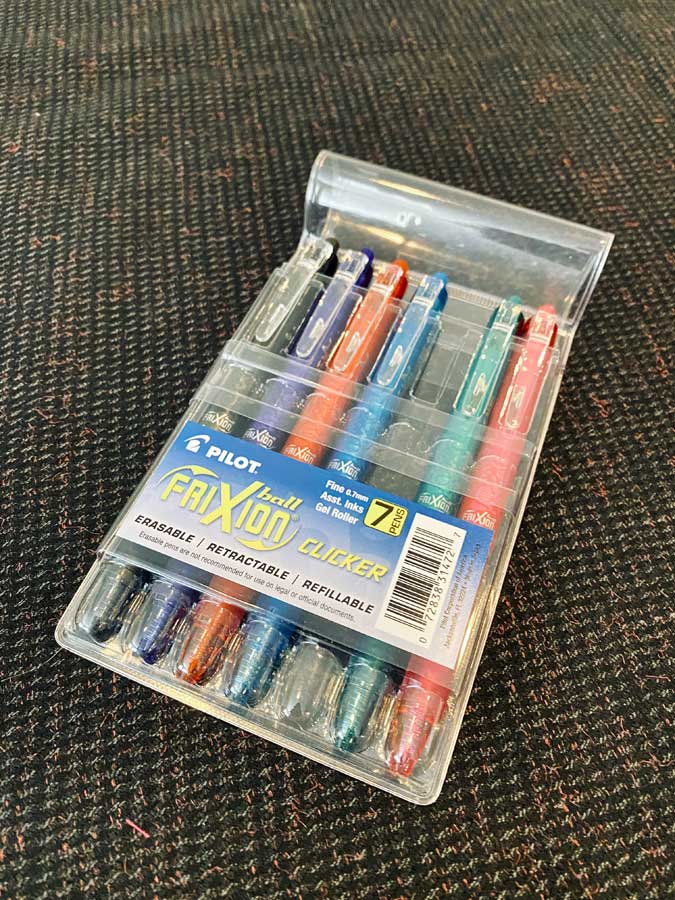
Marking tools - Frixion pensFrixion Pens are a personal favorite of mine. They are easy to find online, in office supply stores and some fabric stores. They work great on smooth fabrics but not so well on textured fabrics. Watch out, though. If you press too hard when marking, they can mar the fabric and leave a ghost line. Ask me how I know this… Press just firmly enough to make the marking visible but not scar the fabric. They erase quickly and easily with heat or steam but be forewarned that if you plan to take your project to the North Pole, those marks just might reappear. Yep, extreme cold can do that, just like magic! There’s a whole chemistry lesson that explains why, but that is for another day.

Tailor’s Chalk

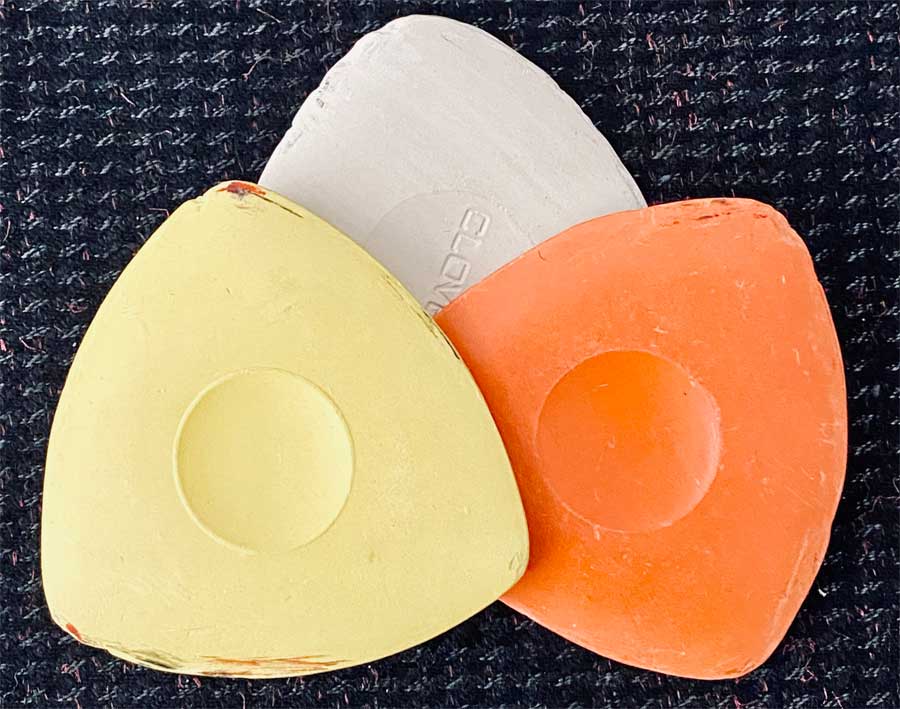
Tailor's chalkTailor’s Chalk comes in two types, with wax and without. Chalk without wax works particularly well on smooth fabric textures. It usually brushes away without leaving a residue, though sometimes too quickly so handle the marked fabric with care. Chalk with wax is a better choice for heavier and textured fabrics as it won’t disappear into the fibers or as quickly, waiting for the heat of an iron to disappear.

The downside of tailor’s chalk is that it gets dull and sometimes crumbles which means you will need to sharpen it. You can easily sharpen it by using a simple sharpening tool from makers like Dritz, or you can sharpen it by carefully (no injuries, please!) scraping the sharp edge of the blade of your paper scissors or an Exacto knife along the edge of the chalk.

Chakoner

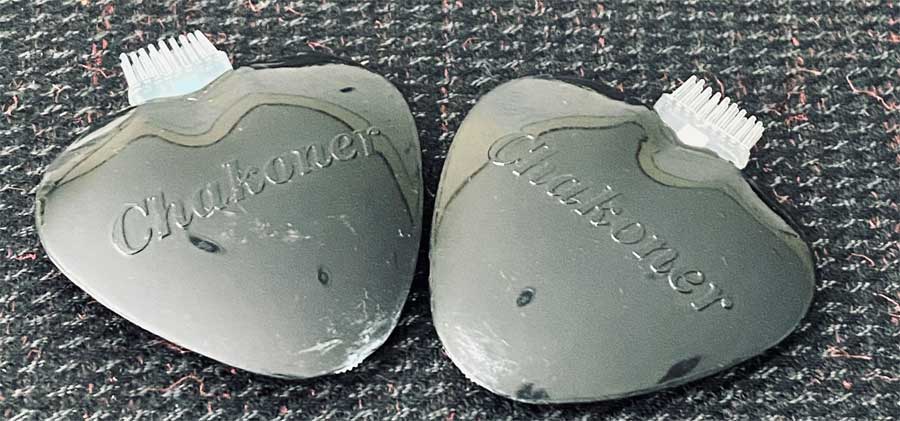
Chakoner is a powdered chalk receptacle with a dispensary wheel that makes a super fine chalk line. It rolls easily over both smooth and textured fabrics without leaving ghost lines and has a brush to help with removing the chalk when you are done. Chakoner’s are refillable, but refilling can be a messy and frustrating job. The most common tip for accomplishing that tricky task is to pour the chalk into the little hole on top of the Chakoner using a small homemade paper cone, which has mostly negative reviews. In the category of repurposing household items for other purposes, one user reported using a.. wait for it… turkey injector with a large gauge needle! It was reportedly still a bit fiddly but more effective than the paper cone. Wonders never cease!

Chakoner

Air/Water Soluble Pens

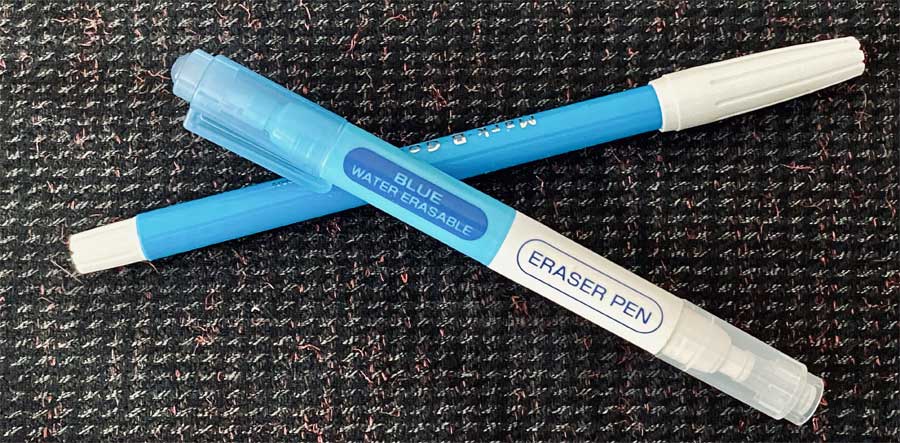
Air/Water soluble pens work well for marking lines and dots and usually leave no residue afterwards. Water soluble pen marks can usually be removed with a damp cloth or cotton swab or a spritz from a spray bottle. Air soluble marks should dissolve into thin air within 12-24 hours on their own, so they are not a good choice if you are marking ahead but won’t get to the sewing for a day or two. Sometimes the markings can bleed, distorting the exact location of the mark so take care not to press the pen on the fabric too long. Also, be aware that these pens can dry out so be sure to replace the cap tightly after each use.

Water soluble pens

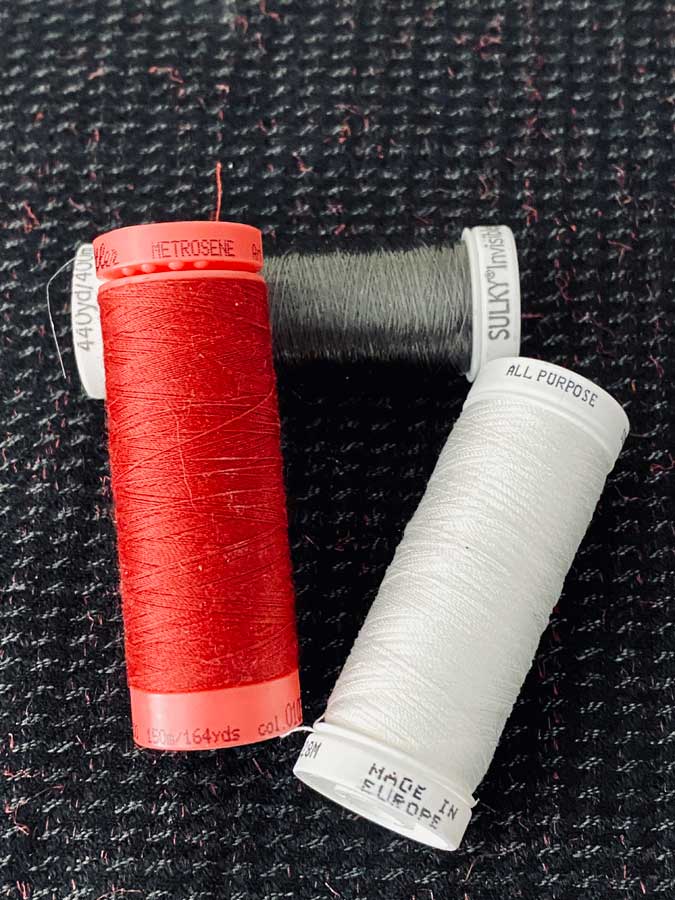
Thread

Marking tools - threadThread can be used for tailor’s tacks and thread tracing and will never leave ghost lines or residue. It is a more time-consuming way to mark and you need to handle the marked pieces with care to be sure the thread doesn’t pull out before using the markings. This method is especially popular with those who are sewing couture garments.

But, what if it doesn’t go away?

With so many options, you are sure to find just the right marking tool for your project. But what if even after you have tested your marking tool on a scrap piece of fabric and made the perfect choice, one of those markings, in a very visible location of course, just won’t disappear. We are right back where we started in this article, “Help! I’ve marked my fabric and I can’t get it out!”

When that happens — and it inevitably will at some point — here are a few tips that just might help you save the day. You still can’t escape that testing advice. The last thing you want to do is make matters worse by trying one of these tips only to find out your fabric absolutely hated the idea and now you have not only the marking pen visible, but also a not-so-lovely spot from where you tried to remove it.

  • The ghost lines sometimes caused by Frixion pens might be removed with either Amodex or Mötsenböcker’s Lift-Off 3 if the line is not the result of pressing so hard that you have marred the fabric. Both are available on Amazon and sometimes in grocery stores.
  • Lightly rubbing chalk markings with a Wet Wipe or vinegar water will often remove stubborn markings without affecting the fabric at all. And since new moms tell us baby wipes can clean ANYTHING, this idea is probably worth trying!
  • Gently rubbing the mark with a Mr. Clean Magic Eraser is said to be effective for removing some markings.
  • To remove stubborn wax-based chalk markings, place a layer of plain brown paper (like a paper bag) over the stain and press (not rub) for several seconds.
  • Stubborn water-soluble marks may be removed by letting the fabric soak in a bowl of lukewarm mildly soapy water. After soaking for a generous amount of time, fill the bowl with cold tap water and rinse until all the soap is gone.
  • You may also have luck forcing a stubborn air-soluble mark away by dabbing with a cotton swab that’s been wet with rubbing alcohol.

Here’s hoping you never ever need any of these “save the day” tips. But at least you have a few to try if you do.


~Sheryl Belson, ASG Plano Chapter

This field is for validation purposes and should be left unchanged.
Did you enjoy this article?
Are you an ASG member?

Tagged With: marking tools, sewing, sewing tips

  • 1
  • 2
  • Next Page »

Become a Member

Join the only national organization dedicated to Advancing Sewing as an Art and Life Skill.

Join Now button

Blog Article Categories

  • ASG Conference
  • Chapter Stories
  • Embroidery
  • Fitting
  • Learn to Sew
  • National Sewing Month
  • Products, Books, & Patterns
  • Projects
  • Quilting
  • Sewing
  • Sewing Techniques
  • Sewing Tips
  • Sewing Tours
  • Videos
  • Disclaimer
  • Privacy Policy

American Sewing Guild
National Headquarters
9660 Hillcroft, Suite 230
Houston TX 77096
713-729-3000 | 713-721-9230 Fax
www.ASG.org

ASG wordcloud - education, conference, discounts, videos, special offers, tours and more

Copyright © 1998–2026 · American Sewing Guild · All Rights Reserved