American Sewing Guild (ASG)

Visit our blog Visit the ASG Facebook page Visit ASG on Pinterest Visit ASG's YouTube channel Visit ASG on Instagram
  • Home
  • Join ASG
    • Join Online
    • Chapter Locations
    • Member Benefits
    • Member Brochure
    • Join by Mail
  • Conference & Education
  • Resources
    • Contests & Awards
    • Giving Back
    • Hall of Fame
    • Links
    • Travel and Tours
    • Measurement Chart
  • Shop
    • ASG Store
    • Chapter Products
    • Video Resources
  • Blog
  • About
    • About Us
    • Donate to ASG
    • ASG Sensitivity Statement
    • FAQ’s
    • Start a Chapter
  • Contact
  • Member Login
    • Login First!
    • Members Only
    • Leadership Only
    • Website FAQ’s
    • Logout
  •  

July 5, 2019

Travel Iron Caddy

Travel Iron Caddy
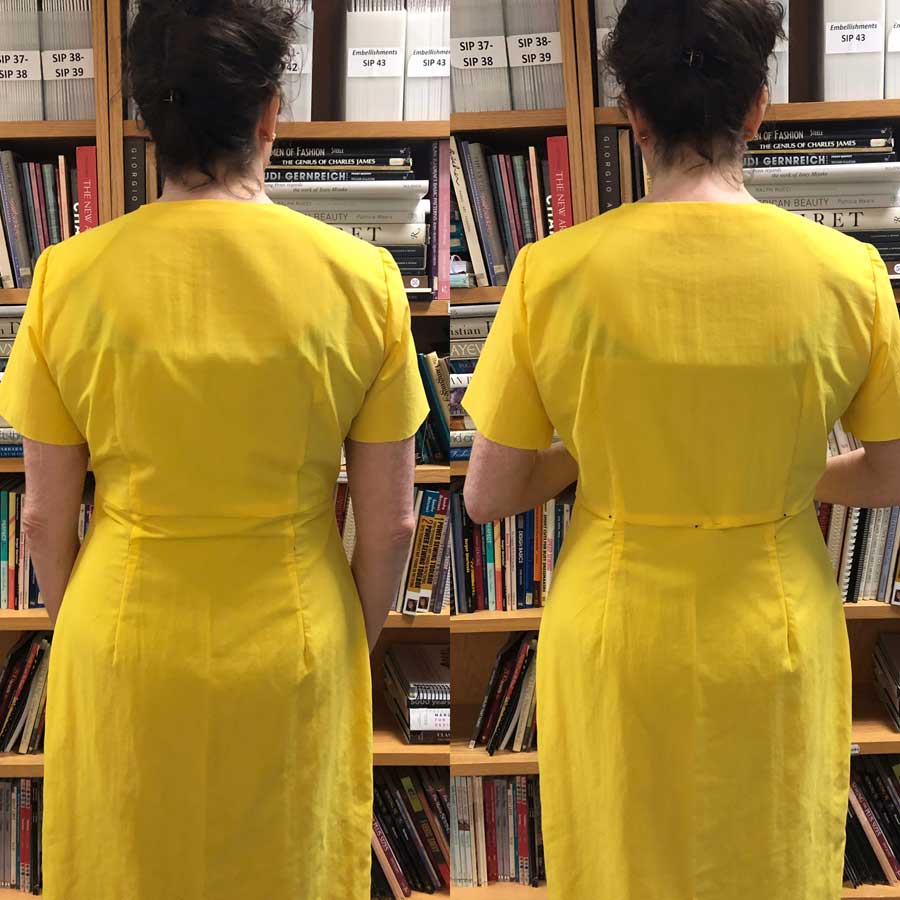
Whether you are packing supplies to take to ASG Conference, or heading to a chapter stitching event, this caddy is the perfect way to safely and easily take your travel iron with you. I made the caddy to fit my Sun Beam Compact Travel Iron model #GCSBT-100, but there are similar size models by Dritz, Rowenta, and other Iron makers.  It also fits nicely in my sewing machine caddy along with my 9”x 12” Omnigrid combination cutting and pressing board.
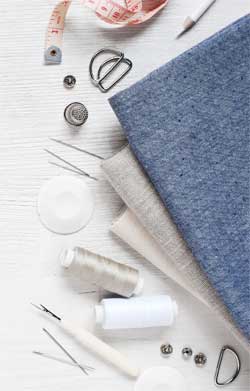
Materials

  • 24” x 11” body fabric
  • 3” x 11”   body fabric for handle strap
  • 24” x 11” lining fabric
  • 24” x 11” Insul Brite fabric (insulated to protect from heat)
  • 7”  ¾” Hook & Loop Velcro
  • 3” piece of Wonder Under
  • Quilter Ruler with 45 degree angle marking

Legend

  • RS = right side of fabric
  • WS = wrong side of fabric

Instructions

Strap: Fold 3” x 11” strip of fabric in half lengthwise WS together and press. Open and press both long edges in, ½” to WS then fold again 1” to WS overlapping, giving you a 1” wide strap.  Now stitch lengthwise to reinforce the strap along both edges and up the middle.  Set strap aside for next step.

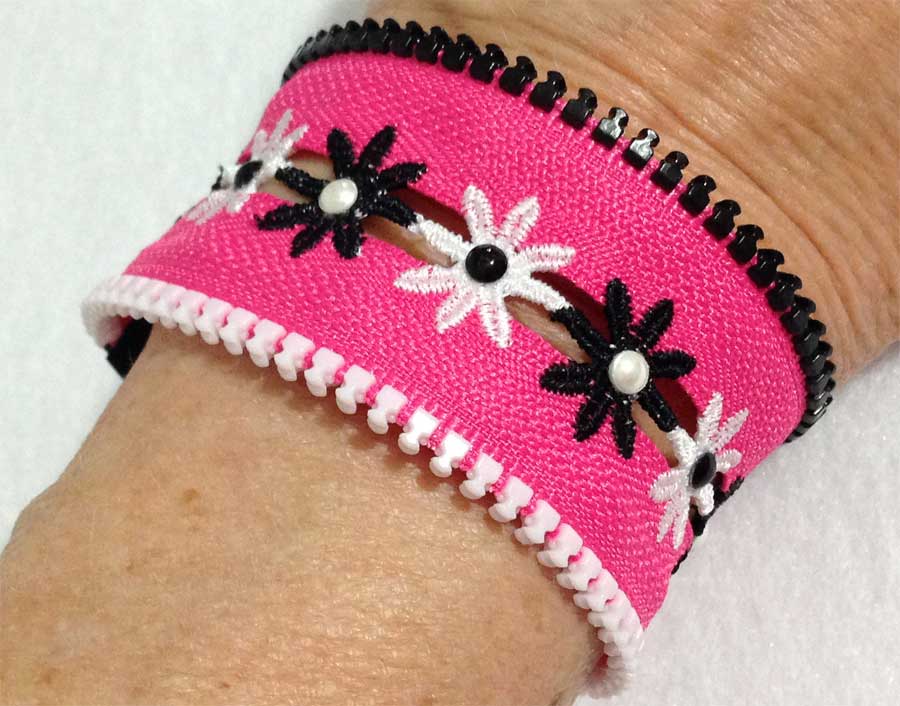
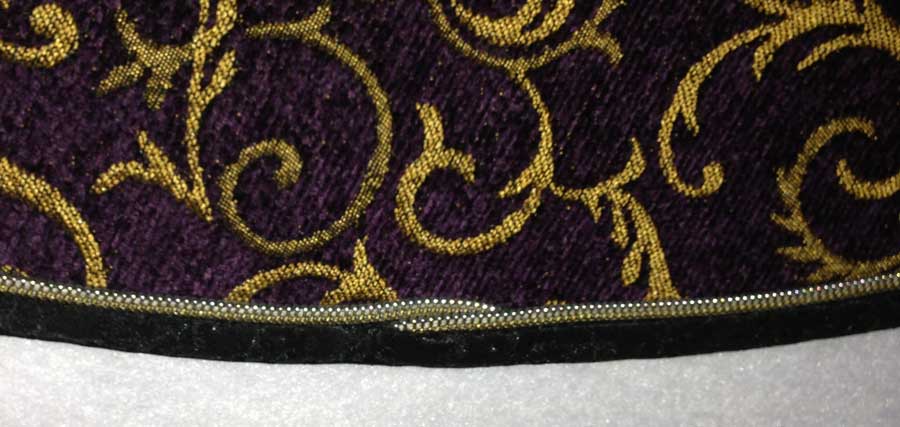
Body of Bag: Layer Insul Brite, lining fabric RS up and then body fabric WS up. Insul Brite will be your bottom layer against the needle plate when you sew. Pin layers together around the inside of the rectangle to hold the layers together. Place long top edge of the strap to RS of body fabric layer 3 ½” down from top edge, double check your fabrics if using a one way directional fabric for your body fabric to make sure the direction of your strap and body are going the same way (Image 1). Stitch around all four edges using a 3/8” seam allowance but leaving a 3’ opening for turning on the bottom edge. Run an extra row of stitching over the strap edges to reinforce (Image 2).

Before turning, clip off the corners outside the corner stitching to allow for less bulk at the corners, be careful not to clip your stitches (Image 3). Turn and press, using a piece of Wonder Under to close the opening.

There are no images in this gallery.


Travel Iron Caddy

Closure: With panel facing RS up, place hook side of Velcro centered at bottom, ¼” up from edge and stitch in place. Leave at least ¾” on each end to accommodate your side seams, trim Velcro if necessary. Lining side up, place the loop Velcro at the top and stitch in place ¼” from top edge, lining up with the bottom edge placement.

With WS together, fold bottom edge up to 5” below top edge and stitch both side seams using ¼” seam allowance or as small as possible, back stitching at top edge to reinforce. (Image 4)

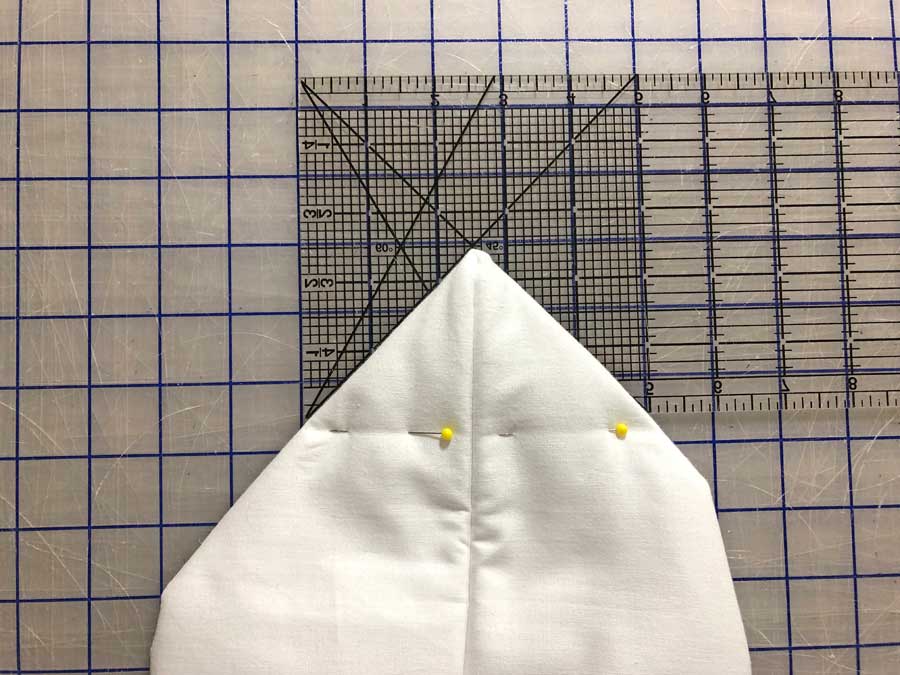
Turn the bag inside out and box the bottom seams. To box the bottom, use a quilter ruler with a 45 degree angle guide. Pin across bottom of the angle on both edges to create the boxed bottom and sew along pinned edges. (Image 5) Turn RS out.

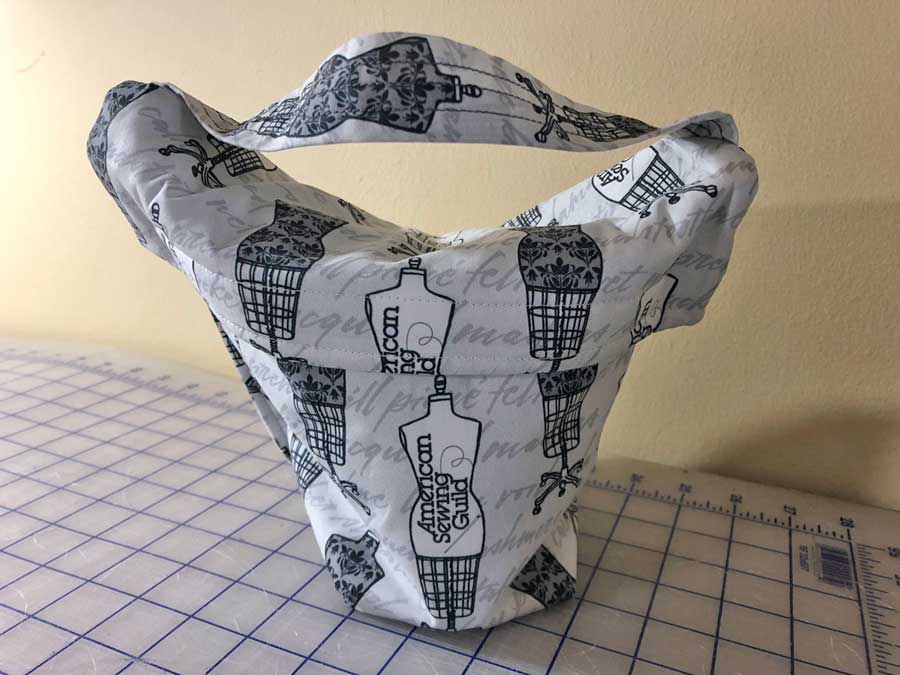
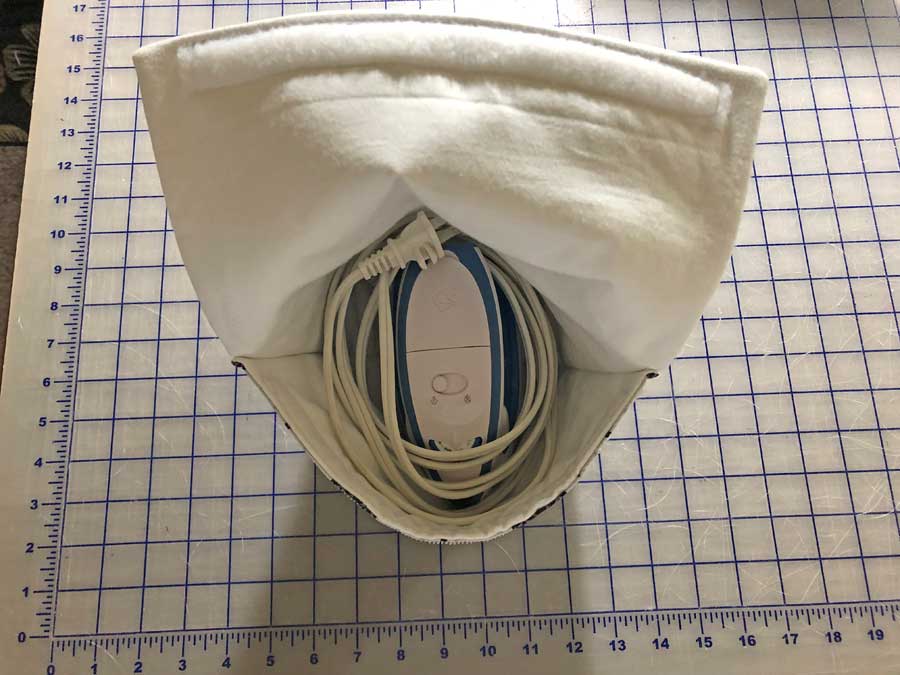
This little iron caddy, with it’s bucket shape, will hold my iron and a few other small items. It also fits into the open space of my machine for travel.


~Carolyn Meyers,  ASG Member, Bucks County Chapter

June 28, 2019

Zip It Up

Zippers have a bad rap as being difficult to work with; however, they are simple to insert when stitched correctly with the proper feet. I recommend using the All-Purpose Foot and the Edge Stitching Foot. You’ll marvel at the ease of inserting zippers in pockets, pillows, handbags and garments when using the right tool. Consider letting a zipper make a statement on your next project by using decorative zippers. The opportunities are endless and the results so much fun. Whether for garments or bags, you can insert zippers trouble free, the easy way.

Ghee's zippers

Did you know that zippers were originally designed for closure on boots? As time progressed zippers were added to garments for closure instead of the traditional buttons. Today, zippers can be seen everywhere, not only garments, but shoes, luggage, sports and outdoor products like tents, sleeping bags, home décor, jewelry, trims and the list goes on and on. The sky is the limit.

Zippers are available in many configurations

  • They may be purchased by the yard or in a roll, closed end (C/E), open end or separating (O/E) to name a few.
  • The sliders may have several different options as well — locking, 2-way open-end/separating, double slide, and reversible.
  • They are available in metal, nylon coil, molded plastic teeth and rhinestone.
  • They are also available in a variety of sizes
    • #3 is the tradition size used for a dress, skirt or pants. The coil is approximately ⅛” or 4mm.
    • #5 is a size used in jackets or outer wear. The coil or teeth (chain) are approximately ¼” or 6mm.
  • The size of the chain may be larger for luggage and other sports related products, or smaller for children’s wear, dolls and such.

Of course, much of this has changed, nowadays, with zippers being used in a variety of ways other than the traditional.

My Favorite Zippers

My favorite zippers are #3 coil for inside pockets of handbags or small bags, and #5 for handbag closure, jackets and coats. I particularly love the nylon coil, plastics and rhinestone zippers. In general, I shy away from metal zippers because of the weight, tendency to pull or snag soft fabrics, and possibility to break needles if not properly applied.

Size it Right

Did you know you can shorten a zipper — very carefully, of course — by cutting it? Make sure to purchase the right zipper for your needs though. A separating zipper must be purchased as a separating zipper and can only shortening from the top.  A closed end zipper can never be made into a separating zipper as the home sewer does not have the equipment to add the retainer box and insertion pin to a zipper.

Inserting a Zipper

Now that some of the basics are out of the way, this is my favorite way to insert a zipper when the teeth or coil are exposed. It is by no means the only way to insert a zipper, but it is a basic way that I consistently use in my projects. It is also the beginning way of several zipper insertion techniques that I use.

  1. Align the cut edge of the fabric with the edge of the zipper tape so that the right sides are facing each other (right sides together). The zipper stop and zipper slider may extend from each end for easier insertion. Place the needle to the far left position. Stitch the length of the zipper with the All-Purpose Foot leaning against the zipper coil.
  2. Fold the fabric over to expose the zipper coil. Position the Edge-stitching, Edge Joining or Ditch Quilting Foot with the bar between the zipper coil and the fold of the fabric. Move the needle position slightly left of the fold and stitch across.
  3. Repeat this process on the other side of the zipper.
  4. Option: When using a decorative zipper tape, apply these instructions in reverse. In other words, begin Step 1 with the wrong sides together so that when the zipper tape is folded back the tape is exposed.

Discount ahead! Continue reading for a limited time discount on Zippers at www.Ghees.com


Extra Zipper Tips

  • Ghee'sUse decorative or specialty zippers to enhance the design of the garment or bag.
  • For special effects, create your own look. Choose two zippers in coordinating colors. Unzip them and swap the colors. Zippers must be of the same style, size of teeth and slider for this design idea to work.
  • Many times, the zipper pull is in the way of accurate stitching. To maintain a straight stitching line, stop before reaching the zipper pull, leaving the needle in the down position. Lift the presser foot, unzip the zipper a few inches and stitch past the bulky area.
  • It is much easier to work with zippers that are too long and trim the excess off. Always be certain the slider is included in the project before trimming the excess tape. Refer to how to “Fix a Zipper.”
  • Because of the bulk in many project, use a Jeans Needle to avoid breaking the needle. Be extremely careful while stitching over bulky areas. Stitch slowly.
  • To avoid melting the zipper coil on polyester, nylon, or plastic zippers, or scratching the iron with metal zippers, do not press the zipper chain. Use a medium to cool iron setting when pressing around the zipper area of a project.
  • Use the sewing machine foot that makes the task easier. The Edge Joining Foot, or Ditch Quilting Foot, a foot with a guiding bar in the center of the foot, provides perfect alignment of stitches from the edge of the zipper tape or stitching the binding.

How to Fix a Zipper

It is very easy to “fix a zipper” or add a slider to yardage. Place the slider on one side of the zipper teeth (chain) and hold with your thumb and finger. Place the other side of the zipper teeth into the slider and give it a little tug. You will feel the teeth catch in the slider. Pull the slider to close the zipper. Be sure to stitch over each end of the zipper to protect. The same instruction works with the coil type zippers.

There are no images in this gallery.

Decorating with Zippers

Ghee's - Heart ZipperThough zippers were designed for function, they can certainly be used for decoration. This 8” rhinestone zipper was stitch on the back shoulder of a vest. Baste along each edge of the zipper tape leaving thread tails at the beginning and end. Open the zipper. Gather the thread to form the heart shape. Miter the ends of the zipper tape to match the shape of the heart. Use a small zigzag stitch to hold the zipper heart shape on the base fabric.

Cut zippers or zipper yardage to create fantasy flowers. Use glue or hand stitching to hold the shape. Glue is easier!

Ghee's - pink zipper braceletMake a bracelet with zippers or yardage. One 18” zipper will make 2 bracelets. Simply use an awl to remove the stop or cut the stop off. Pull the zipper chain apart. Overlap the tape and stitch using an open type decorative stitch to hold the tape together. Add snaps or rhinestones to embellish. Use embroidery stitches to hold the zipper tape together.

Use zippers or zipper yardage instead of corded piping. This photo shows the beginning and ending when a seam allowance is not available to hide the ends. It may be necessary to trim or clip the tape when curves are part of the project as the zipper tape does not have any give. I like to use the Piping Wizard to trim evenly and accurately. This is nylon coil zipper that looks like metal.

Discount

Enjoy a 30% discount on everything in the Zipper category of www.Ghees.com through midnight on July 13, 2019 using code zipit30asgj. After that date, ASG members can log in to the Members Only area for a discount code for 15% off all non-sale items in the Ghee’s store. Discounts cannot be combined.


~Linda McGehee, Ghees

© Copyright 2019 Ghee’s all rights reserved
Ghee’s
PO Box 4424
Shreveport LA 71134
www.ghees.com

June 26, 2019

Join Threads Magazine in Sewing for ASG Conference

Sarah and Erica from Threads Magazine
Sarah, left, and Erica, from the Threads staff, are sewing Simplicity ASG pattern designs for Wear Your ASG Patterns Day at conference. Sarah’s muslin is in yellow rip stop nylon, a stash orphan, if you were wondering.

The American Sewing Guild’s annual conference is always a blast. Every time I attend, I enjoy classes, shopping, the fashion show, the keynote address, and all the sewing camaraderie.

ASG Conference is August 1 through 4, 2019, in the greater Boston area, and the Threads team is raring to go!

We recently started a group project especially for conference: Sewing garments from Simplicity ASG patterns for Wear Your ASG Pattern Day on August 1. To share our progress, and encourage you to sew some of these great patterns too, we’re presenting a monthly Facebook Live posts at Facebook.com/ThreadsMagazine. Tune in to watch our exploits, help us with fabric choices, and keep us on track!

The Patterns

  • Erica is sewing Simplicity ASG 8137, views C and D. What a cute top and pants.
  • Jeannine is sewing Simplicity ASG 8384. She’s making dress view A, with the sleeves from view B.
  • Carol is making up Simplicity ASG 8014, view B, with the collar from view A. She has a head start because she previously sewed a version for a Threads article,” Embellishments: Rickrack Weaving,” by Loretta Kostyk in #196.
  • Christine is sewing Simplicity ASG 8637, a wrap dress with a graceful curved hem. She’s sewing view A, and I can’t wait to see the results in the gorgeous crepe fashion fabric she chose.
  • I’m sewing Simplicity ASG 8735, a wrap dress with a pattern feature I find saves me time: separate pattern pieces for different bust cup sizes.  I haven’t decided on a view yet, but I made my muslin in view C.

Facebook Live Sessions

  • May 31st, 2019:  In our first Threads Live session, we shared our pattern selections and fabric options. Watch the session on our Facebook videos page, Threads Live.
  • June 28, 2019, 11am (Eastern): On Friday, June 28 at 11 a.m. (Eastern), we’re going to talk about muslins and fitting adjustments. We did some preliminary work on muslin-fitting. Erica and Jeannine both needed circumference adjustments, while I needed some length taken out of the back of my muslin. We’ll share more details in the Threads Live session.
  • July 26, 2019, 11am (Eastern): On July 26, we plan to have our finished garments completed to share on Facebook.

Preliminary Fitting

EricaErica’s top muslin was too large in circumference (left). Pinning along the side seams made a difference, but there’s more fitting to be done around the armscye and shoulders (right).
SarahNotice the horizontal crinkling at the back waistline in Sarah’s muslin (left). Pinning out a wedge across the back waistline alleviated that fitting problem (right).


Hope you’ll tune in to Threads Live—and join us in sewing for ASG conference. Cheers!


~ Sarah McFarland, Editor, Threads magazine

Tagged With: ASG Conference, sewing, Threads

June 21, 2019

3 Ways to Ditch Fast Fashion

Buy Less, Wear More, Make Your Own Clothes

Greetings, my dear fellow fashion and sewing enthusiasts! I have a question and I want you to answer it honestly. Are you tired of the repetitive mass produced fashion that lacks both visual and structural quality? Because I sure am.

When I go clothing shopping, which I rarely do these days, the first thing I notice is how the quality of most wardrobe pieces deteriorated while the price tags actually went up. What’s up with that? Can’t quality, price and demand be a bit more in sync? Well, they can be, but not with fast fashion.

In this article, we’ll talk about how to ditch the boring fast fashion, save some pocket money and demonstrate your uniqueness, creativity and originality all at the same time. Sounds pretty good, doesn’t it? I’ll give you three simple, yet very helpful tips that will make everything I’ve just said possible. Shall we begin?

First Step: Buy Less

A certain 19th century poet once wrote that less is more.

I like the phrase because it can be applied to almost anything in life. The Japanese apply it to architecture and interior design, thus creating amazing structures. Race car drivers apply it to speed at times so they have more control over their vehicle and be able to overtake opponents. Some artists apply it to their art and, by doing so, express their inner emotional state more precisely to anyone seeing it.

This concept can be applied to fashion a well. You don’t need a thousand different combinations in your wardrobe. However, if you simply buy clothing without any thought, you’ll end up not wearing at least half of it because you won’t have the time for it. Yes, you’ll put that piece on two or three times after you’ve bought it but afterwards, it’ll hang in your closet collecting dust like an old box in your attic.

Let me tell you what I do instead and what you should at least try out. I buy clothing and accessories that I know I’ll wear at least once in a week. I create a few combinations while shopping and then when they become boring, I mix them up around with other pieces I already have. This gives me an opportunity to basically create a new wardrobe and I save money without sacrificing style. Best of all, I don’t force clothing pieces to stay in the closet and not fulfill their purpose of being worn.

Second Step: Wear More

This step has two meanings, both equally important. The first is about wearing more varied pieces. Buying less doesn’t necessarily mean wearing less, especially if you combine this step with the next one. Fashion isn’t about wearing only one combination and not improvising; it’s the exact opposite. Use what you have, buy as few additions as possible, and you’ll come up with amazing combinations for sure.

The second meaning is about wearing your clothes more often. Clothes are meant to be worn, not to just stand in your wardrobe like a plant in an office. As long as they didn’t get damaged or ruined, you have no reason not to wear them.

Third Step: Make Your Own Clothes

Now we’re at the most helpful step. Making your own clothes has never been easier! Sewing machines have become very affordable and easy to use. They can even be ordered online and shipped all over the world. It’s also easy to find instructional videos on the internet (ASG Members can find educational videos in the Members-Only area), so even if you’re a complete amateur, you can learn how to sew in a reasonably short period of time. Finally, you can earn a decent amount of money from home by sewing, again all thanks to the internet and the availability of places to sell your items.

But what are the benefits of making your own clothes? Although I do like to buy a clothing piece here and there, I sew most of my wardrobe myself. This gives me the ability to be unique with my creations. I enjoy wearing something that no one else owns! And when someone compliments my creation, I won’t lie, I brim with pride. I also sew for the economic benefit.  You won’t believe how much money I save by making my own clothes. Finally, I sew for the sense of accomplishment I get when I finish sewing a piece and take a look at it. It’s amazing to see something usable being born from nothing but fabric and thread. It’s poetry!

Making your own clothes has never been easier than it is in this day and age.

If you want the best results, fuse the three steps together. Buy less finished clothing and purchase fabric instead. You will be able to create three to four pieces for the price of one ready-made item. And all that by making your own clothes! I told you it’s possible to save money while demonstrating your own creativity, uniqueness and ingenuity. And participating in sewing challenges such as “Me Made May” is the perfect opportunity to hone your sewing skills. Those challenges help you focus on the goals you want to achieve when it comes to your sewing.

So, what will it be? Will you follow only one or two of my steps, or will you go all out and combine them into a masterpiece? Whatever you decide to do, try not to sacrifice style or originality for speed and availability. That’s not what fashion is about and you know it.


~ Helen Spencer, HelloSewing.com

June 14, 2019

Creating a Capsule Wardrobe

If you’ve browsed a fashion magazine in the last few years, you may have stumbled upon the idea of the “Capsule Wardrobe.”

ASG Blog - Capsule WardrobeThe “inventor” of the Capsule Wardrobe is Susie Faux. In the 1970s, Susie owned a boutique in London called Wardrobe. She noticed that it was becoming more common for women to buy MORE when it came to their wardrobes. More tops, more pants, more shoes, more accessories. But with all of this MORE, they actually got less:  Lower quality items that would be out of style in a season or two. She came up with the idea of the Capsule Wardrobe as a limited collection of timeless pieces to mix and match to create a variety of looks. Outfits that would last a decade, not just a season.

Though Susie coined the term decades ago, Capsule Wardrobes have recently come back into the spotlight as consumers shift from the idea of buying a lot of low-quality, often low-priced, items, to the idea of owning fewer items that are made to last. This has been extremely true for the clothing industry, where fast fashion – cheaply made and ill-fitting clothing for cheap prices – has ruled for years now.

As any sewist will tell you, the best way to control the quality of your clothing… is to make it yourself. And so comes the idea of the handmade Capsule Wardrobe. But how would you even get started?

The Starting Point

The best place to start is with a list. Sit down and make a list of the clothing you wear most often. Tops, bottoms, shoes, and accessories, everything but undergarments. If you wear skirts often, you may want to include one in your capsule wardrobe. If you can’t choose between leggings and jeans, you may want to create one of each. Capsule Wardrobes aren’t meant to put you out of your comfort zone or force you to adopt a new style. They a way to cut down your wardrobe and truly highlight your unique style. And your Capsule Wardrobe may look completely different from your friends’.

Next, you’ll want to figure out if you will swap your wardrobe out seasonally. If you live in an area where you experience very different temperatures as the seasons change, this is probably the best choice for you. Alternatively, you may want to build one core Capsule Wardrobe if you experience similar weather all year long. If you choose this option, you’ll want to think a lot about how you can layer items to accommodate mild weather changes.

You Make the Rules

There is no specific number of clothing items you need to limit yourself to, but some example formulas for capsule wardrobes are:

  • 50 “base” items workout, lounge, layering, outerwear, and accessories, as well as 9 tops, 5 bottoms and 5 shoes that switch seasonally
  • 37 items per season
  • 36 total items – not counting anything you don’t wear out of the house, like loungewear and formalwear

While 50 items may seem like a lot to you, consider what you wear each day. An outfit with a tank top, tee, headband, earrings, necklace, bracelet, belt, pants, and shoes counts as 9 items! Some Capsule Wardrobe owners strip down to just 10 items, while others go over the 50-item line. Your perfect number will depend on your lifestyle. The key things to keep in mind are to focus on quality, timeless style, and getting rid of excess.

ASG Blog - Capsule Wardrobe

The Benefits

Why do people choose to switch to a Capsule Wardrobe? There are a lot of common answers:

  • To cut down on the amount of clothing thrown away… and taking up space in our overflowing landfills
  • To save money by purchasing fewer items that will last longer
  • To define your style
  • To save time choosing outfits in the morning
  • To improve style by wearing items cut for your body

And while there are many benefits to creating a Capsule Wardrobe, there are even more benefits to sewing it on your own:

  • To save even more by creating your own designer clothing without the designer cost
  • To have total control over material and fit
  • To feel the pride of knowing your amazing wardrobe came from your own two hands
  • To learn to make the clothing items that you enjoy wearing

DIY a Capsule Wardrobe

If you want to DIY a Capsule Wardrobe, here are some additional things to keep in mind:

Looking for Inspiration?

Capsule Wardrobe books on Amazon

Pinch of Yum

Who What Wear

  • The Scope of the Project: Chances are, you won’t be sewing yourself a pair of shoes. So these won’t count toward the total in your capsule wardrobe. The same goes for jewelry and many accessories. Additionally, you may already have a few items that would work great in your Capsule Wardrobe. Know your own pace and understand that it could take you months or longer to create all of the pieces for your wardrobe.
  • Your Color Scheme: In order for almost EVERY item to go with the other items in your Capsule Wardrobe, you’ll probably want to stick to a color scheme. There are a lot of resources out there that can help you choose the perfect color palette, including examples from other Capsule Wardrobe-wearers. Which leads to our next tip…
  • Inspiration From Non-DIY Capsule Wardrobes: There are MANY sewists out there who have built their own Capsule Wardrobes who you can look to for inspiration. But to get a full idea of what you can create with your Capsule Wardrobe, don’t forget to look at wardrobes of fashionistas who purchased the items in their collection.
  • Fabrics: No matter how often you’ll switch out your wardrobe, you’ll want to keep your fabrics in mind. You’ll want to make sure you have good movement, that you won’t have to dry clean the items and that you’ll just simply be comfortable. If you need some help figuring out which fabrics would work best for your Capsule Wardrobe, the ASG Facebook page or your local ASG chapter members are great resources!

If you’re not quite ready for a DIY Capsule Wardrobe, maybe this post will inspire you to clear items out of your closet that you haven’t worn in a while or start to work on more projects for your own wardrobe. As always, we’re here for support and inspiration!

Do you think you will ever create your own Capsule Wardrobe?


  • « Previous Page
  • 1
  • …
  • 52
  • 53
  • 54
  • 55
  • 56
  • …
  • 62
  • Next Page »

Become a Member

Join the only national organization dedicated to Advancing Sewing as an Art and Life Skill.

Join Now button

Blog Article Categories

  • ASG Conference
  • Chapter Stories
  • Embroidery
  • Fitting
  • Learn to Sew
  • National Sewing Month
  • Products, Books, & Patterns
  • Projects
  • Quilting
  • Sewing
  • Sewing Techniques
  • Sewing Tips
  • Sewing Tours
  • Videos
  • Disclaimer
  • Privacy Policy

American Sewing Guild
National Headquarters
9660 Hillcroft, Suite 230
Houston TX 77096
713-729-3000 | 713-721-9230 Fax
www.ASG.org

ASG wordcloud - education, conference, discounts, videos, special offers, tours and more

Copyright © 1998–2025 · American Sewing Guild · All Rights Reserved