American Sewing Guild (ASG)

Visit our blog Visit the ASG Facebook page Visit ASG on Pinterest Visit ASG's YouTube channel Visit ASG on Instagram
  • Home
  • Join ASG
    • Join Online
    • Chapter Locations
    • Member Benefits
    • Member Brochure
    • Join by Mail
  • Conference & Education
  • Resources
    • Contests & Awards
    • Giving Back
    • Hall of Fame
    • Links
    • Travel and Tours
    • Measurement Chart
  • Shop
    • ASG Store
    • Chapter Products
    • Video Resources
  • Blog
  • About
    • About Us
    • Donate to ASG
    • ASG Sensitivity Statement
    • FAQ’s
    • Start a Chapter
  • Contact
  • Member Login
    • Login First!
    • Members Only
    • Leadership Only
    • Website FAQ’s
    • Logout
  •  

January 22, 2021

Idea Board: Off-Grain Fringe Techniques

Fringe, whether you choose to love it or leave it, has undoubtedly stood the test of time. Dating back to 3000 B.C. in Mesopotamia, fringe became popular as a fashion embellishment in the 1920’s, then resurfaced again in the 50’s, and came full circle in the 60’s, 70’s and 80’s. Popular again today, it can be casual and trendy or utterly timeless, like in the garments shown here. Enjoy some ideas from Nancy Nix-Rice on these beautiful fringe accents.


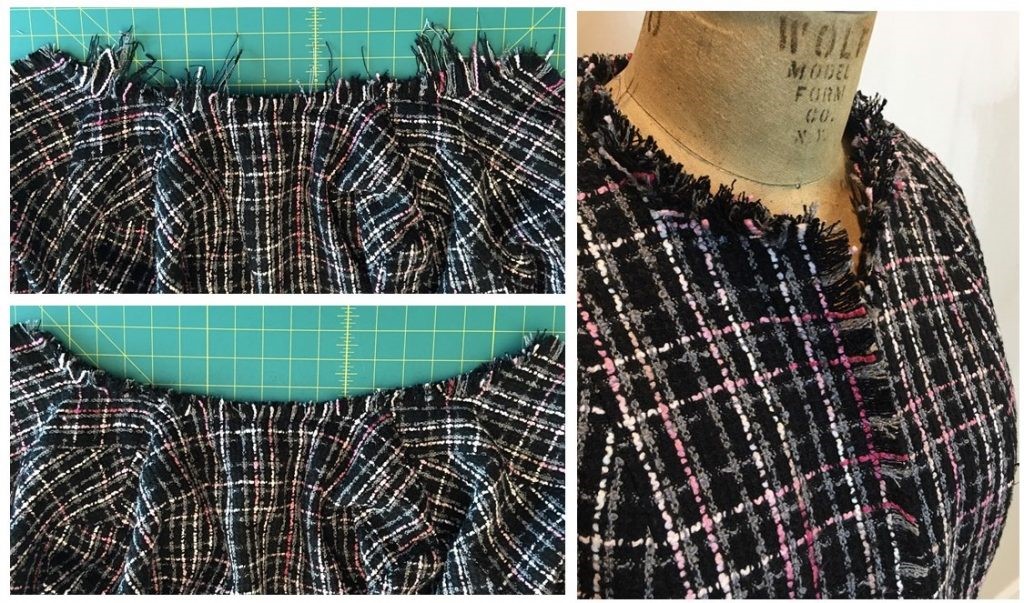
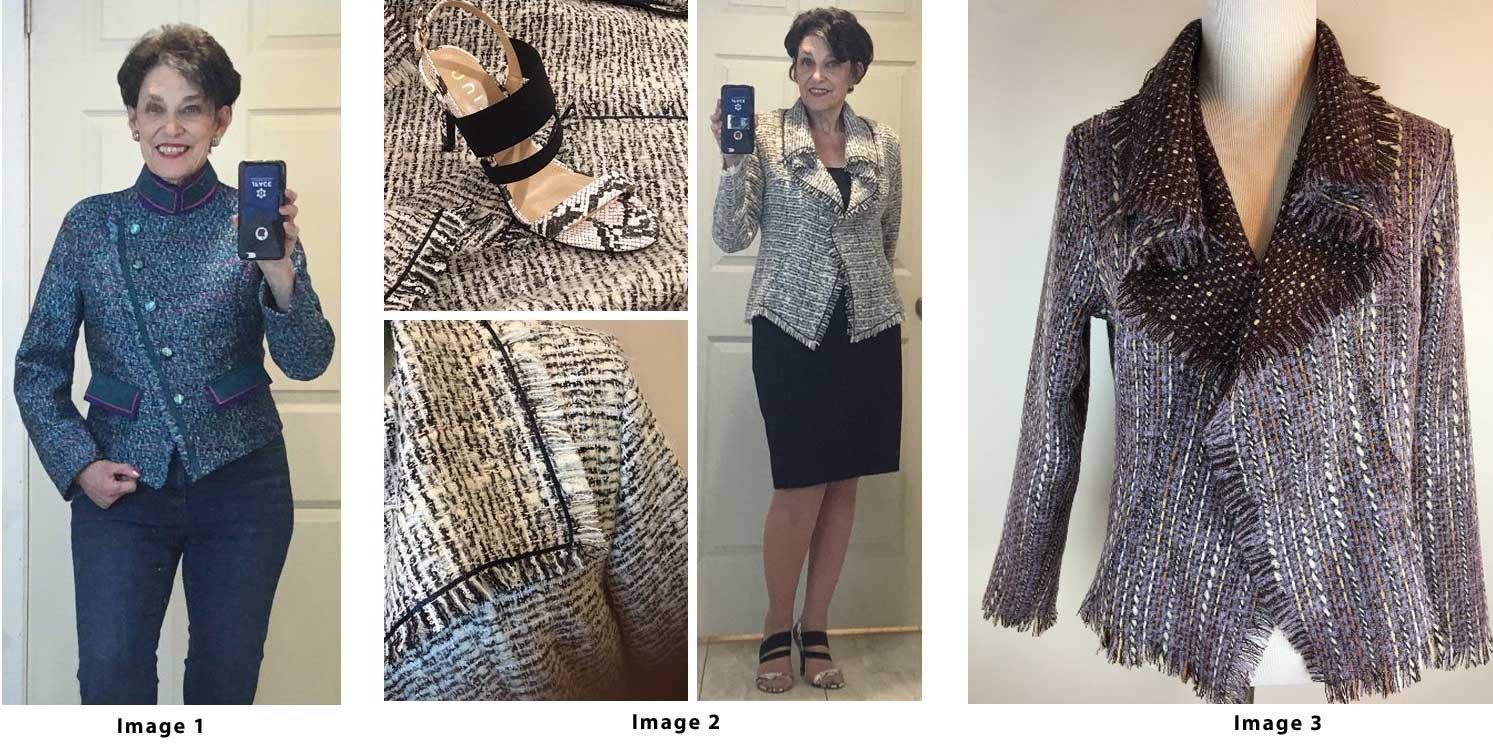
On a multi-color tweed jacket, fringed along the off-grain center edge,  I added a top-stitched band of Ultrasuede to both stabilize the edge and emphasize the diagonal line. Carefully snipping – at about 1” intervals – from edge to seamline parallel to the crossgrain threads allowed the fringe to shape off-grain. (Image 1)

On the Itch to Stitch Hvar cardigan, I eliminated the double layer front in favor of a soft cascade effect. I zigzagged 1/8” black satin ribbon along the seamline to define the inner edge of the fringe, slipping the ribbon through an opening in the loose weave to bring it to the opposite side of the fabric at the bottom of the cascade. (Image 2)

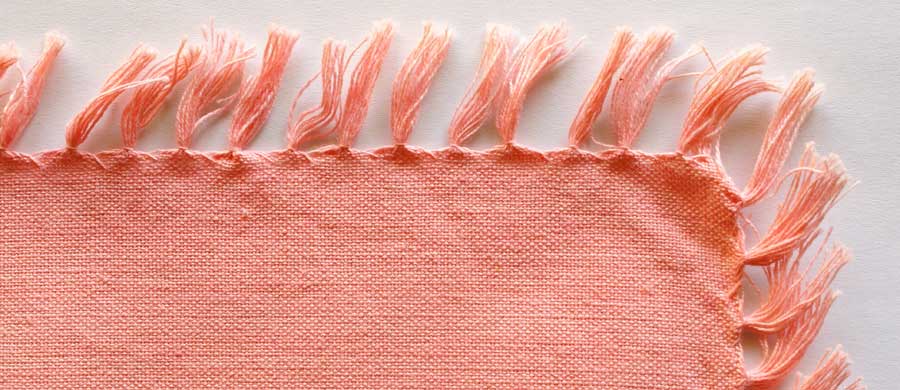
On a second iteration of the Hvar, I used a serpentine stitch to stabilize that endpoint of the fringe. The stitches melded invisibly into the deep tweed texture. (Image 3)

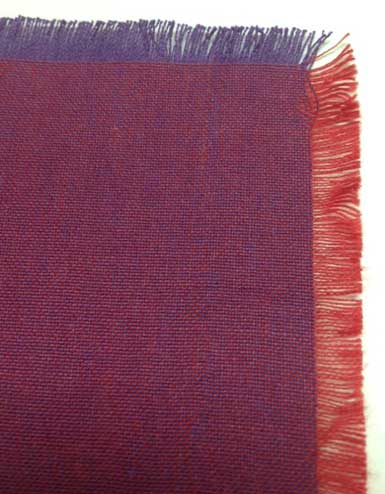
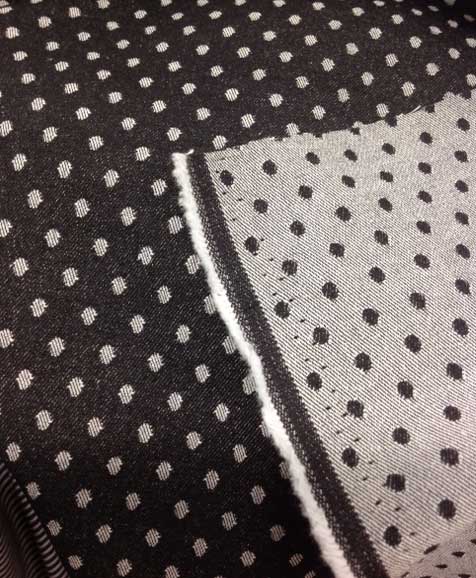
I expected that to be the end of my fringe-fest. Then Butterick came out with this gem – Pattern 6738 – that included directions for creating a fuller, more color-balanced effect by fringing on the true bias. That is especially helpful since many fabrics fringe to a very different looks along the crosswise vs lengthwise grain. (Image 4)

Image 4 (Butterick 6738)

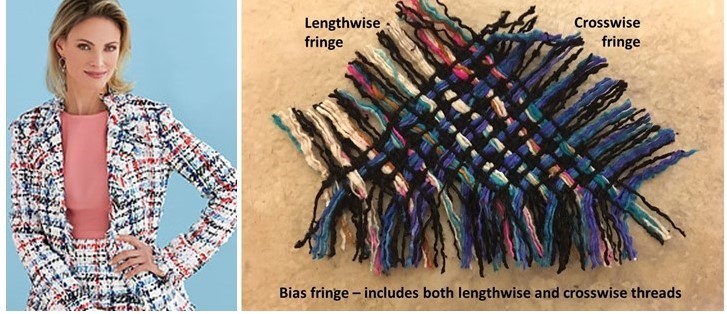
I didn’t actually make that pattern because I already had a black/gray/pink jacket in a bag in the closet – half-finished because of that very issue. The jewel neckline needed that bias technique in its curved areas and the front and hem edges needed an inset layer for a fuller look. Problem solved, and here is the result! (Image 5)

Image 5

~Nancy Nix-Rice

Did you enjoy this article?
Are you an ASG member?
This field is for validation purposes and should be left unchanged.

Tagged With: embellishment, fringe, garment sewing

November 27, 2020

Fast and Easy Fringed Edge Finishes

If you’re looking for a fast and easy edge finish, there’s nothing easier than fringe! It works on single-layer placemats, scarves, patches and pockets, or with a little more effort, you can insert fringe into a seam or hem.

The results of fringing are not always what you expect, as some fabrics are woven with different color threads going lengthwise and crosswise, so you get totally different colors in one direction from the other. Denim is a good example, as white threads are usually used one way and indigo the other.

The Basics

Select a woven fabric (knits cannot be fringed using this technique). Fabrics like linen, burlap, gauze, wools and bouclés are ideal candidates. The looser the weave, the easier the fringing process.

  • To create a simple fringe, be sure your project edge is cut parallel to the fabric grain. Sew a line of stitching where you want the fringe to stop, then start pulling threads up to the stitching line. The stitching thread can match the fabric or contrast with it.
  • For easier removal, use a needle or a large pin to help separate the fabric threads and gently pull them across the fringed area. Note that if your project has a right-angle corner (like a scarf), there will be a gap in the thread fringe at the corners.
  • If you want to knot the fringe, either singly or with thread groups, allow extra length for that process. Test-fringe a sample to see how much length you need for either a square knot or an overhand knot.
  • For a top-fringed pocket, cut the pocket top on the straight grain and extend it the desired fringe length (no hem). For a fringed sleeve hem, determine the sleeve length, then extend the lower edge the desired fringe length, being sure to keep a straight grain edge.
  • Single-layer scarves can be fringe-finished on all edges or just the ends, like on a muffler.

Inset Fringe

  • Inserting fringe into a seam allows for more placement flexibility and allows for placing it on a curve as well.
  • To make a fringe strip, cut a straight grain strip the desired width of the fringe, plus the requisite seam allowance. Stitch and fringe as noted above. On very loosely woven fabrics, layer two strips for a denser fringe.
  • Use the fringe strip as you would a piping, basting it along one layer of the seamline with the fringe facing the bulk of the project. Then top with the second layer of the project, and sew just inside the basting line. When you turn the project right side out, the fringe will extend beyond the seamed edge.
  • For long fringe strips, simply abut the ends of multiple fabric strips as needed. If you need a bulkier fringe, layer two strips atop each other and treat as one layer.

Design Tip: inset fringe can be made from matching or contrasting fabric.

Trim Tactics

If desired, you can add a ribbon or trim along the stitched edge of fringe as an accent, whether it’s single layer or inserted into a seam.

Don’t forget to check the selvage of your fabric, as some have fun fringes that can be used as is, and they already match!


~Linda Griepentrog
Linda is the owner of G Wiz Creative Services and she does writing, editing and designing for companies in the sewing, crafting and quilting industries. In addition, she escorts fabric shopping tours to Hong Kong. She lives at the Oregon Coast with her husband Keith, and two dogs, Yohnuh and Abby. Contact her at .

Did you enjoy this article?
Are you an ASG member?
This field is for validation purposes and should be left unchanged.

Tagged With: fringe, fringed edges, jacket, jeans, knotted fringe, learn to sew, placemats, scarves, sewing tip

Become a Member

Join the only national organization dedicated to Advancing Sewing as an Art and Life Skill.

Join Now button

Blog Article Categories

  • ASG Conference
  • Chapter Stories
  • Embroidery
  • Fitting
  • Learn to Sew
  • National Sewing Month
  • Products, Books, & Patterns
  • Projects
  • Quilting
  • Sewing
  • Sewing Techniques
  • Sewing Tips
  • Sewing Tours
  • Videos
  • Disclaimer
  • Privacy Policy

American Sewing Guild
National Headquarters
9660 Hillcroft, Suite 230
Houston TX 77096
713-729-3000 | 713-721-9230 Fax
www.ASG.org

ASG wordcloud - education, conference, discounts, videos, special offers, tours and more

Copyright © 1998–2025 · American Sewing Guild · All Rights Reserved