American Sewing Guild (ASG)

Visit our blog Visit the ASG Facebook page Visit ASG on Pinterest Visit ASG's YouTube channel Visit ASG on Instagram
  • Home
  • Join ASG
    • Join Online
    • Chapter Locations
    • Member Benefits
    • Member Brochure
    • Join by Mail
  • Education & Classes
  • Resources
    • Contests & Awards
    • Giving Back
    • Hall of Fame
    • Links
    • Travel and Tours
    • Measurement Chart
  • Shop
    • ASG Store
    • Chapter Products
    • Video Resources
  • Blog
  • About
    • About Us
    • Donate to ASG
    • ASG Sensitivity Statement
    • FAQ’s
    • Start a Chapter
  • Contact
  • Member Login
    • Login First!
    • Members Only
    • Leadership Only
    • Website FAQ’s
    • Logout
  •  

October 7, 2022

Pattern Weights

Tatuo round cloth pattern weights available on Amazon and other sewing retailers.

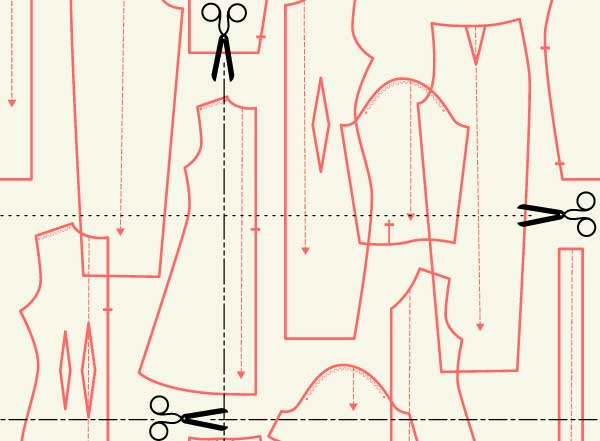
What’s’ your preferred method for cutting out projects—pins or pattern weights? There are sewists who swear by one or the other, but most of us tend to love both, depending on the fabric being used.

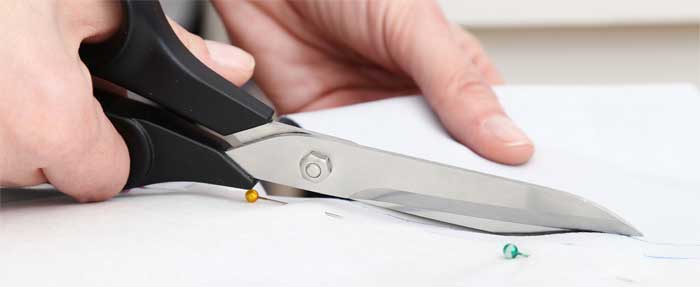
Pins hold pattern tissue firmly in place for cutting, but there are some fabrics where pins can leave permanent marks and, lo and behold, if you’re not pinning within the seam allowance, there could be those telltale marks. Vinyls and some faux suedes are prime examples of fabrics that benefit from the use of weights over pins.

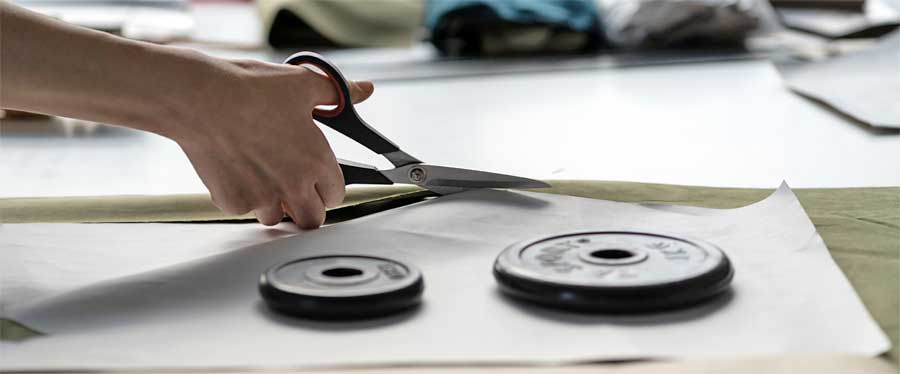
Weights hold fabric flat against the cutting surface and if you cut with a rotary cutter instead of scissors, nothing moves. However, you do need to protect the surface with a special mat to avoid damage to the table top.

You can cut a weighted pattern with scissors, but it’s a bit tricky since the scissor blade tends to “pick up” the fabric as you cut, potentially shifting the weights around the perimeter.

Cutting around a pattern with weights

In addition to eliminating the potential of pin marks, weights help secure slippery fabrics in place—a task  much harder with pinned pieces that can slide around. Weights are also preferred on thick fabrics where pinning is near impossible—think wool coating or mohairs.

So, bottom line—there’s a place to use both methods of securing the pattern to the fabric.

Small weights can also be used at your machine to keep slippery fabrics from driving you crazy while seaming.

Let’s take a look at weights…

Many companies make pattern weights, from tiny rounds to large, heavy, flat metal rectangles used in the garment industry to secure multiple thicknesses on long tables.
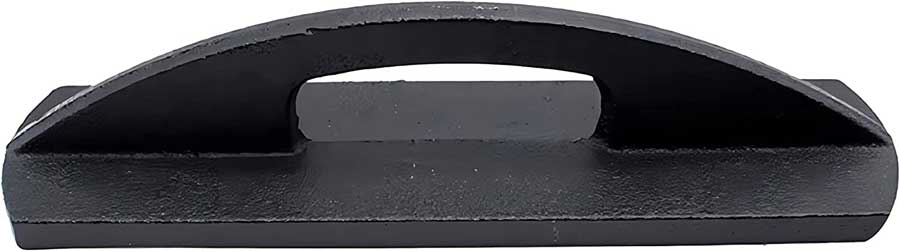
Cast iron

If you’re cutting large pieces, like draperies or curtains, these iron weights can be handy for holding layers together without shifting. The raised handle makes them easy to move around as needed, and because of their weight, they stay in place with aplomb.

Cast iron pattern weight.

Glass

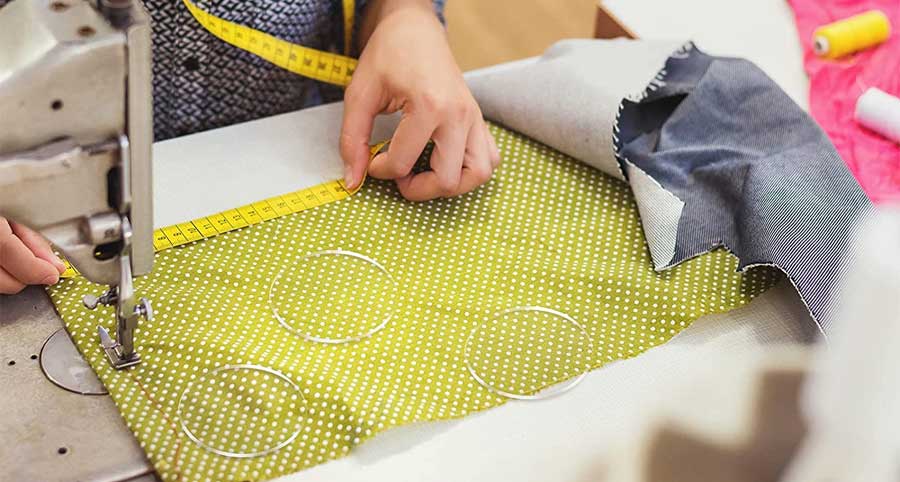
Circular glass weights are ideal for holding smaller spaces, and they have the advantage of being able to see through them in case you’re matching plaids, prints, etc. Just line up the pieces and weight them in place while you align adjacent pattern pieces.
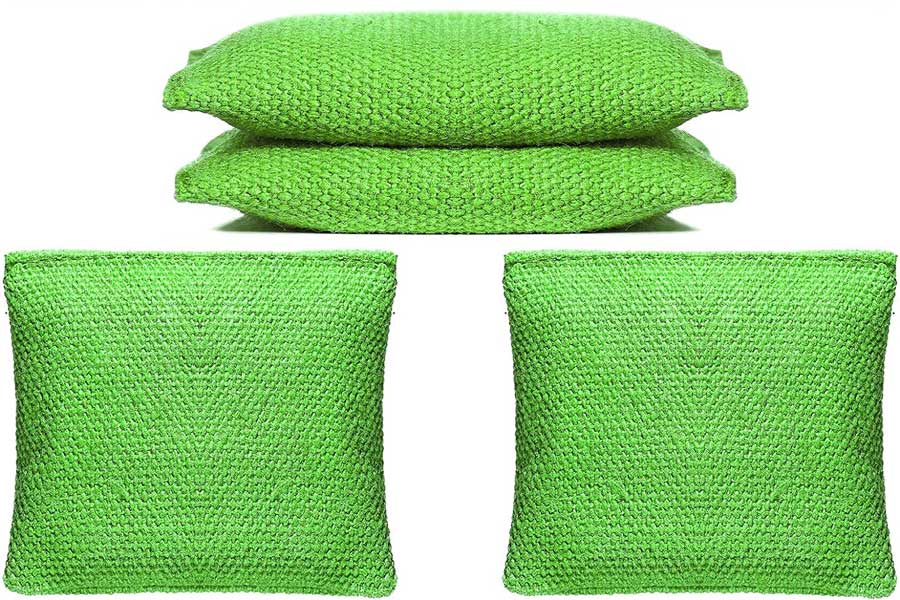
Glass pattern weights

Fabric Bags

Weighted fabric bags in various sizes and shapes are another option for pattern weights. Usually filled with metal shot or shavings for weight, these handy little notions can be stacked atop each other if you need more weight in a particular area of the pattern piece you’re cutting.
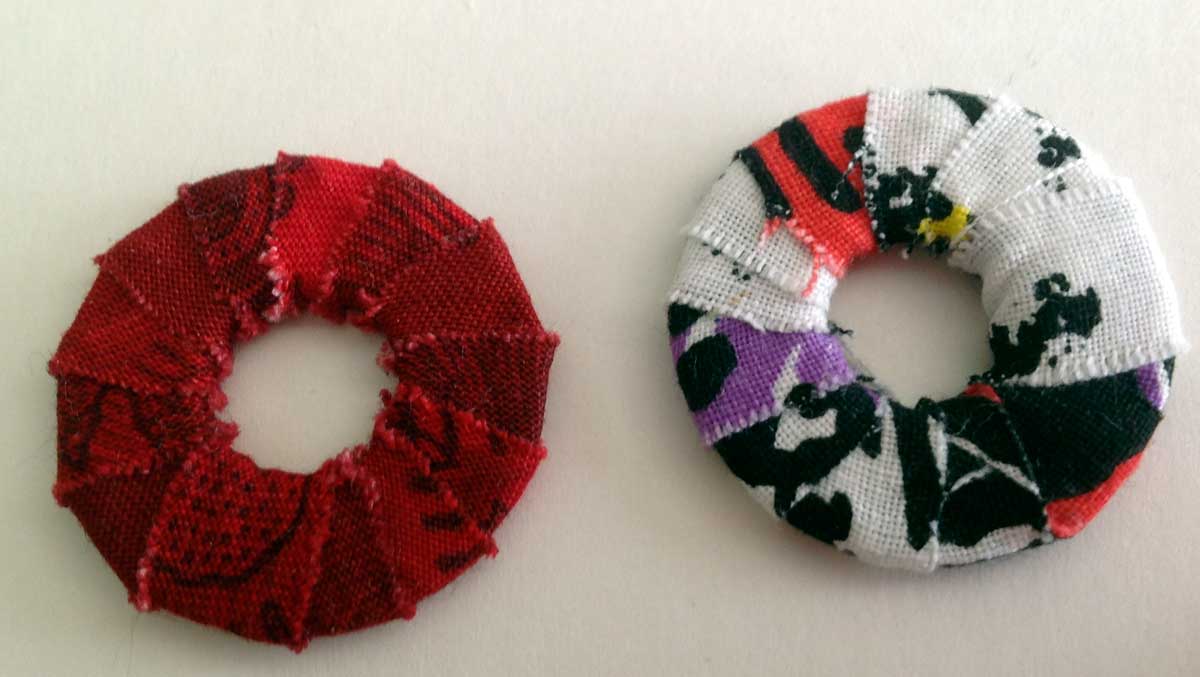
Fabric pattern weights

DIY Weights

While available readymade, handy little fabric pillows or bags are easy to make yourself in any size or shape you need for your work. Just be sure the outer fabric is densely woven to keep the filler safely inside. If you use clean sand (from the pet store) or ground walnut shells for filler, it’s best to add a liner as well to ensure no leakage, but that’s not needed if you use metal shot or rice, beans, etc. for the weight you need.

  • Other options suggested by guild members include using rolls of pennies for weight—especially handy for narrow pattern spaces like straps and facings, but note that they can roll too.
  • Open the pantry and check out sardine and tuna cans for potential weights. While these are larger in size than many weights, they are readily available and of course the contents are edible after use in case it’s near lunch time. Can-size weights are better used with large patterns, like home décor items.
  • Out on a beach walk? Pick up some large flat stones to create weights. Again, paintable for fun.
  • Small ceramic tiles are also perfect for pattern weights. A tile store always has scrap pieces and sometimes they just give them away.
  • Either covered or uncovered fishing weights are another DIY option—available in various shapes, sizes and weights depending on your needs.
  • Head to the hardware store and look at flat metal washers—available in many sizes, these are ideal to use for pattern weights. For more fun, paint them bright colors, wrap them with yarn or fabric strips, or decoupage some fun fabrics to the surface.

Pattern weights - wrapped washers

Using Weights

  • Just as we pin near the pattern edge, weights are best positioned in the same area. Depending on the shape of the pattern pieces and the weights, position the pieces near the corners for added hold.
  • If your fabric is larger than your cutting surface, use weights on the fabric around your pattern pieces to help keep it from sliding.
  • Weights can also be used on paper—like for tracing patterns from a multi-size sheet master. They help to keep both from sliding and keep lines continuous.

~Linda Griepentrog Linda is the owner of G Wiz Creative Services and she does writing, editing and designing for companies in the sewing, crafting and quilting industries. In addition, she escorts fabric shopping tours to Hong Kong. She lives at the Oregon Coast with her husband Keith, and three dogs, Yohnuh, Abby, and Lizzie. Contact her at .

Did you enjoy this article?
Are you an ASG member?
This field is for validation purposes and should be left unchanged.

Tagged With: cutting fabric, patterns, sewing

August 10, 2022

What I’m Sewing: Sinclair Patterns Bondi 22

ASG Member, Kim Caywood, shares her experience making the Bondi 22 Knit Classic Fitted T-shirt from Sinclair Patterns:

Sinclair Patterns Bondi 22 Knit Classic Fitted T-shirt
Sinclair Patterns Bondi Knit Classic Fitted T-shirt pattern link

Q: Item Created 
A. Top

Q. Independent Pattern Designer
A.
Sinclair Patterns

Q. Name and Number of Pattern
A.
Bondi 22

Q. Fabric Used:
A. Double Brushed Poly

Q. Special Embellishments/Notions Used
A. None

Q. Skill level required?
A.
Confident Beginner

Q. Are the instructions easy to follow?
A.
As with all Sinclair patterns the instructions are easy to follow with well written text and photos to match. There are step by step instructions.

Q. Are you pleased with the finished result? Did it meet your expectations?
A.
This top more than meets my expectations! I have made several tops with this pattern because it’s such a simple pattern to make

Q. Did it look like the picture?
A.
Yes it looks just like the picture

Q. Did you make any modifications in the pattern?
A.
No modifications were made to the pattern. They also offer two sleeve add-on patterns. One is puffed sleeves and the other is flared.

Q. Are there any changes you would have made?
A. This pattern is great just the way it is.

Q. Did the pattern teach you any unique or special techniques?
A.
I learned how to make a V-neck.

Q. Would you make this again?
A.
Most definitely

Q. Would you recommend this pattern to others?
A.
Yes I would. I have found Sinclair Patterns to have the best fit. They offer all their patterns in Petite, Regular and Tall.

Editors Note: This pattern comes in in sizes up to a 4X


~Kim Caywood, ASG member

Tagged With: patterns, t-shirt

November 19, 2021

Special Offer: Carpe Diem Dress and Tunic Pattern from Fit For Art Patterns

Carpe Diem dress & tunic patternFit for Art Patterns is introducing its fourth core pattern, the Carpe Diem Dress and Tunic. It features a scoop neckline, natural shoulder, and square armhole construction for woven fabrics. Choose sleeveless, cap sleeve or ¾ length sleeve view. Each view can be sewn in one of three lengths — tunic, above the knee, or below the knee dress — with an optional back belt and pleat insert. Fashion the Carpe Diem loosely to be pulled over the head or more fitted with a back keyhole opening or zipper. Pattern includes AB or CD fronts and straight or flared side panels for customizing the fit in the bust and hips. The instruction book includes design tips for choosing materials, personalizing and finishing your dress or tunic.  Carpe Diem is a multi-size pattern in XS – 3XL, available in print or digital format.

ASG Members can take advantage of our special offer for 20% off the Carpe Diem Dress & Tunic and all other Fit for Art Patterns through Friday, Nov. 26 (EST) with the coupon code found on the Special Offers page in the Members Only area.

The Carpe Diem Dress complements our other core patterns; wear it with a Tabula Rasa Jacket and Eureka! Pants that Fit. Visit the Fit for Art website to purchase the pattern, view the photo gallery of Carpe Diem samples, and find links to great resources in Helpful Hints for Dresses. 


This is an advertisement from Fit for Art Patterns

Tagged With: patterns

May 14, 2021

Paperless Sewing: Projectors in the Sewing Room

Banks do it…utilities do it…credit card companies do it, and now you can do it in your sewing room as well! What is it? Going paperless.

Papers in the air

With more and more sewing patterns available online in PDF format, you can have instant gratification without a trip to the local fabric store to get the latest offering. But, maybe the tedium of printing out all the pages, aligning guide marks, and taping the multitude of pieces together into a cumbersome giant paper offering isn’t one you relish. And of course, then you have to figure out how to refold all the pieces for storing for future use.

But, there is another way—projection sewing! Instead of printing, taping, etc., you simply project the pattern pieces directly onto your fabric and cut. The digital pattern file is stored in your computer for reuse anytime you want it.

What do you need?

Projector

Projector imageFirst you need a projector mounted over your cutting surface. The projector can be ceiling mounted or it can be attached to a tripod, photo boom or some other kind of photo stand so that the projected image faces your cutting surface.

When you’re looking for a projector, check the image resolution, as the higher the resolution, the sharper the image will appear on your fabric. Check that it offers a remote, so you don’t have to climb up to the ceiling to make adjustments, like focusing. Also make sure that the projector can be operated in a vertical orientation as not all are designed to vent correctly in that position. Note the lumen output, as this determines the brightness. If your sewing room is brightly lit, look for a higher lumen setting.

Another important setting to check when purchasing a projector is the “throw”. This is the distance from the projector lens (not the ceiling) to your cutting surface to determine the clarity of the image. A short-throw projector is suitable for 3-8 feet, which encompasses most sewing situations.

When installing the projector, or placing it in a temporary holder, it’s imperative that the lens is level as well as the cutting table below it, to avoid distortion.

Connection

Because the PDF pattern file is in your computer, tablet or phone, you need to have a way to get it to the projector. Some projectors are wireless, others require a cable connection, others require alternate means of interfacing, so check that information before purchasing to ensure compatibility.

Pattern

Any PDF pattern can work for projecting, but there are companies that make pattern files specifically designed for projection. These offer the pattern pieces in their final layout, with grainlines all going in the same direction, ready for cutting. There may be multiple pages to the pattern file, depending on what the project is and the size. If your fabric is directional, double-check that the tops of all pieces are going in the same direction, otherwise you’ll need to adjust before projecting.

Pattern graphic

Getting Ready

Before you project the pattern pieces onto your fabric, it’s imperative to calibrate the projector so that the patterns show up at the proper size. Some projectors offer a calibration guide that you can project and synch with your gridded cutting mat to ensure the sizing, but those guides are also available online and with some PDF patterns. Usually there’s a 1” and 2” square to align with the mat grid, and some have keystones in the corners to ensure that there’s no distortion along the outer edges of the image. Once this process is complete, note the projector’s zoom setting needed for future pattern work.

Partial image of cutting mat

You need to be proficient with Adobe Acrobat Reader (or other PDF app/program) to be able to rotate pattern pieces that may need to be changed for the layout, and to hide any layers of the pattern for all the sizes that you’re not using. If you’re projecting onto dark fabric, you may want to change colors (under Acrobat’s Accessibility options) so that the pattern lines show as white or a bright color on the fabric.

When any of those changes are complete, it’s time to hide the calibration grid, lay out your fabric and project the pattern. Align the fold with any projected fold line and be sure the edges of your fabric are squared to the cutting mat lines. If your fabric is slippery, you might want to use pattern weights to hold it in place during cutting. Then, simply cut out all the pieces along the projected lines. If there’s more than one page of pattern pieces, you’ll need to reposition the fabric for the subsequent layouts.

The big question—What about alterations?

Many of us don’t fit perfectly into a single pattern size, but you can still use projector sewing. If you have complex alterations for fit, such as shoulder or armhole changes, it’s best to project your pattern pieces onto large sheets (or a roll) of paper, cut out the pieces and make the necessary changes manually.

But, if you simply need to toggle between two sizes, it’s easy. For example, if you need a size 14 on the top and a 16 on the bottom, leave both size layers visible for projection and gradually taper between the sizes.

If you need to lengthen or shorten the pattern interior (like waistline length), that can be done while cutting. Using a removable marker, mark the designated lengthen/shorten line projected on the image just outside the cut line. As you’re cutting the pattern out, stop when you get to that line and slide the fabric in the direction needed so that the image is the requisite amount away from the cutting line end.

It’s just as easy to add length to the bottom of a pattern piece as well, just be sure to leave enough space on the fabric beyond the initial projected line, then slide the fabric to allow for the image placement at the requisite addition. Slide the fabric the opposite direction to shorten at the hemline.

For more information:

  • Simple Life Pattern Company
  • Little Ragamuffin
  • Projectors for Sewing Facebook Group
  • Projector Central – search this site for projector information or to use the Find a Projector search function to search for a projector to meet your needs.
  • Check YouTube for numerous videos on paperless sewing topics, calibration and projector settings

~Linda Griepentrog
Linda is the owner of G Wiz Creative Services and she does writing, editing and designing for companies in the sewing, crafting and quilting industries. In addition, she escorts fabric shopping tours to Hong Kong. She lives at the Oregon Coast with her husband Keith, and two dogs, Yohnuh and Abby.

Did you enjoy this article?
Are you an ASG member?
This field is for validation purposes and should be left unchanged.

Tagged With: paperless sewing, patterns, projection

May 27, 2020

Fireside Chat: Gail Yellen from Gail Patrice Designs

Join ASG Board Member, Sheryl Belson, in this fireside chat with Gail Yellen of Gail Patrice Designs. Gail offers a collection of patterns, teaches a wide range of classes and workshops, authored the book, Serger Essentials, and has a YouTube channel where she offers videos called Serger Tip Clips. ASG members can receive a special discount using her discount code found in the members only area! Gail is a wealth of information!


~Sheryl Belson

Did you enjoy this article?
Are you an ASG member?
This field is for validation purposes and should be left unchanged.

Tagged With: Gail Yellen, patterns, sewing, sewing educator

  • 1
  • 2
  • 3
  • Next Page »

Become a Member

Join the only national organization dedicated to Advancing Sewing as an Art and Life Skill.

Join Now button

Blog Article Categories

  • ASG Conference
  • Chapter Stories
  • Embroidery
  • Fitting
  • Learn to Sew
  • National Sewing Month
  • Products, Books, & Patterns
  • Projects
  • Quilting
  • Sewing
  • Sewing Techniques
  • Sewing Tips
  • Sewing Tours
  • Videos
  • Disclaimer
  • Privacy Policy

American Sewing Guild
National Headquarters
9660 Hillcroft, Suite 230
Houston TX 77096
713-729-3000 | 713-721-9230 Fax
www.ASG.org

ASG wordcloud - education, conference, discounts, videos, special offers, tours and more

Copyright © 1998–2025 · American Sewing Guild · All Rights Reserved