American Sewing Guild (ASG)

Visit our blog Visit the ASG Facebook page Visit ASG on Pinterest Visit ASG's YouTube channel Visit ASG on Instagram
  • Home
  • Join ASG
    • Join Online
    • Chapter Locations
    • Member Benefits
    • Member Brochure
    • Join by Mail
  • Education & Classes
  • Resources
    • Contests & Awards
    • Giving Back
    • Hall of Fame
    • Links
    • Travel and Tours
    • Measurement Chart
  • Shop
    • ASG Store
    • Chapter Products
    • Video Resources
  • Blog
  • About
    • About Us
    • Donate to ASG
    • ASG Sensitivity Statement
    • FAQ’s
    • Start a Chapter
  • Contact
  • Member Login
    • Login First!
    • Members Only
    • Leadership Only
    • Website FAQ’s
    • Logout
  •  

May 16, 2025

Giving Your Sewing Machine Some Love

As much as we love sewing, some tasks aren’t quite as much fun as others, but they’re no less important. One of those tasks is cleaning your sewing machine. If you allow dust, lint and thread to build up in the machine, you’re asking for trouble, so make a point to clean it on a regular basis.

How often do I need to clean my machine?

Experts advise cleaning every 10-12 hours of use, or more often if you’re using fuzzy fabrics like fleece, wool, quilt batting, etc.

What You’ll Need

In addition to the machine manual, you’ll need a few helpful tools. Look for the machine’s lint brush (or a small paintbrush), a soft cloth, pipe cleaners, Q-Tip, tweezers, a screwdriver (if needed) and perhaps treat yourself to a mini vacuum attachment. Or, if you prefer, look for disposable sewing machine cleaning brushes.

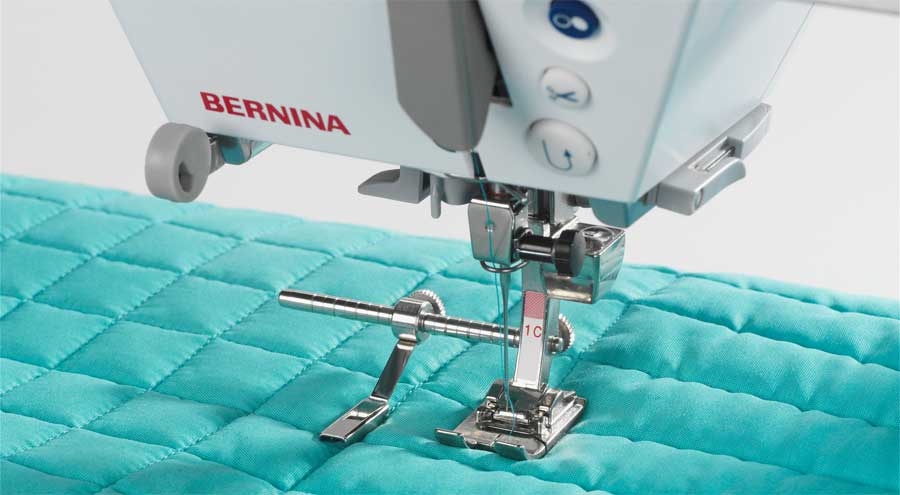
First and foremost, consult your instruction book for the care specifics of your model. Then, unplug the machine before you begin. Remove the needle and presser foot to allow easy access to the innards of the machine where the accumulations can easily go unnoticed.

Up Top

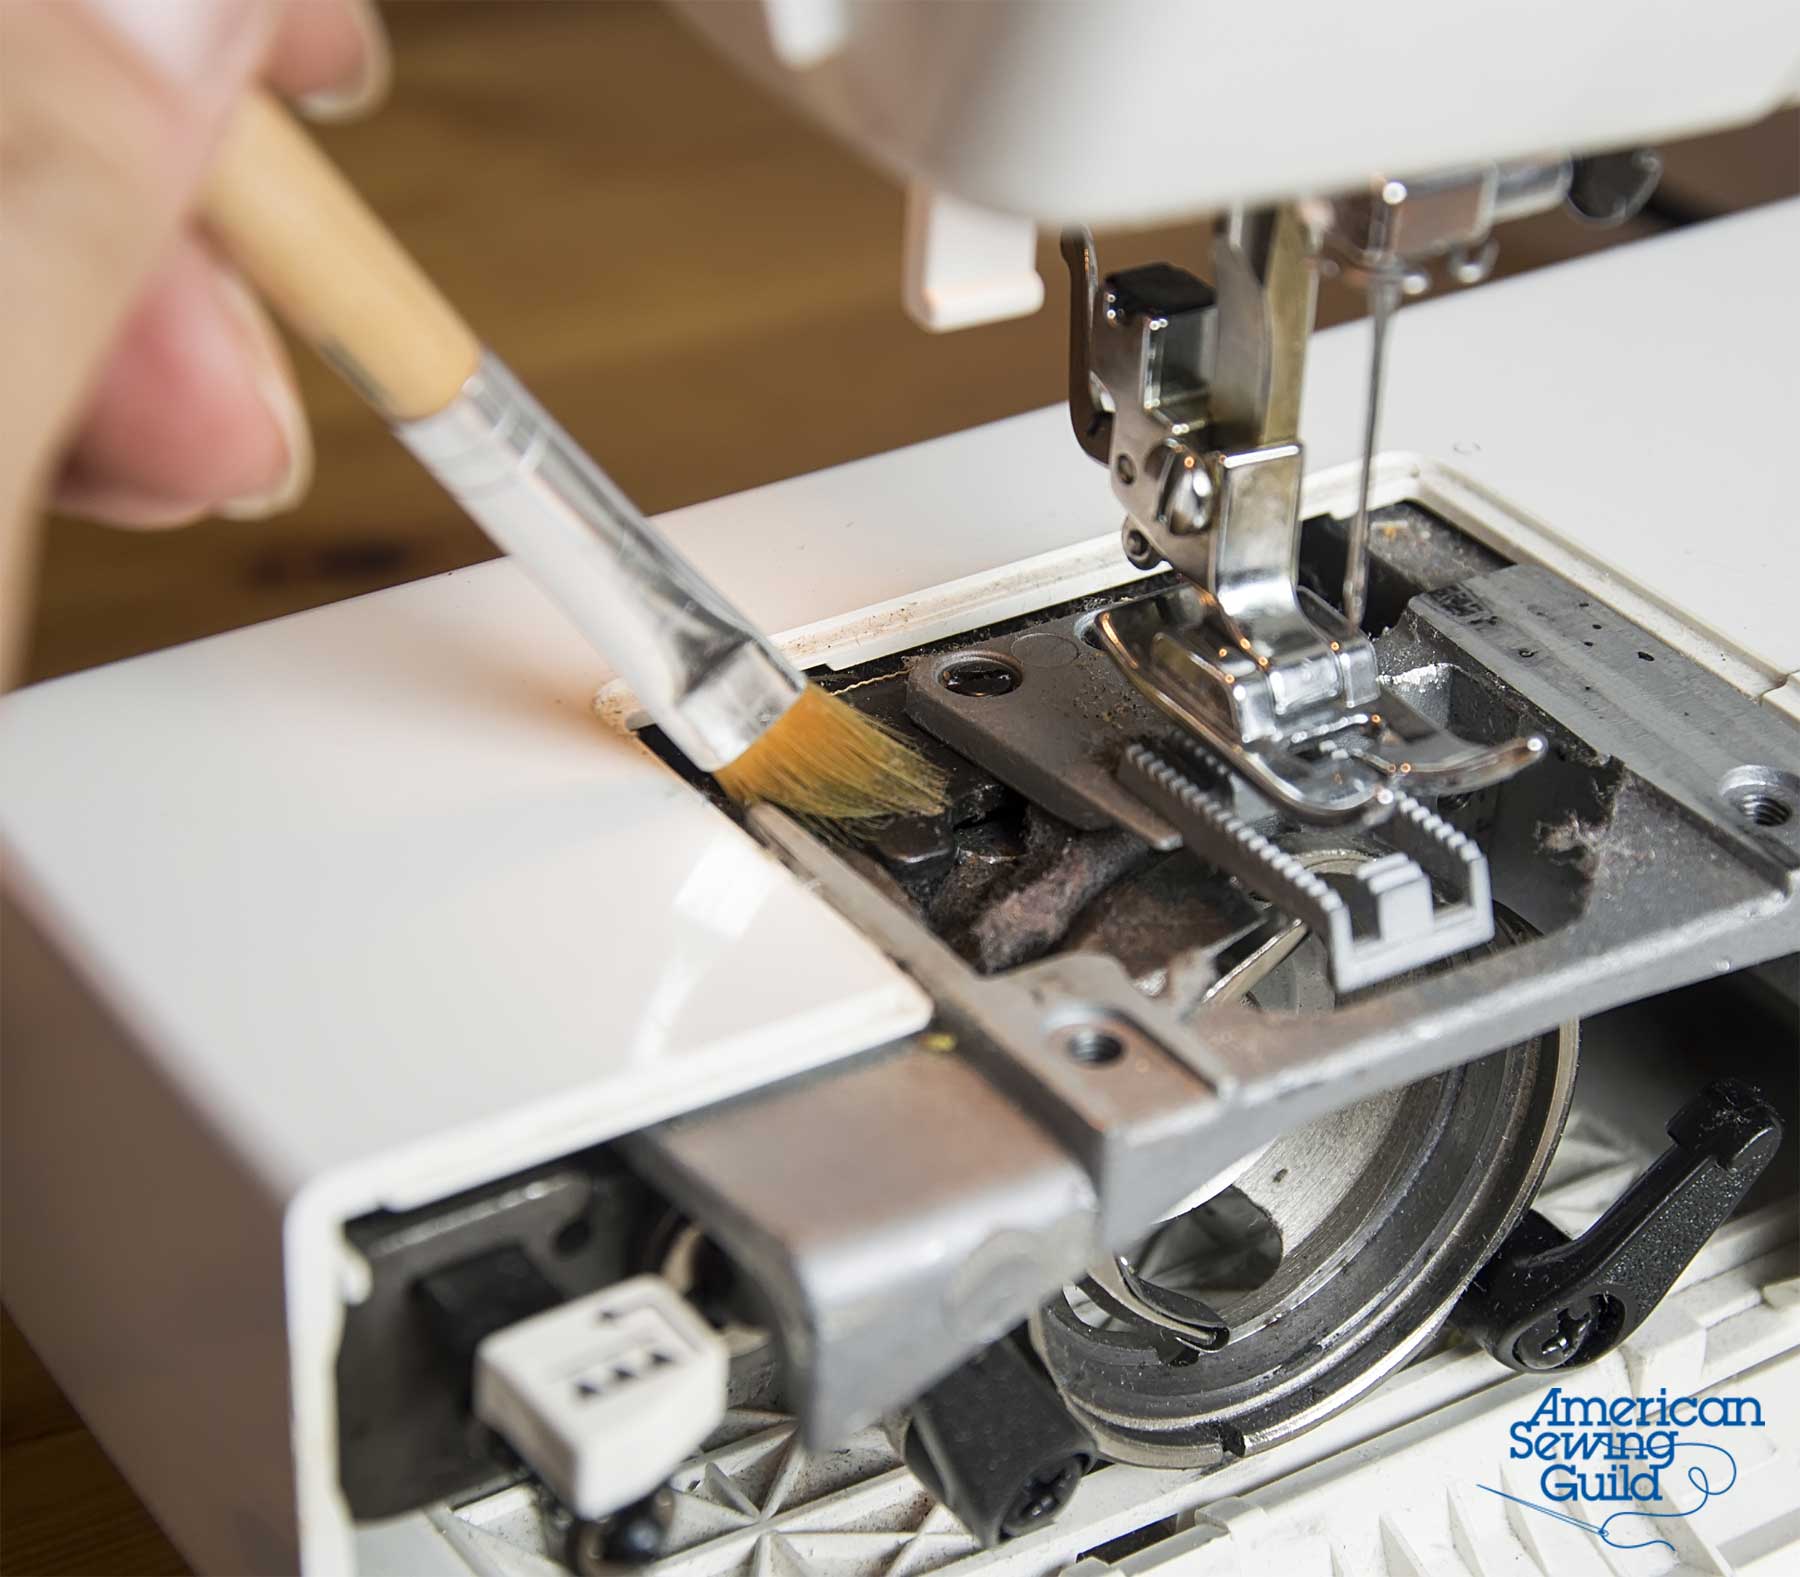
Once you’ve removed the needle and presser foot, take off the machine’s throat or needle plate. This can be done by pushing a button, lifting a lever or unscrewing it, depending on the machine brand. Doing this exposes the machine feed dogs (those little teeth that move the fabric), thread cutter (if you have one) and other movable parts. And, very likely, some packed-in lint as well.

Gently brush the lint out from under the sewing machine's throat plat

Lint comes from the fabric we sew, the thread we use and from the dust in the environment, including those loyal pets who watch us create at the machine.

Use the brush, tweezers and/or a pipe cleaner to pull out the gobs of lint throughout the entire area. Lift the feed dogs to remove lint packed underneath them. Avoid the temptation to simply blow lint out with your breath or with canned air, as both not only introduce unwanted moisture into the machine, but they can imbed the dust bunnies further into the machine’s mechanism. The use of canned air can also void some machine warranties. Gently lift it out one whisp at a time.

Don’t forget to clean the area above the presser foot, as lint often accumulates there as well and sometimes up into the light area if it’s accessible.

Fold the soft cloth and clean between the tension disks to dislodge any bits that might be hidden as a result of thread breakage while sewing.

Down Below

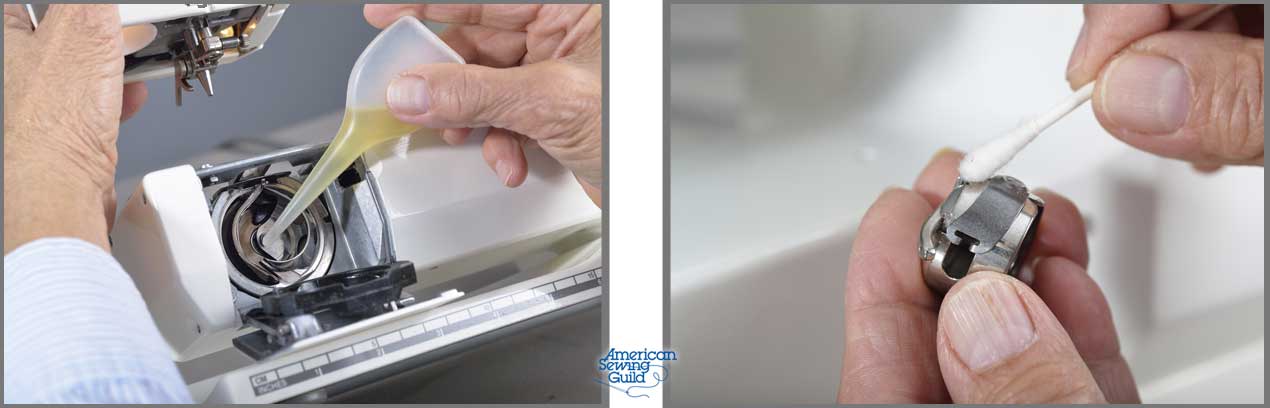
Remove the bobbin case (if you have one) and open the bobbin area per your instruction manual. Pay close attention to the process, as you’ll be putting it back together in reverse order. Remove lint or any errant thread bits in that entire area, including inside and outside the bobbin case.

If your machine requires oil, now is the time to do it, once lint is removed and the moving parts are visible. Carefully follow the instruction manual for where and how to lubricate and use ONLY sewing machine oil for the task.

Clearning and oiling the bobin case

Finishing up

When you’re done with the cleaning tasks, reassemble the parts and plug the machine back into the power source. If you oiled it, run it for a while without thread or bobbin to work the oil into the parts. This is a great time to put in a new needle as well.

Use a barely damp cloth to wipe down the outside of the machine to remove any visible stains. You probably didn’t mean to touch the machine after eating chocolate.

Call in the Pro

Regular machine cleaning is essential to successful sewing, but so is a yearly or bi-yearly check-up from your dealer. They can get to the internal workings that you can’t reach, and their work goes beyond cleaning. So, don’t skip it…it’s like your personal health check-up.


~Linda Griepentrog is the owner of G Wiz Creative Services and she does writing, editing and designing for companies in the sewing, crafting and quilting industries. In addition, she escorts fabric shopping tours to Hong Kong. She lives at the Oregon Coast with her husband Keith, and three dogs, Yohnuh, Abby, and Lizzie. Contact her at .

Tagged With: bobbin case, cleaning, machine cleaning, sewing machine

December 16, 2022

Handy Notions: Seam Guides

Whether you’re just learning to sew, teaching a novice sewer, or just need a little extra security to make even seamlines, there’s a seam guide to help you with the process.

In addition to sewing seams, guides are also helpful for evenly applying trims equidistance from an edge, hemming, decorative stitching, or topstitching. While the machine presser foot edge is a good guide for small distances, a movable seam guide can go anywhere on the machine base for wider spacing, either left or right of the foot.

Look at the machine throat plate as most have markings for various distances from the needle, often up to 1”, sometimes on both sides of the foot, and sometimes in metric designations. But, if those markings aren’t enough to keep you on the straight and narrow, consider some other options.

Magnetic Appeal

One of the most common seam guides is a raised edge shape that magnetically adheres to the machine base. Because it’s easily removable, you can use it only when needed for a particular task. A single guide can be used on multiple machines if you have one specific to classes or travel.

Magnetic Seam Guide available on Amazon.

Magnetic seam guides come in a variety of shapes and sizes—some designed for curved edges, others for corners and some for straight seaming.

Adhesive-backed Guides

Instead of a magnetic backing, some seam guides adhere to the machine with a repositionable adhesive. They do not damage the machine’s surface, but can be moved as needed. Some offer curved edges for guiding both inner and outer curves with confidence.

Clover Needlecrafts Stick n Stitch Tool available from Amazon.


Screw-in Guide

Depending on your machine brand and model, there may be a screw hole in the top of the machine base that can support a screw-in seam guide. These guides are adjustable and slide on the screw to set the correct distance from the needle, but that distance is limited.

Universal screw-in seam guide available on Amazon.

Quilting Guide

An add-on quilting guide may be an optional or standard accessory for your machine, depending on brand and model. Though designed for spacing quilting lines, it’s also usable for seaming and topstitching a set distance from the fabric edge. The guide has an adjustable “arm” that extends from the presser foot shank and slides to create a guide for evenly spaced stitching. It’s secured at a specific setting with a small screw to keep it from slipping from the chosen distance. If you’re looking for wide spacing, be sure to check the length of the extension arm.

Quilting guide image courtesy of Bernina

Quilting guide image courtesy of Bernina

Presser Feet

Some machines work with a presser foot that has a built-in adjustable seam guide. Because of its attachment to the foot, the guide edge is limited in distance from the needle position. Check with your machine dealer to see if this foot will fit your machine.

Presser foot with a seam guide available on Amazon.

Gridded Base

If a small add-on guide doesn’t pack enough “oomph” for you, consider a lined addition to your machine’s surface so you can have measurements extending on one or both sides of the presser foot for foolproof following.

Repositionable seam guide available on Amazon.

When positioning a seam guide, remember to measure the distance needed from the needle position, not the presser foot edge.

DIY Seam Guides

Instead of purchasing a separate accessory, many people have opted for DIY seam guides of all sorts. The most common is to adhere a non-marring and removable tape, such as painter’s tape, to the machine base at the desired distance from the needle. It’s easily repositionable for various tasks and you can write notes on it; plus, it had two parallel edges, so either one can be used depending on the stitching width needed.

Another simple option is to stretch a rubber band tautly around the free arm of the sewing machine at the desired distance from the needle. A piece of narrow elastic tied around the arm works in the same manner.

If you have a pad of sticky notes in your office, move them to your sewing room and adhere the entire pad to the machine base to make a raised-edge seam guide. The glued-together side should face the needle.


~Linda Griepentrog is the owner of G Wiz Creative Services and she does writing, editing and designing for companies in the sewing, crafting and quilting industries. In addition, she escorts fabric shopping tours to Hong Kong. She lives at the Oregon Coast with her husband Keith, and three dogs, Yohnuh, Abby, and Lizzie. Contact her at .

Did you enjoy this article?
Are you an ASG member?
This field is for validation purposes and should be left unchanged.

Tagged With: learn to sew, seams, sewing machine

August 12, 2022

Triple Straight Stitch

Often overlooked because the machine icon doesn’t really look like the actual stitch, the triple straight stitch is a fun one, both for utility use and for embellishments. Depending on the machine brand, the stitch may also be called a straight stretch stitch or a backstitch.

On the stitch screen or dial, it appears as three rows of straight stitching side by side. But in fact, that’s not how it sews out. Instead, it’s really three stitches on top of each other with the needle penetrating the same hole at each end of the stitch. Whether your machine sews it as two stitches forward and one back, or one stitch forward, one stitch back and another stitch forward depends on the brand, but the look is the same—a bold straight stitch.

Triple straight stitch on the machine

What’s it for?

Because the machine is sewing back and forth to create this stitch, there is some inherent stretch built into it. It’s great for sewing seams or hems in knit fabrics to maintain flexibility without popping stitches, as often happens with just a regular straight stitch. And ideal as well for use on leggings or swimwear where stretch is needed for fit.

It’s also perfect for use where there is extra reinforcement needed, like on tote bag handles, pant crotches, armhole seams, etc. Outdoor gear is another perfect place to utilize this stitch. It’s essentially three times as strong as an ordinary straight stitch.

Because the stitches are sewn on top of each other, it still allows you to press a seam allowance open and flat.

With the backward and forward motion of the machine as it sews out this stitch, it’s a good idea to slow your sewing speed, using either the speed regulator or a lighter touch on the foot pedal.

Beyond the Basics

Even though its intended purpose is for utility use, this stitch can take on a totally new persona when used decoratively.

Like most machine stitches, you can vary the look by changing the stitch length. While the default length might be ideal for sturdy seam sewing, lengthening it makes it ideal for other uses.

The triple straight stitch is ideal for topstitching. You can sew a well-defined and prominent line of stitches to accent a seam, garment edge or outline an appliqué. Because you’re getting three stitches on top of each other, the stitching line appears heavy without having to invest in a heavy weight or novelty thread and a specialty needle. You can simply sew with the same thread you used to construct the garment, or a contrast.

You can even sew this stitch with metallic thread. Or, use a shiny rayon or polyester embroidery thread for a bit of extra sheen. Opt for a variegated thread for an even more interesting look.

When used on denim, the triple straight stitch can mimic the topstitching found on ready-to-wear jeans.

Topstitching on jeans

In addition to topstitching, the stitch can be used to create designs on its own—from free-flowing curves to a precise grid, as shown in the photos below.

When used with white thread on a dark background, this stitch can look similar to Sashiko stitching. It’s also ideal for quilting, whether following the design in a printed fabric for accent or sewing in channels or grids. It can also be used as an outline for pieced motifs, as shown in the next image.

One note of caution: Because the fabric moves forward and backward as it forms this stitch, stick to gentle curves as opposed to tight curves which are harder to control.

And, there’s more…

You can sew the triple straight stitch with a double needle to create perfectly aligned stitch lines, or with a wing needle to leave tiny holes often used by heirloom sewers as accents and for attaching other trims. In both instances, it’s a good idea to sew slower than normal for consistent stitching.

If you add width to this stitch, you get an entirely different stitch—a triple zigzag—which is great for embellishing as well, as the three threads make the stitch much more prominent than a simple zigzag.

Think you might need a little play time with this great stitch?


~Linda Griepentrog
Linda is the owner of G Wiz Creative Services and she does writing, editing and designing for companies in the sewing, crafting and quilting industries. In addition, she escorts fabric shopping tours to Hong Kong. She lives at the Oregon Coast with her husband Keith, and two dogs, Yohnuh and Abby. Contact her at .

Did you enjoy this article?
Are you an ASG member?
This field is for validation purposes and should be left unchanged.

Tagged With: learn to sew, sewing machine, stitches, triple stitch

June 13, 2021

Sewing Basics: Sewing Machine Terms

It’s National Sewing Machine Day! Spend 17 minutes with us in this video and learn about 6 different parts of your sewing machine. Want to learn more? If you aren’t a member already, we hope you’ll consider joining ASG — we would love to meet and sew with you!


~Sheryl Belson

Did you enjoy this article?
Are you an ASG member?
This field is for validation purposes and should be left unchanged.

Tagged With: bobbin, feed dog, hand wheel, presser foot, sewing machine, thread spool

Become a Member

Join the only national organization dedicated to Advancing Sewing as an Art and Life Skill.

Join Now button

Blog Article Categories

  • ASG Conference
  • Chapter Stories
  • Embroidery
  • Fitting
  • Learn to Sew
  • National Sewing Month
  • Products, Books, & Patterns
  • Projects
  • Quilting
  • Sewing
  • Sewing Techniques
  • Sewing Tips
  • Sewing Tours
  • Videos
  • Disclaimer
  • Privacy Policy

American Sewing Guild
National Headquarters
9660 Hillcroft, Suite 230
Houston TX 77096
713-729-3000 | 713-721-9230 Fax
www.ASG.org

ASG wordcloud - education, conference, discounts, videos, special offers, tours and more

Copyright © 1998–2025 · American Sewing Guild · All Rights Reserved