American Sewing Guild (ASG)

Visit our blog Visit the ASG Facebook page Visit ASG on Pinterest Visit ASG's YouTube channel Visit ASG on Instagram
  • Home
  • Join ASG
    • Join Online
    • Chapter Locations
    • Member Benefits
    • Member Brochure
    • Join by Mail
  • Education & Classes
  • Resources
    • Contests & Awards
    • Giving Back
    • Hall of Fame
    • Links
    • Travel and Tours
    • Measurement Chart
  • Shop
    • ASG Store
    • Chapter Products
    • Video Resources
  • Blog
  • About
    • About Us
    • Donate to ASG
    • ASG Sensitivity Statement
    • FAQ’s
    • Start a Chapter
  • Contact
  • Member Login
    • Login First!
    • Members Only
    • Leadership Only
    • Website FAQ’s
    • Logout
  •  

July 11, 2025

Fabric Q&A

Q. What is English Netting, and how is it different from nylon net or tulle?

A. English netting is a very soft, pliable and drapeable fabric used for bridal veils, bridal gown overlays and as a basis for machine embroidered lace. It’s most often 100% cotton or a blend of cotton/polyester. The threads are matte finish and slightly thicker than most other nettings. It’s characterized by hexagon shaped holes. The netting is sometimes used for trim on knit garments due to its slight stretch. English netting gives the look and drape of silk without the added cost.

Nylon net is much stiffer and has larger holes than either tulle or English netting. It’s available in wide widths (up to 108”) and is used to add fullness, like on a costume or tutu. Because of its crispness, nylon net isn’t very comfortable for a garment as it’s too stiff.
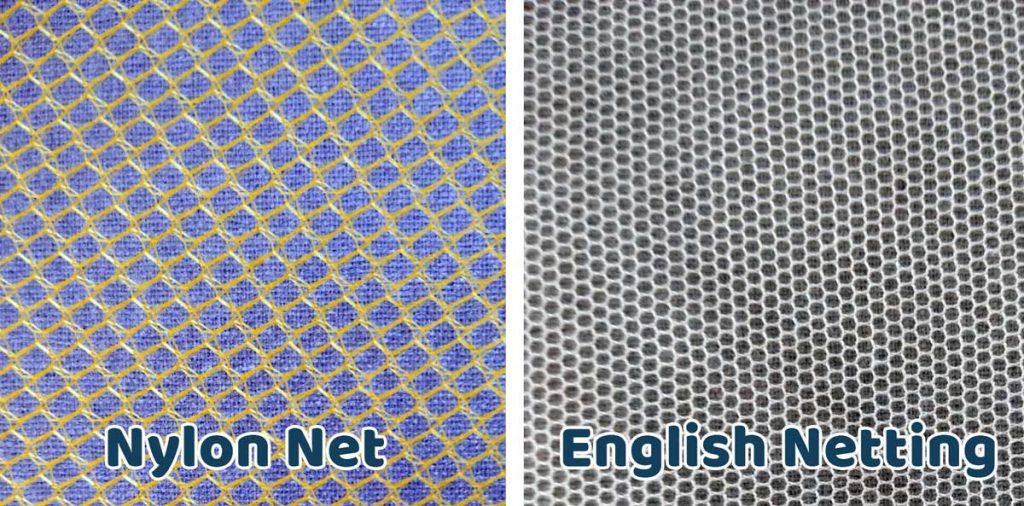
Netting photos

Tulle is a finer version of nylon net with smaller holes and a softer touch. Tulle is sheerer than either of the other two nettings mentioned so it’s often used most often for bridal veils.


Q. Why are some fabrics made from more than one fiber?

Fabric bolts

A. Fibers are often blended to take advantage of the attributes of each. For example, some fabrics have a small amount of Lycra added for stretch, or a bit of silk is sometimes added to cotton or wool for added sheen. Polyester is often blended with cotton to improve wrinkle resistance. Fibers are also blended to help with cost—luxury fibers like cashmere or alpaca can be added to wool in small amounts to create a better hand at a still reasonable price. When caring for blended fabrics, be sure to follow the bolt instructions for proper laundering/cleaning methods, and be aware of the blended fibers in choosing an iron temperature for pressing.


Q. Do I need to pre-shrink fabric before cutting out a garment?

Washing machine

A. The answer depends on the fiber content of the fabric. Look for guidance on the bolt end, but as a general rule, you should pre-treat the fabric as it will be cared for in the finished project. If the fabric is washable, send it through a wash/dry cycle before cutting. If you’re concerned about shrinking, multiple launderings may be in order. Fabrics like denim and flannel will often shrink more with each repeated washing, so it’s a good idea to purchase a little extra fabric to compensate for that. Note that fabric shrinkage amounts are often listed on the bolt end with indicators like “3-4% residual shrinkage may occur”. That amount of shrinkage can affect the fit of a garment.

For dry-clean-only fabrics, either take them to the drycleaner to be steam shrunk, or complete that process at home. If you’re working with home décor fabrics, steam-press them, but do not launder as protective finishes may be removed.


Q. I bought fabric for a jacket but after washing it, it’s way too soft to hold its shape. Is there anything I can do to salvage it?

A. The easiest way to change the fabric hand and make it firmer for your project is to fuse interfacing to the wrong side. A lightweight tricot knit interfacing can be fused to all the cut pieces to add body and support to make it more appropriate for the intended project. Some prefer to fuse the interfacing to the yardage prior to cutting instead of trying to match it up to individual cut pieces later. You’ll need a large flat surface and plenty of steam, and perhaps a press cloth, depending on the interfacing brand and application instructions. Be sure to follow the instructions for applying it and allow the fabric to cool flat before moving.


~Linda Griepentrog is the owner of G Wiz Creative Services and she does writing, editing and designing for companies in the sewing, crafting and quilting industries. In addition, she escorts fabric shopping tours to Hong Kong. She lives at the Oregon Coast with her husband Keith, and three dogs, Yohnuh, Abby, and Lizzie. Contact her at .

Tagged With: fabric, learn to sew, sewing, sewing tip

September 9, 2022

Handy Notions: Tracing Wheels

The tracing wheel may be a sewing notion you were first introduced to when you began sewing, as it’s a handy way to transfer construction markings from the pattern to the fabric. Whether it’s patch pocket locations, a zipper opening, buttonholes, darts or pleats, using a tracing wheel is a quick way to get accurate markings for sewing.

Tool Styles

Tracing wheels come in several different styles, depending on their use. All should be used on a hard, flat surface for best marking visibility.

Double Wheels

If you’re working with a pattern that doesn’t include seam allowances, you will need to add them before cutting your fabric. An adjustable double wheel uses two heads and you can select the spacing between them, depending on the desired seam allowance, from ¼” to 1 ¼”. The heads snap into a handle and remain parallel to each other for accurate marking outside the original pattern outline to add fabric for seams.

In addition to being able to add seams, a double wheel allows you to mark the original pattern outline, so you have a marked line to follow for sewing. This is especially helpful for beginners, and for any garments that may require some fitting adjustments.

A double tracing wheel can also be used to enlarge or decrease a pattern size, by adjusting an even amount in the needed areas.

Clover double tracing wheel

This type of tool is versatile, as you can also use it with just one head if you prefer.

Smooth Wheels

Looking like a tiny pizza cutter, only not sharp, a smooth tracing wheel makes a continuous, unbroken marked line. On fabrics that are impressionable (i.e. the marked line shows without using marking paper), the smooth wheel can be used to trace the pattern outline for cutting without pinning. This is especially handy for things like leather or vinyl, where pin marks are permanent. Just wheel around the pattern outline and cut on the impression line.

Dritz 746 Smooth Tracing Wheel on Amazon

Serrated Wheels

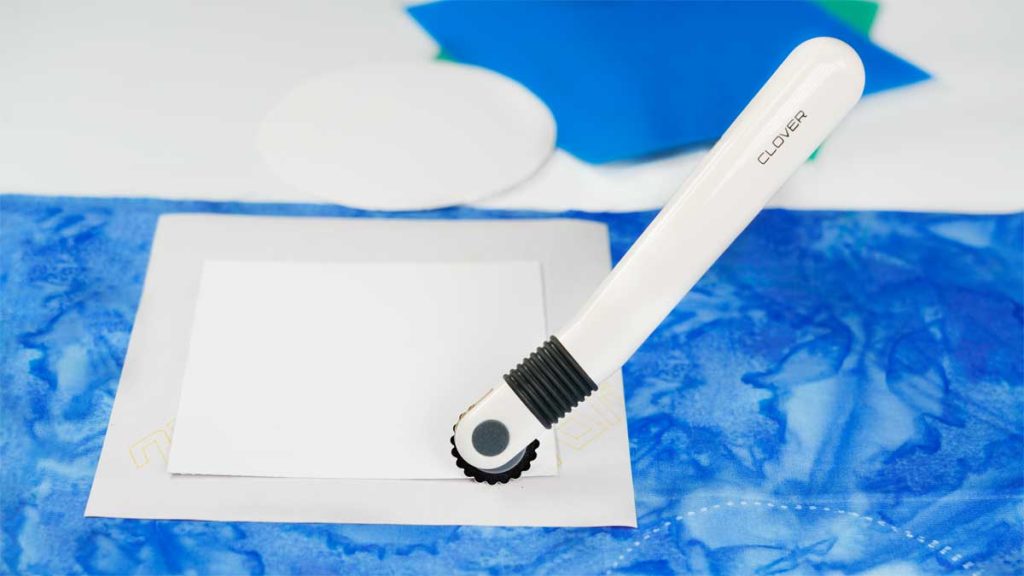
If you don’t need a continuous line, but a dotted or dashed one will do, the serrated wheel with its tiny spiked head points, will make that happen. Because there are spaces between the points, the marked lines come out the same way.

Clover serrated tracing wheel

Blunt-point Wheels

On more fragile and lightweight fabrics, a serrated wheel may cause some surface damage, so switch instead to the blunt-point wheel. The small scallops are gentler on delicate fabrics, but produce an equally visible line as their spikey counterparts.

Clover blunt edge wheel

Needle-point/Spiked Wheels

Made with long spikes, these wheels are best used not for marking, but for tracing patterns onto tag board or crisp paper. Simply trace the original pattern outline to create a more permanent pattern, handy for reusing multiple times. It can also be used to perforate leather for easier stitching. If you use this wheel on fabric, most will become damaged from the small holes it creates.

Tihood needlepoint tracing wheel on Amazon.

Using a Tracing Wheel

Tracing wheels are most often used with some type of tracing or transfer paper. The paper is available in multiple colors, and today, most tracing paper markings wash out. If you plan to use the tracing paper on the fabric right side, be sure it’s designated as “wax-free.”

Caution: Some tracing paper markings become permanent once they are pressed as they’re heat-set into the fabric, so be sure to test products first on your fabric before use.

To transfer markings to a project that’s cut double (with fabric wrong sides together), place the tracing paper between the layers so that color is exposed to both layers. Trace the markings with the designated tracing wheel, remove the paper, and the markings will show on the wrong side of both layers.

If you cut with the fabric right sides together, encase both layers in the tracing paper with the colored side against the fabric wrong sides, and then trace the markings.

If you cut a single-layer pattern, place the colored paper under the layer with the color against the fabric wrong side, then mark.


~Linda Griepentrog Linda is the owner of G Wiz Creative Services and she does writing, editing and designing for companies in the sewing, crafting and quilting industries. In addition, she escorts fabric shopping tours to Hong Kong. She lives at the Oregon Coast with her husband Keith, and three dogs, Yohnuh, Abby, and Lizzie. Contact her at .

Did you enjoy this article?
Are you an ASG member?
This field is for validation purposes and should be left unchanged.

Tagged With: learn to sew, sewing notion, sewing tip

February 18, 2022

Sewing Projects: Making Multiples

Do you showcase your DIY projects at craft sales or bazaars, make things for charity, or make dozens of handmade items for gifts? No matter what time of year, making multiples of the same or similar item can be simple and quick with a few helpful hints.

Tagboard on Amazon (affiliate link; we may earn a small commission on your purchase)

Streamline your pattern. If you’re making lots of hats, for example, create a tagboard pattern you can trace around. Not only does this save wear and tear (and shredding) of tissue paper patterns, but it’s more accurate for cutting. It doesn’t matter if the fabric colors are the same, as long as it’s the same item being cut.

Simplify the design. Depending on the project, you may be able to change up the design a bit to save time. For example, instead of creating tedious narrow hems on something, could you bind the edges with bias tape instead? Instead of finishing seams, like on a gift bag, could you add a simple lining to hide seams and add a bit more body?

Rotary cut multiple layers. Depending on the project and the fabric, you may be able to stack fabrics and cut six or so layers at one time with a good rotary cutter.

Choose a neutral thread. If you’re making lots of items in different colors, avoid constantly changing threads by using a neutral. White, off-white or light gray work for seaming light colors, and navy, black or dark gray blend with dark colors. If your project has topstitching, you may want to use thread to match the fabric, in which case, stack up similar colors and do the matching stitching at one time.

Bundle components. If your project requires elastic, for example, pre-cut the number of lengths needed before you start construction. When it’s time to insert the elastic, it’s ready to go, without have to go back and cut for each project.

Fuse fast. Think fusible interfacing if your project requires more body. You can fuse fabric prior to cutting out pieces to avoid having to tediously match up cut edges.

Chain sew. Continuous sewing is a technique borrowed from factories and involves sewing as many things as possible without cutting the thread. Simply feed in the next item and go, letting completed units trail out the back of the machine. Not only do you save thread, but also a lot of time. Once a task is done, simply clip apart all the pieces and move onto the next step.

Chain sewing—how far can you go without cutting the thread?


Sew without pins. Take a lesson from factory workers and learn to sew without pins. The task of stopping to remove pins as you approach them takes time and slows your speedy construction methods used for sewing multiples.

If you’re bored making the same item, play a game. It makes the time go faster if you challenge yourself to accomplish a certain task within a time frame. For example, if you finish x quantity of y task by 1pm, you can reward yourself with a break and a cup of your favorite beverage. (Warning: Do not drink alcoholic beverages while sewing.)

Plan ahead. Sew together small components—like ties, drawstrings, etc.—prior to constructing the item. For example, if you’re mass-producing aprons, make all the neck ties and waistline ties first before it’s time to attach them. If you’re making dozens of fleece hats, make all the pompoms first and they’re ready when you get to sewing the seam that includes them.

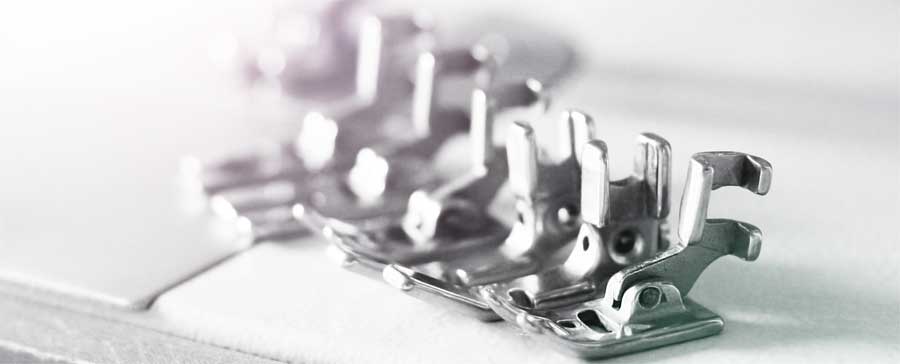
Don’t hesitate to invest. If you’re going to be doing a lot of sewing of similar items, think about what sewing machine attachments might help make your task easier. Depending on the project, you may find it’s a serious timesaver to invest in a bias binding attachment, edgestitch foot or perhaps a narrow hemming foot. If your machine doesn’t come with one, perhaps a ¼”-foot would help keep seamlines on the straight and narrow. Check with your dealer to see if there’s a machine accessory to help with specific tasks you’re facing that could speed up your work.

machine feet

Keep it clean. Sewing multiples can add a lot of lint to your sewing machine bobbin area and feed dogs. Be sure to regularly brush out those areas for trouble-free sewing.

Hand MadeAdd an ID. If you’re a prolific crafter who sells your wares, it’s always good to add a bit of professionalism to your projects with labels or tags. It’s easy to create and print tags from the computer, as there are several templates available online. Add your business name if you have one, or simply your contact information in case someone wants to purchase another similar item. Care instructions may be noted as well, and if the project comes in different sizes, indicate the size on the tag too.


~Linda Griepentrog

Linda is the owner of G Wiz Creative Services and she does writing, editing and designing for companies in the sewing, crafting and quilting industries. In addition, she escorts fabric shopping tours to Hong Kong. She lives at the Oregon Coast with her husband Keith, and two dogs, Yohnuh and Abby. Contact her at .

Did you enjoy this article?
Are you an ASG member?
This field is for validation purposes and should be left unchanged.

Tagged With: sewing business, sewing project, sewing tip, sewing tips

November 8, 2021

How to Sew a Baby Hem

Our short video will show you how easy it is to create a baby hem. Sew simple, sew easy!


~Sheryl Belson

Did you enjoy this article?
Are you an ASG member?
This field is for validation purposes and should be left unchanged.

Tagged With: baby hem, hems, sewing tip

January 29, 2021

Slick Tricks: Working with Laminated Fabrics

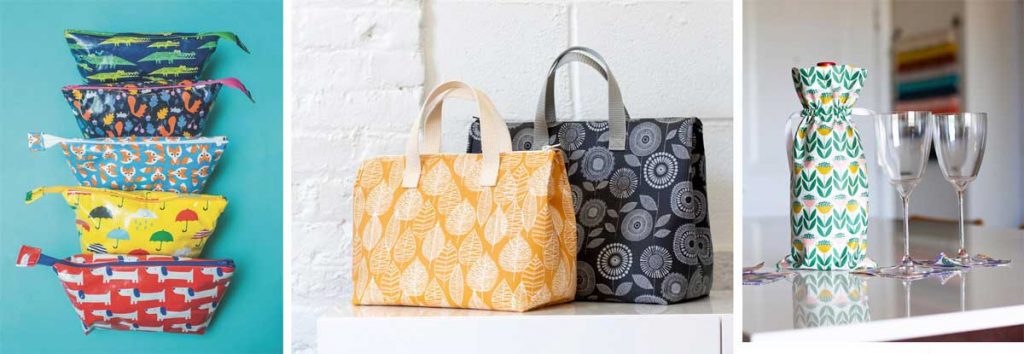
If you’re looking to make that perfect raincoat, try one of the great laminated fabrics on the market today. Colorful cottons with a clear coating are ideal for rainy weather attire, and a host of other projects from cosmetic bags to totes and aprons.

And you have options—laminated cottons come with either a matte finish or a glossy finish, depending on the brand and the desired look. In many instances, the same print is available in a non-laminated version, so that you can use it for facings, hood linings, binding, etc.

Although they do require some care when sewing, there’s nothing off-putting about these fun fabrics. Just be sure to purchase a laminated cotton, as opposed to traditional oilcloth fabric which has a heavier mesh base and is best suited for home décor items.

The coating on laminates makes them water resistant (not waterproof), and it keeps seam allowances from fraying. Some coatings are lightweight and others a bit heavier, so select the fabric by the intended use. Softer coatings are ideal for garments, as they’re more flexible than heavier ones.

Preparation

Photo courtesy of Cloud9 Fabrics

When choosing a pattern, look for simple lines and few seams, as well as raglan sleeves vs. set-in. There’s no room for error with laminates, so be sure the pattern fits you.

When you cut out your project, opt for pattern weights instead of pins, unless you keep them only within the seamlines as the marks are permanent.

Mark with chalk or soap slivers and never a tracing wheel, as that can damage the coating.

Sewing

There are some helpful notions for stitching these sticky fabrics. Spring clips, such as Wonder Clips, help hold layers in place without pinning, as do coated paperclips.

If sticking is an issue, opt for a non-stick presser foot, or put tape on the bottom of a regular foot to keep it moving. Sticking becomes an issue usually only if you’re sewing with the right side up, otherwise, the fabric should move smoothly under the foot.

Adjust the stitch length to slightly longer than normal and use a small needle to avoid large holes in the fabric.

Pressing isn’t an option for most laminates, so keep the iron away. To keep the seams flat, finger-press, then topstitch, either open or with seam allowances to one side. Topstitching is also recommended for all edges to keep them flat.

Photos courtesy of Cloud9 Fabrics

Finishing

If your raincoat requires buttonholes, interface the area with a sew-in interfacing (not fusible) and use the setting on your machine that produces a buttonhole with simply straight stitching around the slit. Any dense satin stitching can damage the fabric.

For hems, there’s no need to finish the edge as the lamination keeps the fabric from fraying—just turn up the hem evenly, clip it in place and sew one or two rows of stitching evenly from the folded edge.

On a tote, bound edges work perfectly—not only are they easy to do, but they also reduce the bulk of multiple laminate layers on turned-and-stitched edges.


~Linda Griepentrog
Linda is the owner of G Wiz Creative Services and she does writing, editing and designing for companies in the sewing, crafting and quilting industries. In addition, she escorts fabric shopping tours to Hong Kong. She lives at the Oregon Coast with her husband Keith, and two dogs, Yohnuh and Abby. Contact her at .

Did you enjoy this article?
Are you an ASG member?
This field is for validation purposes and should be left unchanged.

Tagged With: laminated fabric, learn to sew, raincoat, sewing, sewing tip

  • 1
  • 2
  • Next Page »

Become a Member

Join the only national organization dedicated to Advancing Sewing as an Art and Life Skill.

Join Now button

Blog Article Categories

  • ASG Conference
  • Chapter Stories
  • Embroidery
  • Fitting
  • Learn to Sew
  • National Sewing Month
  • Products, Books, & Patterns
  • Projects
  • Quilting
  • Sewing
  • Sewing Techniques
  • Sewing Tips
  • Sewing Tours
  • Videos
  • Disclaimer
  • Privacy Policy

American Sewing Guild
National Headquarters
9660 Hillcroft, Suite 230
Houston TX 77096
713-729-3000 | 713-721-9230 Fax
www.ASG.org

ASG wordcloud - education, conference, discounts, videos, special offers, tours and more

Copyright © 1998–2025 · American Sewing Guild · All Rights Reserved