There is nothing more timeless (or useful) than a high-quality, well-made swimsuit. I recently had a customer who is an avid swimmer contact me after 10 years to make her another set of swimsuits. Although I usually purge dormant patterns from customers, I still had hers and her shape had not changed much during in the 10 years. The original suits had for the most part withstood the onslaught of chlorine and salt and were just starting to show some loss of recoil in the elasticized edges. This is understandable as the elastic fibers are usually the first to go. But all things aside, 10 years says a lot about the garment. Let’s look at what it takes to make a high-quality swimsuit and then in a future article, delve into staple garments of high quality.

It’s All in the Layers
It is important to look at the layers of things to consider in making a timeless swimsuit—or event a garment for that matter. By layers, we refer to the considerations you must ponder for that garment to still be viable in terms length of time of wear and its fashion trend longevity.
Style

The first layer we see is the style of the garment. Visually, a garment will always be in style if it suits the wearer, meaning that it accentuates the figure type. With fashion trends constantly changing, there will be short-lived styles, but a well fitted, high quality swimsuit in a style that flatters the wearer is always in style. Also, remember trends cycle. As a longtime seamstress once told me; 7 years to come in, 7 years in style, and 7 years to go out. By that time, they are back in style. If you are lucky to be around long enough, you will see this trend on repeat.
Fit
If a swimsuit fits the wearer well and is the correct style for the anthropometry (size and stature) of the wearer, the visual results will be positive. There are design details that one can use to flatter the figure as well.
- Using gathers to add volume, or using color blocks mixed with colors to create optical illusions are great factors to keep in mind. These details applied to a well fitted tank-style swimsuit will never go out of style.
- Within the suit base, you can eye out details of neckline shape, both front and back, shoulder strap width and placement on the shoulder, and the cut and shape of the leg style both front and back.
- A slightly higher cut leg can have the visual of creating a longer leg, but without a well fitted seat it can cause the seat or bottom of the back of the suit slide out of place. One thing a wearer does not want to deal with is constantly fixing the back of the bottom of the suit or the straps. So, length, width, and placement all count towards a well-fitting garment. Not only will this flatter the body type but will feel comfortable and be functional as well. Less is not always best when it comes to coverage.
- You can add a variety of support mechanisms including a shelf bra, underwires, or sewing cups right into the lining. They are not as hard as they might appear to accomplish. There are a lot of similarities with sewing lingerie and bras to sewing swimwear. Both are very close fitting with little or no ease and have small seam allowances.
Choosing Fabric and Lining
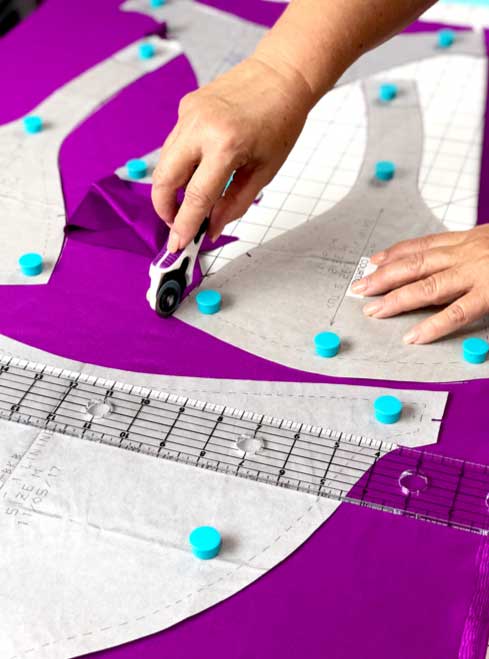
When choosing your fashion fabric, choose exquisite fabrics! The most resilient and brilliant colored spandex fabrics have an 80% nylon / 20% spandex blend. That is not to say that some polyester blends do not work, but they usually will not have the same resiliency and it will affect longevity. When looking at prints, try to look for fabrics that use the wet print method of dying the fabric as opposed to heat sublimation. When fabrics are heat sublimated, the colors fade as the garment is stretched. Try it out when you get a spandex fabric next time. Grab 5 inches and stretch it. Look at the print colors. Do they fade with stretching? If so, that will happen as the garment is worn.

Weight of fabric is also a consideration. Anything less than 5oz. per sq. yd. is too thin and will not last or have the structure needed for a suit to last. Anything higher than 7oz. per sq. yd. might be too heavy when wet so look carefully before choosing. Study your fabric, look at the direction of the print and how that will translate when laying down your pattern. At best, aim to achieve the greatest amount of stretch going around the body; while making sure it works with the print design. You do not want to have sideways designs on the print going in the vertical of the suit.
Lining
You can line the front and/or the back of the swimsuit. The lining plays an important role in a well-made garment as it allows the garment to slide onto the wearer and also protects the fashion fabric from perspiration. It also protects the textile of the fashion fabric from the wear and tear of friction. Lining fabric does have a right and wrong side so study it closely to determine top from bottom. Use a lining that has the same or very close to the stretch coefficient of the fashion fabric. I often use bold colors in the lining as well, because the garment should look as beautiful on the inside as the outside—a ‘tell’ of a high-quality garment! If you happen to be using light colored fashion fabrics such as yellows or whites, then it is best to use a color of lining that closely resembles your skin tone. It may appear that this will show through, but rest assured, it won’t.

Cut the lining as you did the fashion fabric, so that the greatest amount of stretch goes around the body. Use a 4 way stretch fabric so the tension lines can be created in when the garment is worn. This, of course, presupposes that you have put thought into creating these tension lines in your planning of the design details of the suit itself. I have found after many years of doing swimwear that the pattern on the lining is 1/16th smaller than the original garment pattern. You can trim the seam allowances of the lining after you cut it out or make an additional lining pattern with these specifications. This is often done on collars in blazers to account for turn of the cloth and a better overall fit of the garment.
Strap Placement

Strap placement and size is a consideration for a functional suit. Straps that are place too far away from the neckline will constantly fall off unless you add a back horizontal support strap. The properties of spandex do help immensely with this, but you must know how to use it to its full advantage. Spandex will support with creating tension lines vertically and horizontally, but the strap must have horizontal tension created by strap width, and vertical tension created by the strap placement with respect the shoulder point and neckline. Find just the right spot so the strap stays put, combined with the best width, allowing the spandex do its work, then add elastic for added security and structure. A comfortable armhole that gives you the coverage you need will help you decide the best strap placement.
Construction of the Garment
It is best practice—but not required—to use an overlock machine to do the bulk of the construction. You can use a lockstitch, coverstitch, or zigzag stitch to do the finish work. I use a combination of these, depending on the suit. You can line both the front and the back, or just the front as previously mentioned.
Sewing the crotch: I never line only the crotch area for all the reasons discussed above about what the function of the lining plays in the overall integrity of the garment. If using both a front and back lining, stack your garments in the following order in preparation to sew the crotch:
- Wrong side up of front fashion fabric—to right side up of back of fashion fabric—to wrong side up of back of lining—to right side up of front lining.
In essence, you have stacked the fashion fabric front and back, right sides together, and the front and back lining right sides together underneath. When you have completed sewing the crotch seam, the right side of the front lining should lie against the wrong side of the front fashion fabric, and same for back. The beauty of this is that the crotch seam is encased so the overlocked seam does not lie against the body. Ideally, you can do this for the side seams and shoulder seams too as well. My sewing order is crotch seam sewn, shoulder seams, then side seams. I do this in a chain fashion to save time, then clip the connected trail treads.

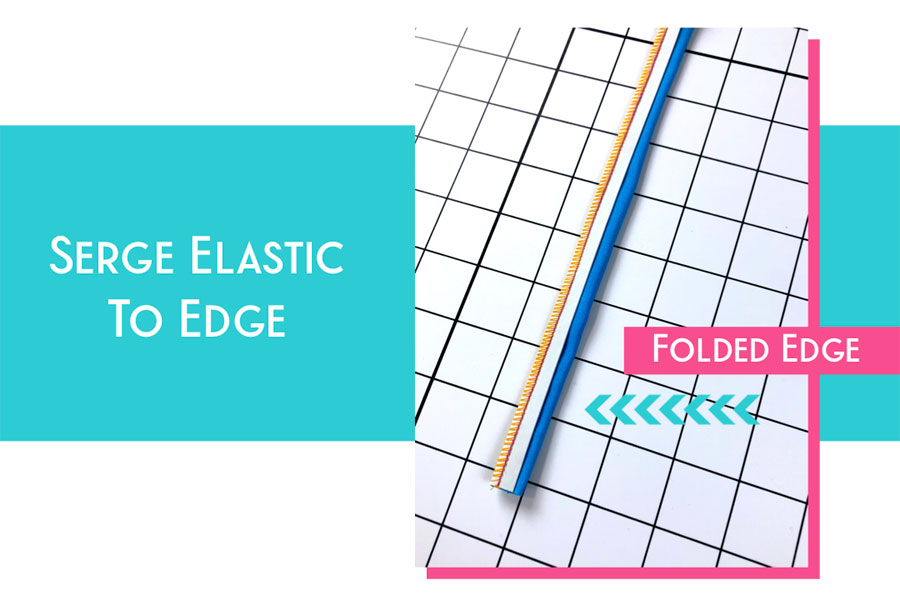
Applying the Elastic
Apply elastic to the wrong side of the swimsuit, on the lining side, with an overlock machine or zigzag stitch on your conventional machine. The stitch lengths and widths depend on size of elastic. Use a larger zigzag stitch on larger width elastics; however, a 2.5 width and 2-3 length is a good starting point. Although some use a three-step zigzag, I have found after years of experience that less-is-best when it comes to thread in the elastic as it will allow the elastic to keep its recoil and resiliency. Although I do use the three-step zigzag on lingerie
Type of Elastic
The best type of elastic for swimsuits is cotton braided elastic. It comes in a variety of lengths and has a beige or crème color to it. Knit elastic does not have the resiliency in the high-tension areas, and nylon braided is too thick. You can use latex elastic but if you so, use the no stretch techniques and make sure your patterns are commensurate with that.
Length of Elastic
Learning what NOT to do: Ready to wear now uses a smooth look to elastic. This means the elastic length is almost the same length as the opening. In order to do this, your pattern has negative ease, meaning smaller than the body size so that the garment stretches when on the body. This allows the garment to look smooth on the rack for retail, but is a lesson in what not to do on your custom garment.
Years ago, the elastic was stretched to fit the garment hole and I still use this technique today in certain areas of the suit to get the best secure fit, especially if the suit is used for exercise or competition. In a deep curve area, you stretch the elastic and it can be up to .9 % stretch factor. Measure the area to be elasticized and multiply by 0.9 — this will give you the elastic length. You can match one to one on straight lines, then stretch over curves. A perfect example of this is the armhole area. The strap has straight lines so keep the elastic one-to-one there but pull it to fit the length when going around the underarm. Don’t stretch the fabric, only the elastic. It is not hard and a technique you will acquire by practice and tenacity.

An alternative is to get machine feet or tension mechanisms to do the work for you. Personally, I find that you need various stretch techniques within one garment… and who has time to keep changing feet or attachments! If you use the stretching elastic technique, you will see the results in the garment when it’s off the body; however, remember that a swimsuit is worn on the body which is where it needs to fit well, be functional, and look good so don’t worry about the gathering effect that stretching elastic causes. Paying careful attention to this in the leg opening means a successful swimsuit. Stretch the elastic to fit over the backside of the swimsuit with less stretch in the front of the leg line. This helps the back “cup” over the derriere.
Practice with your elastic:
- Anchor a 5” piece of elastic to a table via tape or pin it to a garment, with a tape measure underneath.
- 5″ x .05 (5 percent stretch) =.25, so 5″+ .25 = 5.25.” Practice stretching the elastic from 5” to just under 5.25.“ Then practice stretching 5” to 9.5,” which is a 90% stretch, etc.
- You can calculate for any stretch coefficient you want. Oftentimes, lingerie will use a 3% strech, which is a very little bit but a good technique to practice when using very little stretch.
Neckline Elastic
Neckline elastic application for both front and back will use a combination of stretching elastic to little (3%) or no stretching, depending on the style lines.
I will often time write my cutter’s “must” measurements for each swimsuit on the patterns:
- Neckline opening, cut elastic _______
- Armhole opening, cut elastic _______
- Leg line opening, cut elastic ________
The Order of Things
The order for applying elastic to your swimsuit can be varied. I usually do neckline, armholes, and leg openings. Sometimes there is a back opening as in a keyhole back. When overlocking the elastic to the opening, it is placed on the wrong side of the garment, with the elastic side up, and the right side of the garment against the feed dogs.

You can also bind elastic edges to have a contrast look to your suit. When doing that, cut off the width of elastic for the area; for example, if using ¼” elastic, trim off ¼” from that opening. Then remeasure the area, cut a strip of binding the length of the opening (or you can use the stretch coefficient plus ½’ seam allowance). Sew the binding strip in the round technique and then pin to the opening right sides together. Cut the elastic at 90% stretch length, plus ½” overlap, and pin to the opening. You will have to stretch the elastic in the appropriate areas as you are sewing both the elastic and binding to the opening and trim off the excess after topstitching (see below.)
Topstitching to the Finish
Next on the list is topstitching. Turn the elastic to the wrong side when topstitching with either a zigzag or coverstitch machine. The right side of the fabric should face up and the elastic side should face the feed dogs. You could also stitch with the right side against the feed dogs and the wrong side up if using a zigzag stitch. If using a zigzag, zig on the elastic, then zag just at the edge or just off the edge, using the edge of the pressor foot as your guide depending on the width of elastic used. If using a coverstitch machine, keep the needles close to the outside edge of elastic so it will hold it down. Whichever way you decide to orient the fabric with respect to the feed dogs, use your left (or non-dominant) hand to hold the fabric in a perpendicular line to the line of the stitching. This will help keep tension on the spandex fabric so it is held snug to the elastic and you will not get any rippling. You may need to pull on the elastic as you go around the curves just like you did when inserting the elastic. Topstitch all the elasticized edges in any order you want. I typically do the neckline, then armholes and, finally, the legs.

If you need to do tacking of thin straps, then use a bar tack or a small-width, short-length zigzag stitch.
If you have decided to bind the elastic edges, you would need to trim off the area to be elasticized an amount equal to the width of the elastic on the garment itself. Remember you will not be turning under the elastic but rather turning the binding over the elastic and topstitching it from there. You can use a variety of methods to topstitch; zigzag, coverstitch, etc. Use your hands to pull the binding snugly over the elastic and around the wrong side of the garment by holding the edge of the binding with your non-dominant hand, and manage the topstitched area with our dominant hand. For example, I am right-handed, so I use my left hand to hold taught and slightly pull it perpendicular to the line of stitching while my right hand guides the garment. Sometimes your left hand (or non-dominant hand) will be underneath a part of the garment which is ok – you will get used to doing it with practice. Be especially careful around curves to keep the binding tight around the garment and the area being bound for a nice, smooth, topstitched finish.
Ironing It All Out

I iron my spandex when all is complete using a piece of silk or polyester organza over the garment which allows me to see the garment area to be pressed. Use steam over the elastic and allow it to recoil to its original (or mostly original) length. Finally, I always tell my customers, that to preserve the longevity of their garment, they should wash it in cold water, with clear, gentle detergent. Rinse it well, and hang the garment dry out of direct sunlight to preserve the elastic fibers.
Like any other type of garment, it will take practice to get acclimated to working with stretch garments but just think of all the suits you can make while trying. Not wearing swimsuits anymore? I am sure there are plenty of willing subjects who would be delighted to reap the benefits of your swimwear sewing musings! Long-lived and long-loved swimsuits is the end result.
~Kim Larcom, ASG Member (Boston Chapter), known as The Bridgewater Seamstress, is the Entrepreneur for Astrosportswear Activewear. She graduated from the Master Seamstress certificate program at the University of Rhode Island and owns her own custom activewear business.