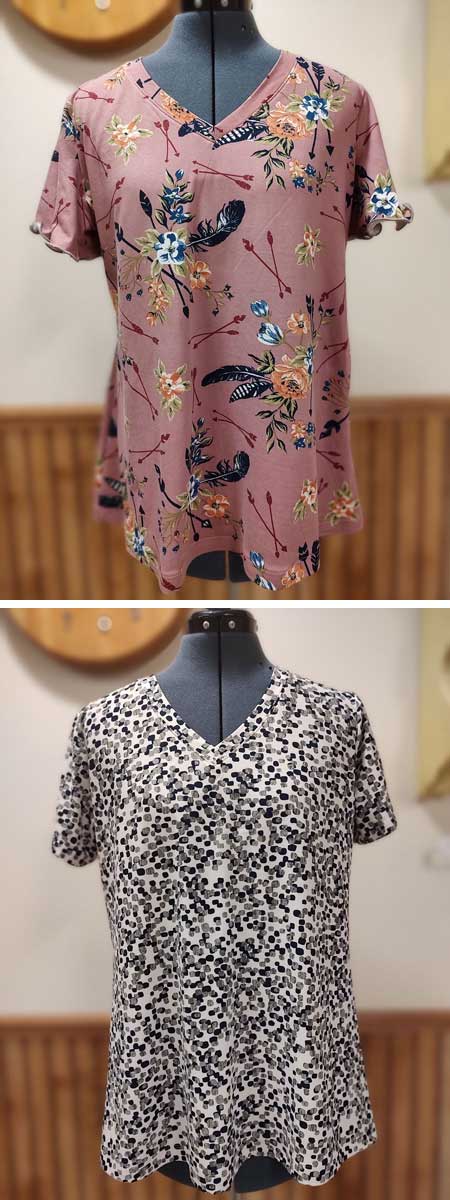
ASG Member, Kim Caywood, shares her experience making the Bondi 22 Knit Classic Fitted T-shirt from Sinclair Patterns:

Q: Item Created
A. Top
Q. Independent Pattern Designer
A. Sinclair Patterns
 Q. Name and Number of Pattern
A. Bondi 22
Q. Fabric Used:
A. Double Brushed Poly
Q. Special Embellishments/Notions Used
A. None
Q. Skill level required?
A. Confident Beginner
Q. Are the instructions easy to follow?
A. As with all Sinclair patterns the instructions are easy to follow with well written text and photos to match. There are step by step instructions.
Q. Are you pleased with the finished result? Did it meet your expectations?
A. This top more than meets my expectations! I have made several tops with this pattern because it’s such a simple pattern to make
Q. Did it look like the picture?
A. Yes it looks just like the picture
Q. Did you make any modifications in the pattern?
A. No modifications were made to the pattern. They also offer two sleeve add-on patterns. One is puffed sleeves and the other is flared.
Q. Are there any changes you would have made?
A. This pattern is great just the way it is.
Q. Did the pattern teach you any unique or special techniques?
A. I learned how to make a V-neck.
Q. Would you make this again?
A. Most definitely
Q. Would you recommend this pattern to others?
A. Yes I would. I have found Sinclair Patterns to have the best fit. They offer all their patterns in Petite, Regular and Tall.
Editors Note: This pattern comes in in sizes up to a 4X
~Kim Caywood, ASG member

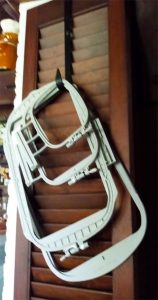 After breaking one of her embroidery hoops by laying it down on a table and then placing something on top of it, Rosemary from NJ bought a wreath hanger from a dollar store. She now slips the hanger over a door near her embroidery machine and actually remembers to place the hoops on the hanger when not embroidering. No more broken hoops!