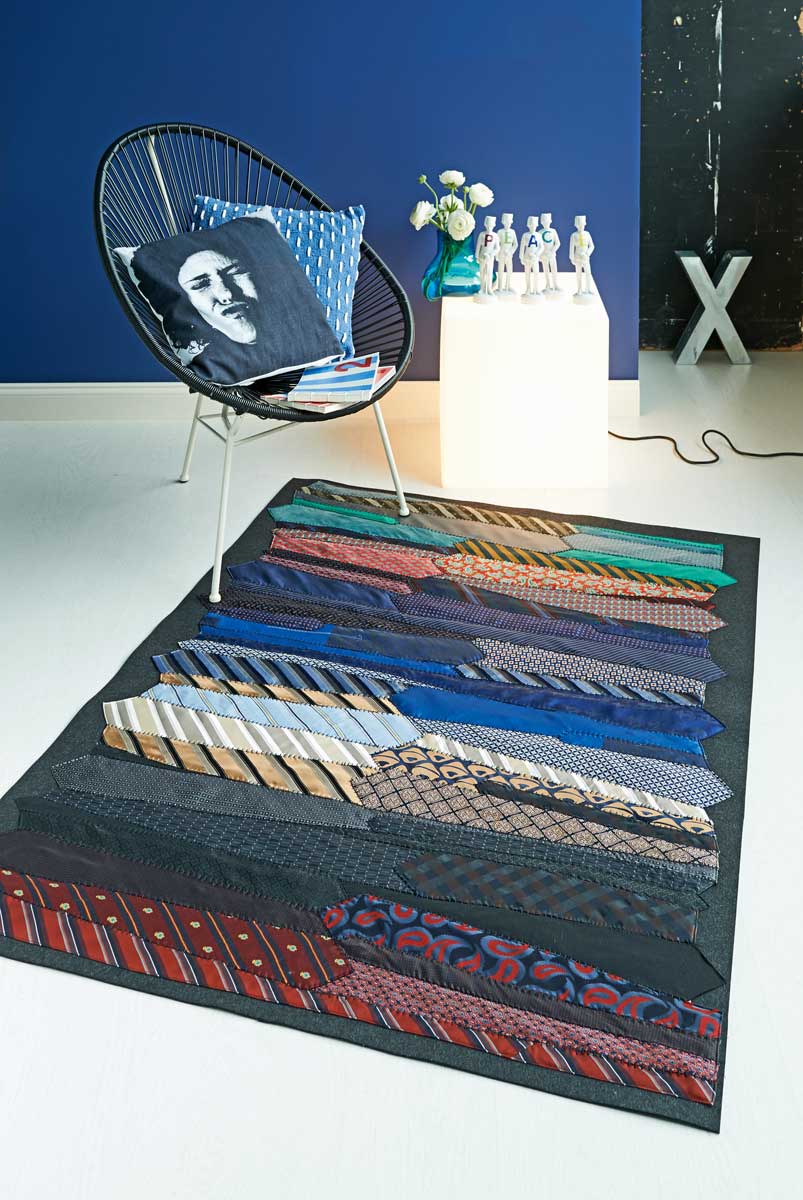
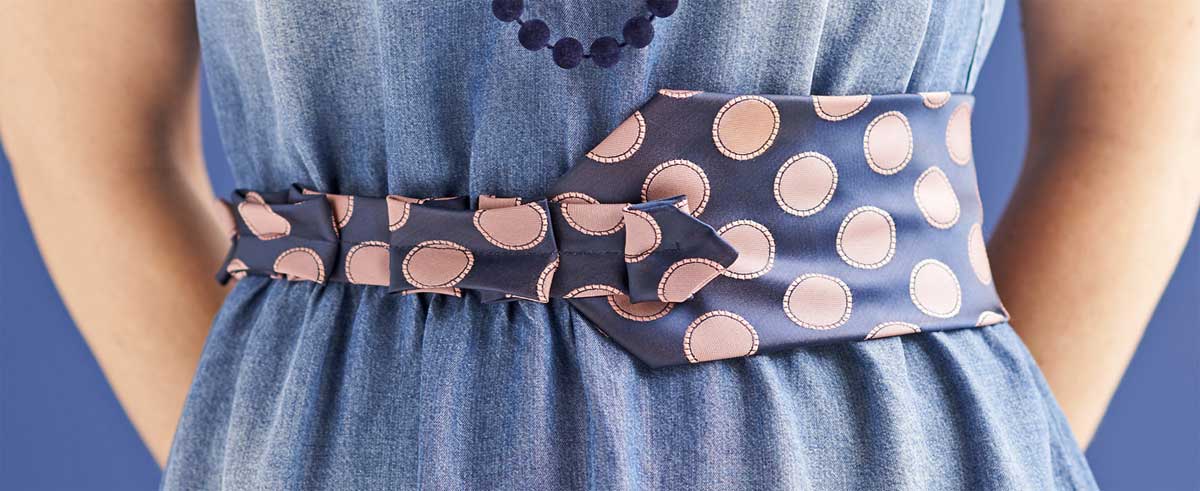
An Advent calendar with pockets that holds cards suggesting the day’s special activity or a special treat is a popular tradition with children of all ages. The first Advent calendars originated as early as the 19th century and was used to mark the countdown in December to Christmas. Advent calendars are 24 or 25 days beginning December 1 and ending December 24 or 25. ASG member, Sara Scheil, shared the instructions for one she made one for her children.
Materials
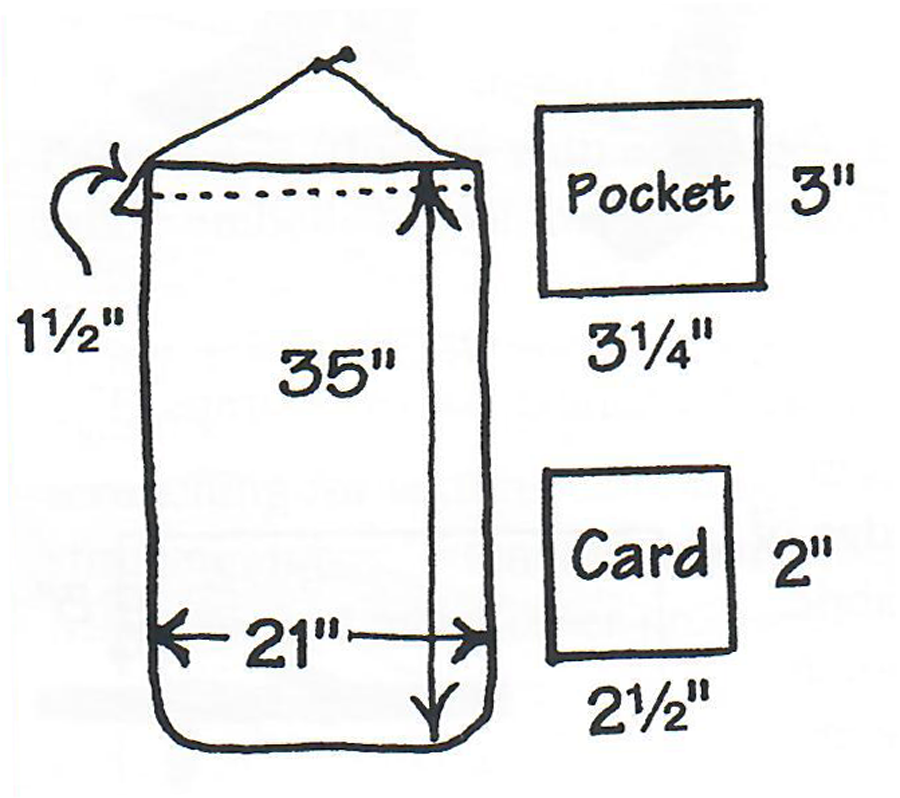
- 21″ x 36″ piece of sturdy fabric (quilted fabrics work well for this)
- 6″ – 10″ of solid color coordinating fabric. A fabric with body will work best.
- 21″ of 3/8″ wood doweling
- Approximately 30″ of cord or fabric tube for a hanger
- Card stock and fabric paint in contrasting color
Instructions
 Edge finish the quilted fabric on all sides (serge with a overlock stitch or bind with a narrow bias tape).
Fold down the top edge 1″ and stitch along the edge to form a casing for the dowel rod. Include the cord or fabric tube used for the hanger in this stitching by positioning the ends at each outer edge on the underside of the calendar.
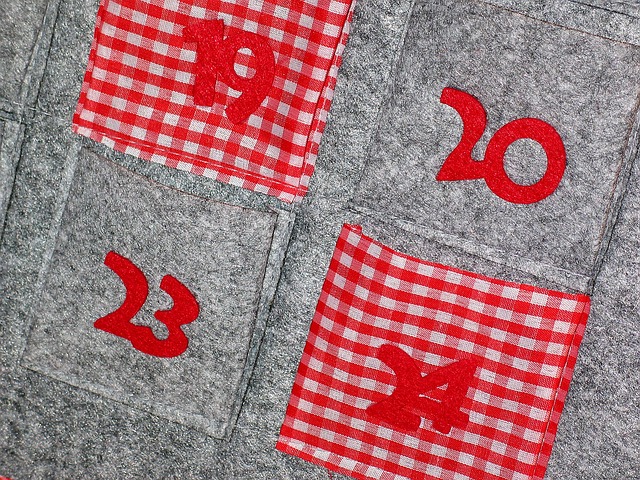
On the solid colored fabric, using a ruler and fabric marker or chalk pencil, draw lines to make the pocket rectangles 3″ high and 3 1/4″ wide. Edge finish with the serger using a narrow stitch such as a rolled hem. Pinking the edges could be a substitute. Make 25 rectangles for the pockets.
On each pocket, paint, embroider, or applique the numbers 1 through 25 for the days of the calendar.
Optional: You may wish to title your calendar. Consider painting the words “Advent Calendar” on a rectangle approximately 3″ high and at least 12″ long of the solid fabric. Edge finish and topstitch on the upper 4″ space of the calendar.
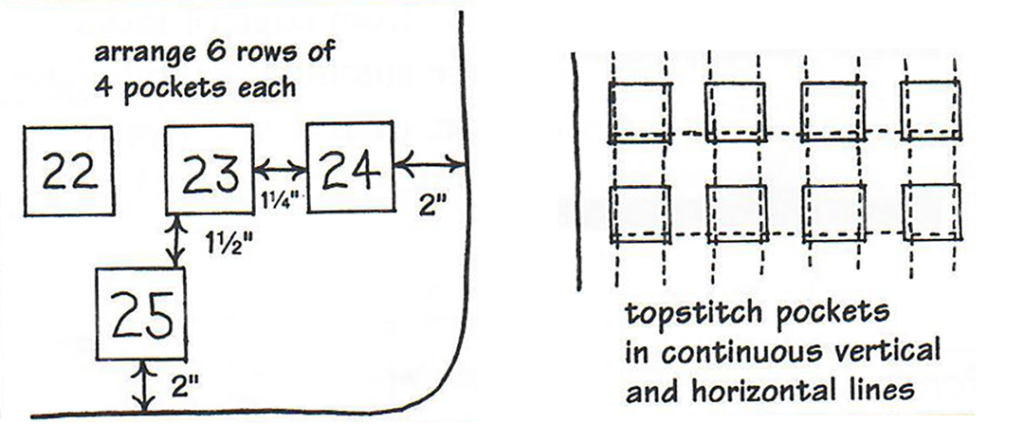
Layout the 25 pockets on the calendar using the suggested measurements as a guide. Secure with washable glue stick. Let dry. Top-stitch the 3 sides of each rectangle by stitching each row with a continuous vertical and horizontal stitching line. Day 25 will be done separately in a “U” shape, of course.
Cut card stock into pieces 2″ high and 2″ wide. On the cards, record activities that your family enjoys or that are important to you during this season. Alternatively, you can include small gifts or candies in each pocket.
 Card/Pocket Ideas

- Play Christmas music
- Put up the Christmas tree
- Drive around to see the lights and decorations
- Make Christmas cookies
- Read the Christmas story
- Look at photos from previous Christmas seasons
- Hang stockings
- Visit Santa
- Special treat
- Craft supplies
- Pieces of a larger toy set given in a few pieces each day (LEGO’s are great for this)
- Chocolates
- Small jewelry or accessory items
Sara shares that her children would race to the calendar each morning to read the card. The surprise of what the day’s activity would be was very exciting. Seeing what day of the month it was not only taught them about the calendar sequence but avoided repetitive questions about when Christmas would be here. The activities they chose encouraged family togetherness and reminders of the meaning of the holiday.
~ This project is adapted from an article by Sara Scheil published in a previous issue of Notions.


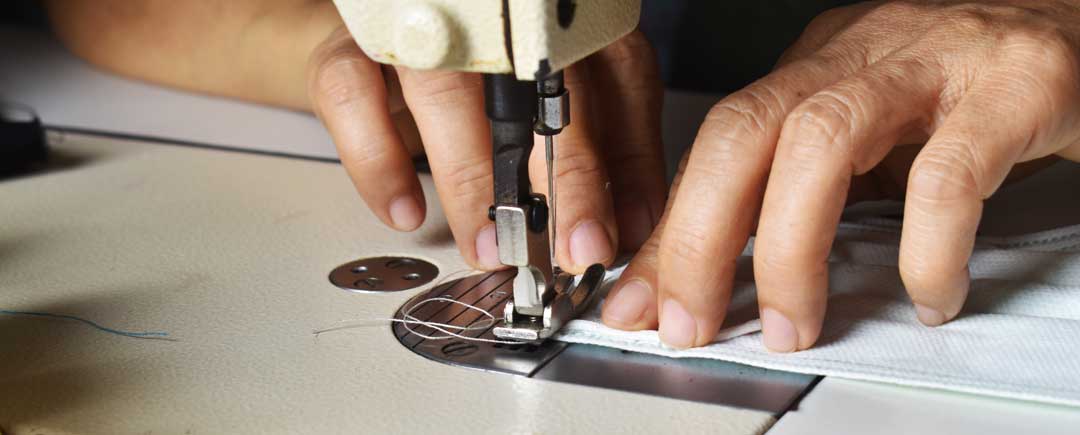
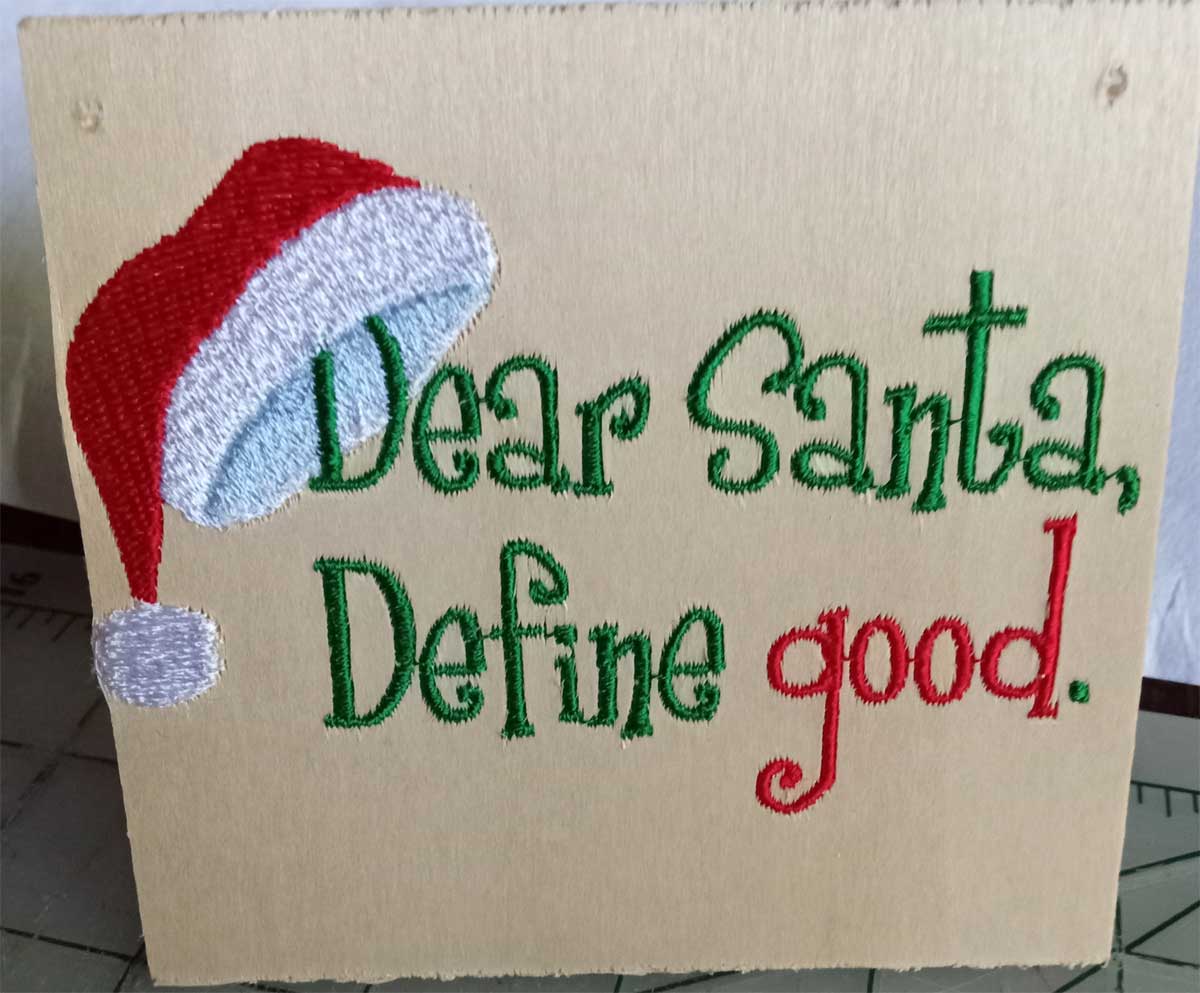

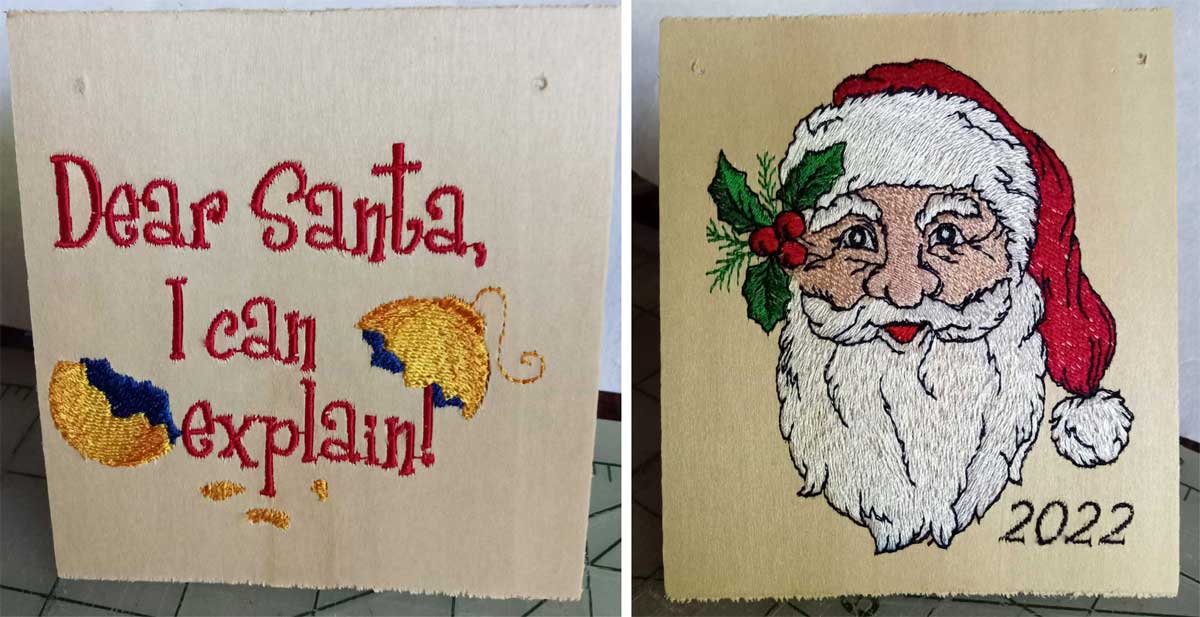
 Each penetration of the needle creates a hole in the wood that does not heal so it is best to use the smallest needle that can get the job done. The samples shown here were all stitched with a 75/11 universal needle. The needle will dull more quickly than normal stitching through fabric, so be sure to change it frequently and make sure to keep any that you use designated for wood. My needle did over 100,000 stitches and was still going strong! It is also a good idea to stitch at a slower speed — setting the machine at 600 stitches per minute should be fine in most cases. Begin each design by lowering the needle into the wood, then starting the stitch out. This small trick seems to anchor the wood to the stabilizer and helps reduce the impact of that first stitch, thus avoiding broken needles.


 A. A shop hop is an event organized by many fabric store owners in a region who cooperate together for one cause—enticing consumers to visit. Shop hops are usually sponsored by quilt store owners, but sometimes other fabric stores join in the fun.