


 Careful finishing touches on a garment are a reflection of your overall sewing skills. No matter how well your garment looks, something as simple as a puckered hem can easily detract from your garment’s overall appearance.
Do you know what may cause your hems to pucker and ripple? It might be as basic as the fact that the hem allowance doesn’t reflect the inside width and shape of the side seams.
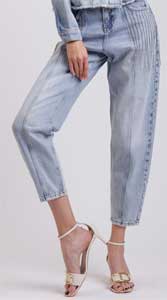
Sewists of all skill levels can learn how to make pattern-perfect hems. Whether you need to shorten your new pair of cropped pants or you are in the final stages of completing the perfect pair of pants you made from scratch, you will benefit from these directions for truing a hem. The dictionary describes “truing” as conforming to or consistent with a standard pattern, like a true copy. To true a pattern means to make all the pieces match and join so the facings are perfect mirror images of their corresponding garment sections.
The full version of this article is available on the ASG Members Only blog and requires member login.
CLICK HERE to read the full article. Not a member? Join online!

 Princess-line seams often result in a smoother line that allows for a body-skimming fit. They can also be more flattering than typical darts, especially if you have a large bust or shoulders as they not only help to flatter curves, but allow for more opportunities for fitting. They can also be used to create a unique style to the garment by using contrasting fabric or color blocking, or even to add a piped contrasting trim.