Whenever ASG members are asked what they love about their organization, high on the list is always the willingness of fellow members to share ideas and help out with solutions. This is true, especially in neighborhood group meetings held in person or on electronic platforms.
The Princeton, NJ Chapter’s “Thread Magicians,” is an online machine embroidery group that is open to all ASG members regardless of their chapter affiliation. ASG members can complete the Group Request here. Non-members can join ASG as part of a chapter or become a member-at-large to participate in this group.
Here are just a few of the tips shared at a recent meeting:
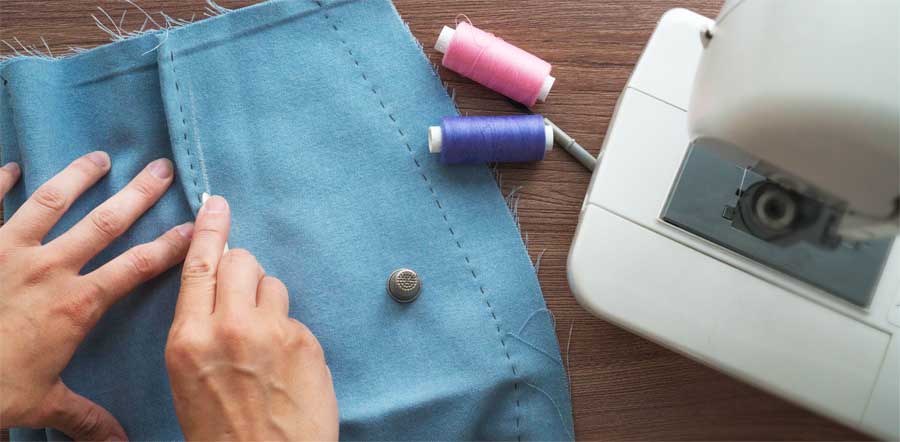
Thread Nets
Marsha in Oregon said she rarely uses the thread nets that are supposed to be used on spools of thread to tame the feeding of thread from the spool to the machine. Instead, she places the nets on rolls of stabilizer to prevent them from unrolling while in storage as well and keeping the plastic use instructions right with the stabilizer. Since the nets are see-through, it is easy to see labels and instructions through the nets without removing them.
Storing Rolls of Stabilizer
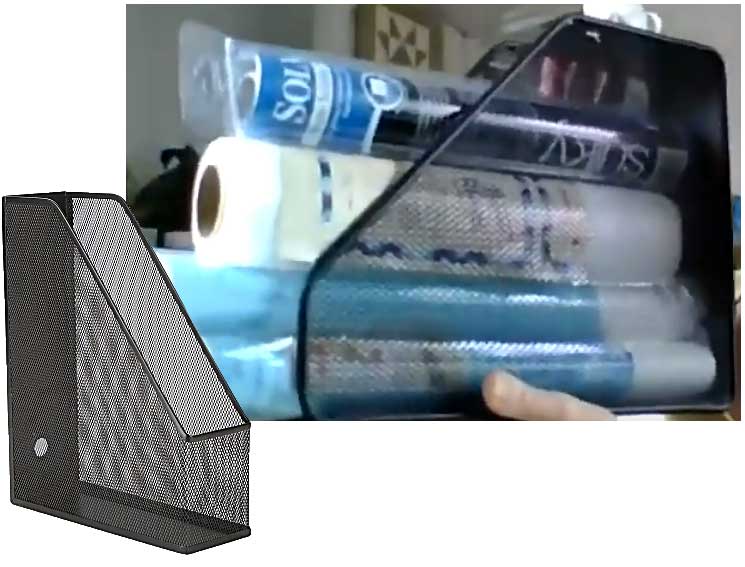 To store rolls of stabilizer, Dale from New Jersey suggested getting some magazine storage containers. The containers all have the same basic shape but can come in cardboard, plastic, metal, or wood. Turn them so they sit on their longest side and tuck the rolls of stabilizer inside. The containers allow the stabilizers to be stacked without fear of them rolling away.
Dale also added that if you have ever had thread unwind and become a massive bird’s nest right on the spool, she suggests turning the spool upside down and allowing the thread to unwind so the nest can be removed. (And yes, this one worked great!)
Thread Organizers
Beverly and Kendra, also from NJ, recycle egg cartons into thread organizers. They number the 12 or 18 compartment cartons and place thread spools into each compartment to keep colors in the order in which they will be used in a design. Even large cones can be inverted and placed in the cartons top down without any trouble. This certainly beats frantically searching for the right color only to find it rolled away during the last thread change. Kendra also suggested using a pet wrap like Coband to wrap around your hoop to prevent slippery fabrics from sliding in the hoop. It doesn’t leave a sticky residue like other tapes. Paper tape from the first aid section of the dollar store also works well for placement of pieces during appliqué or in-the-hoop projects.

Speaking of organizing threads, Constance from Florida suggested cutting pieces of clingy plastic into 1” x 6” or 2” x 6” strips to wrap around thread spools to keep thread from unrolling. The plastic can be purchased from a variety of box stores or recycled from packaging like those that blankets come in. To help keep track of the strips while using the thread, Constance places a line made with a grease pen or permanent marker down the center of the strip, providing a visual reference on an otherwise clear surface. This makes the strip easier to see when not on the spool. For her bobbins, she takes a small box and lines it with double sided tape. When she places bobbins in the box, the tape holds them in place, preventing them from falling out or bouncing around in the box and unwinding and becoming tangled. To be doubly sure the bobbins don’t unwind, she also uses aquarium hose cut to the specific width of her bobbins. She then makes a slit in the hose so that she can slip it around the bobbin holding the thread in place. While many members used ponytail bands to slip around spools and bobbins, the aquarium hose is a smoother, sleeker look and allows bobbins to slip easily into store-bought bobbin holders.
Organizing Appliqué Pieces
Andi in California likes to use page protectors from the stationery store to organize her appliqué pieces. She cuts out the various parts of the appliqué and places them in the page protector along with any notes or instructions. When she is ready to work, the pieces are all together and ready to go. These are especially helpful when she is traveling to a retreat to do the work. Unlike the paper plates she used before, the protectors can be stored in a notebook and don’t slide or allow pieces to escape.
Added Work Surface
While browsing a thrift store, Christine from NJ found a bedside table like the kind that are usually found in hospitals. She said she didn’t know what she would do with it, but she purchased it anyway. Now it is her constant companion while sewing. She can wheel it up to her cutting table and adjust the height to give her extra room for her cutting tools, or even move her sewing machine around the house or outside. It is extra sturdy and can easily handle the weight of her sewing machine as well as the vibration when sewing.
Spraying Adhesives
From Arizona, Sandy suggested cutting the bottom from a gallon milk container and placing the opening over the item she wants to spray with adhesive. She then takes her spray can nozzle and sprays through the top of the container. The sides of the milk container prevent the overspray from traveling around her sewing space and getting everything sticky.
Organizing Machine Feet
To organize her machine feet, Lynda from NJ uses a pill organizer. The compartments are just the right size for most feet and are easily seen through the plastic container. She also says a toe separator used for pedicures makes a great bobbin holder. And if you run out of toppers for embroidery, Glad Press and Seal will work in a pinch. It won’t wash away, but it tears easily.
Storing Embroidery Hoops
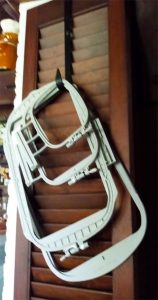 After breaking one of her embroidery hoops by laying it down on a table and then placing something on top of it, Rosemary from NJ bought a wreath hanger from a dollar store. She now slips the hanger over a door near her embroidery machine and actually remembers to place the hoops on the hanger when not embroidering. No more broken hoops!
Go Green
Elaine in Massachusetts shared her “go green” ideas. The Boston Chapter made lint cleaners for attendees at the 2019 conference. Members took a coffee stirrer and half of a chenille stem. The ends of the chenille stem were looped around and inserted into the opening at one end of the stirrer, and voila, a lint brush that gets into those tight spaces around the bobbin case for the embroidery machine or the serger. Elaine also puts her Edge gum boxes to use. She labels them and places her packages of machine needles inside so that she can see at a glance her packages of needles separated by size.
There were also endorsements of a number of products that members find especially helpful.
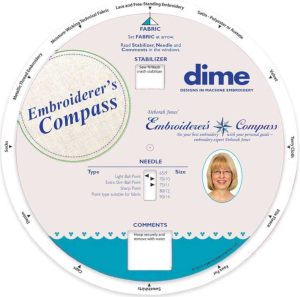
- Tina from Oregon recommends the Embroiderer’s Compass from dime for matching up the right stabilizer with the right fabric. By simply rotating the disks, this tool gives suggestions for the stabilizer as well as toppers.
- The Perfect Box Bottom is one of Gini’s suggestions from Texas. She says it makes squaring up the bottoms of boxes or purses a breeze.
- The Hoop Mat by dime was also noted by Beverly as a handy embroidery tool. It prevents the embroidery hoop from sliding away while trying to hoop the fabric. The lines on the mat also help with aligning items.
So, whatever part of the country you hale from, we hope you found some of these tips and hacks useful. Happy stitching!
~Rosemary Fajgier, former ASG Board Chair