American Sewing Guild (ASG)

Visit our blog Visit the ASG Facebook page Visit ASG on Pinterest Visit ASG's YouTube channel Visit ASG on Instagram
  • Home
  • Join ASG
    • Join Online
    • Chapter Locations
    • Member Benefits
    • Member Brochure
    • Join by Mail
  • Conference & Education
  • Resources
    • Contests & Awards
    • Giving Back
    • Hall of Fame
    • Links
    • Travel and Tours
    • Measurement Chart
  • Shop
    • ASG Store
    • Chapter Products
    • Video Resources
  • Blog
  • About
    • About Us
    • Donate to ASG
    • ASG Sensitivity Statement
    • FAQ’s
    • Start a Chapter
  • Contact
  • Member Login
    • Login First!
    • Members Only
    • Leadership Only
    • Website FAQ’s
    • Logout
  •  

November 3, 2023

Stabilizers: Not Just for Embroidery

Firming Things Up

Embroidery Stabilizer
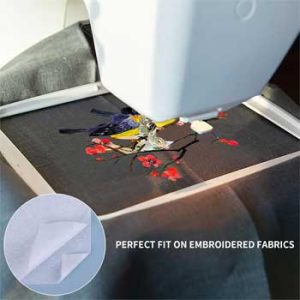
View on Amazon. We may earn a small commission on your purchase at no extra cost to you.

If you own an embroidery machine, chances are good you have a drawer full of various types of stabilizers needed for your embellishing. However, if you don’t have an embroidery machine, you may not think you need stabilizers—but think again!

What is stabilizer?

Simple answer—something to put behind or over fabric temporarily to well, stabilize it, while stitching. Because machine embroidery uses dense stitches and lots of thread, stabilizers help to eliminate puckering.

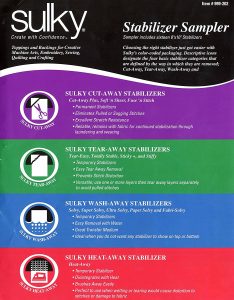
Stabilizers come in a variety of constructions—from woven and non-woven to mesh, film and liquid. They have a variety of application methods, from sew-in to fusible to self-adhesive. And, they have a variety of removal methods, from cut-away and tear-away to heat-away and water-soluble. Check out your store’s offerings for a multitude of mix-and-match construction, application and removal methods.

Note that most stabilizers are designed to be temporary, while similar products called interfacings are meant to be permanent. Stabilizers can also become permanent additions to your project.

So, even if you don’t do embroidery…you need stabilizer too! Here’s why:

Decorative stitching can cause some fabrics to pucker and distort, and if the stitches are especially wide, they can cause “tunneling” which means the edges of the stitches pull in toward each other. Using a stabilizer underneath can help eliminate these issues. Another option is to use liquid stabilizer to stiffen the fabric prior to stitching, then wash it out after stitching.

Appliqué, especially on lightweight fabrics or knits, can also cause puckering, so place stabilizer under the area you’re working with to keep the appliqué and the base fabric pucker-free.

Beading and sequins can cause distortion due to the added weight, so adding a stabilizer under the area will help with support. This is one area where a stabilizer can be left in permanently.
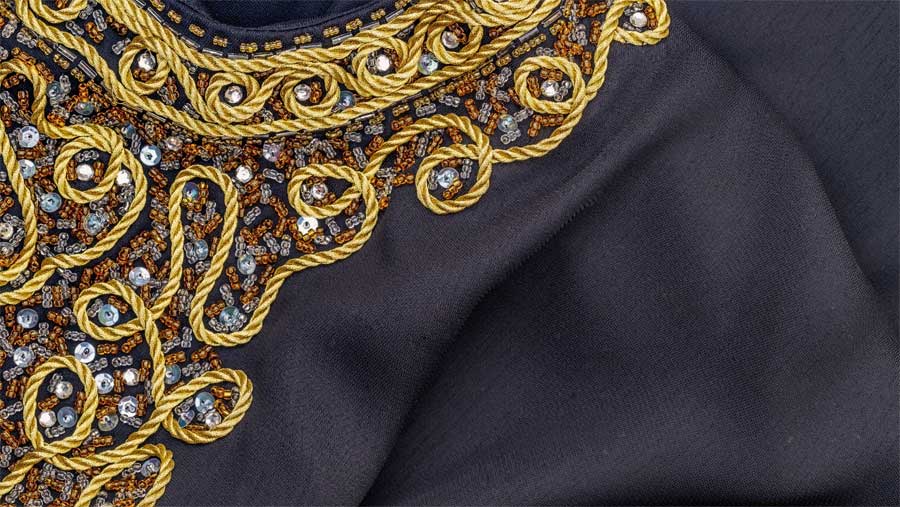
Add stabilizer to support the weight of beading

Off-the-edge stitching can play havoc with your sewing machine, as well as the fabric edge, so if you’re trying to stitch scalloped or picot edging, lay a piece of wash-away stabilizer under the edge and extending about ½”. After the stitching is complete, remove the stabilizer, leaving only your delicately stitched edge.
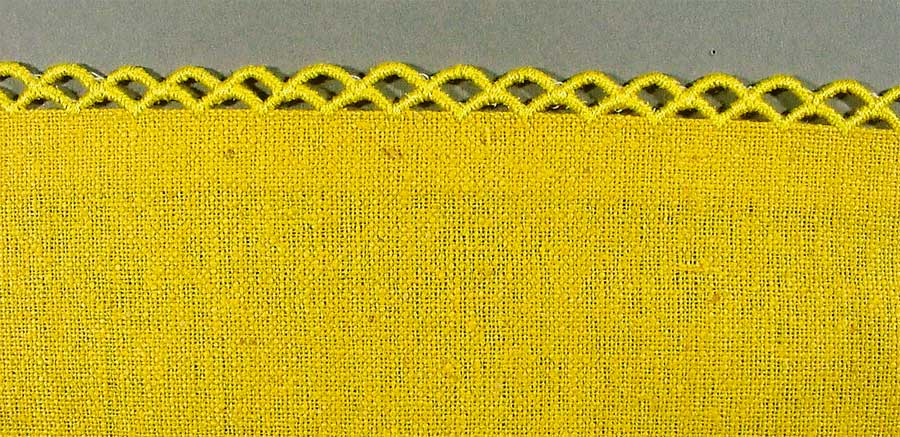
Picot Edge (image compliments of Bernina)

Serger rolled hems sometimes leave pesky fabric threads poking through the serger threads, but if you wrap the edge in a narrow strip of water-soluble stabilizer before sewing, those troublesome threads will be contained. If you’re serging a regular stitched edge, liquid stabilizer along the fabric edge will help keep it flat.

Buttonholes sometimes stretch, despite our best interfacing efforts, but adding a strip of stabilizer on the top and bottom of the fabric can help minimize distortion. A clear film stabilizer is ideal for this purpose. This technique also works well for buttonholes and seams on a textured fabric, like bouclé or loosely woven suiting, where the fabric threads or nubs may catch on the presser foot toes. Stabilizer makes for smooth stitching lines by compressing the surface texture.
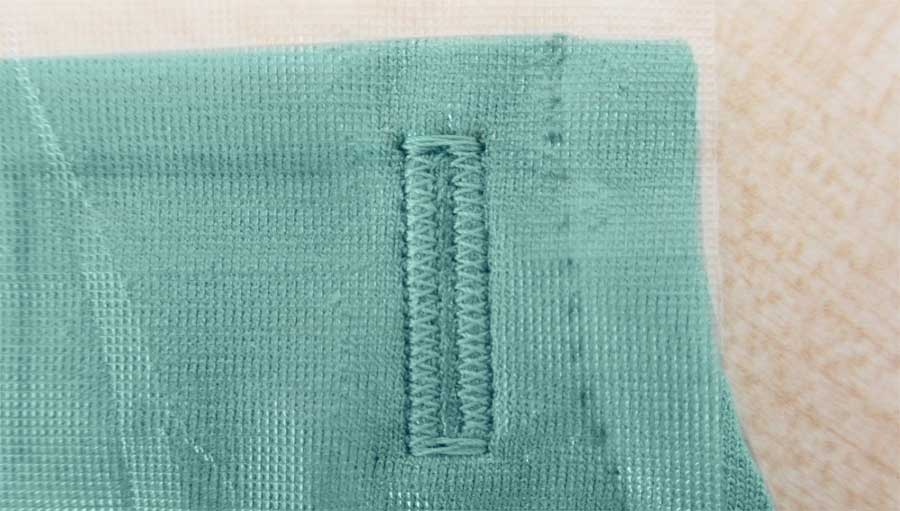
Stabilizing a buttonhole

Sewing sheer fabrics can sometimes be a wrestling match, as they tend to slip, slide and stretch during construction. But with the addition of a liquid stabilizer, seamlines can be stable for stitching, and edges firmed for hemming. Stabilizing the fabric itself can also make for easier and more accurate cutting. This assumes your sheer fabric is washable to remove the stabilizer after construction.

Couching—the addition of yarns, ribbons and trims with either controlled or free-motion stitching—can also cause distortion in the base fabric, but adding a stabilizer firms up the surface for easier attachment.

Creating your own free-form fabric or scarves using just yarns is easy–just sandwich the fibers between layers of clear wash-away stabilizer. Stitch in place, then rinse away.

Hemstitching with a wing needle can sometimes damage the fabric as the needle “wings” can catch on fabric threads, pulling them into the needle hole. Liquid stabilizer can eliminate that and create well-defined holes for your design.
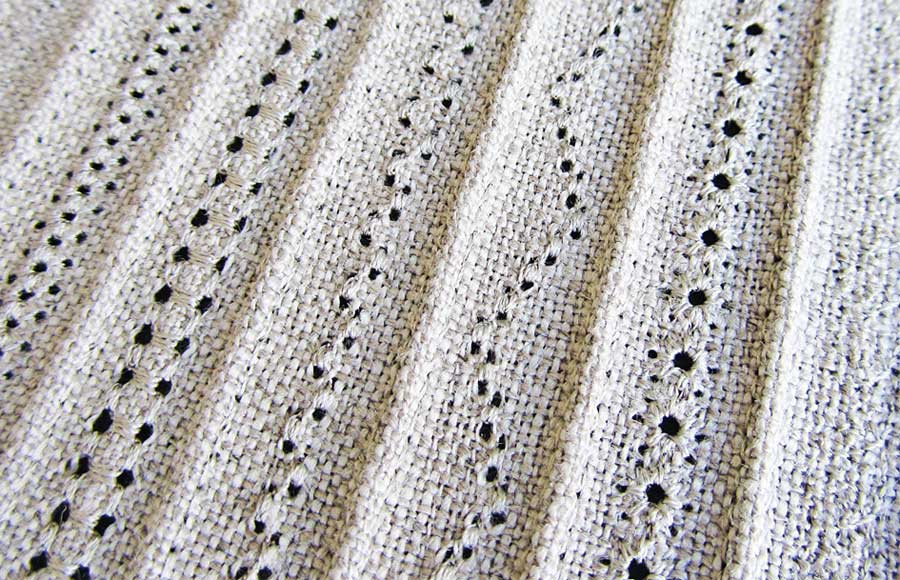
Wing Needle (image compliments of Bernina)

Die-cutting is a great place to use stabilizer for cleaner edges on lightweight cottons. Some stabilizers come in pre-cut sheets specifically for this purpose.

Paper-piecing is an ideal place to use an inkjet-printable stabilizer. Just print multiples of your quilt blocks and you’re ready to stitch on clearly printed lines.

So, even if you’re not a machine embroiderer, you will need a drawer of various stabilizers—trust me!


~Linda Griepentrog is the owner of G Wiz Creative Services and she does writing, editing and designing for companies in the sewing, crafting and quilting industries. In addition, she escorts fabric shopping tours to Hong Kong. She lives at the Oregon Coast with her husband Keith, and three dogs, Yohnuh, Abby, and Lizzie. Contact her at .

Did you enjoy this article?
Are you an ASG member?
This field is for validation purposes and should be left unchanged.

Tagged With: buttonholes, embroidery, stablizers

July 22, 2022

Tips and Hacks for Machine Embroidery

Whenever ASG members are asked what they love about their organization, high on the list is always the willingness of fellow members to share ideas and help out with solutions. This is true, especially in neighborhood group meetings held in person or on electronic platforms.

Thought bubbles

The Princeton, NJ Chapter’s “Thread Magicians,” is an online machine embroidery group that is open to all ASG members regardless of their chapter affiliation. ASG members can complete the Group Request here. Non-members can join ASG as part of a chapter or become a member-at-large to participate in this group.

Here are just a few of the tips shared at a recent meeting:

Thread Nets

Marsha in Oregon said she rarely uses the thread nets that are supposed to be used on spools of thread to tame the feeding of thread from the spool to the machine. Instead, she places the nets on rolls of stabilizer to prevent them from unrolling while in storage as well and keeping the plastic use instructions right with the stabilizer. Since the nets are see-through, it is easy to see labels and instructions through the nets without removing them.

Storing Rolls of Stabilizer

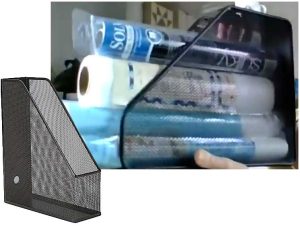
To store rolls of stabilizer, Dale from New Jersey suggested getting some magazine storage containers. The containers all have the same basic shape but can come in cardboard, plastic, metal, or wood. Turn them so they sit on their longest side and tuck the rolls of stabilizer inside. The containers allow the stabilizers to be stacked without fear of them rolling away.

Dale also added that if you have ever had thread unwind and become a massive bird’s nest right on the spool, she suggests turning the spool upside down and allowing the thread to unwind so the nest can be removed. (And yes, this one worked great!)

Thread Organizers

Beverly and Kendra, also from NJ, recycle egg cartons into thread organizers. They number the 12 or 18 compartment cartons and place thread spools into each compartment to keep colors in the order in which they will be used in a design. Even large cones can be inverted and placed in the cartons top down without any trouble. This certainly beats frantically searching for the right color only to find it rolled away during the last thread change. Kendra also suggested using a pet wrap like Coband to wrap around your hoop to prevent slippery fabrics from sliding in the hoop. It doesn’t leave a sticky residue like other tapes. Paper tape from the first aid section of the dollar store also works well for placement of pieces during appliqué or in-the-hoop projects.

thread

Speaking of organizing threads, Constance from Florida suggested cutting pieces of clingy plastic into 1” x 6” or 2” x 6” strips to wrap around thread spools to keep thread from unrolling. The plastic can be purchased from a variety of box stores or recycled from packaging like those that blankets come in. To help keep track of the strips while using the thread, Constance places a line made with a grease pen or permanent marker down the center of the strip, providing a visual reference on an otherwise clear surface. This makes the strip easier to see when not on the spool. For her bobbins, she takes a small box and lines it with double sided tape. When she places bobbins in the box, the tape holds them in place, preventing them from falling out or bouncing around in the box and unwinding and becoming tangled. To be doubly sure the bobbins don’t unwind, she also uses aquarium hose cut to the specific width of her bobbins. She then makes a slit in the hose so that she can slip it around the bobbin holding the thread in place. While many members used ponytail bands to slip around spools and bobbins, the aquarium hose is a smoother, sleeker look and allows bobbins to slip easily into store-bought bobbin holders.

Organizing Appliqué Pieces

Andi in California likes to use page protectors from the stationery store to organize her appliqué pieces. She cuts out the various parts of the appliqué and places them in the page protector along with any notes or instructions. When she is ready to work, the pieces are all together and ready to go. These are especially helpful when she is traveling to a retreat to do the work. Unlike the paper plates she used before, the protectors can be stored in a notebook and don’t slide or allow pieces to escape.

Added Work Surface

While browsing a thrift store, Christine from NJ found a bedside table like the kind that are usually found in hospitals. She said she didn’t know what she would do with it, but she purchased it anyway. Now it is her constant companion while sewing. She can wheel it up to her cutting table and adjust the height to give her extra room for her cutting tools, or even move her sewing machine around the house or outside. It is extra sturdy and can easily handle the weight of her sewing machine as well as the vibration when sewing.

Spraying Adhesives

From Arizona, Sandy suggested cutting the bottom from a gallon milk container and placing the opening over the item she wants to spray with adhesive. She then takes her spray can nozzle and sprays through the top of the container. The sides of the milk container prevent the overspray from traveling around her sewing space and getting everything sticky.

Organizing Machine Feet

To organize her machine feet, Lynda from NJ uses a pill organizer. The compartments are just the right size for most feet and are easily seen through the plastic container. She also says a toe separator used for pedicures makes a great bobbin holder. And if you run out of toppers for embroidery, Glad Press and Seal will work in a pinch. It won’t wash away, but it tears easily.

Storing Embroidery Hoops

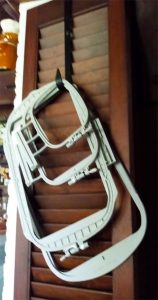
Embroidery hoop storage ideaAfter breaking one of her embroidery hoops by laying it down on a table and then placing something on top of it, Rosemary from NJ bought a wreath hanger from a dollar store. She now slips the hanger over a door near her embroidery machine and actually remembers to place the hoops on the hanger when not embroidering. No more broken hoops!
Go Green

Elaine in Massachusetts shared her “go green” ideas. The Boston Chapter made lint cleaners for attendees at the 2019 conference. Members took a coffee stirrer and half of a chenille stem. The ends of the chenille stem were looped around and inserted into the opening at one end of the stirrer, and voila, a lint brush that gets into those tight spaces around the bobbin case for the embroidery machine or the serger. Elaine also puts her Edge gum boxes to use. She labels them and places her packages of machine needles inside so that she can see at a glance her packages of needles separated by size.

There were also endorsements of a number of products that members find especially helpful.

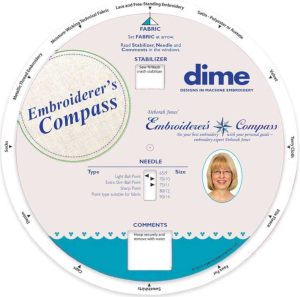
  • Tina from Oregon recommends the Embroiderer’s Compass from dime for matching up the right stabilizer with the right fabric. By simply rotating the disks, this tool gives suggestions for the stabilizer as well as toppers.
Embroiderers Compass on Amazon
Embroiderers Compass on Amazon. We may earn a small commission if you make a purchase.
  • The Perfect Box Bottom is one of Gini’s suggestions from Texas. She says it makes squaring up the bottoms of boxes or purses a breeze.
  • The Hoop Mat by dime was also noted by Beverly as a handy embroidery tool. It prevents the embroidery hoop from sliding away while trying to hoop the fabric. The lines on the mat also help with aligning items.

So, whatever part of the country you hale from, we hope you found some of these tips and hacks useful. Happy stitching!


~Rosemary Fajgier, former ASG Board Chair

Did you enjoy this article?
Are you an ASG member?
This field is for validation purposes and should be left unchanged.

Tagged With: embroidery, machine embroidery, sewing, sewing room tips

December 3, 2021

Creating a Monogram

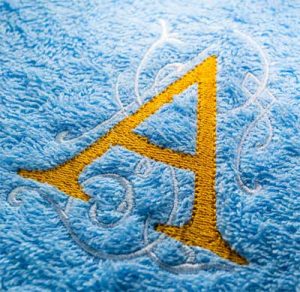
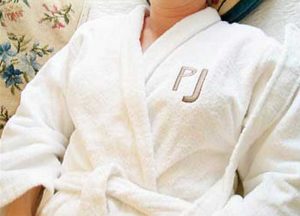
Monogrammed robeWhether it’s an item you’ve made or an item you’ve bought, a monogram is a wonderful way to add a personal touch. And if you’re pressed for sewing time, it’s a great way to solve your gift-giving dilemmas. For example, if you don’t have time to make a robe, buy it and personalize it… with towels to match!

Monograms are usually composed of capital letters. Until the beginning of the 20th century, a single initial, usually the last initial, was the most common style. Today, one-, two-, and three-letter monograms are all equally common but the most conventional monogram arrangement consists of three letters: a larger central letter, flanked by two smaller letters, one on each side. Generally, the center letter is the surname or last name, with the letter on the left representing the first name, and the letter on the right representing the middle name. This arrangement makes sense for an individual with three initials available. Typically, each member of the household sharing the same surname would have their own monogram. A married couple might choose to blend their individual initials into a common monogram. For example, John R. Smith, who marries Katherine L. Brown, might create the common monogram JSK. In contemporary life, it would also be acceptable to use KSJ, with the woman’s initial appearing first.

Arranging the Letters

The spacing of the letters and their position relative to each other will vary depending on the style of lettering, the letters themselves, and your own personal preference.

When you work with individual designs for each letter, you have complete control over placement and spacing. Just move the letters around onscreen until you are happy with the results, then save the combination under a new file name—one that you can easily remember.

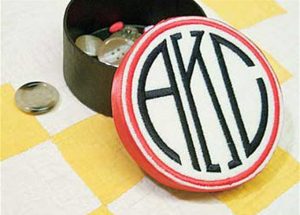
Embroidered boxSeveral of the EmbroideryArts styles (e.g., Circle, Empire) have left, middle, and right versions of each letter. Although the individual letters can still be used alone, these styles are designed to make three-letter monograms that form a specific shape, so the left side A, for example, is a different letter than the right side A.

Start with the larger center letter for the surname or last name, and then add the flanking letters, on the left and right. This sewing sequence will produce longer connecting threads between letters for embroiderers whose machines do not have automatic thread trimmers, and will also push the fabric away from the center as the complete design is sewn.

Placing the Design

Once you’ve determined the arrangement of your letters, you’ll need to consider the placement on your project. To do this, stitch out a sample of the monogram and photocopy it. Then:

  1. Find the center of the design by measuring the height and width, then drawing crossed lines half way between each dimension.
  2. At the center point, cut away a 1⁄4″ square or use a standard paper punch to make a hole.
  3. Cut away the excess paper surrounding the monogram and place the photocopy where you intend to put the monogram.
  4. Using a water-soluble or air-soluble marker, mark the design center on the fabric. If you don’t want to mark directly on your fabric, place a dot on a small piece of masking tape. Slide the tape under the hole in the photocopy until it is centered, then hold both the photocopy and the tape together, and place the two where you want the design to go. Lift the photocopy and the tape will stay in place, marking the center.
  5. Hoop the fabric, making sure the center mark is in the center of the hoop. If using the tape method, remove the tape before stitching the monogram.

Where the Letters Go

If you’re puzzled about where to place the monogram, here are a few guidelines.

  • Golf shirt: 7″ to 9″ inches down from the left shoulder seam and 4″ to 6″ over from the center.
  • Wash cloth: 1-1/2″ above the hem, or 1″ above the border for placement parallel to the edge; for placements in the corner, turn the washcloth diagonally until the shape is a diamond, then determine placement based on the design size.
  • Monogrammed towelHand towel: 2″ above the hem, or 1-1/2″ above the border, on the opposite edge from the label.
  • Bath towel: 4″ above the hem, or 2″ above the border, on the opposite edge from the label.
  • Sheets: the bottom of the monogram should be centered at the midpoint of the sheet width, and should be approximately 2″ above the wide hemline at the top of the sheet.
  • Pillowcase: centered at the midpoint of the width of the open end, and also centered midway between the edge of the pillowcase and the hem edge.
  • Shirt cuff: on the top of the wrist, and from 1″ to 1-3/8″ toward the buttonhole from the center of the cuff. Cuff monograms are typically small, and are placed so that the bottom of the design is 1/4″ to 1/2″ above the cuff edge
  • Coat lining: on the right side of the lining, at approximately waist level.

~This article appeared in a previous issue of Notions
Richards Jarden, born and raised in the suburbs of Philadelphia, Pa., studied fine arts in the U.S., India, England, and Canada as a college student. He is a former associate professor of fine arts, and in the late 1980s was head of the Sculpture Department at Rhode Island School of Design. He has managed various art-related businesses, first in architectural restoration, later in decorative painting, and since 1993 in embroidery design and digitizing. He has a particular interest in lettering and monogramming, and is the president of Embroideryarts (www.embroideryarts. com), which designs and markets digitized monogram designs for home and commercial embroiderers.

Did you enjoy this article?
Are you an ASG member?
This field is for validation purposes and should be left unchanged.

Tagged With: embroidery, monogram

February 19, 2021

Back to Basics: Machine Embroidery

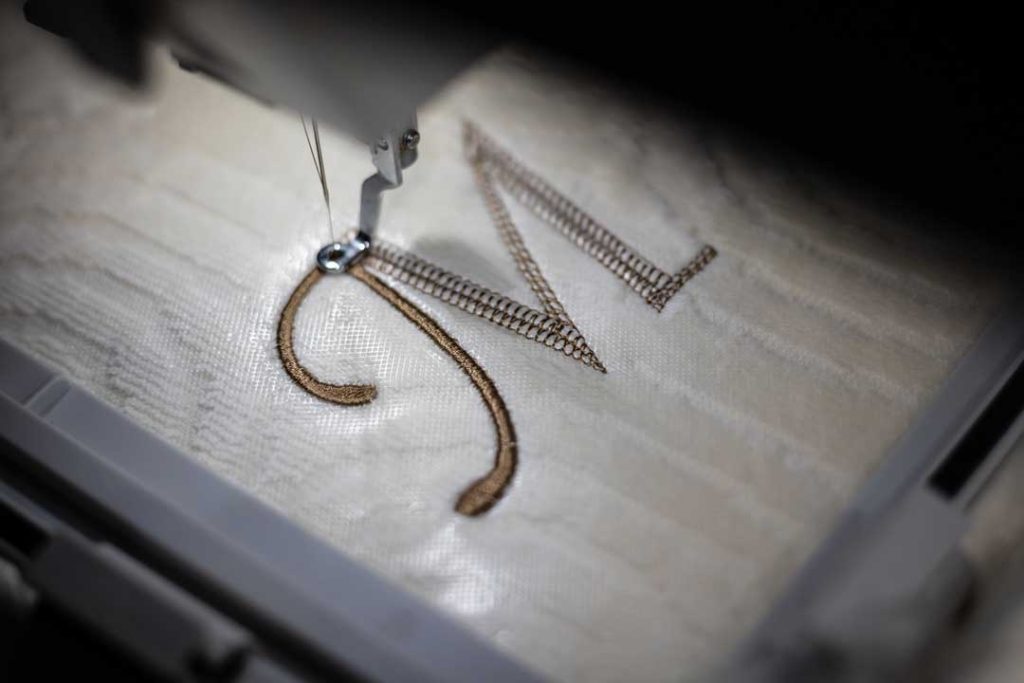
Machine embroidery is one of the hottest ways to personalize your sewing and add your unique touch to your handmade items as well as store bought purchases. It can help turn a ho-hum item into a one-of-a-kind masterpiece. We must warn you, however, this aspect of sewing is definitely addictive and, unfortunately, can be quite expensive.

Needle

To get started, you need an embroidery machine. Most of the major manufacturers have a number of models that range in price from less than $400 to, well, let’s just say more than the cost of a car. Some of the models are embroidery only, while others are combo machines that allow you to do all your sewing as well as embroidery. Which brand should you buy? There are good arguments to be made for all of them, but perhaps the best choice is to buy one from a reputable dealer in your area. A dealer can provide both lessons and regular maintenance on your machine which can be better than the few dollars you save from buying online.

Hoops

One of the features that can influence your decision is hoop size. A hoop is used to hold the fabric and moves it in the machine so the design can be stitched. Many of the entry level machines come with only 4” x 4” hoops.  That is the size of the design area that can be stitched on your item. This is a great size for over the pocket designs on t-shirts or children’s clothing, but if your intent is to embroider elaborate designs on jacket backs, then look for a machine that can accommodate larger designs. Hoop sizes are getting larger each year, with a 16” hoop currently one of the largest in the home sewing market. Machines have embroidery arms to hold the hoops and are programmed for specific movements and cannot accommodate just any size hoop.  So just because the manufacturer makes a larger size hoop doesn’t mean that a particular machine can use the larger size. Always check the specs for a particular machine.

The basic hoop is composed of an inner and outer plastic ring that generally fit together to hold the surface to be embroidered. While most of these hoops have screws to tighten the outer hoop over the inner one, in recent years more innovative hoops have come on the market. Some machines can use magnetic hoops that rely on strong magnets to hold the stitching surface in place and prevent hoop marks from being left on the surface. Others are spring loaded to make the hooping process easier.

Stabilizers

Buy on Amazon (affiliate link)

Stitching a design on a fabric adds not only weight to the fabric, but also stress as the needle  and threads continues to perforate and pull. While some heavy fabrics can handle this without any help, most would do well to have a stabilizer for added support. A stabilizer is a specially made backing that generally goes in the hoop with the fabric to help support the stitches and prevent the fabric from distorting. Choosing the perfect stabilizer can be a daunting task with so many manufacturers, weights, sizes, and styles.  Generally speaking, most experts will recommend using what’s called a “cutaway” stabilizer for most embroidery. As the name implies, the excess stabilizer that is used on the back of the fabric is cut away after the design is stitched and the remainder stays in the item. This provides the added support that is often needed not only through the stitching process but through multiple washings afterward.

While this support after the item is stitched is important, many embroiderers dislike the look and feel of the cutaway stabilizer. The extra support can hinder the smooth drape of a fabric and the leftover edges can irritate skin when the back of the design comes in contact with sensitive areas. When a lighter hand is preferred, a “tear-away” stabilizer can be used. The tear away is more loosely constructed and tears easily where the needle perforates it. This provides a cleaner look to the interior but sacrifices long term stability.

There are also stabilizers specifically designed for use on the right side of the fabric. These stabilizers are intended to prevent stitches from sinking into plush fabrics and getting lost. These “wash-aways” or water soluble ones are for temporary use only and disappear when placed in water. They are also used in free-standing lace—but that’s another discussion.

Needles & Threads

While it may be enticing to try to use regular sewing thread to embroider, for best results specially made embroidery thread gives the best results. These threads come in a multitude of colors and have an added sheen that regular sewing thread lacks. Most designs are meant to be stitched with a 40 weight thread. Using a different weight of thread can change how a design stitches out as well as how the final result will look. A thicker, heavier weight thread (30 or less) can make the design too dense and cause thread breakage or bunching up of threads while stitching. A lighter weight can cause gaps in coverage and allow fabric colors to show through the stitching. Threads can be made of cotton, polyester, rayon, and metallic. The current recommendation is a polyester thread. Changes in manufacturing methods give the new polyesters the luster of rayons but with more durability. Estimated shelf life for polyester thread is about 100 years. Rayons are beautiful, but do not hold their color when bleached; and cottons create lint that is harmful to the machine.

Most embroidery designs use a special bobbin thread instead of a matching thread in the bobbin. This thread is a lighter weight than the top thread, and can be purchased on cones or pre-wound bobbins. Always be sure to check with your manufacturer to determine if pre-wounds are recommended for your particular machine.

When using the 40 weight thread, a 75/11 needle  size is generally used.  Ball point, jersey, or stretch needles can be used on knits, while a universal or embroidery needle works well on wovens. Embroidery machines stitch at about 1,100 stitches per minute and can build up heat due to the friction of the rapid and continuous stitching. This wears out needles quickly and requires frequent changing of needles after a few hours of stitching to prevent their bending and breaking.

Embroidery Designs

Ghee’s Garden Embroidery Designs. ASG Members: get your discount code on the Special Offers page of the ASG.org Members area.

Embroidery machines require a specifically created computerized design before anything can be stitched out. Some machines come with generic designs like flowers, animals, holiday motifs, etc.  Other machines are themed with Disney, Pixar, and even Star Wars motifs.  In addition to the designs found in the machine, most manufacturers also sell designs that can be transferred to their machines through both direct and wireless computer links, flash drives, or older specialty cards. A quick search of the internet will also bring up a multitude of sites that sell these digitized designs. Before buying from an outside source, it is important to know the format, or language that your particular machine uses. ART, DST, EXP,  HUS, JEF, PCS, PES, SEW, VIP, VP3, and XXX are just some of the designations you may see. Buying the incorrect format is like speaking to someone in a foreign language. The machine won’t be able to translate to stitch out the design.

In addition to the format and size of the design, it is also important to know the stitch count. The stitch count is the number of stitches needed to produce the design. If a design is extremely dense with a high number of stitches used to create it, some of the smaller machines may not be able to handle that much data for stitching it out.

It’s also a good idea to remember that not all digitized designs are created equal. Many digitizers will offer free samples of their designs so you can test them out and see for yourself the quality of their work. You will soon learn which designers are your favorites and produce designs that meet your needs and budget. And if you are a bit of a computer geek and want a challenge, there are digitizing programs for the home embroiderer to create their own designs. You can take your drawing and turn it into your own one of a kind design.

Machine embroidery is a great way to challenge your creativity and expand the possibilities of your sewing projects. And if the embroidery bug has bitten, be sure to check out the ASG neighborhood groups that are springing up across the country. With many of them now online, these neighborhood groups welcome members from outside their normal chapter territory. They are an excellent source of inspiration and embroidery knowledge.


~Rosemary Fajgier

Did you enjoy this article?
Are you an ASG member?
This field is for validation purposes and should be left unchanged.

Tagged With: embroidery thread, hoops, machine embroidery, stabilizer

December 11, 2020

What I’m Embroidering: Tile Embroidery

Gorgeous! Amazing! Exquisite! So detailed!
But how LONG did it take?

Diana Latino of the Princeton Chapter is getting used to comments like these that come every time she shares one of her completed tile embroideries. And she has a number of them done already.

What’s Tile Embroidery?

Tile embroidery is a complex design done on an embroidery machine in which up to 32 separate, usually very dense designs are stitched independently  and then sewn together to create a complete picture for a wall size quilt.

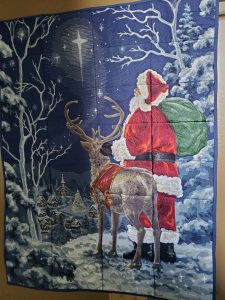
Diane’s holiday design, Starry Night Santa from OESD is the perfect example of this intricate style. With the light just right, you can see where the separate tiles have been sewn together to create the image of Santa standing on a snowy landscape looking up at the Christmas star. Each tile is created by the embroidery stitches with a myriad of threads to create the subtle shadings. The entire design was more than a million stitches with about 32 thread changes per tile. And as for how long did it take, Diana claims to have completed the embroidery in just a week. Then she added, “But that was stitching 8 hours or more a day, every day,” and credits husband Mike with doing all the cooking which allowed her to focus on the stitching. With 32 tiles and each tile taking up to 3 hours to embroider, that was an intense 96 hour work week! But the results are spectacular.

Getting Started

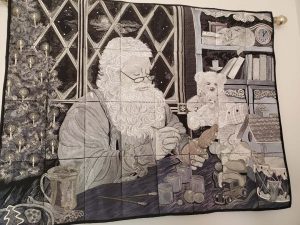
Diana began embroidering in 2005, and discovered the tiles in 2010 when she got tired of just sewing for her kids and wanted something more challenging. She says she gets such a feeling of accomplishment when she puts the finishing touches on one of these designs, and even though many are holiday themed, she leaves them hanging all year. Her Santa’s Workshop, also from OESD, is another Christmas themed design. This one appears to be in black and white, but achieves its detail and subtle shadings through the use of 18 different shades of gray thread. Keeping the thread names, numbers, and spools coordinated is one of her biggest challenges. In fact, she once relied on the color name that came up on her machine and ended up with a blue ear on Santa!  Now she lines up all her threads and labels them BEFORE she begins her first tile.

Adding Machine Appliqué

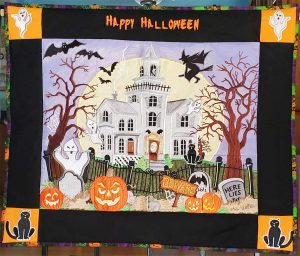
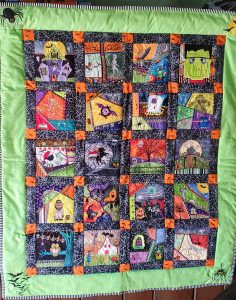
Some of the designs like Poppy also incorporate machine appliqué with the stitching. The use of fabrics cuts down the embroidery time and gives a more traditional quilting look to the finished project. Her Halloween from Molly Mine designs is another example of the use of appliqué. And another Halloween design this time from Anita Good is Haunted House.

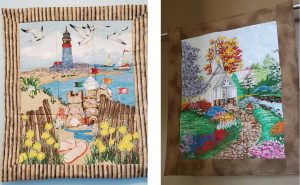
Not all of her efforts go into holiday designs. Diana shared some pictures of floral designs from Anita Good, Connecting Flowers and County Church as well as the landscape, Beach.

Tips

If you have been inspired to try a tile embroidery, Diana has a few suggestions.

  • Organization is essential for any project, but especially when working with tiles.
  • Be sure to have the right threads and label them so you can easily select the correct color.
  • To save fabric, instead of cutting out and hooping separate blocks, cut fabric into longstrips the required width for the hoop.  This allows you to hoop the next design without the large areas of wasted fabric outside the hoop.
  • To make stitching the tiles together easier, on each completed tile, label the back with the number of the tile to make sewing the project more organized.
  • To line up the tiles more accurately, a bright colored thread in the bobbin for the outline stitch makes the alignment more visible.
  • Trim the blocks to a ½” seam allowance instead of the ¼” recommended.  The ½” is more manageable.

Diana regularly shares her embroidery projects with the online embroidery group of the Princeton Chapter where she has inspired and motivated members to experience the fun of machine embroidery.


~Diana Latino, Princeton Chapter

Did you enjoy this article?
Are you an ASG member?
This field is for validation purposes and should be left unchanged.

Tagged With: embroidery, quilt, wall quilt

Become a Member

Join the only national organization dedicated to Advancing Sewing as an Art and Life Skill.

Join Now button

Blog Article Categories

  • ASG Conference
  • Chapter Stories
  • Embroidery
  • Fitting
  • Learn to Sew
  • National Sewing Month
  • Products, Books, & Patterns
  • Projects
  • Quilting
  • Sewing
  • Sewing Techniques
  • Sewing Tips
  • Sewing Tours
  • Videos
  • Disclaimer
  • Privacy Policy

American Sewing Guild
National Headquarters
9660 Hillcroft, Suite 230
Houston TX 77096
713-729-3000 | 713-721-9230 Fax
www.ASG.org

ASG wordcloud - education, conference, discounts, videos, special offers, tours and more

Copyright © 1998–2025 · American Sewing Guild · All Rights Reserved