American Sewing Guild (ASG)

Visit our blog Visit the ASG Facebook page Visit ASG on Pinterest Visit ASG's YouTube channel Visit ASG on Instagram
  • Home
  • Join ASG
    • Join Online
    • Chapter Locations
    • Member Benefits
    • Member Brochure
    • Join by Mail
  • Conference & Education
  • Resources
    • Contests & Awards
    • Giving Back
    • Hall of Fame
    • Links
    • Travel and Tours
    • Measurement Chart
  • Shop
    • ASG Store
    • Chapter Products
    • Video Resources
  • Blog
  • About
    • About Us
    • Donate to ASG
    • ASG Sensitivity Statement
    • FAQ’s
    • Start a Chapter
  • Contact
  • Member Login
    • Login First!
    • Members Only
    • Leadership Only
    • Website FAQ’s
    • Logout
  •  

December 1, 2023

Faux Fur PomPoms

Pompoms on a purseDo you have scraps of faux fur leftover from other projects? Or maybe you have other fur items you’d like to repurpose into something else? Try making just 2 pompoms, and you may become “pompom crazy!” A major symptom: embellishing everything in sight with puffy little faux fur pompoms.

At a glance, tracing circles on fur scraps may appear to be a child’s craft…and it very well could be. On the other hand, high-fashion furriers use pompoms as zipper pulls, whimsical embellishments, to finish the ends of a scarf, and so much more.

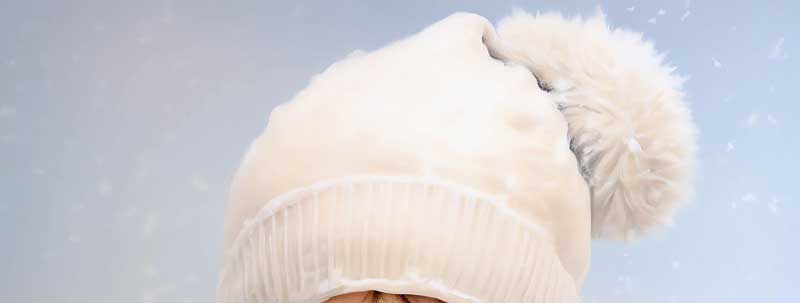
Pompom hat

Let’s get started!

  • Trace the pattern on the fur backing, or simply trace a 4″ round lid, cup, etc. on to the back of the fur piece (Figure 1).
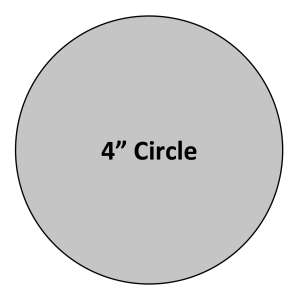
PomPom pattern
Figure 1 (click for pdf pattern)
  • With a snipping motion—and cutting through the backing only—cut out the circle.
  • Set your machine stitch for a long, wide zigzag stitch (4W,4L).
  • You’ll need 13 inches of strong cord such as twine, yarn, or a double strand of ordinary sewing thread.

Because fur is so forgiving, thread color matching is unnecessary so use whatever color of thread is currently in your machine.

  • Using the zig-zag setting, stitch close to the edge with the backing side up and the cord, twine or doubled sewing thread centered under the zigzag stitching (Figure 2).
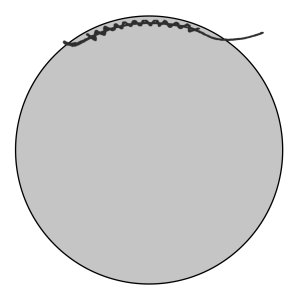
Figure 2
  • Sew completely around the circle, back-tacking at start and finish.
  • Grasp cord ends and pull up gathers (Figure 3).
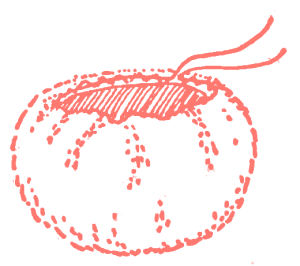
Figure 3

As if by magic, a puffy ball forms. Tie off the cord, leaving ends long enough for securing the pompom to whatever you embellish.

If your pom-pom needs some pouf, stuff lightly with cotton balls.
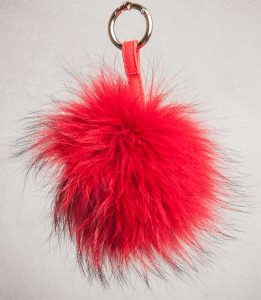
Pompom keychainFor a Zipper Pull

  • Tie a pompom to a zipper pull. just as furriers do on S5.000 jacket.

For a Hair Tie

  • Secure a pompom to an elastic hair band for a pony tail with panache.

For a Velvet/Fur Tie

  • A length of black velvet cord and two pom-poms. one black. one white, equals a hair tie with star quality.

For a Neck Accessory

  • For a fabulous holiday look, wear the above velvet! fur tie at the neck of a silk shirt.

For Everything

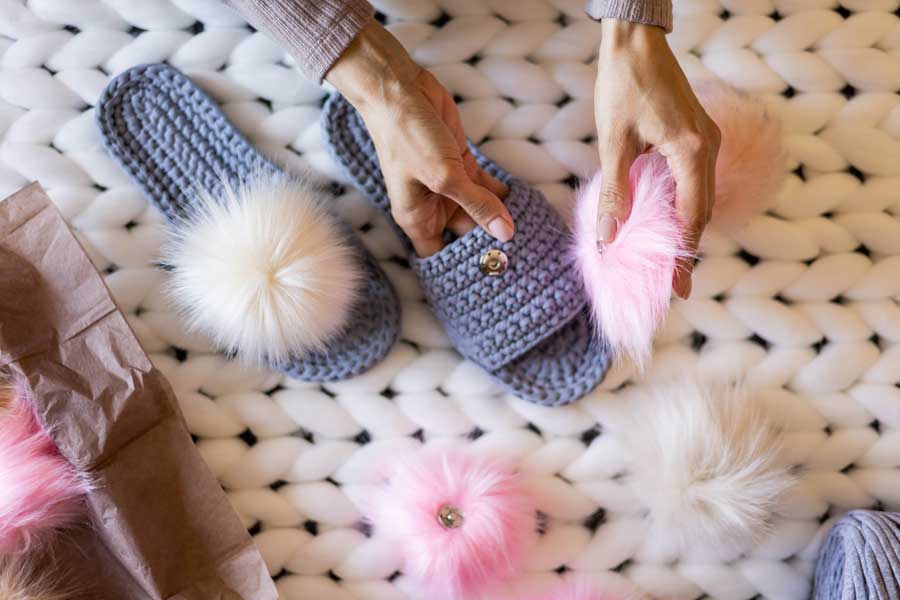
Pompoms on slippers

  • Add fur pompom to everything: a knit cap, scarf ends, shoe tops, draw cord ends, shoe ties, or slippers.
  • Sprinkle a faux fur jacket or wearer with fur pompoms.
  • Use as buttons.
  • To change the size of the pompom, just change the size of the circle.

~Based on an article by Donna Salyers, Fabulous Furs

Did you enjoy this article?
Are you an ASG member?
This field is for validation purposes and should be left unchanged.

Tagged With: faux fur, pompom

November 17, 2023

The Fringe/Tailor Tacking Foot

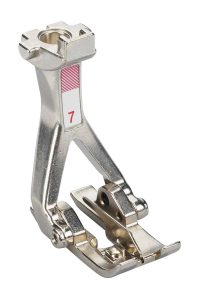
Fringe/Tailor Tacking Foot

Foot Fun

You probably have lots of presser feet for your machine(s), but truth be told, we use only a few of them regularly: straight stitch foot, zigzag or satin stitch foot, and the zipper foot. What about all those others lingering in the accessory box? Let’s take a look at one rather funky one—the fringe (or tailor tack) foot.

This unique foot has a vertical bar in the middle. When you sew a wide zigzag, the elevated loops slide off the back of the foot. Check with your dealer for a machine-specific one or look for a generic version that will fit.

Fringe foot
Fringe Foot

This foot was originally designed for machine tailor tacks—those tiny thread groupings that mark darts and other design details on a garment. But creative types have gone beyond the tailor tacks for some creative uses and hence the alternate name for this foot—fringe foot.

Tailor Tacking

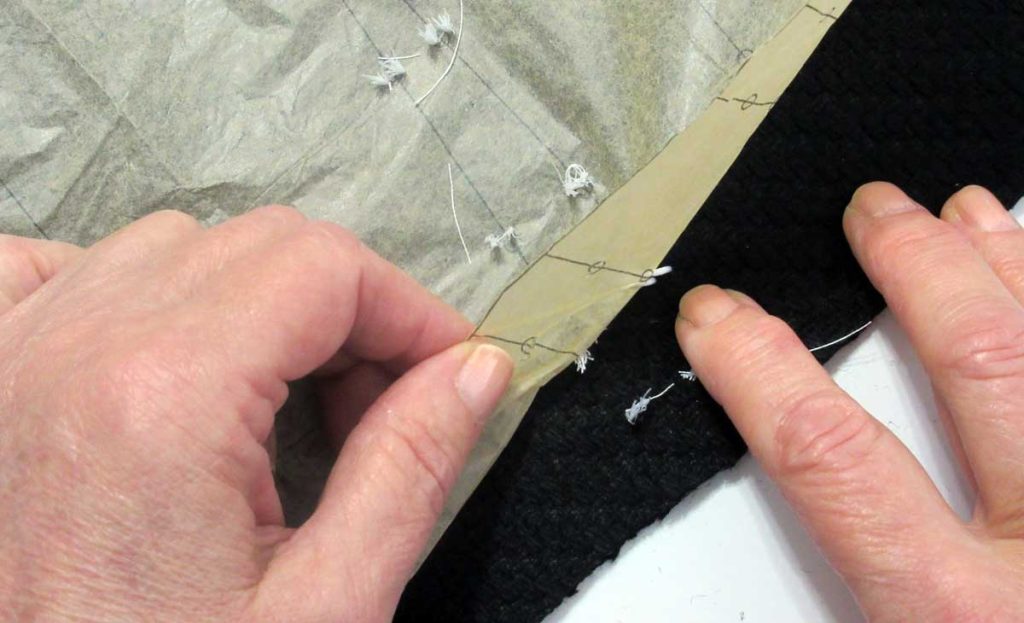
To use this foot for marking, simply sew through both layers of the cut garment pieces and the paper pattern using a wide zigzag and a very short stitch length. Sew four or five times to mark dots. Gently pull the paper up and separate the garment layers, then clip the threads between. The threads clearly mark the details and stay in until they’re sewn, then they’re easily removed.

Tailor Tacking

Bridge Seam

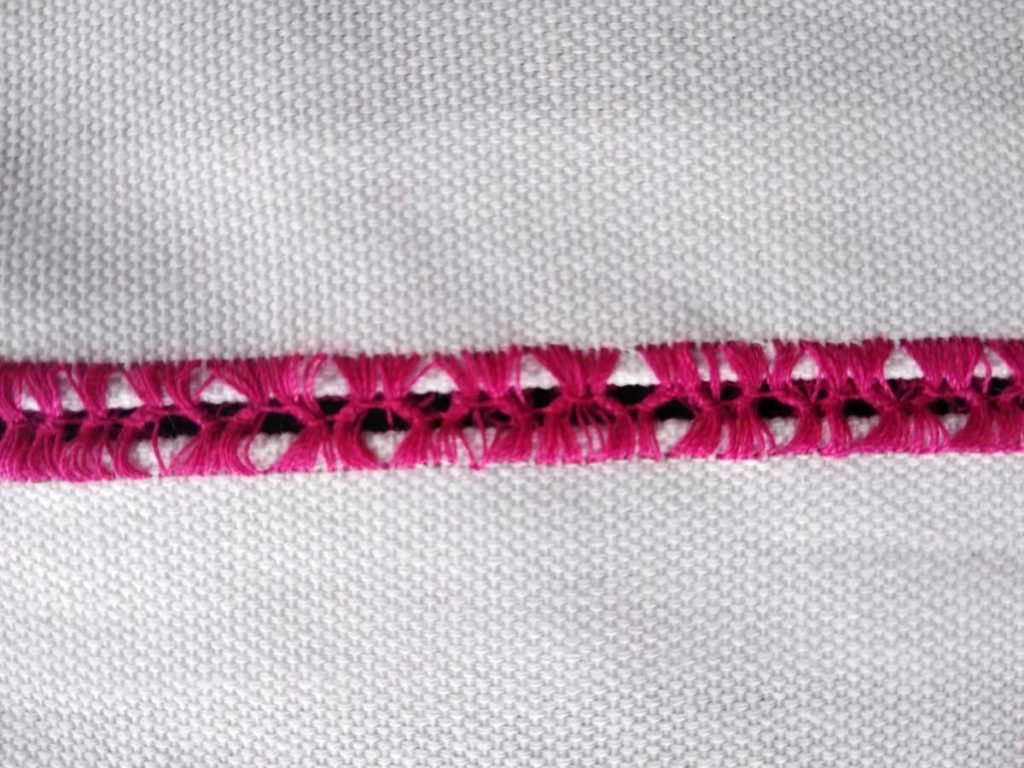
This specialty foot can be used to create a decorative seam. Loosen the upper thread tension and set the machine for a wide zigzag with a short length (test-stitch). Place the garment pieces right sides together and sew along the seam line. Once the seam is sewn, gently pull the layers apart and press the seam allowances open. The thread loops are now flattened and span the seam edges to create a narrow opening. The seam can be left that way, or you can topstitch each side for added stability. This type of seam is primarily decorative and shouldn’t be used in areas of high stress.

Bridge Seam

Faux Fagoting Decorative Stitch

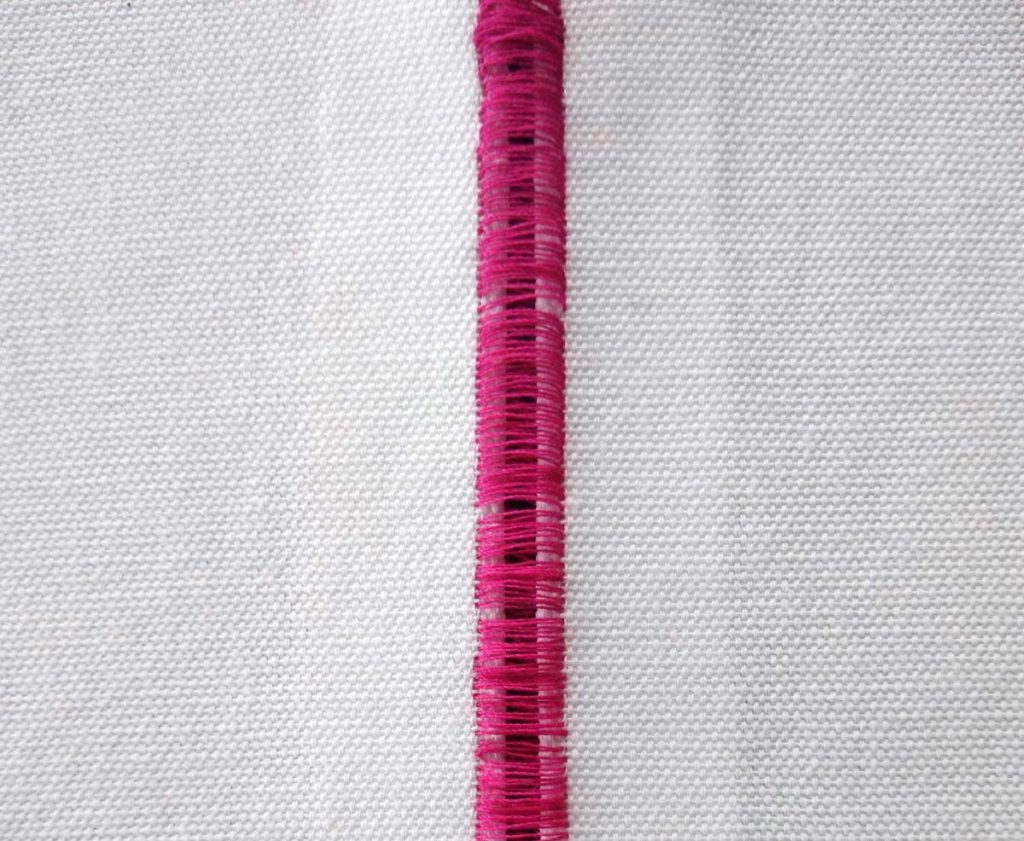
If you’ve sewn the bridge seam, don’t stop there—add another decorative touch. Switch presser feet to a straight stitch or all-purpose foot and set the machine for a straight stretch stitch. This goes two stitches forward and one stitch backward, creating a prominent straight stitch. Hold both sides of bridged stitch flat and sew down the center, being careful not to catch the fabric edges. As you sew, the backward and forward motion of this stitch groups together the bridge stitches into little “bundles.”

Faux Fagoting Decorative Stitch

Border Issues

The bridge stitch, whether bundled or plain, makes a perfect center for creating a wider border. Sew a wide decorative stitch on each side of the openwork, using your mirror-imaging function for symmetry. The decorative stitch should barely touch the bridge stitches.

Fun Fringes

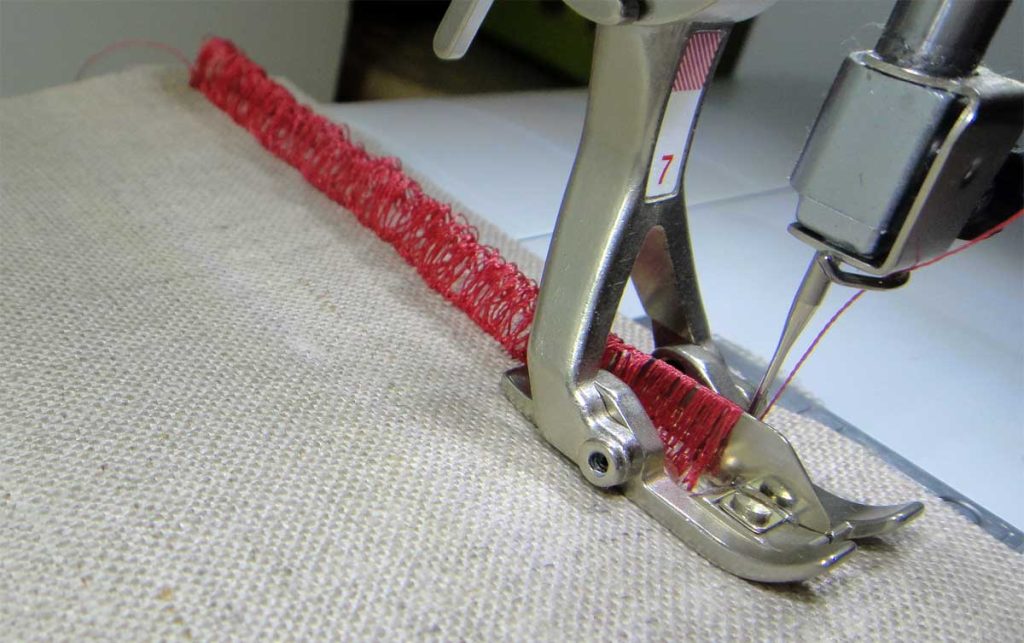
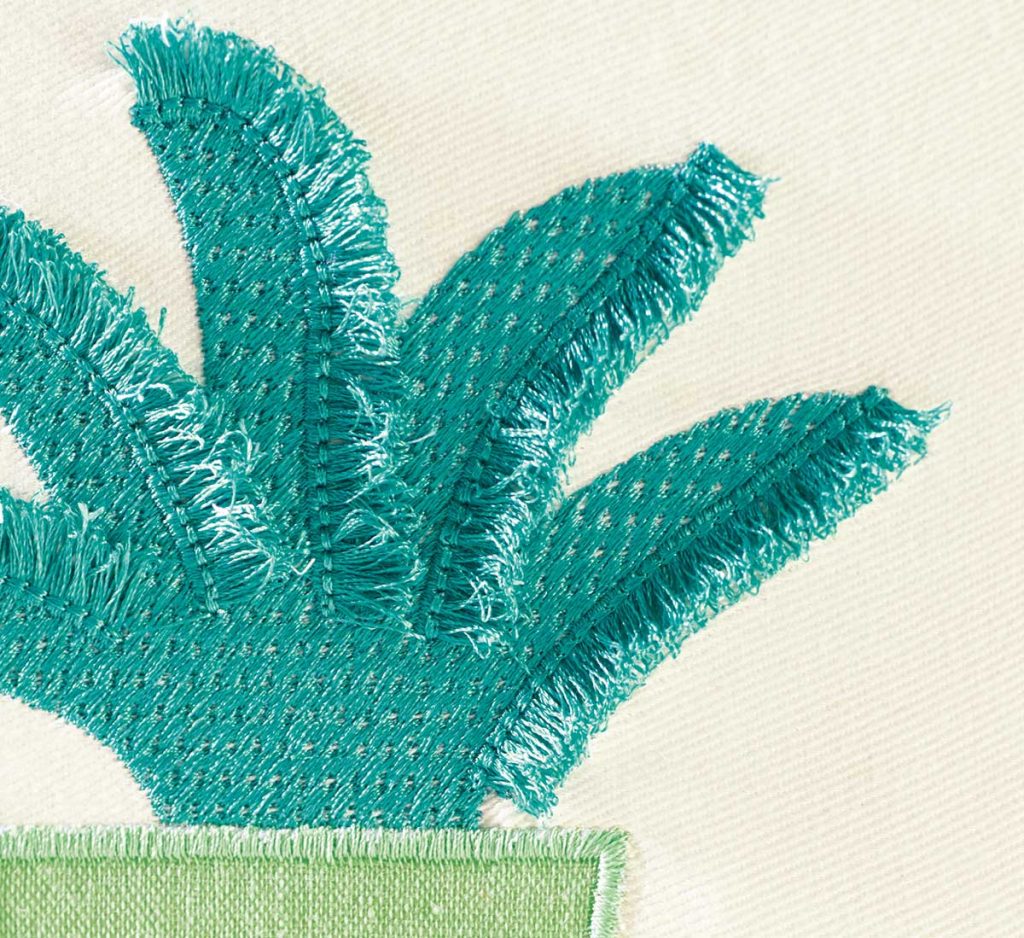
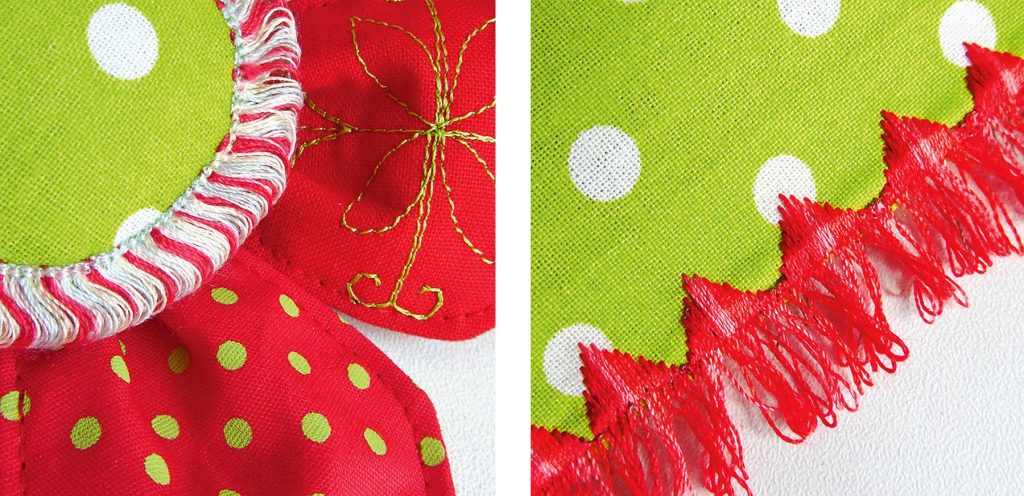
This foot can be used to make either eyelash fringe (cut on one side) or looped fringe, either on a fabric base or on the project edge. When sewn on fabric, multiple rows can be sewn side by side to create a loopy texture (think lion’s mane), or the looped stitches can be used to outline an appliqué.

Outline an appliqué

When sewn as an edge finish, the fringe (either cut or looped) can be combined with a decorative stitch.

Edge finish

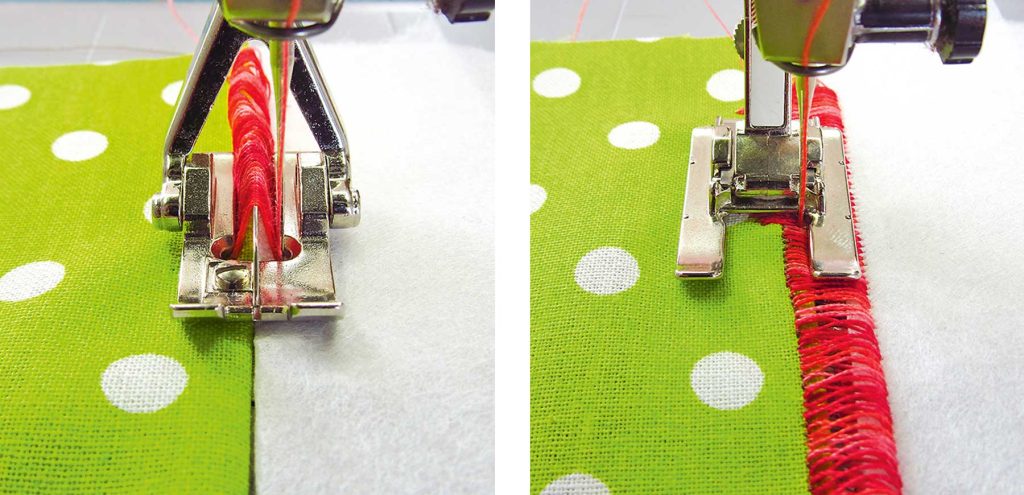
Set up your machine for the widest zigzag and hand turn the wheel to be sure the needle clears the bar. Use a contrast thread in the bobbin. Set the stitch length to the desired density and test-stitch to be sure the loops easily slide off the back of the bar. Sew the fringe line, then change presser feet and sew along one edge anchoring the stitch loops. From the wrong side, pull out the contrast bobbin thread and use a pin to pull the fringe loops to the right side. The loops can be left as-is, or cut to make eyelash fringe.

To sew a fringed edge, use the same machine set-up, but place a piece of removable stabilizer along the finished project edge. Sew the fringe catching the stabilizer on the right edge. Straight or decoratively stitch the fringe edge in place, remove the bobbin thread, then remove the stabilizer. The fringe can be left looped or cut.

Sewing a fringed edge (left) and decoratively stitch the fringe edge (right).

Heavy Weights

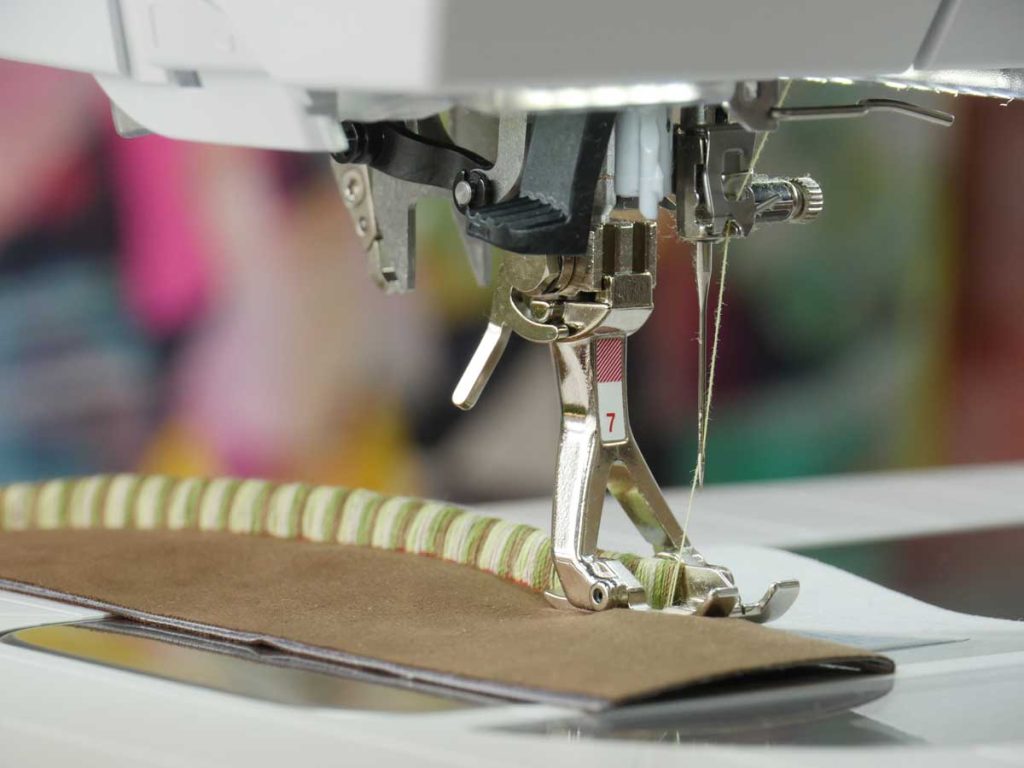
You can use a slightly heavier thread weight, either solid or variegated. But, be sure to test-stitch first to be sure that the stitch density and heavier thread will allow the thread loops to easily slide off the back of the vertical bar—otherwise, you get an unsightly jam-up. Adjust either for smooth stitching.

Most of the images in this article were provided compliments of Bernina.


~Linda Griepentrog is the owner of G Wiz Creative Services and she does writing, editing and designing for companies in the sewing, crafting and quilting industries. In addition, she escorts fabric shopping tours to Hong Kong. She lives at the Oregon Coast with her husband Keith, and three dogs, Yohnuh, Abby, and Lizzie. Contact her at .

Did you enjoy this article?
Are you an ASG member?
This field is for validation purposes and should be left unchanged.

November 10, 2023

Couture Sewing: Working on the Bias Grain (preview)

You can take advantage of the bias grain in couture garments in two ways:

  1. Garment sections or entire garments can be cut on the bias grain to create interesting effects in the drape, fit, and visual design of the garment, or
  2. Bias-cut fabric strips can be used to bind edges and to create piping for both decorative and functional purposes.

Madame Vionnet said, “There are three grains: lengthwise, crosswise, and bias. We must understand them all.”

The fear of working on the bias was ingrained in many of us at an early age. Some sewing teachers spoke of it as the enemy, never to be understood and to be kept at a distance. The bias is not a disease—it is a grain of cloth that when respected, can be used to your advantage to produce remarkable results.

The bias does, at times, have a mind of its own, but with understanding comes control. Couture is about bias. When you can handle bias, you are couture!

  • Bias hangs “thinner” than both straight and crossgrain.
  • Bias doesn’t ravel.
  • Bias doesn’t wrinkle.
  • Bias is soft and rounded.
  • True bias is the grain that runs at a
  • 45-degree angle to the lengthwise and crosswise grains.

When working on the bias, the fabric must be perfectly grained up and the bias line established.

The full article is in the Members area of the website. CLICK HERE to read the full article. Not a member? Join online!


November 3, 2023

Stabilizers: Not Just for Embroidery

Firming Things Up

Embroidery Stabilizer
View on Amazon. We may earn a small commission on your purchase at no extra cost to you.

If you own an embroidery machine, chances are good you have a drawer full of various types of stabilizers needed for your embellishing. However, if you don’t have an embroidery machine, you may not think you need stabilizers—but think again!

What is stabilizer?

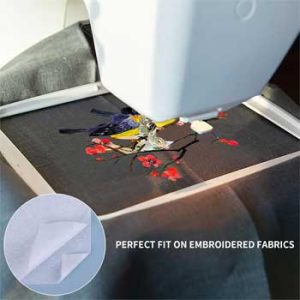
Simple answer—something to put behind or over fabric temporarily to well, stabilize it, while stitching. Because machine embroidery uses dense stitches and lots of thread, stabilizers help to eliminate puckering.

Stabilizers come in a variety of constructions—from woven and non-woven to mesh, film and liquid. They have a variety of application methods, from sew-in to fusible to self-adhesive. And, they have a variety of removal methods, from cut-away and tear-away to heat-away and water-soluble. Check out your store’s offerings for a multitude of mix-and-match construction, application and removal methods.

Note that most stabilizers are designed to be temporary, while similar products called interfacings are meant to be permanent. Stabilizers can also become permanent additions to your project.

So, even if you don’t do embroidery…you need stabilizer too! Here’s why:

Decorative stitching can cause some fabrics to pucker and distort, and if the stitches are especially wide, they can cause “tunneling” which means the edges of the stitches pull in toward each other. Using a stabilizer underneath can help eliminate these issues. Another option is to use liquid stabilizer to stiffen the fabric prior to stitching, then wash it out after stitching.

Appliqué, especially on lightweight fabrics or knits, can also cause puckering, so place stabilizer under the area you’re working with to keep the appliqué and the base fabric pucker-free.

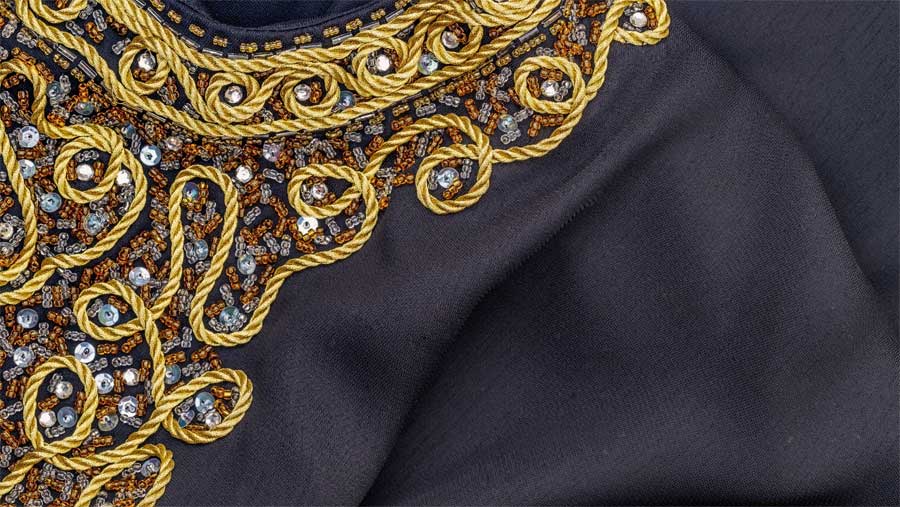
Beading and sequins can cause distortion due to the added weight, so adding a stabilizer under the area will help with support. This is one area where a stabilizer can be left in permanently.

Add stabilizer to support the weight of beading

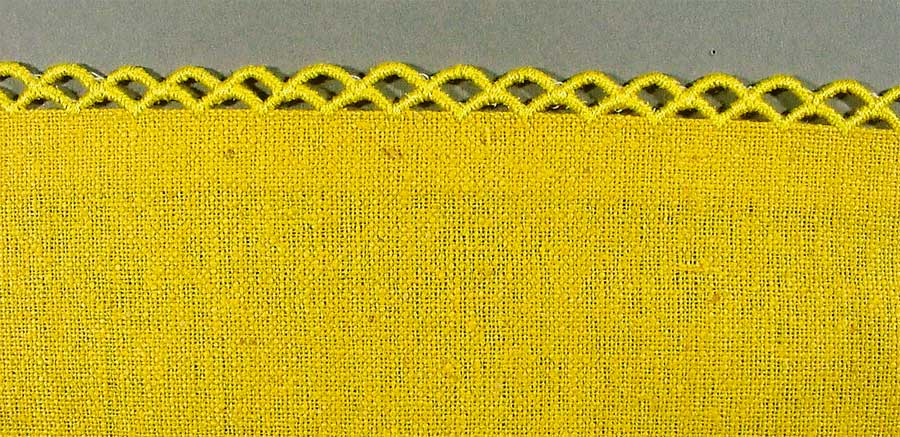
Off-the-edge stitching can play havoc with your sewing machine, as well as the fabric edge, so if you’re trying to stitch scalloped or picot edging, lay a piece of wash-away stabilizer under the edge and extending about ½”. After the stitching is complete, remove the stabilizer, leaving only your delicately stitched edge.

Picot Edge (image compliments of Bernina)

Serger rolled hems sometimes leave pesky fabric threads poking through the serger threads, but if you wrap the edge in a narrow strip of water-soluble stabilizer before sewing, those troublesome threads will be contained. If you’re serging a regular stitched edge, liquid stabilizer along the fabric edge will help keep it flat.

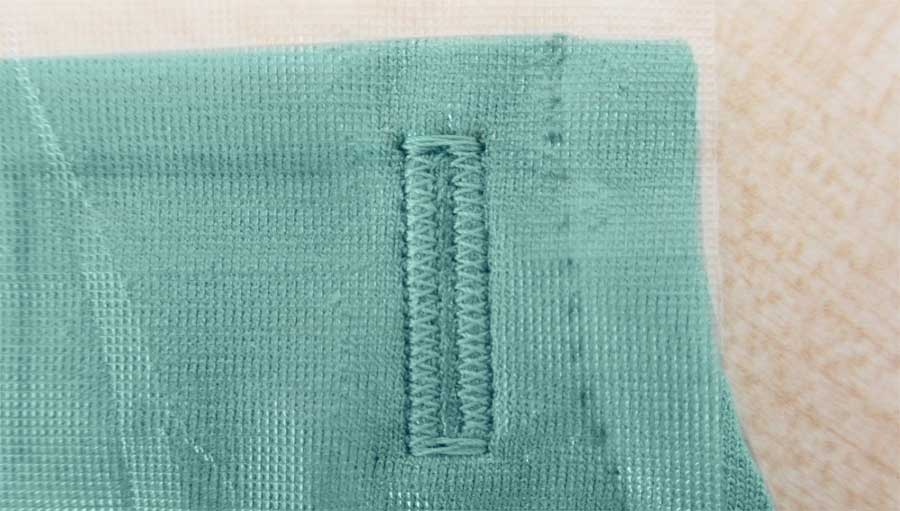
Buttonholes sometimes stretch, despite our best interfacing efforts, but adding a strip of stabilizer on the top and bottom of the fabric can help minimize distortion. A clear film stabilizer is ideal for this purpose. This technique also works well for buttonholes and seams on a textured fabric, like bouclé or loosely woven suiting, where the fabric threads or nubs may catch on the presser foot toes. Stabilizer makes for smooth stitching lines by compressing the surface texture.

Stabilizing a buttonhole

Sewing sheer fabrics can sometimes be a wrestling match, as they tend to slip, slide and stretch during construction. But with the addition of a liquid stabilizer, seamlines can be stable for stitching, and edges firmed for hemming. Stabilizing the fabric itself can also make for easier and more accurate cutting. This assumes your sheer fabric is washable to remove the stabilizer after construction.

Couching—the addition of yarns, ribbons and trims with either controlled or free-motion stitching—can also cause distortion in the base fabric, but adding a stabilizer firms up the surface for easier attachment.

Creating your own free-form fabric or scarves using just yarns is easy–just sandwich the fibers between layers of clear wash-away stabilizer. Stitch in place, then rinse away.

Hemstitching with a wing needle can sometimes damage the fabric as the needle “wings” can catch on fabric threads, pulling them into the needle hole. Liquid stabilizer can eliminate that and create well-defined holes for your design.

Wing Needle (image compliments of Bernina)

Die-cutting is a great place to use stabilizer for cleaner edges on lightweight cottons. Some stabilizers come in pre-cut sheets specifically for this purpose.

Paper-piecing is an ideal place to use an inkjet-printable stabilizer. Just print multiples of your quilt blocks and you’re ready to stitch on clearly printed lines.

So, even if you’re not a machine embroiderer, you will need a drawer of various stabilizers—trust me!


~Linda Griepentrog is the owner of G Wiz Creative Services and she does writing, editing and designing for companies in the sewing, crafting and quilting industries. In addition, she escorts fabric shopping tours to Hong Kong. She lives at the Oregon Coast with her husband Keith, and three dogs, Yohnuh, Abby, and Lizzie. Contact her at .

Did you enjoy this article?
Are you an ASG member?
This field is for validation purposes and should be left unchanged.

Tagged With: buttonholes, embroidery, stablizers

October 27, 2023

Pin Weaving (preview)

Pin weaving is a form of small-scale weaving traditionally done on a frame made of pins with the warp and weft wrapping around the pins. Pin-woven textiles have a selvage edge all the way around.

The equipment needed for pin weaving is minimal, consisting of straight pins; a padded, pinnable board; a rectangle of fusible interfacing; pearl cotton to make the loom; and a tapestry needle which you will use to weave an assortment of textural yarns and perhaps fabric strips into your finished piece.

The Loom

The size of the weaving determines the board size. You can purchase the padded board in a retail shop, or you can make your own.

The complete version of this article is available on the ASG Members Only blog and requires member login.
CLICK HERE to read the full article. Not a member? Join online!

  • « Previous Page
  • 1
  • …
  • 13
  • 14
  • 15
  • 16
  • 17
  • …
  • 62
  • Next Page »

Become a Member

Join the only national organization dedicated to Advancing Sewing as an Art and Life Skill.

Join Now button

Blog Article Categories

  • ASG Conference
  • Chapter Stories
  • Embroidery
  • Fitting
  • Learn to Sew
  • National Sewing Month
  • Products, Books, & Patterns
  • Projects
  • Quilting
  • Sewing
  • Sewing Techniques
  • Sewing Tips
  • Sewing Tours
  • Videos
  • Disclaimer
  • Privacy Policy

American Sewing Guild
National Headquarters
9660 Hillcroft, Suite 230
Houston TX 77096
713-729-3000 | 713-721-9230 Fax
www.ASG.org

ASG wordcloud - education, conference, discounts, videos, special offers, tours and more

Copyright © 1998–2025 · American Sewing Guild · All Rights Reserved