American Sewing Guild (ASG)

Visit our blog Visit the ASG Facebook page Visit ASG on Pinterest Visit ASG's YouTube channel Visit ASG on Instagram
  • Home
  • Join ASG
    • Join Online
    • Chapter Locations
    • Member Benefits
    • Member Brochure
    • Join by Mail
  • Conference & Education
  • Resources
    • Contests & Awards
    • Giving Back
    • Hall of Fame
    • Links
    • Travel and Tours
    • Measurement Chart
  • Shop
    • ASG Store
    • Chapter Products
    • Video Resources
  • Blog
  • About
    • About Us
    • Donate to ASG
    • ASG Sensitivity Statement
    • FAQ’s
    • Start a Chapter
  • Contact
  • Member Login
    • Login First!
    • Members Only
    • Leadership Only
    • Website FAQ’s
    • Logout
  •  

April 29, 2022

Zippers as Trim

Sometimes things normally found in our sewing rooms end up with surprise uses. Such is the case for zippers!

Zippers from Ghees.com
Photo courtesy of Ghees.com

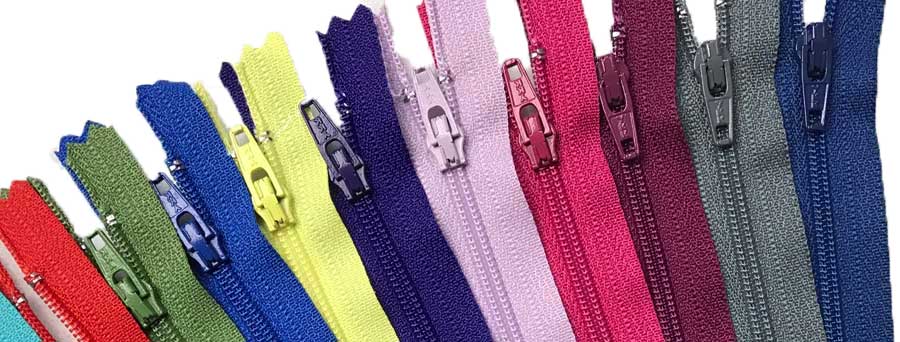
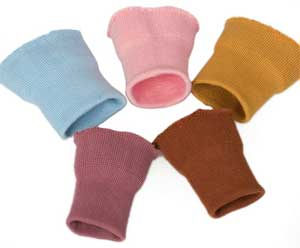
With the myriad types of zippers available, they can definitely do more than close a garment. Think about them turning into jewelry or becoming piping or a surface trim. When grouped, they can also cover an entire garment section, like a cuff or collar.

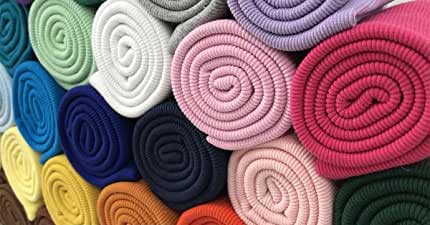
Zippers are not only available individually, but you can purchase zipper by the roll or by the yard from some resources. When you purchase zipper tape by the yard, you have more flexibility to use it for many things since you’re not limited by standard lengths.

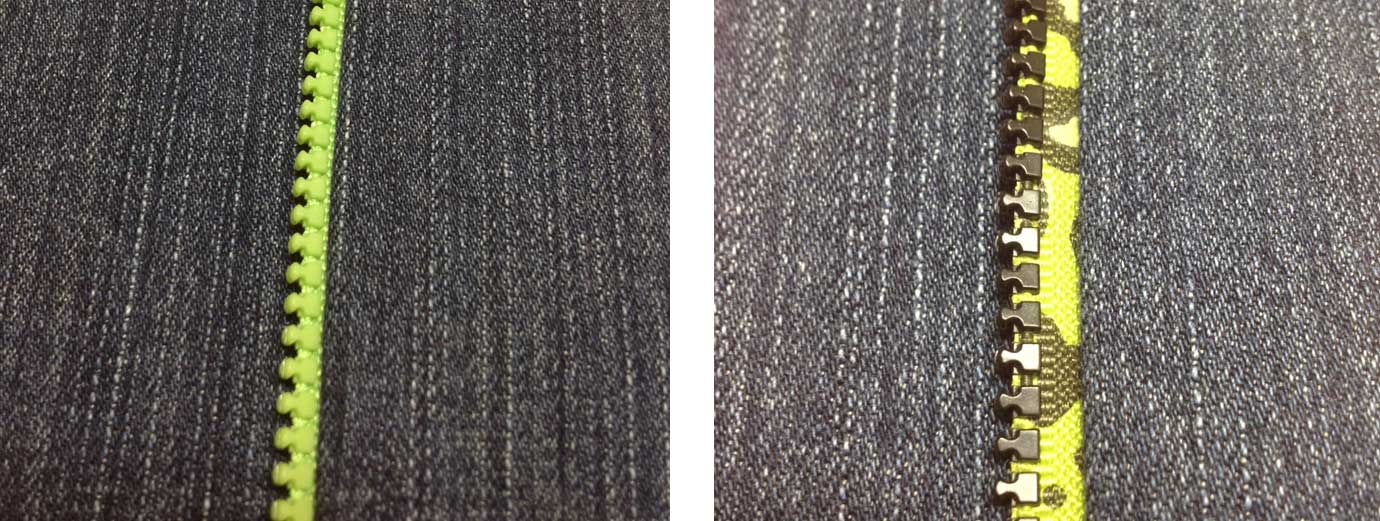
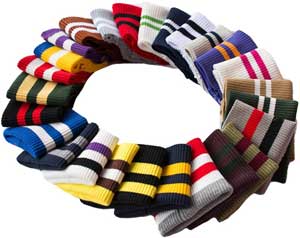
The various types of zipper teeth add to the intrigue. Look for brightly colored plastic teeth on sport-weight zippers, brassy metal teeth on jeans and utility zippers, and even multi-color teeth on some novelties. For a bit of glam, indulge some rhinestone teeth.

Zipper tapes, the woven base for the teeth, come in many types as well, from solid color basics to printed or stripes of all sorts. For a bit of bling, you can also find metallic and satin zipper tapes.

Let the zipper inspire you for alternate uses!

April 29 is National Zipper Day!

Weaving

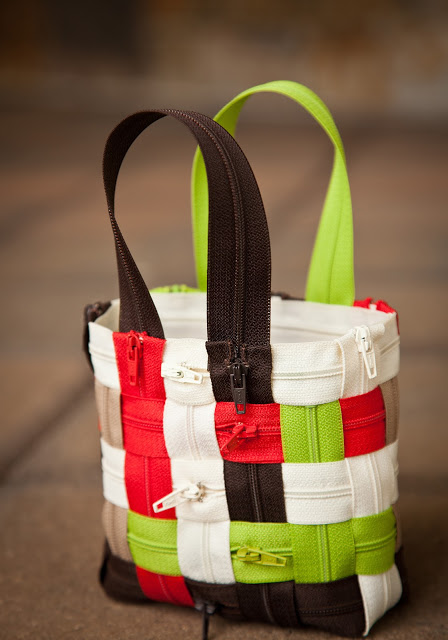
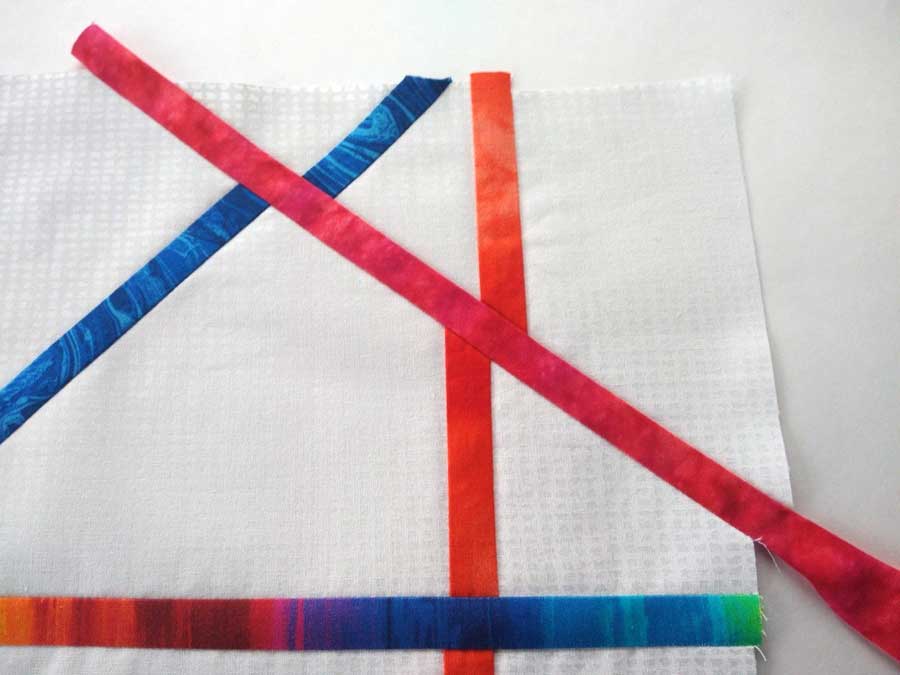
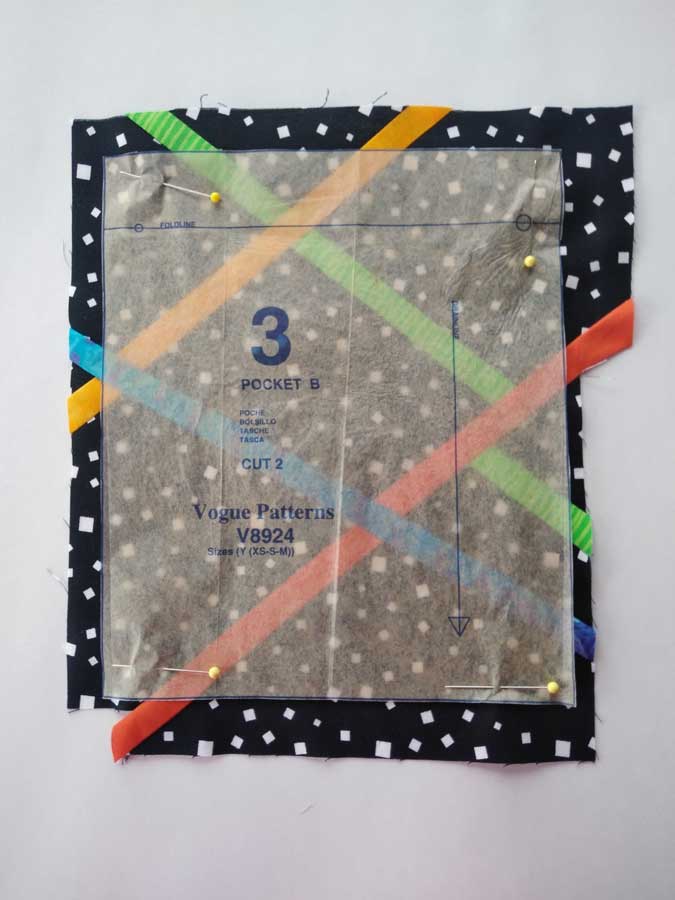
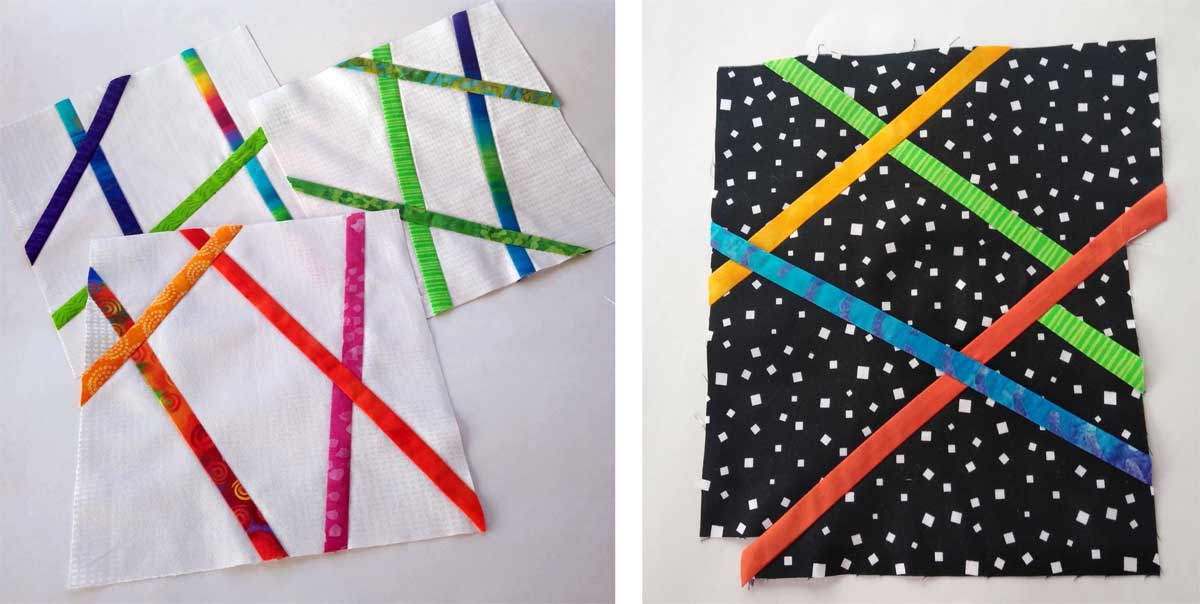
If you want to cover a large area, like for making a pillow, garment yoke, or perhaps a tote bag front, think about weaving zippers to the size you need.

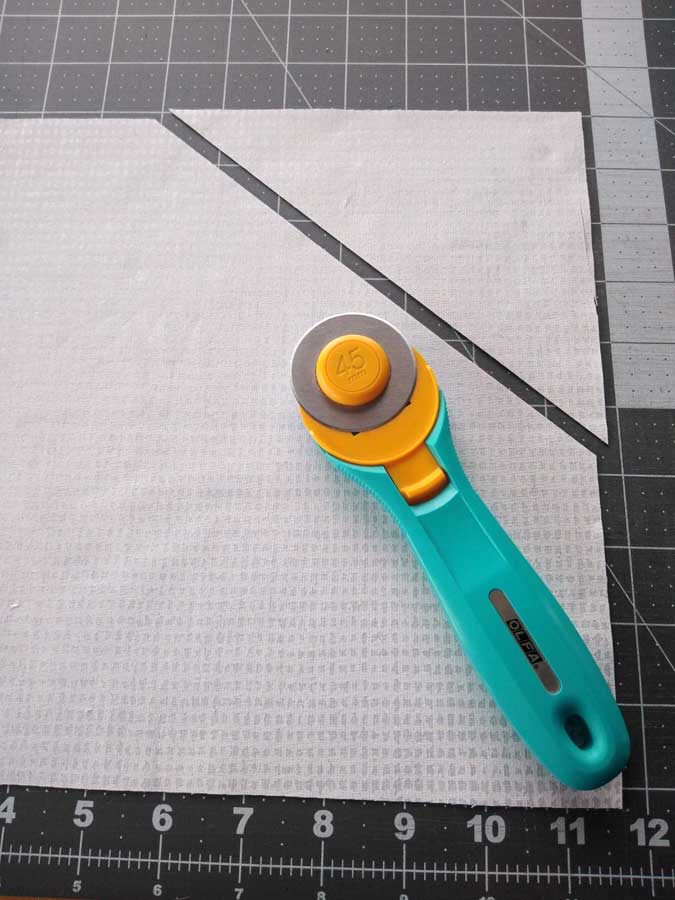
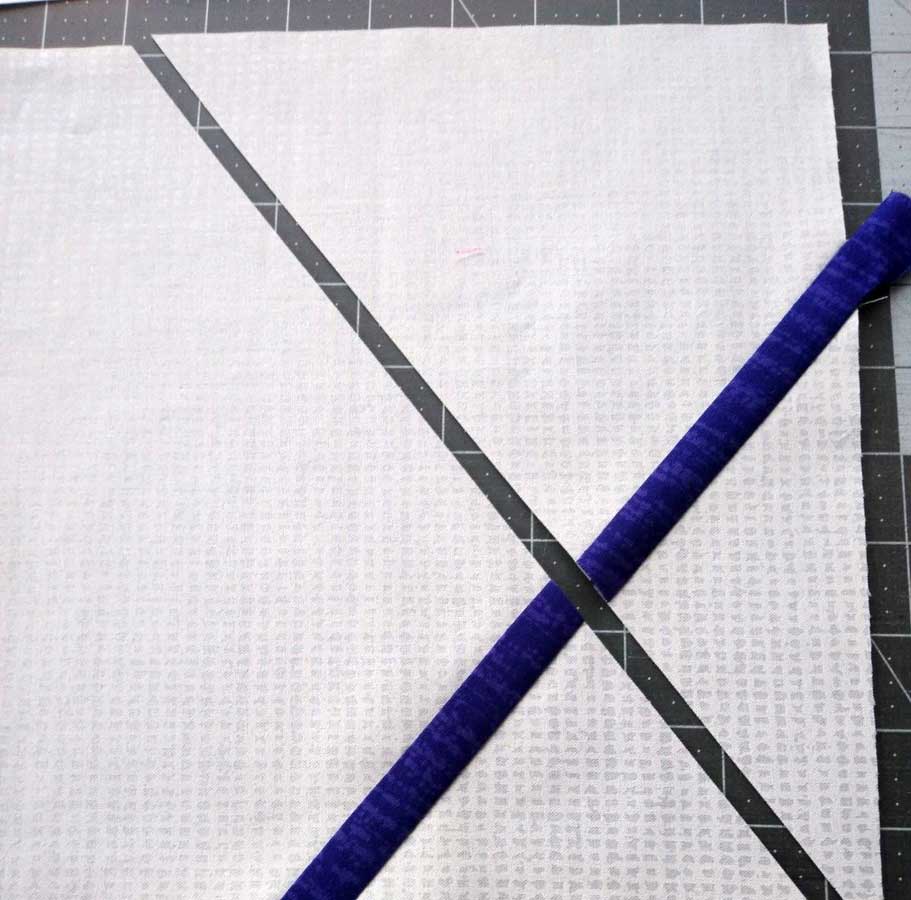
A simple over-one-under-one patterning done over a pinnable surface can yield some sizeable pieces. A bit of stitching (or fabric glue) at the overlaps can secure the pieces in place and allow for cutting of the size and shape needed for the project.

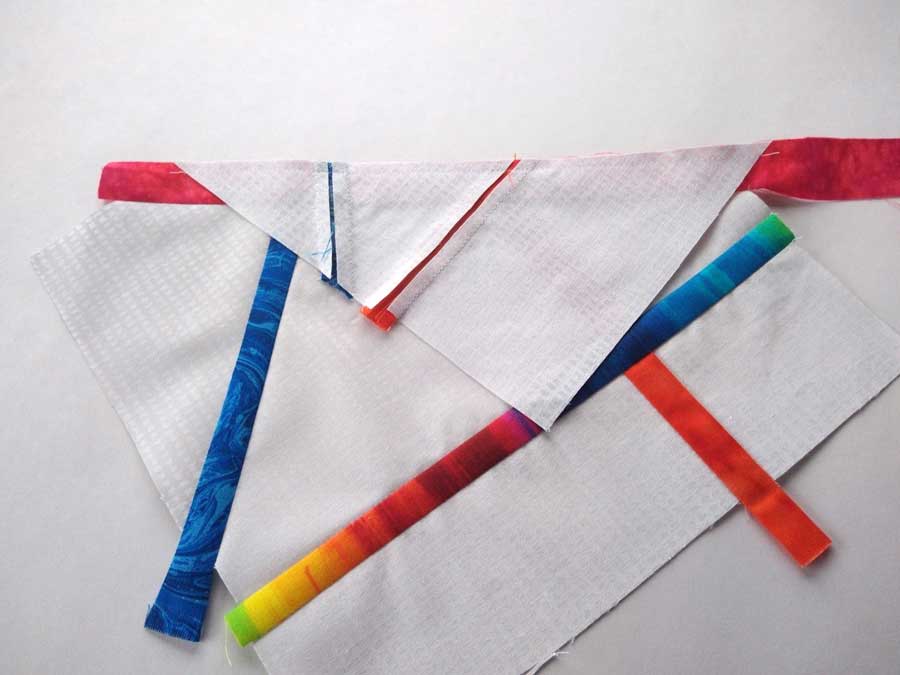
Before cutting woven zippers, trace the piece shape needed and stitch just inside the cutting line so the woven strips don’t distort or pull apart. Once the piece is secure, use the woven zipper area as you would fabric, with one exception. If the zipper teeth are metal, remove those within the seam allowances to avoid breaking needles.

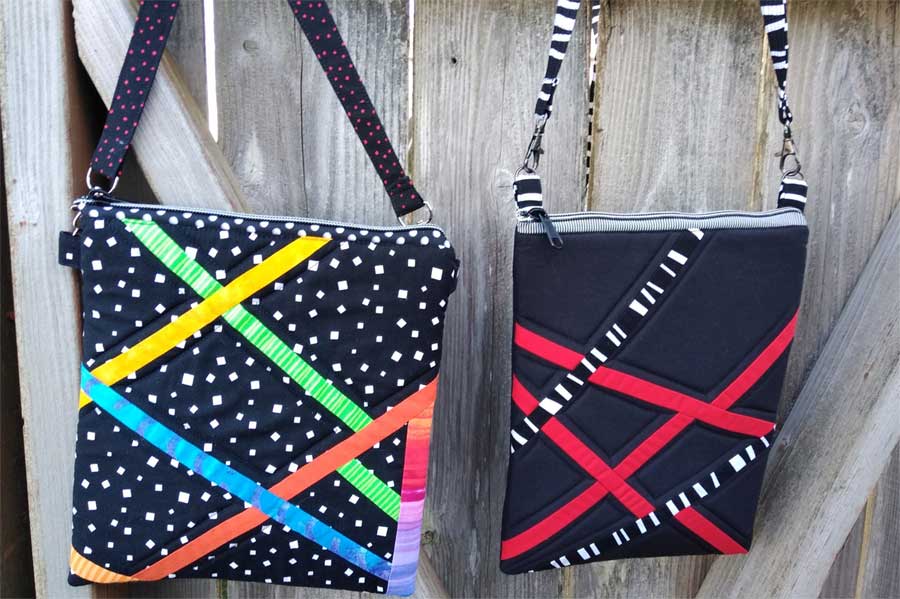
Looking for inspiration? Check out this cute zipper bag from Yarnspirations and visit the link to see how it’s made.
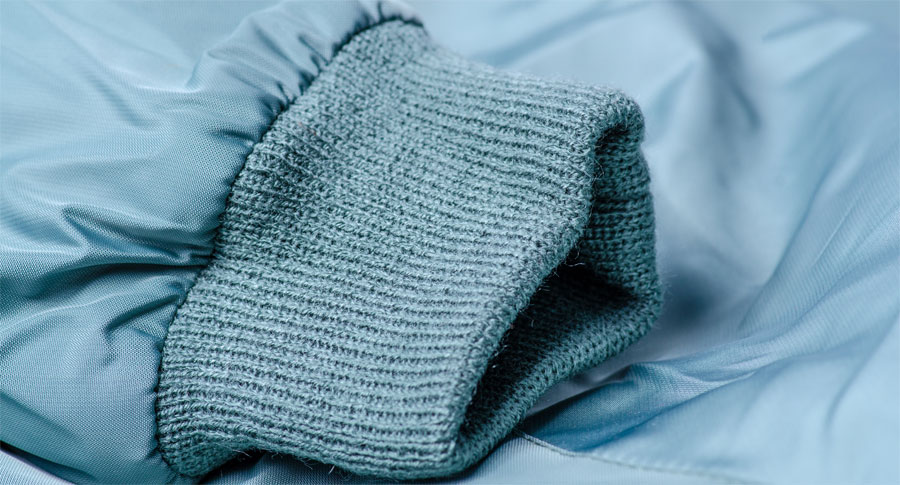
Zipper Bag from Yarnspirations
Photo courtesy of Coats & Clark. See bag instructions at Yarnspirations.

Stacking

Zipper tapes can be overlapped, either closely or more widely spaced, to fill an area, such as a cuff or jacket yoke, or to make a bracelet. The easiest way to do this is to cut a lightweight background fabric in the size and shape needed, then stitch the zippers onto it. For a bracelet, a felt background is ideal since it’s comfortable against the skin, yet sturdy enough to hold the weight of multiple zippers.

Zipper tapes can be parallel to each other, or not, depending on the desired look, and zipper pulls can be incorporated for added accents.

Zipper bracelet by Coats & Clark
Photo courtesy of Coats & Clark

Shaping

Zipper flower from Coats & Clark
Photo courtesy of Coats & Clark

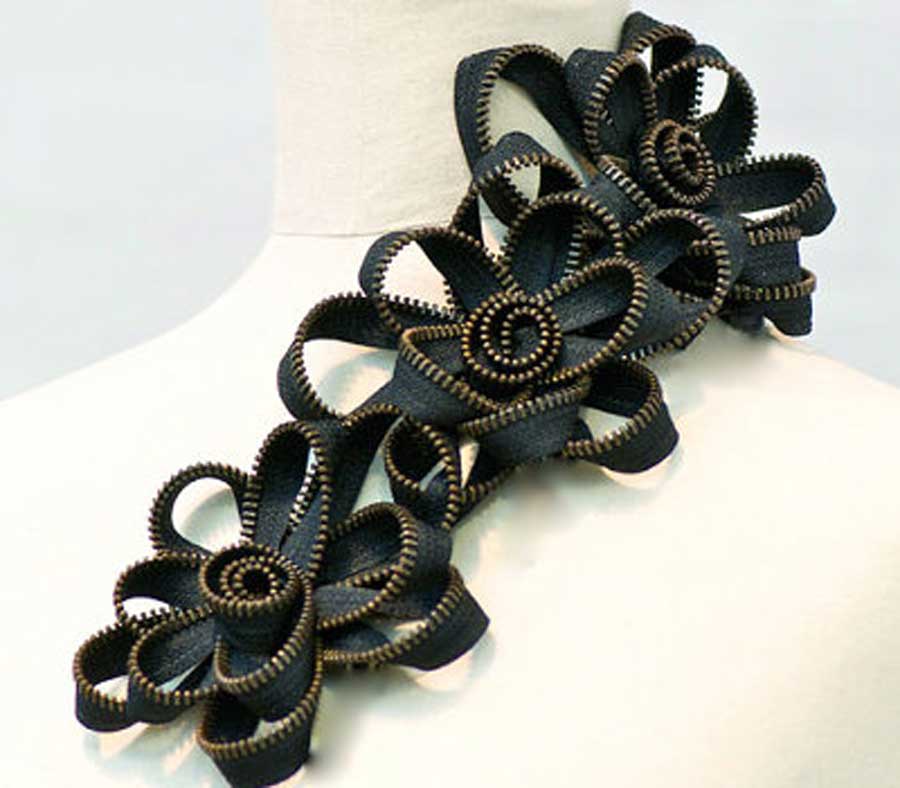
Zipper tape is readily shapeable with a few hand stitches to hold it in place, so making freestanding flowers is easy. Just shape the petals to the desired size and hand-tack the center. Sew directly to the project, or add a pin back to make a jewelry accent.

To make longer lengths of trim, use hand stitches along the tape edge to shape it, either in regular or random patterning, then stitch through the zipper to hold it in place.

For even more flexibility, trim the zipper tape close to the teeth, so that those become the focal point. To prevent fraying, coat the cut edges with a fray stopping product. To hold the design shape, hand-stitch over the teeth with invisible thread.

Zipper as a button
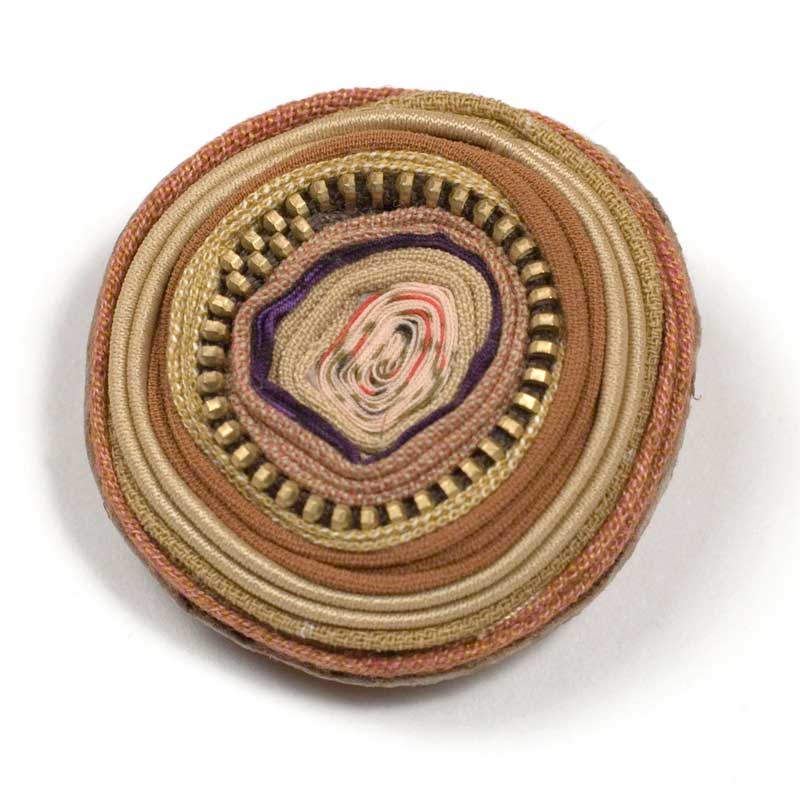
Consider using zippers decoratively to make buttons—the glint of metal teeth works well when coiled with other fabrics. Hand-stitch the wraps together to create the desired size, or stitch them to a background circle of fabric. These types of decorative buttons are best for show, and not for use through a buttonhole, though they can work well through loops…perhaps loops made of zipper.

Piping

Who says piping has to be fabric? It can be even more interesting if it’s made from zippers. Fun teeth create the exposed trim portion for a fun pop of color when inserted into a seam or used along an edge. Insert the zipper tape as you would standard piping so that the teeth are the visible portion, or stitch further away from the teeth to show a hint of the zipper tape as well.

Zippers as piping

Do not extend heavy teeth beyond the seamline, but instead trim them off and use a fray stopping product to secure the ends.

To apply edge piping to a curve, clip into the zipper tape and spread it so it lies flat against the shaped edge.

Zipper applied to a curve and clipped

One caution: Metal or large plastic zipper teeth can be an irritant to the skin when used along the edge of a garment, so keep that in mind when choosing where to use them.

So, start looking at zippers in a new light—not just hidden closures. Happy Zipper Day!


~Linda Griepentrog
Linda is the owner of G Wiz Creative Services and she does writing, editing and designing for companies in the sewing, crafting and quilting industries. In addition, she escorts fabric shopping tours to Hong Kong. She lives at the Oregon Coast with her husband Keith, and two dogs, Yohnuh and Abby. Contact her at .

Did you enjoy this article?
Are you an ASG member?
This field is for validation purposes and should be left unchanged.

Tagged With: National Zipper Day, sewing, zippers

April 22, 2022

Preparing Your Fabric

Even though it may seem inconvenient and a waste of time, preparing your fabric before sewing ensures that your finished garment will look, hang, and wear well.

  • Laundering: Many fabrics will shrink or pucker along the seams the first time they’re laundered, so it’s a good idea to wash or dry-clean it before you cut out your pattern pieces.
  • Straighten the Grain: After preshrinking, straighten the grain of the fabric by pulling or pressing to ensure that the finished garment will look its best.

Preshrinking and Pressing

washing machineTo preshrink, use the same method that you plan to use to launder your finished item. For example, if you’ll be washing and drying a garment by machine, preshrink by machine. If you’re unsure of the best care for the fabric, check the bolt for laundering information (this is a handy. Alternatively, some fabrics also have care symbols on the selvage edge that show care information. Note that there are also some fabrics that have been pre-shrunk or may not be in danger of shrinking. For example, many wools and silks are “needle-ready” and need nothing more than a touch up with an iron before you layout and cut the pattern pieces. With these fabrics, keep in mind that you will need to eventually clean most items regardless. Another item to note is that new fabric is treated with a finishing process to give it that lovely shine and polish. While it does make the fabric easier to work with for cutting and sewing, the finish will disappear after the first cleaning whether you do it as a pre-shrink or if you wait until it’s time for the item to be laundered.

  • Washing by hand is often the best way to launder hand-sewn garments. To preshrink the fabric, either wash and dry it by machine this first time only or simply wash it by hand. If you plan to do it by hand, fold the fabric and submerge it in warm to hot water with a little detergent. The detergent will work to remove any excess dye or finishing substance. Then rinse and air-dry the fabric.
  • Undyed white and off-white wools tend to shrink at an alarming rate and should always be  preshrunk. Lay the fabric on a large terry towel that has just been washed in the machine. The towel should be damp, but not sodden. Roll the fabric and damp towel together like a jelly roll, then leave them overnight. The next day, press the fabric smooth to remove the moisture.
  • Some fabrics, such as wool crepe, must be dry cleaned. In this case, have your dry cleaner process the fabric as if it were a finished garment.

Press your preshrunk fabric before you cut out your pattern pieces and hang it on a hanger so that it won’t wrinkle. Be especially careful when working with fabrics such as crepe as uneven pressing could lead to the width and length becoming uneven and the grainlines no longer straight. While you’re at it, press and hang your pattern pieces, too — they’ll be easier to  work with!

Straightening the Grain

Fabric grain refers to the direction in which the threads run. It’s important for the lengthwise and crosswise threads to meet at right angles, or the project will twist or hang crooked. Even though fabric is woven straight, with the lengthwise and crosswise threads at right angles to each other, it is often pulled off-grain during the finishing process or as it is wound onto the bolt. If you cut and sew a garment off-grain, it may never hang the way you expect it to.

To combat this potential problem, check that the fabric is on the straight of the grain. That is with all edges, selvage, and cross-grain straight and at right angles. Start by making a snip through the selvage about 1″ to 2″ from one of the raw edges. Then do one of the following:

  • If the fabric tears easily, tear the fabric from the cut point
  • Take hold of one crosswise thread and pull it until the fabric gathers. Keep pushing the gathers along until you reach the other end or selvage of the fabric. You should see a fine line being created in the fabric. If the thread breaks, smooth out the gathers and cut on that line until you each the thread end, then pull a new thread from that line and continue working towards the opposite end. When you’re finished, carefully cut through that line to the end.

Now that you have a straight grainline, fold your fabric, matching the selvages and the cut edges. It’s a good idea to press the fabric and then place it on a flat surface. The selvage and cross-grain should be straight and at right-angles to each other. Cross-grain threads should lie on top of one another. If your fabric lays smoothly and your cut edges are even with each other, you’re ready to lay out your pattern and begin cutting out the pieces.

If the fabric is off-grain, pull the fabric firmly from the corners along the bias to straighten it. If you have a lot of yardage to work with, work slowly down the length of the fabric, pulling every 12″ from corner to corner. It helps to have another pair of hands to help with this, but if you are working alone, you can press the fabric while stretching it along the bias as you work.

Do you understand fabric grain, why it’s important and how to work with it? This video will help to explain it.


Did you enjoy this article?
Are you an ASG member?
This field is for validation purposes and should be left unchanged.

Tagged With: fabric care, grainline, preshrink

April 15, 2022

Pick-up Sticks: Creating Artistic Fabric

Perhaps you remember that challenging childhood game of pick-up sticks where you had to carefully remove a stick without disturbing the others around it? Well, that nostalgic game has inspired a fun sewing technique showcasing brightly colored channels inset at various angles onto a base fabric.

Whether you use this technique to create artistic fabric for a small project, a section of a garment (like a pocket, collar, cuff, etc.), or for a quilt, it’s sure to provide some fun sewing time. For purposes of these instructions, we’ll refer to the larger piece as base fabric.

Two bags made with artistic fabric
Pink Sand Beach Design’s Barbados Bag (modified)

Tools

Rotary cutter, ruler, and mat

Preparation

  • Cut the base fabric 1 ½” – 2” larger than the finished size needed. For example, if you’re making a pieced collar, create a rectangle that much larger than your pattern piece.
  • Cut the assorted color inset strips 1” wide.

Cutting Up

Lay the base fabric right side up and make your first cut at any angle you like, cutting it into two sections.

With right sides together and raw edges matching, sew one side of an inset strip to one side of the previously made cut. Press the seam allowances toward the inset.

Matching the second side to the adjacent base section raw edges, sew the remaining inset edge to the opposite side of the cut. Press the seam allowances toward the inset. Trim the excess inset length.

Lay the pieced fabric right side up on your cutting mat. Decide on the angle of your next cut and slice it apart again. The second inset can be at any angle and can bisect the first inset or not, depending on the desired effect.

Repeat steps 1-3 to complete the second inset.

Continue in the same manner, slicing, insetting, and pressing until you have the desired look. Three to five insets per piece is an attractive addition. Note that the edges of the base fabric will not be even once strips have been inserted.

Tip: When you slice through an inset and reassemble the pieces, the adjacent inset sections may or may not align, depending on how you position the second section. If you choose to offset them, do so enough that the alignment looks purposeful and not as though it’s just slippage that caused it.

Once the base is complete, press it flat, and trim to the size needed, including seam allowances for further construction. If you’re making a small project or using the pieced section in a garment, cut out the pattern piece(s) from the completed section of fabric.

Beyond the Basics

  • This technique can be used on almost any woven or non-woven fabric—think lightweight leather, denim, linen, silk, etc. It can work on knits as well if you stabilize the base fabric with fusible interfacing first to avoid stretching.
  • For easier handling, especially on loosely woven fabrics, use spray starch or another pressing aid on the base fabric before starting the piecing to help stabilize bias-cut seams.
  • The base fabric can be solid or print and so can the insets, so mix and match for fun.

  • The inset pieces can be multiple colors or a single color, depending on the desired look.
  • Use the new shapes created by the insets as a guide to quilt the fabric to fleece, foam or batting, depending on the project you’re making. For garments, pre-shrunk flannel backing adds a light touch without adding warmth.
  • A single square is ideal as an inset in a jacket back, or turn under the edges and make it an appliqué. Add some piping around the edge to frame the featured section.

~Linda Griepentrog
Linda is the owner of G Wiz Creative Services and she does writing, editing and designing for companies in the sewing, crafting and quilting industries. In addition, she escorts fabric shopping tours to Hong Kong. She lives at the Oregon Coast with her husband Keith, and two dogs, Yohnuh and Abby. Contact her at .

Did you enjoy this article?
Are you an ASG member?
This field is for validation purposes and should be left unchanged.

Tagged With: artistic fabric, artwork, bags, fabric, garments, quilts

April 8, 2022

Rib-it!

Sometimes a hem just doesn’t cut it—maybe you want something a little snugger, a little warmer, or even a contrast color. Look no further than ribbed cuffs to make all those things happen. They add a professional looking finish to any garment from outerwear to sport and loungewear, including our beloved joggers.

Ribbing on a jacket cuff

But, how do you work with them?

Striped cuffs from Amazon.. Note this an affiliate link.

Ribbed cuffs can be purchased ready-made in a myriad of colors and varying textures of rib, both solid and striped patterning. They’re available in nylon, polyester, cotton and blends of those fibers, depending on what you’re putting them on, and they come in different weights—heavier for outerwear, lighter for T-shirts.

Cotton ribbings offer a more matte appearance, while synthetic fibers can add a bit of a sheen to the finished cuff. Cotton is less resilient to go back to its original shape after wearing, so it’s often paired with a synthetic to aid in that recovery.

If you’re purchasing ready-made cuffs, be sure to check the size, as many brands come in sizes for both children’s garments and adult sleeve finishing. Note not only the height of the cuff, but also the circumference, keeping in mind that ribbing stretches to allow for a snug fit.

Most ready-made ribbed cuffs are seamless as they’re knitted on a round-needle machine.

Adding Cuffs

Ribbed cuffs from Amazon. Note this an affiliate link.

Ribbed cuffs can be applied to both woven and knit fabrics, and to sleeves or pant legs for a snugger, warmer fit than just a hem. If your pattern calls for ribbed cuffs, chances are good that the pattern length has been shortened to allow for the cuff length. If not, you may need to trim the length to accommodate the cuff length. For ease of instructions, we’ll be applying the cuff to a sleeve, but the same details apply if you’re applying a cuff to pant legs.

The lower sleeve edge will be larger than your cuff for proper fit. Starting at the underarm seam, divide the lower sleeve opening into quarters and pin-mark. Divide the upper edges (two layers) of the cuff into quarters and pin-mark. With right sides together, match the folded cuff quarters to the quarters of the sleeve opening. There should be more garment than cuff.

Using a narrow zigzag or serger stitch, sew around the upper cuff/sleeve edge stretching the ribbed cuff to fit the sleeve fabric. Sew with the ribbing side facing you. Sewing one quarter at a time allows for even distribution of the sleeve fullness as it’s attached to the cuff. If you’re using a serger, trim off the knit cuff/sleeve edges at the seamline; if you’re using a zigzag, sew along the seam allowance, trim if needed, and sew again over the knit edges to finish.

To add a sportier look, finger-press the seam toward the sleeve and topstitch 1/8” beyond the seamline.

D-I-Y Rib Cuffs

Ribbing fabricIf you prefer to make your own cuffs, look for ribbing at your local fabric store or online resource to match or contrast with the garment. Generally, ribbing is narrower than fashion fabrics, and the rib patterning may vary depending on the weight. Note the fiber content as mentioned above. Ribbing can be sold by the yard or by the inch.

• You don’t need much rib to make cuffs—just twice the finished cuff length, plus seam allowances.

• To cut the cuffs, measure your wrist (or ankle for pants) and add 1”. Make a paper pattern for the cuffs using that measurement for the width and about 7” for the length—this will make a 3”-tall cuff using a ½” seam allowance.

• Cut the cuff so that the greatest amount of stretch goes across the width of the pattern and the ribs go vertically.

• Fold each cuff in half width-wise with right sides together and sew a ½” seam down the rib line. Trim the seam allowance and finger-press open. Try on the cuff to check for fit, and resew if necessary, depending on how snugly you want the cuff to fit.

• Fold the cuff wrong sides together, matching the seamlines and pin the upper edges together.

• Apply the cuff as noted above for ready-made versions.

WARDROBE TIP: Adding ribbed cuffs to either sleeves or pant legs is a way to extend the wearing life of garment for a growing child. As these areas get too short, just add a few extra inches of cuff to change the look of the garment and allow the item to be worn longer.


~Linda Griepentrog is the owner of G Wiz Creative Services and she does writing, editing and designing for companies in the sewing, crafting and quilting industries. In addition, she escorts fabric shopping tours to Hong Kong. She lives at the Oregon Coast with her husband Keith, and two dogs, Yohnuh and Abby. Contact her at .

Did you enjoy this article?
Are you an ASG member?
This field is for validation purposes and should be left unchanged.

April 1, 2022

The Gilded Chain of Chanel

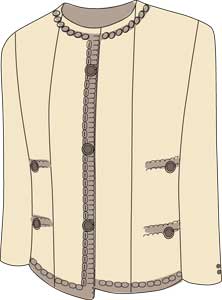
The gilded chain is an attractive, decorative trim on the inside of most Chanel jackets at the hemline, and is one of the most Chanelisms (the term used by the editors of Vogue Magazine to describe distinctive Chanel techniques). The chain is generally made of brass or heavy metal and is used instead of inexpensive lead weights that are hidden between the hem allowance and outer shell in traditional tailored jackets.

The chain is an essential component and plays an integral role in controlling the drape of Chanel’s distinctive jackets. Many of these featherweight designs have only two fabric layers — a lightweight fashion fabric and a blouse-weight lining that have been quilted together. They are often assembled without the usual interfacings, underlinings, facings, and linings.

Read more (requires member login)

The complete version of this article is available on the ASG Members Only blog.
CLICK HERE to read the full article. Not a member? Join online!

Tagged With: chain weight, chanel jacket

  • « Previous Page
  • 1
  • …
  • 28
  • 29
  • 30
  • 31
  • 32
  • …
  • 62
  • Next Page »

Become a Member

Join the only national organization dedicated to Advancing Sewing as an Art and Life Skill.

Join Now button

Blog Article Categories

  • ASG Conference
  • Chapter Stories
  • Embroidery
  • Fitting
  • Learn to Sew
  • National Sewing Month
  • Products, Books, & Patterns
  • Projects
  • Quilting
  • Sewing
  • Sewing Techniques
  • Sewing Tips
  • Sewing Tours
  • Videos
  • Disclaimer
  • Privacy Policy

American Sewing Guild
National Headquarters
9660 Hillcroft, Suite 230
Houston TX 77096
713-729-3000 | 713-721-9230 Fax
www.ASG.org

ASG wordcloud - education, conference, discounts, videos, special offers, tours and more

Copyright © 1998–2025 · American Sewing Guild · All Rights Reserved