 Whether you sew slowly and diligently or you speed on with reckless abandon, your sewing machine can help with speed control. Most every machine has a speed control of some sort, but sometimes it’s overlooked.
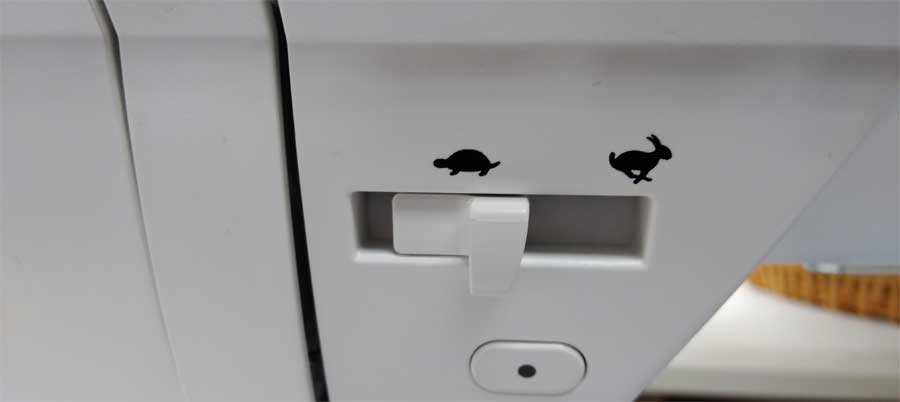
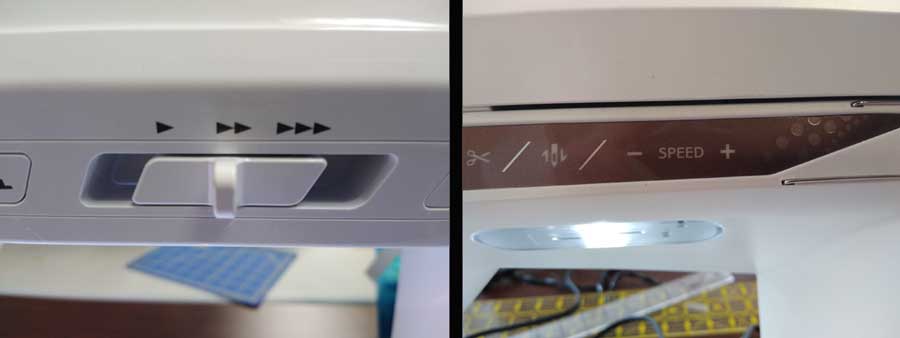
These handy regulators look different depending on the machine brand, but the function is the same—to act as a governor for your sewing speed. Some are sliding levers with dots to indicate speed (one dot, two dots, three dots), some offer plus and minus indicators, still others offer arrowheads (one, two, three), and then there’s the clever tortoise and hare indicators. Other brands of machines offer plus and minus sign push buttons, rather than sliders, for speed indication.
“Why do I need this function when I can simply adjust the sewing speed by varying the foot pedal pressure?”
One great place to use the speed regulator is if you’re teaching someone to sew. Sometimes there’s a tendency to want to “speed” and we all know what happens then if you’re new to sewing—an opportunity for a lesson in ripping out stitches. Using the speed regulator ensures a slow, steady pace and fewer mistakes.
Going around tight curves is a place where you might want to go more slowly than when stitching long, straight seams. Along the same lines, appliqué requires a slower pace for accuracy and good edge coverage. Sewing very heavy thick fabric is often more successful with a slower speed.
Sewing decorative stitches is another place you may want to utilize the stitch speed regulator, so that you’re sewing at a consistent speed for the best appearance. On some machines if you vary the speed as you’re sewing, the stitch appearance may be slightly different.
The speed regulator works with the embroidery function on some machines, but not others. It’s a handy way to slow down the stitching when using metallic or other novelty threads that tend to require more diligence. The slower speed is also great for the intricacies of lace making and structural embroidery.
And then there’s free-motion stitching…stippling and embroidery work. Free-motion stitching often tends to “get away from you” and you can work yourself into a seemingly insurmountable corner if you’re going too fast. That said, some free-motion stitchers prefer to go at the maximum speed, so it simply depends on your comfort (and skill) level.
The stitch speed regulator is just another way, in conjunction with the foot control, you can control your stitching speed if you’re sew inclined. Some machines also allow you to control speed by adjusting the rpm/stitches per minute setting.
Finally, did you know that many machines also have a control to set the bobbin winding speed? If you go full-throttle when winding a bobbin, some threads can stretch and adversely affect your seam sewing tension. One place to slow the winding speed is when you’re filling a bobbin with novelty thread for bobbinwork—slow and steady wins the race in this instance. Winding metallic threads onto the bobbin also requires a slower pace to avoid breakage. So, check your instruction manual to see if your brand has a way to adjust the bobbin-winding speed.
I debated about sharing this anecdote but decided to go for it, as I’m sure some of you can relate…
I recently had my sewing machine serviced and when I got it back, it seemed to sew slower than I’d remembered. I dismissed the thought, but as I kept sewing for a few days, I’d resolved that I might need to call the dealer where I had it serviced. Time got away from me, and I took the machine to a sewing retreat. When I was lamenting that the machine seemed to be sewing slower than I’d remembered, one astute table mate (thank you, Andi) said calmly, “Have you tried moving the slider bar?” “What slider bar?” said I.
Apparently, the service person had put the speed slider level in the middle of the available speed range, which is why the machine was sewing slower. Who knew? A very embarrassing truth be told, I’ve sewn for many decades and never used the speed adjustment on any machine I’ve had. I’m a pedal-to-the-metal type of girl and if I need to sew slower, I just lighten the pressure on the foot pedal. Lesson learned: Read the instruction manual!
As an aside, I polled several sewing friends and most have never used this machine feature either. ~Linda
~Linda Griepentrog
Linda is the owner of G Wiz Creative Services and she does writing, editing and designing for companies in the sewing, crafting and quilting industries. In addition, she escorts fabric shopping tours to Hong Kong. She lives at the Oregon Coast with her husband Keith, and two dogs, Yohnuh and Abby. Contact her at gwizdesigns@aol.com.


