American Sewing Guild (ASG)

Visit our blog Visit the ASG Facebook page Visit ASG on Pinterest Visit ASG's YouTube channel Visit ASG on Instagram
  • Home
  • Join ASG
    • Join Online
    • Chapter Locations
    • Member Benefits
    • Member Brochure
    • Join by Mail
  • Conference & Education
  • Resources
    • Contests & Awards
    • Giving Back
    • Hall of Fame
    • Links
    • Travel and Tours
    • Measurement Chart
  • Shop
    • ASG Store
    • Chapter Products
    • Video Resources
  • Blog
  • About
    • About Us
    • Donate to ASG
    • ASG Sensitivity Statement
    • FAQ’s
    • Start a Chapter
  • Contact
  • Member Login
    • Login First!
    • Members Only
    • Leadership Only
    • Website FAQ’s
    • Logout
  •  

March 31, 2021

Fireside Chat: Shankari Paradee

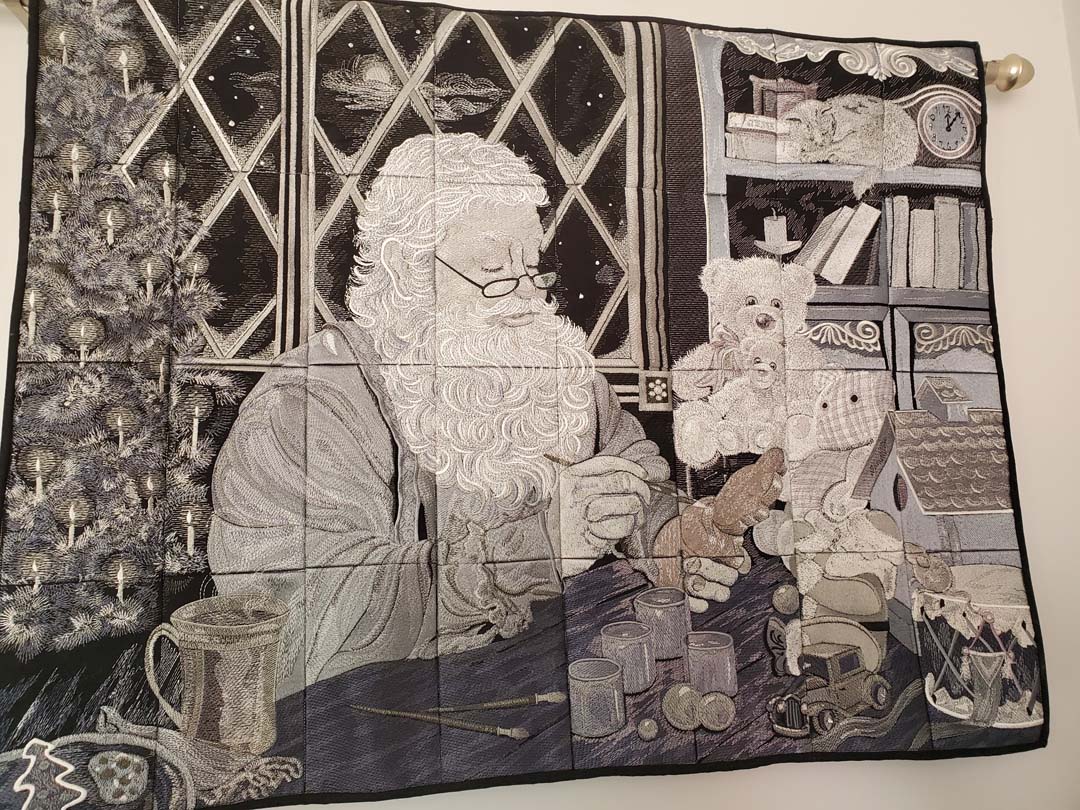
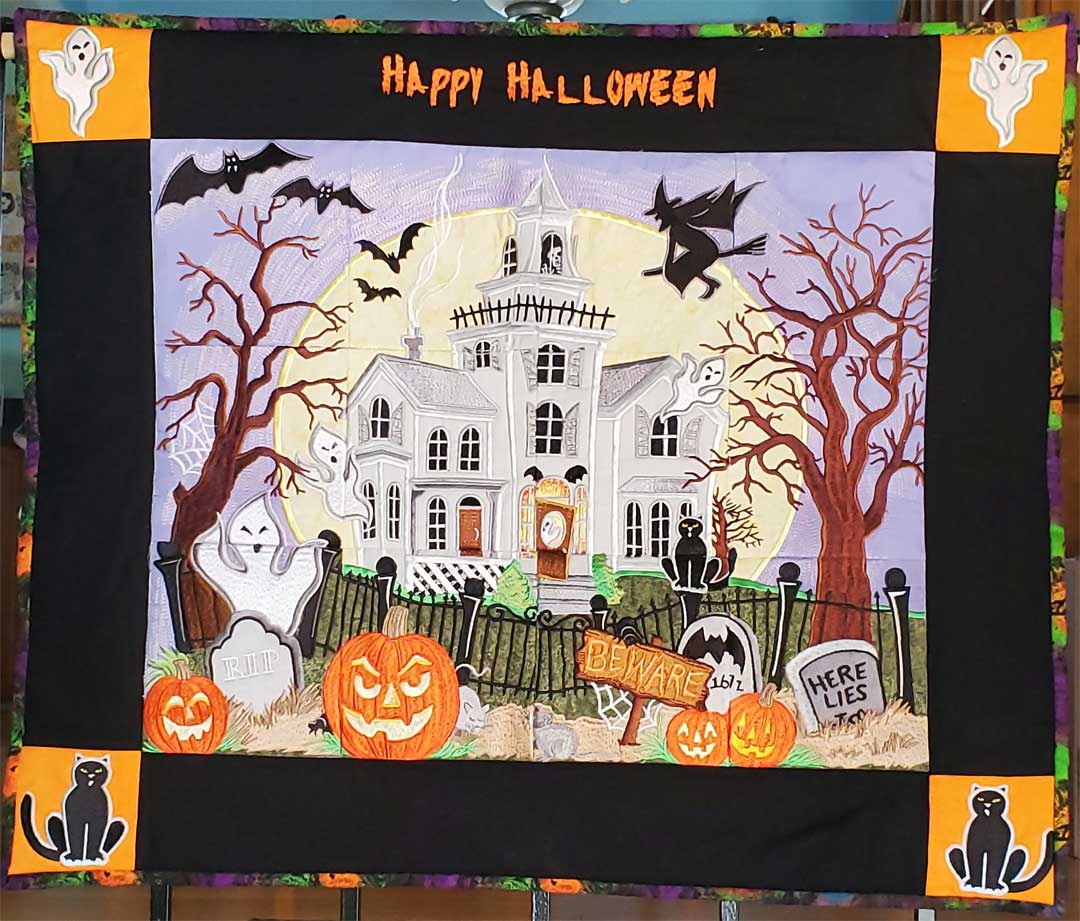
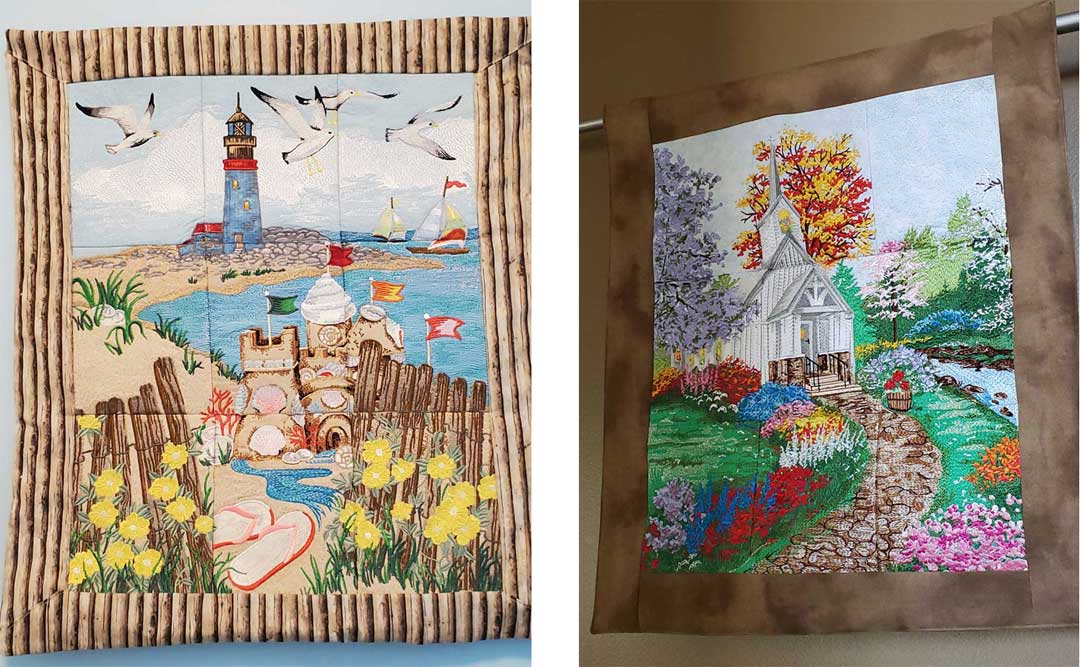
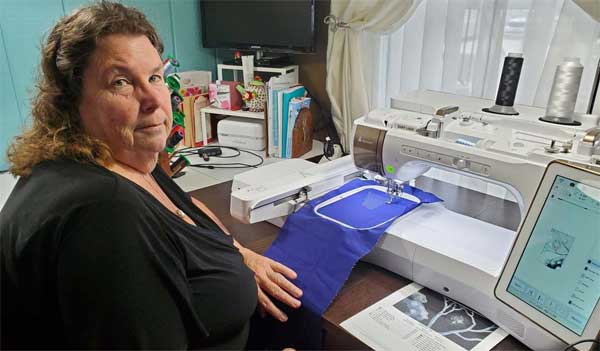
We hope you enjoy this 25 minute chat with Shankari (a.k.a. Sewl Sister) as she talks about making quilts and memory bears with a plan for zero waste. Her goal is to live in a world with no landfill fabric. We think you will enjoy her story and be inspired! Visit the Sewl Sister website at https://www.sewlsister.com/


~Sheryl Belson

Did you enjoy this article?
Are you an ASG member?
This field is for validation purposes and should be left unchanged.

Tagged With: fabric, memory bears, quilt

February 12, 2021

To Boldly Go Where No Quilt Has Gone Before

This is the story of my little lap quilt that ended up across the country, helping people.

I’m sure all sewists can relate to seeing a certain fabric that catches their eye and the excitement of seeing that it’s on clearance! JoAnn’s had Star Trek fabric for $3.00 a yard and I had to buy it. As a 12 year old, I loved Star Trek so I brought it home and there it sat, in my stash, for several years. Then COVID-19 happened and everything shut down, so I used my new-found free time to sew and vowed to use some of my stash. Like many, I made masks, but I also needed to do something creative and fun. I came across the Star Trek fabric and went to work. In a few days I had a nice lap quilt in red and black, quilted with embroidered stars, but it really didn’t fit my decor. I decided to ask my son, Andrew, if any of his friends would like a science fiction quilt. He thought about it and came up with a plan. He wanted to put it up for auction on Twitter for charity.

I really didn’t think anyone would pay much for it, but anything for charity is good. Since the pandemic had caused food insecurity for so many, we chose Philabundance. After five days on Twitter, the winning bid was $125.00 from a young man in California named Josh. I was so happy that the quilt would feed people and make Josh happy.

Then something exciting occurred — Josh and Andrew were contacted by William Shatner. Yes, “the” William Shatner… the REAL CAPTAIN KIRK! Mr. Shatner told Josh he was lucky to get the quilt and wished that he had seen it sooner so that he could have bid on it and put it in his children’s charity auction. Josh was so sweet, he donated the quilt for the auction! I boxed the quilt up and sent it to Mr. Shatner’s company in April of 2020 and included a note about the quilt. And since Josh was so nice, I made him a new Star Trek quilt to replace the donated one.

The pandemic continued and I kept busy, not thinking much about the quilt. In early November, Andrew received the following tweet from Mr. Shatner:

@yoda have you seen the current bid price? Your mother should go into business!

I couldn’t believe it! Now don’t think that I am vain enough to believe that my sewing skills are worth that much. It may have something to do with the fact that the quilt was signed by William Shatner – Captain Kirk himself – on the label.

I was so excited and shared this story with my friend, Dianna Kelly, and she mentioned it at our Sew What group Zoom meeting. I hadn’t followed up on the bidding because I just didn’t think it would go any higher … but then Beverly Betz found this:

Final bid $ 905.00! I am beyond thrilled that my sewing hobby has helped children and provided food for those who are struggling. The takeaway here is a reminder that what we do as sewists is now being looked at in a different light since the pandemic started. Whether it’s quilts, masks, or caps for friends, family or strangers, what we create is making a difference in the world. So to paraphrase Mr. Spock from Star Trek  — live long and prosper — and keep sewing.


~Lynda Harrison, ASG Member

Did you enjoy this article?
Are you an ASG member?
This field is for validation purposes and should be left unchanged.

Tagged With: Captain Kirk, charitable sewing, quilt, sewing, Star Trek, William Shatner

January 22, 2021

Idea Board: Off-Grain Fringe Techniques

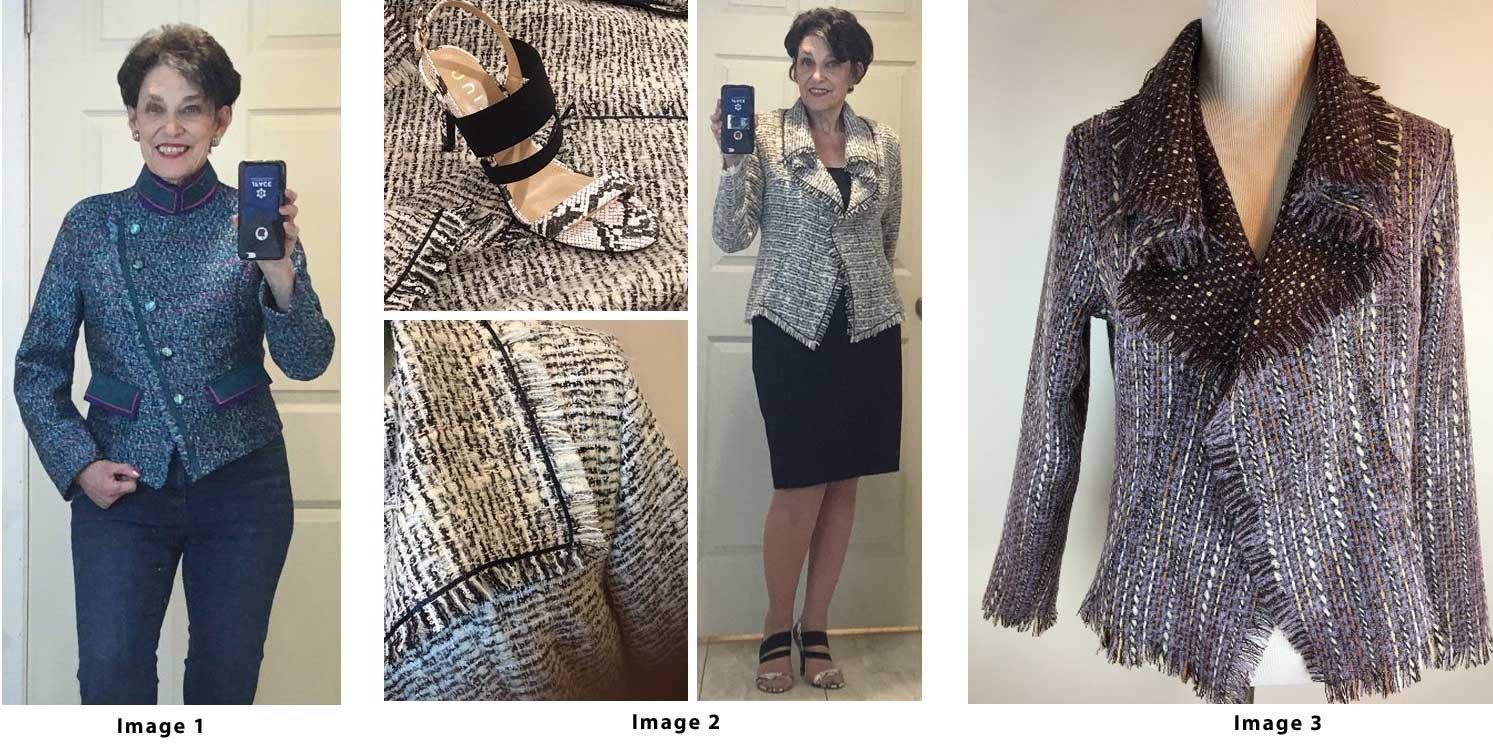
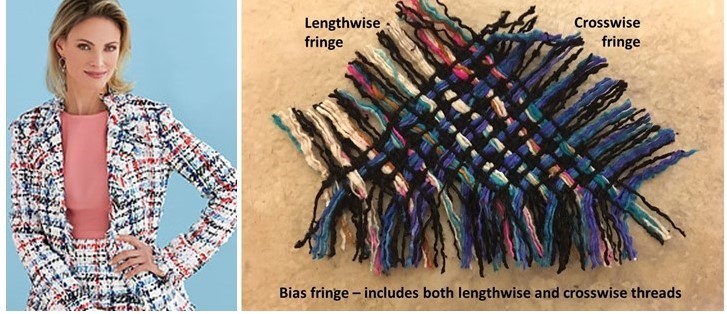
Fringe, whether you choose to love it or leave it, has undoubtedly stood the test of time. Dating back to 3000 B.C. in Mesopotamia, fringe became popular as a fashion embellishment in the 1920’s, then resurfaced again in the 50’s, and came full circle in the 60’s, 70’s and 80’s. Popular again today, it can be casual and trendy or utterly timeless, like in the garments shown here. Enjoy some ideas from Nancy Nix-Rice on these beautiful fringe accents.


On a multi-color tweed jacket, fringed along the off-grain center edge,  I added a top-stitched band of Ultrasuede to both stabilize the edge and emphasize the diagonal line. Carefully snipping – at about 1” intervals – from edge to seamline parallel to the crossgrain threads allowed the fringe to shape off-grain. (Image 1)

On the Itch to Stitch Hvar cardigan, I eliminated the double layer front in favor of a soft cascade effect. I zigzagged 1/8” black satin ribbon along the seamline to define the inner edge of the fringe, slipping the ribbon through an opening in the loose weave to bring it to the opposite side of the fabric at the bottom of the cascade. (Image 2)

On a second iteration of the Hvar, I used a serpentine stitch to stabilize that endpoint of the fringe. The stitches melded invisibly into the deep tweed texture. (Image 3)

I expected that to be the end of my fringe-fest. Then Butterick came out with this gem – Pattern 6738 – that included directions for creating a fuller, more color-balanced effect by fringing on the true bias. That is especially helpful since many fabrics fringe to a very different looks along the crosswise vs lengthwise grain. (Image 4)

Image 4 (Butterick 6738)

I didn’t actually make that pattern because I already had a black/gray/pink jacket in a bag in the closet – half-finished because of that very issue. The jewel neckline needed that bias technique in its curved areas and the front and hem edges needed an inset layer for a fuller look. Problem solved, and here is the result! (Image 5)

Image 5

~Nancy Nix-Rice

Did you enjoy this article?
Are you an ASG member?
This field is for validation purposes and should be left unchanged.

Tagged With: embellishment, fringe, garment sewing

December 24, 2020

Happy Holidays 2020

Happy holidays from the American Sewing Guild!

https://www.asg.org/wp-content/uploads/2020/12/ASGChristmas2020.mp4

Tagged With: Christmas

December 11, 2020

What I’m Embroidering: Tile Embroidery

Gorgeous! Amazing! Exquisite! So detailed!
But how LONG did it take?

Diana Latino of the Princeton Chapter is getting used to comments like these that come every time she shares one of her completed tile embroideries. And she has a number of them done already.

What’s Tile Embroidery?

Tile embroidery is a complex design done on an embroidery machine in which up to 32 separate, usually very dense designs are stitched independently  and then sewn together to create a complete picture for a wall size quilt.

Diane’s holiday design, Starry Night Santa from OESD is the perfect example of this intricate style. With the light just right, you can see where the separate tiles have been sewn together to create the image of Santa standing on a snowy landscape looking up at the Christmas star. Each tile is created by the embroidery stitches with a myriad of threads to create the subtle shadings. The entire design was more than a million stitches with about 32 thread changes per tile. And as for how long did it take, Diana claims to have completed the embroidery in just a week. Then she added, “But that was stitching 8 hours or more a day, every day,” and credits husband Mike with doing all the cooking which allowed her to focus on the stitching. With 32 tiles and each tile taking up to 3 hours to embroider, that was an intense 96 hour work week! But the results are spectacular.

Getting Started

Diana began embroidering in 2005, and discovered the tiles in 2010 when she got tired of just sewing for her kids and wanted something more challenging. She says she gets such a feeling of accomplishment when she puts the finishing touches on one of these designs, and even though many are holiday themed, she leaves them hanging all year. Her Santa’s Workshop, also from OESD, is another Christmas themed design. This one appears to be in black and white, but achieves its detail and subtle shadings through the use of 18 different shades of gray thread. Keeping the thread names, numbers, and spools coordinated is one of her biggest challenges. In fact, she once relied on the color name that came up on her machine and ended up with a blue ear on Santa!  Now she lines up all her threads and labels them BEFORE she begins her first tile.

Adding Machine Appliqué

Some of the designs like Poppy also incorporate machine appliqué with the stitching. The use of fabrics cuts down the embroidery time and gives a more traditional quilting look to the finished project. Her Halloween from Molly Mine designs is another example of the use of appliqué. And another Halloween design this time from Anita Good is Haunted House.

Not all of her efforts go into holiday designs. Diana shared some pictures of floral designs from Anita Good, Connecting Flowers and County Church as well as the landscape, Beach.

Tips

If you have been inspired to try a tile embroidery, Diana has a few suggestions.

  • Organization is essential for any project, but especially when working with tiles.
  • Be sure to have the right threads and label them so you can easily select the correct color.
  • To save fabric, instead of cutting out and hooping separate blocks, cut fabric into longstrips the required width for the hoop.  This allows you to hoop the next design without the large areas of wasted fabric outside the hoop.
  • To make stitching the tiles together easier, on each completed tile, label the back with the number of the tile to make sewing the project more organized.
  • To line up the tiles more accurately, a bright colored thread in the bobbin for the outline stitch makes the alignment more visible.
  • Trim the blocks to a ½” seam allowance instead of the ¼” recommended.  The ½” is more manageable.

Diana regularly shares her embroidery projects with the online embroidery group of the Princeton Chapter where she has inspired and motivated members to experience the fun of machine embroidery.


~Diana Latino, Princeton Chapter

Did you enjoy this article?
Are you an ASG member?
This field is for validation purposes and should be left unchanged.

Tagged With: embroidery, quilt, wall quilt

  • « Previous Page
  • 1
  • …
  • 39
  • 40
  • 41
  • 42
  • 43
  • …
  • 62
  • Next Page »

Become a Member

Join the only national organization dedicated to Advancing Sewing as an Art and Life Skill.

Join Now button

Blog Article Categories

  • ASG Conference
  • Chapter Stories
  • Embroidery
  • Fitting
  • Learn to Sew
  • National Sewing Month
  • Products, Books, & Patterns
  • Projects
  • Quilting
  • Sewing
  • Sewing Techniques
  • Sewing Tips
  • Sewing Tours
  • Videos
  • Disclaimer
  • Privacy Policy

American Sewing Guild
National Headquarters
9660 Hillcroft, Suite 230
Houston TX 77096
713-729-3000 | 713-721-9230 Fax
www.ASG.org

ASG wordcloud - education, conference, discounts, videos, special offers, tours and more

Copyright © 1998–2025 · American Sewing Guild · All Rights Reserved