American Sewing Guild (ASG)

Visit our blog Visit the ASG Facebook page Visit ASG on Pinterest Visit ASG's YouTube channel Visit ASG on Instagram
  • Home
  • Join ASG
    • Join Online
    • Chapter Locations
    • Member Benefits
    • Member Brochure
    • Join by Mail
  • Conference & Education
  • Resources
    • Contests & Awards
    • Giving Back
    • Hall of Fame
    • Links
    • Travel and Tours
    • Measurement Chart
  • Shop
    • ASG Store
    • Chapter Products
    • Video Resources
  • Blog
  • About
    • About Us
    • Donate to ASG
    • ASG Sensitivity Statement
    • FAQ’s
    • Start a Chapter
  • Contact
  • Member Login
    • Login First!
    • Members Only
    • Leadership Only
    • Website FAQ’s
    • Logout
  •  

April 2, 2021

Sewing Q&A

Maybe you’ve wondered about something related to sewing, but couldn’t find an answer elsewhere. We’re here to help!

Bias Binding

Q. If I want to cut my own bias binding, how do I do that?
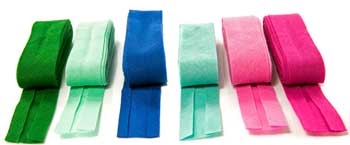
A. True bias is a 45° angle to the selvage edge of the fabric. It’s stretchier than either the lengthwise or crosswise grain making it ideal to bind curves. To find that angle, use a ruler with a 45° marking and align that mark with a straight edge of the fabric (selvage) to make your first cut. After the initial cut, use the ruler to cut enough bias strips for your project at the width you need.

  • Bias binding is usually cut four times the desired finished width, plus seam allowance. So, if you want a ½” finished binding, cut the strips 2 1/2” wide (using a ¼” seam allowance).
  • Seam the lengths together along the straight grain using a diagonal seam. Why? So that it distributes the bulk of the seam more evenly and the seam allowances aren’t on top of each other making a lump.
  • If you’re binding something without curves, you can cut binding on the straight grain instead of bias. Simply cut the strips across the width of the fabric and sew them together using diagonal seams to create the length needed.
  • Fold the binding using a bias tape maker, or apply using another method.

Tip: Watch our short video on how to use a bias tape too

Press Cloth

Q. Why do I need to use a press cloth? 
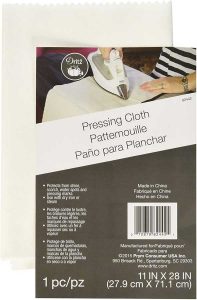
Dritz Pressing Cloth available on Amazon

A. A press cloth is used to protect the fabric so that it isn’t damaged by the iron’s heat. It helps prevent scorching, water marking and errant press marks. Some fabrics develop a shine if they’re pressed directly and it’s irreversible; others can melt. A press cloth can be as simple as a piece of cotton fabric. Some press cloths are napped, others are flat finished, depending on the material you’re using it on. Good fabric choices for press cloths are solid color batiste, muslin and silk organza. The latter allows you to see through the cloth to the fabric detailing below.

Another function of a press cloth can be to add moisture to the pressing process. Some fusible interfacings and stabilizers fuse best with a damp press cloth, and moisture is helpful for shaping wool pieces, like collars and lapels, during the tailoring process.

Fusible Stay Tape

Q. The shoulders in my knit T-shirts seem to stretch. Is there a way to prevent that?

A. Absolutely! You can purchase a straight grain fusible stay tape that can be ironed on over the shoulder seamline area before you stitch the seam. That will maintain the original size of the pattern piece. Another option is to use the selvage area of a similar color woven fabric as a stay tape that you sew over. If you need some give in the shoulder seam, sew over some clear elastic that you stretch ever so slightly as you sew the shoulder seam.

Shredding Thread

Q. What causes my thread to shred (and break) while I’m sewing?
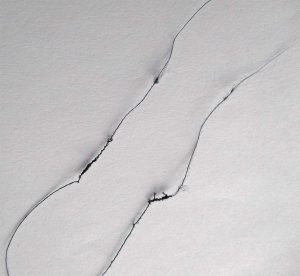
A. There are several things that can cause thread to shred, but most commonly is using the wrong size needle. Thread needs to have clearance to pass freely through the eye of the needle and subsequently through the fabric layers you’re sewing. If the needle isn’t large enough to make a hole of sufficient size, the abrasion can cause the thread to shred as it passes through the fabric. Always match the size and type of needle to the fabric.

Another cause of shredding can be a burr on the needle. If you’ve sewn over pins (Like, who would do that?), they could have slightly nicked the needle and that rough area can catch on the thread as it forms the stitches. Poor quality thread can also be an issue, so always purchase good quality thread—it’s worth the investment.


~Linda Griepentrog
Linda is the owner of G Wiz Creative Services and she does writing, editing and designing for companies in the sewing, crafting and quilting industries. In addition, she escorts fabric shopping tours to Hong Kong. She lives at the Oregon Coast with her husband Keith, and two dogs, Yohnuh and Abby. Contact her at .

Did you enjoy this article?
Are you an ASG member?
This field is for validation purposes and should be left unchanged.


Tagged With: bias binding, fusibles, pressing cloth, stay tape, thread

March 31, 2021

Fireside Chat: Shankari Paradee

We hope you enjoy this 25 minute chat with Shankari (a.k.a. Sewl Sister) as she talks about making quilts and memory bears with a plan for zero waste. Her goal is to live in a world with no landfill fabric. We think you will enjoy her story and be inspired! Visit the Sewl Sister website at https://www.sewlsister.com/


~Sheryl Belson

Did you enjoy this article?
Are you an ASG member?
This field is for validation purposes and should be left unchanged.

Tagged With: fabric, memory bears, quilt

February 12, 2021

To Boldly Go Where No Quilt Has Gone Before

This is the story of my little lap quilt that ended up across the country, helping people.

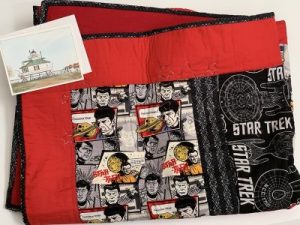
I’m sure all sewists can relate to seeing a certain fabric that catches their eye and the excitement of seeing that it’s on clearance! JoAnn’s had Star Trek fabric for $3.00 a yard and I had to buy it. As a 12 year old, I loved Star Trek so I brought it home and there it sat, in my stash, for several years. Then COVID-19 happened and everything shut down, so I used my new-found free time to sew and vowed to use some of my stash. Like many, I made masks, but I also needed to do something creative and fun. I came across the Star Trek fabric and went to work. In a few days I had a nice lap quilt in red and black, quilted with embroidered stars, but it really didn’t fit my decor. I decided to ask my son, Andrew, if any of his friends would like a science fiction quilt. He thought about it and came up with a plan. He wanted to put it up for auction on Twitter for charity.

I really didn’t think anyone would pay much for it, but anything for charity is good. Since the pandemic had caused food insecurity for so many, we chose Philabundance. After five days on Twitter, the winning bid was $125.00 from a young man in California named Josh. I was so happy that the quilt would feed people and make Josh happy.

Then something exciting occurred — Josh and Andrew were contacted by William Shatner. Yes, “the” William Shatner… the REAL CAPTAIN KIRK! Mr. Shatner told Josh he was lucky to get the quilt and wished that he had seen it sooner so that he could have bid on it and put it in his children’s charity auction. Josh was so sweet, he donated the quilt for the auction! I boxed the quilt up and sent it to Mr. Shatner’s company in April of 2020 and included a note about the quilt. And since Josh was so nice, I made him a new Star Trek quilt to replace the donated one.

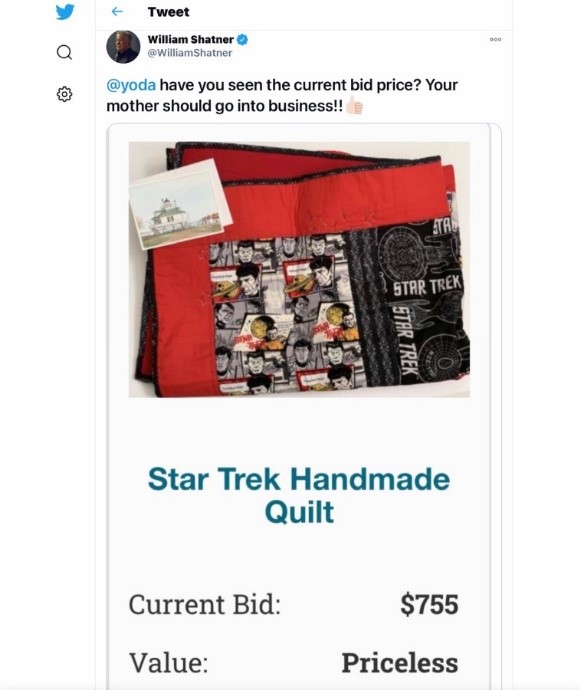
The pandemic continued and I kept busy, not thinking much about the quilt. In early November, Andrew received the following tweet from Mr. Shatner:

@yoda have you seen the current bid price? Your mother should go into business!

I couldn’t believe it! Now don’t think that I am vain enough to believe that my sewing skills are worth that much. It may have something to do with the fact that the quilt was signed by William Shatner – Captain Kirk himself – on the label.

I was so excited and shared this story with my friend, Dianna Kelly, and she mentioned it at our Sew What group Zoom meeting. I hadn’t followed up on the bidding because I just didn’t think it would go any higher … but then Beverly Betz found this:

Final bid $ 905.00! I am beyond thrilled that my sewing hobby has helped children and provided food for those who are struggling. The takeaway here is a reminder that what we do as sewists is now being looked at in a different light since the pandemic started. Whether it’s quilts, masks, or caps for friends, family or strangers, what we create is making a difference in the world. So to paraphrase Mr. Spock from Star Trek  — live long and prosper — and keep sewing.


~Lynda Harrison, ASG Member

Did you enjoy this article?
Are you an ASG member?
This field is for validation purposes and should be left unchanged.

Tagged With: Captain Kirk, charitable sewing, quilt, sewing, Star Trek, William Shatner

January 22, 2021

Idea Board: Off-Grain Fringe Techniques

Fringe, whether you choose to love it or leave it, has undoubtedly stood the test of time. Dating back to 3000 B.C. in Mesopotamia, fringe became popular as a fashion embellishment in the 1920’s, then resurfaced again in the 50’s, and came full circle in the 60’s, 70’s and 80’s. Popular again today, it can be casual and trendy or utterly timeless, like in the garments shown here. Enjoy some ideas from Nancy Nix-Rice on these beautiful fringe accents.
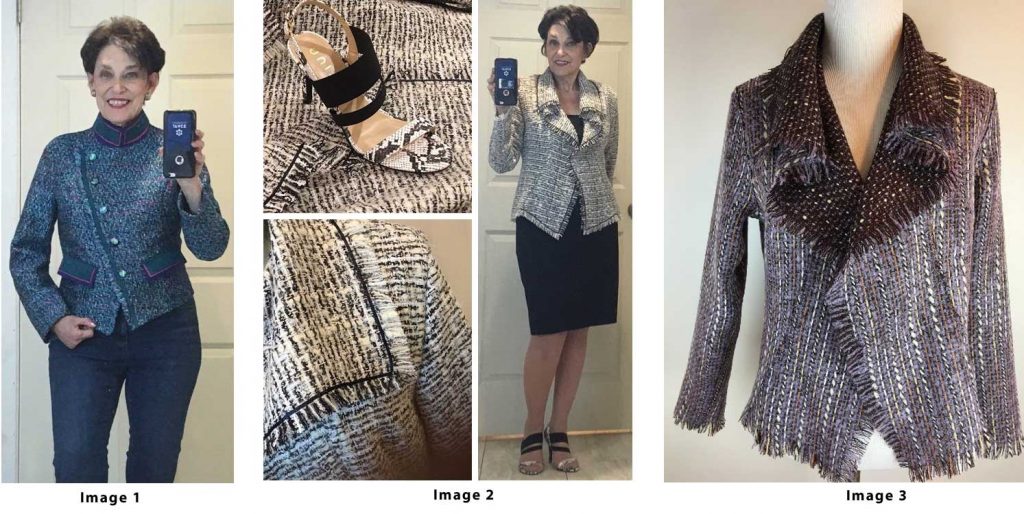
On a multi-color tweed jacket, fringed along the off-grain center edge,  I added a top-stitched band of Ultrasuede to both stabilize the edge and emphasize the diagonal line. Carefully snipping – at about 1” intervals – from edge to seamline parallel to the crossgrain threads allowed the fringe to shape off-grain. (Image 1)

On the Itch to Stitch Hvar cardigan, I eliminated the double layer front in favor of a soft cascade effect. I zigzagged 1/8” black satin ribbon along the seamline to define the inner edge of the fringe, slipping the ribbon through an opening in the loose weave to bring it to the opposite side of the fabric at the bottom of the cascade. (Image 2)

On a second iteration of the Hvar, I used a serpentine stitch to stabilize that endpoint of the fringe. The stitches melded invisibly into the deep tweed texture. (Image 3)

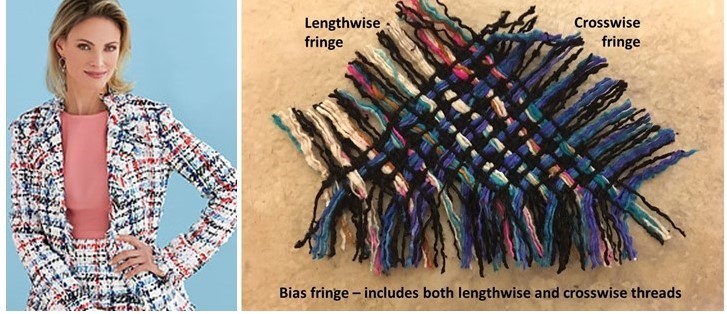
I expected that to be the end of my fringe-fest. Then Butterick came out with this gem – Pattern 6738 – that included directions for creating a fuller, more color-balanced effect by fringing on the true bias. That is especially helpful since many fabrics fringe to a very different looks along the crosswise vs lengthwise grain. (Image 4)

Image 4 (Butterick 6738)

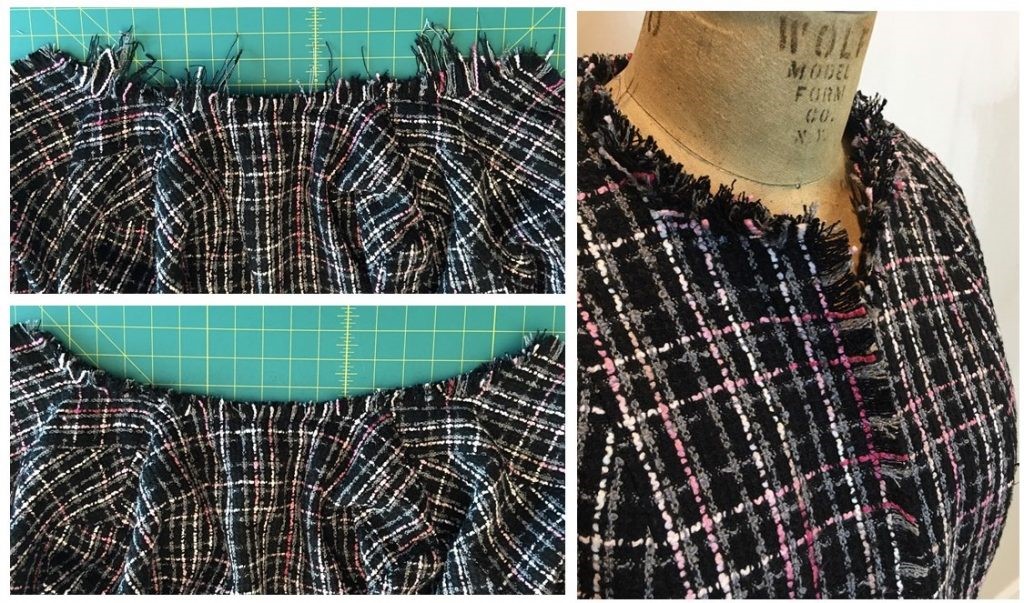
I didn’t actually make that pattern because I already had a black/gray/pink jacket in a bag in the closet – half-finished because of that very issue. The jewel neckline needed that bias technique in its curved areas and the front and hem edges needed an inset layer for a fuller look. Problem solved, and here is the result! (Image 5)

Image 5

~Nancy Nix-Rice

Did you enjoy this article?
Are you an ASG member?
This field is for validation purposes and should be left unchanged.

Tagged With: embellishment, fringe, garment sewing

December 24, 2020

Happy Holidays 2020

Happy holidays from the American Sewing Guild!

https://www.asg.org/wp-content/uploads/2020/12/ASGChristmas2020.mp4

Tagged With: Christmas

  • « Previous Page
  • 1
  • …
  • 39
  • 40
  • 41
  • 42
  • 43
  • …
  • 63
  • Next Page »

Become a Member

Join the only national organization dedicated to Advancing Sewing as an Art and Life Skill.

Join Now button

Blog Article Categories

  • ASG Conference
  • Chapter Stories
  • Embroidery
  • Fitting
  • Learn to Sew
  • National Sewing Month
  • Products, Books, & Patterns
  • Projects
  • Quilting
  • Sewing
  • Sewing Techniques
  • Sewing Tips
  • Sewing Tours
  • Videos
  • Disclaimer
  • Privacy Policy

American Sewing Guild
National Headquarters
9660 Hillcroft, Suite 230
Houston TX 77096
713-729-3000 | 713-721-9230 Fax
www.ASG.org

ASG wordcloud - education, conference, discounts, videos, special offers, tours and more

Copyright © 1998–2025 · American Sewing Guild · All Rights Reserved