


Adding a bit of detail to a collar can add flair and interest on a plain shirt, jacket or dress. This short video will show you how to use bias tape to embellish your next collar.
~© ASG: Thank you to Sheryl Belson, ASG Plano Chapter
Adding a bit of detail to a collar can add flair and interest on a plain shirt, jacket or dress. This short video will show you how to use bias tape to embellish your next collar.
~© ASG: Thank you to Sheryl Belson, ASG Plano Chapter
Much as we love sewing, things don’t always go as planned. Sometimes an accident happens in the process from cutting to finishing, or even at the first wearing. Rather than using any of ‘those’ words, it’s a lot more fun to try to figure out a creative solution to the problem that looks like it was intentional. Let’s look at three of those possible occurrences:
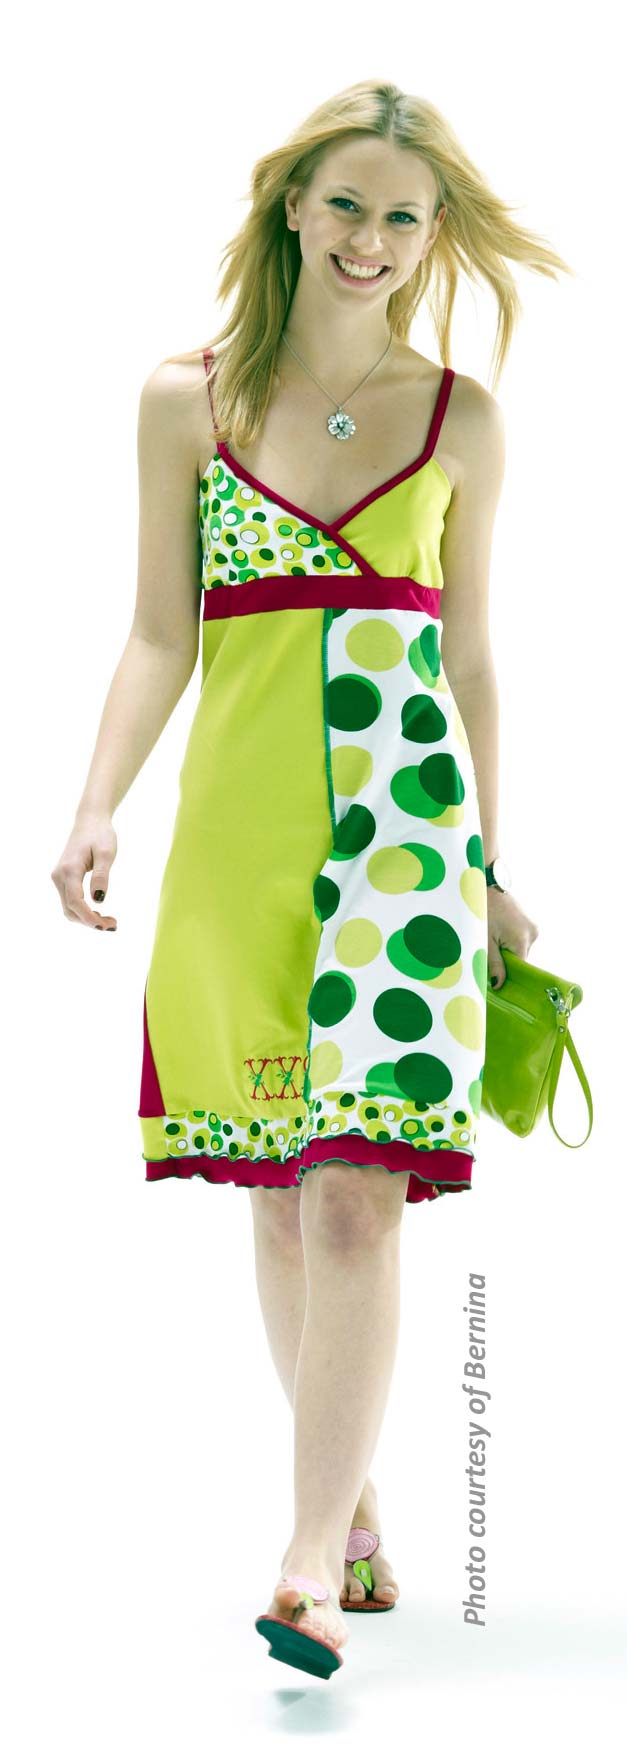
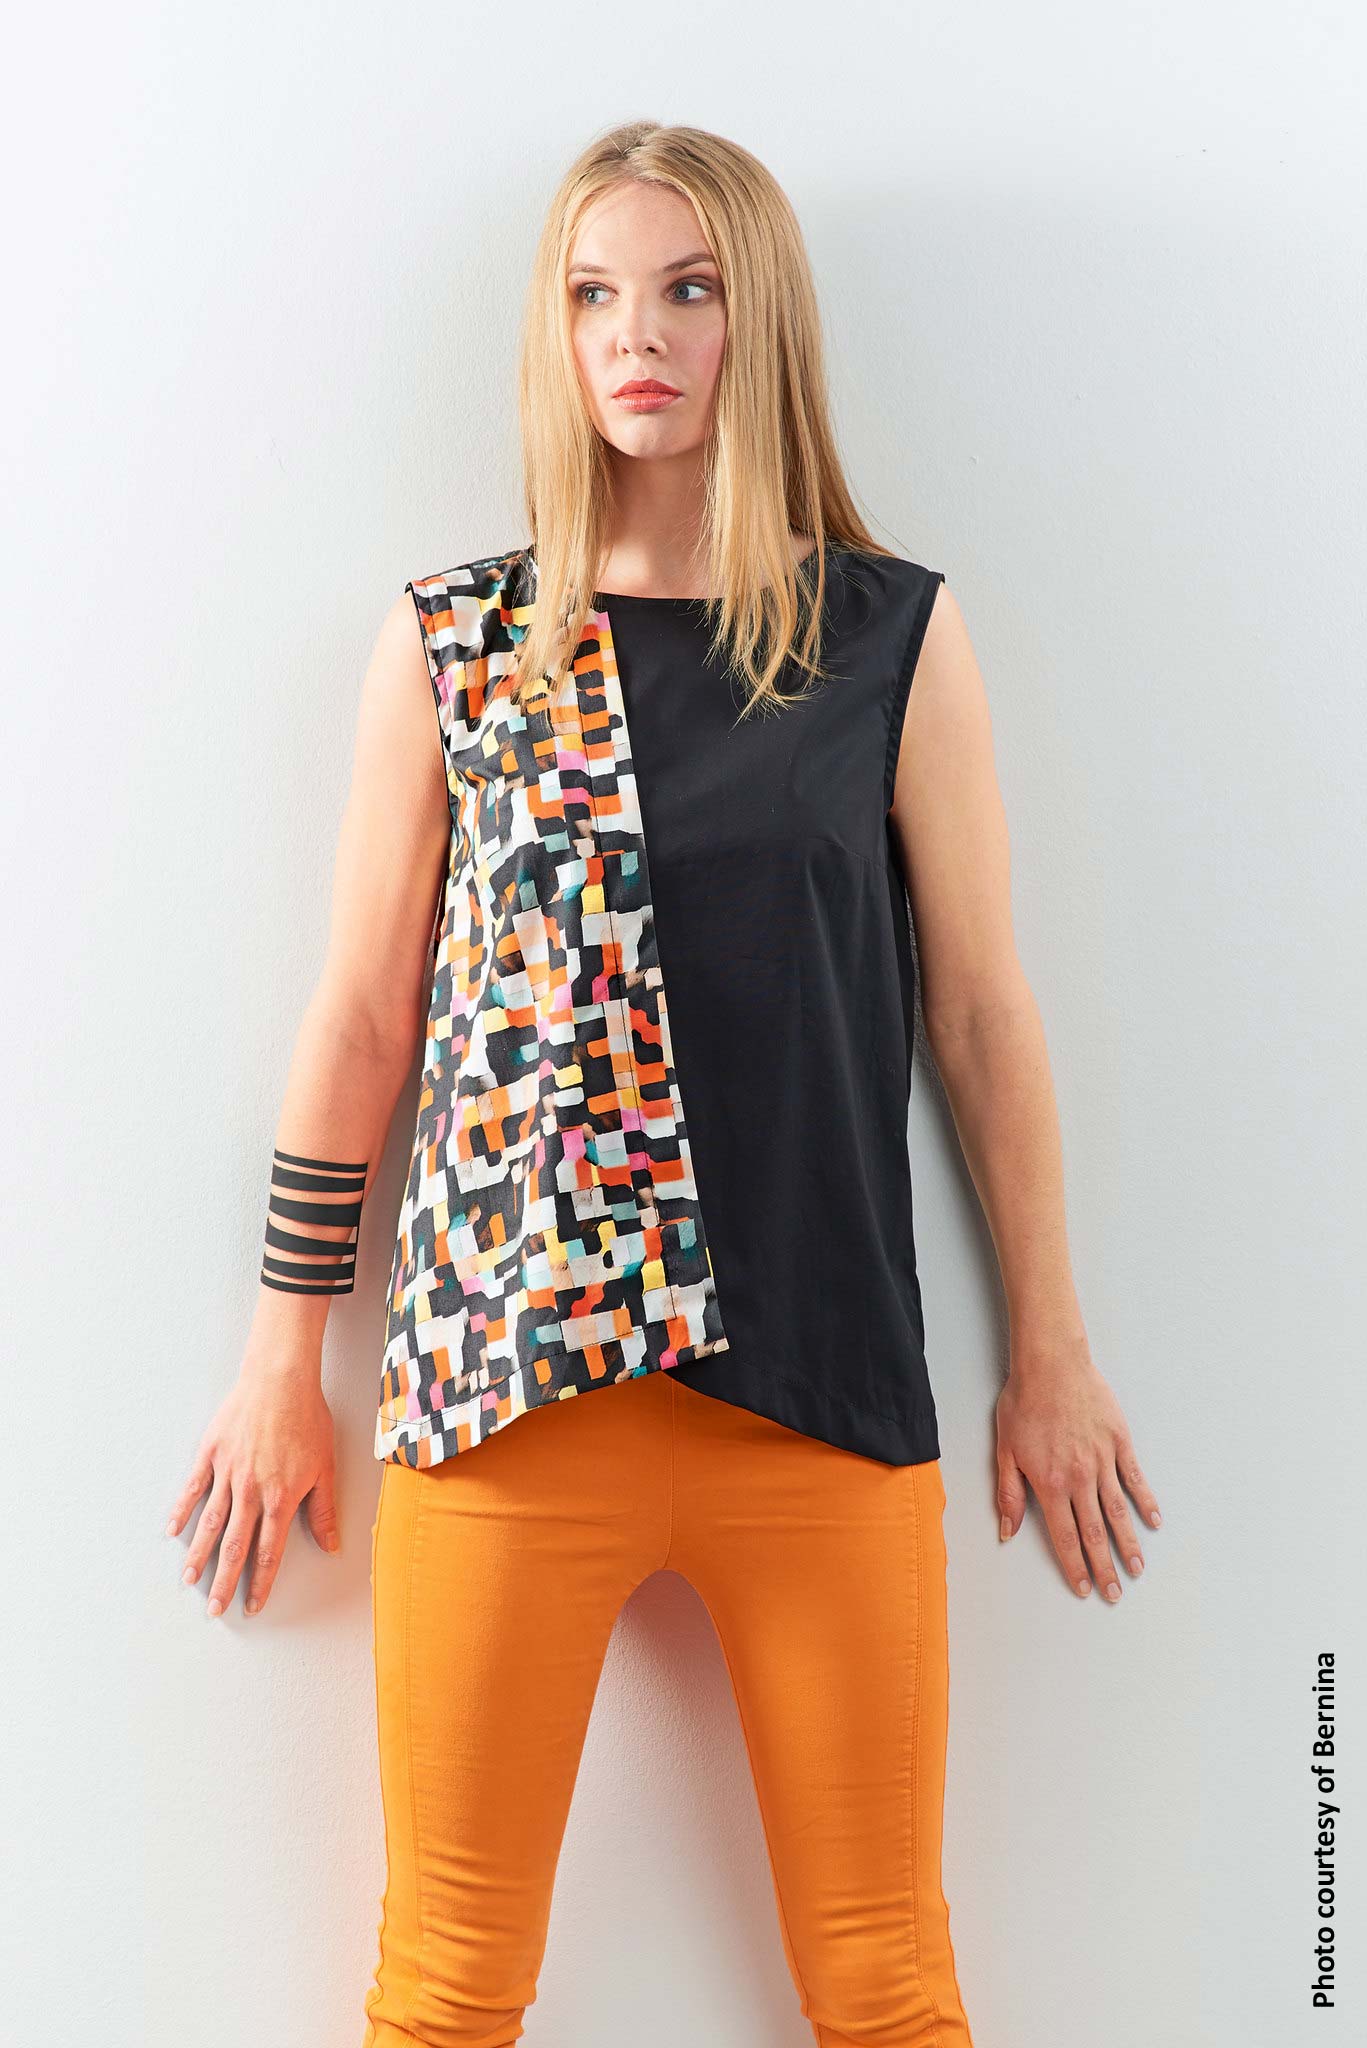
We’ve all done it, thinking we can outsmart the pattern company requirements. Maybe we’re trying to use up fabric in our stashes, but somehow there’s not quite enough. Two creative solutions are pattern mixing and color blocking. Instead of cutting all the garment pieces from the same fabric, mix them up for fun.
 Make it seem like there was a plan for your artsy touch. Look for prints in similar colors and/or motifs. Fabric manufacturers often make coordinated groupings that are made to go together. Choose fabrics with similar motifs—for example, garden or flower prints. Select prints of similar scale and contrasts. Solids are always a good go-to tie-together—pick a color found in the print(s) or go with one directly across the color wheel for a bolder look. Just remember when cutting, you’ll need a left and right half to the garment and it’s easy to forget to flip the pattern piece over.
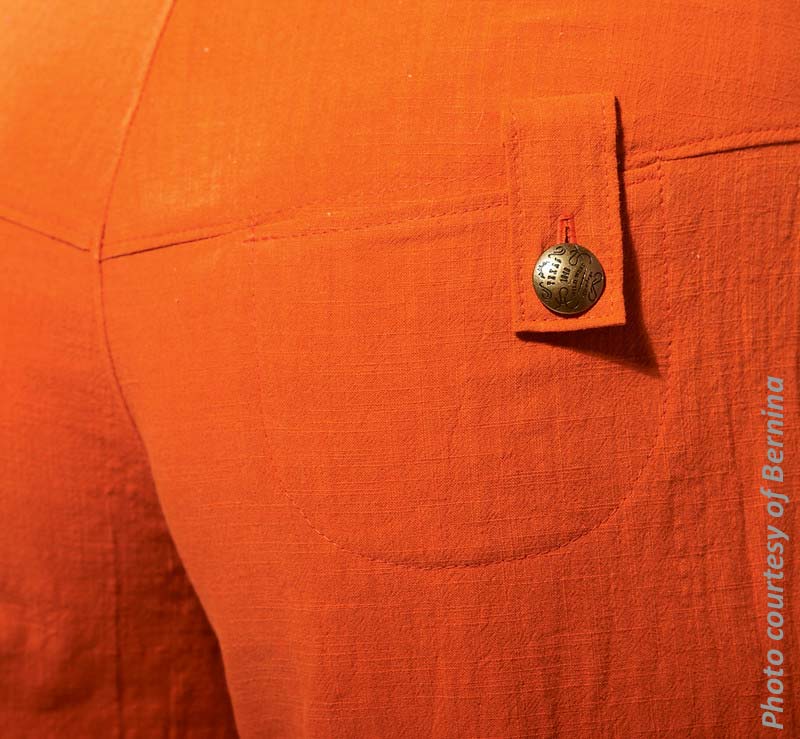 Let’s just say you accidentally cut a hole in your garment while trimming a seam allowance. Who hasn’t done that at some point in their sewing life? The creative solution: Add something to cover it—like a tab. But before you do, stabilize the erroneously cut edges by ironing a piece of fusible interfacing on the wrong side of the snip to hold the edges together and keep them from fraying. No one will be the wiser to your solution.
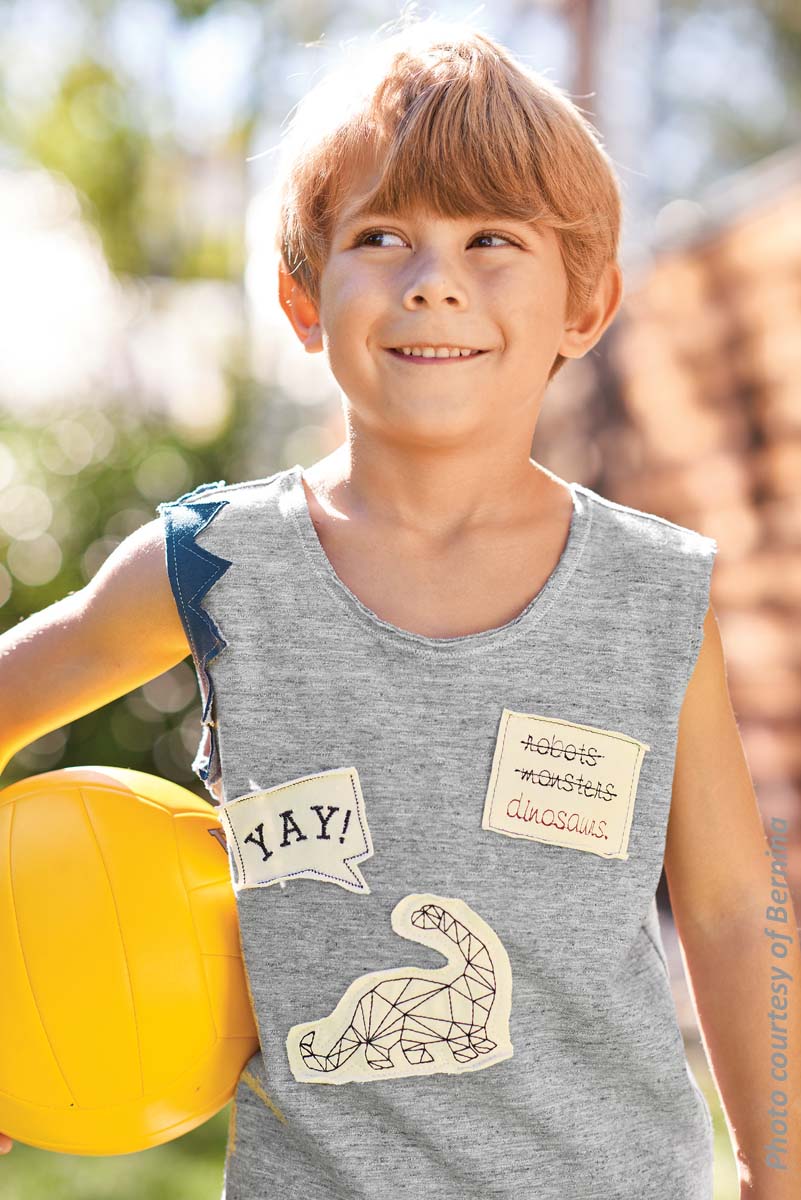
It never fails, the first time your grandchild wears a garment you’ve painstakingly made, they spill something on the front of it and voilà—permanent stains, despite your best efforts. A fun solution: Use embroidered patches to cover the stains and add some fun. Embroider them yourself or purchase them from the notions wall at your favorite fabric store. Use invisible thread and sew around the edges and listen as people say, “Isn’t that a cute shirt? I love the patches.” We’ll never tell.
So, when something doesn’t quite go as planned, take a deep breath, don’t panic and find a sewing friend to help you come up with a creative resolution. Sometimes the solution is more fun than the original plan.
~Linda Griepentrog
Linda is the owner of G Wiz Creative Services and she does writing, editing and designing for companies in the sewing, crafting and quilting industries. In addition, she escorts fabric shopping tours to Hong Kong. She lives at the Oregon Coast with her husband Keith, and two dogs, Yohnuh and Abby. Contact her at .
 This story is by Hope Wright from ASG Springfield Lincolnland Chapter
I taught a Summer Sewing Camp this year and when I went to the school for start of sign up, one teacher’s aide expressed some regrets that she never learned to sew. I told her that if she could drive, she could learn. That was based on my opposite experience — since I could sew, it was pretty easy to learn to drive. Just had to remember to step on the brake, not just lift the foot from the pedal! Since then, I’ve been thinking of comparisons.
© Hope Wright, ASG Springfield Lincolnland Chapter
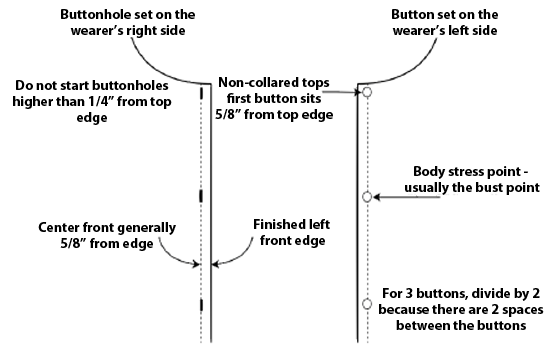
 Button and buttonhole placements can sometimes be confusing. If the button and buttonhole are placed incorrectly, the garment may be too tight, too loose, or create gaping. The number of buttons on the garment is suggested on your pattern envelope, but it’s up to your personal preference or need. A good guide to start placing your buttons vertically is to keep in mind your body’s pressure points. Pressure points are where your body may put strain on the garment and may be your bust, belly, or even the hip if you are making a button front dress or skirt.
Once you have identified your pressure point(s), mark these on your muslin or sloper (block) pattern for future reference.
Now that you have the button position, you need to determine if you want vertical or horizontal buttonholes. Horizontal buttonholes will need a facing deep enough to fit the entire length of the buttonhole. I have seen some patterns where the facing is too narrow for horizontal buttonholes. Vertical buttonholes allow for button play. This means if the button is not set exactly in the measured spot, there is room for the button to move up and down within the hole.
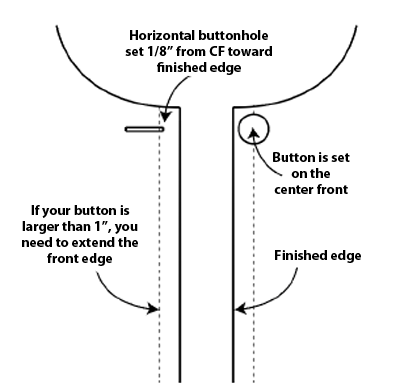
The distance between center front and the finished edge of your garment is generally 5/8”. This is okay if your button is 7/8” or smaller. If the button is larger, you will need to extend the distance from CF to the finished edge of your garment.
 To figure out what size buttonhole to use, some machines have a button hole foot that the button sits on the back carriage and the machine will make a buttonhole to that size. Or you have a machine that is computerized and you can adjust for your button size. The general rule of thumb is, the buttonhole needs to be 1/8” bigger than the button, for ease of going through the hole.
When making a vertical buttonhole, the button and buttonhole will be placed exactly at center front. In the case of horizontal buttonholes, the button is set at center front, but the hole is started 1/8” away from center, toward the finished edge. If your garment needs a button at the top edge, I start at 5/8” down for the button placement, but you can decide how far down, depending on the width of your button. But never start a buttonhole higher than ¼” below the neck edge.
Something that I do for jackets, especially for horizontal buttonholes, is to set all the buttonholes along the edge of your fabric BEFORE cutting out the front body. This allows for checking the placement without chancing ruining the garment and works best for bound button holes because the inside opening is usually hand finished.
~© Annalisa T, Alameda County Chapter
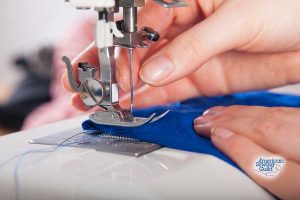
You have all of your supplies ready, you’ve adjusted your pattern, cut your fabric and you’re ready to start sewing. Before you sit down at the machine, have you thought about the best seam finish to use for your fabric? This post will help you to choose the best method to assure your seams are perfect.
 Batik: Flat fell seam or sew with a plain seam and serge together
© Sunny Kent, ASG Inland Empire Chapter
