American Sewing Guild (ASG)

Visit our blog Visit the ASG Facebook page Visit ASG on Pinterest Visit ASG's YouTube channel Visit ASG on Instagram
  • Home
  • Join ASG
    • Join Online
    • Chapter Locations
    • Member Benefits
    • Member Brochure
    • Join by Mail
  • Education & Classes
  • Resources
    • Contests & Awards
    • Giving Back
    • Hall of Fame
    • Links
    • Travel and Tours
    • Measurement Chart
  • Shop
    • ASG Store
    • Chapter Products
    • Video Resources
  • Blog
  • About
    • About Us
    • Donate to ASG
    • ASG Sensitivity Statement
    • FAQ’s
    • Start a Chapter
  • Contact
  • Member Login
    • Login First!
    • Members Only
    • Leadership Only
    • Website FAQ’s
    • Logout
  •  

July 10, 2020

Using Striped Fabric to Bind an Edge

It’s Stripe Hype!

Whether you’re binding a jacket front, collar or a quilt, using a striped fabric for the binding is a great way to accent the edge.

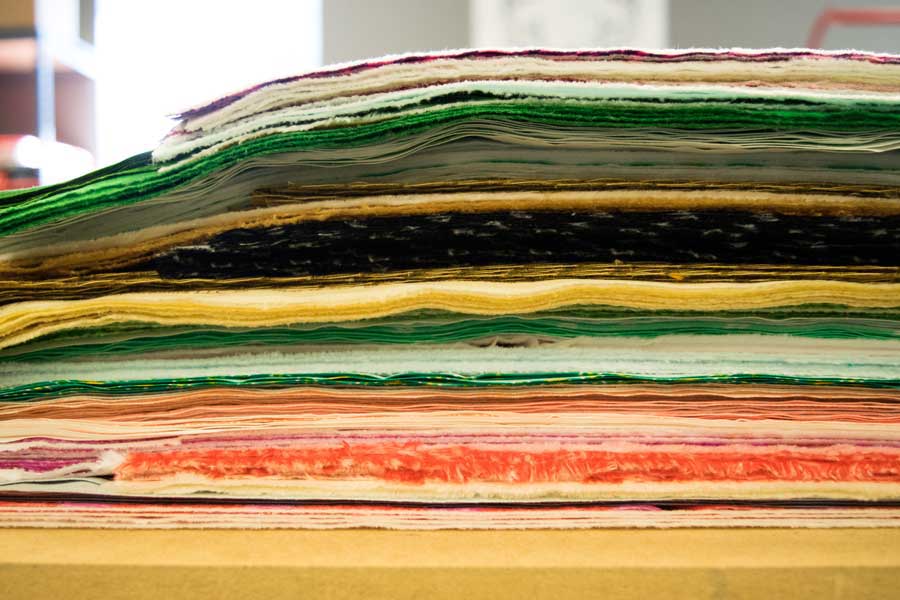
Stripes come in varying forms—from simple two-color versions to multi-color patterning, wide to narrow—but one thing’s for sure: they’re fun!

From the top: crosswise; lengthwise; bias

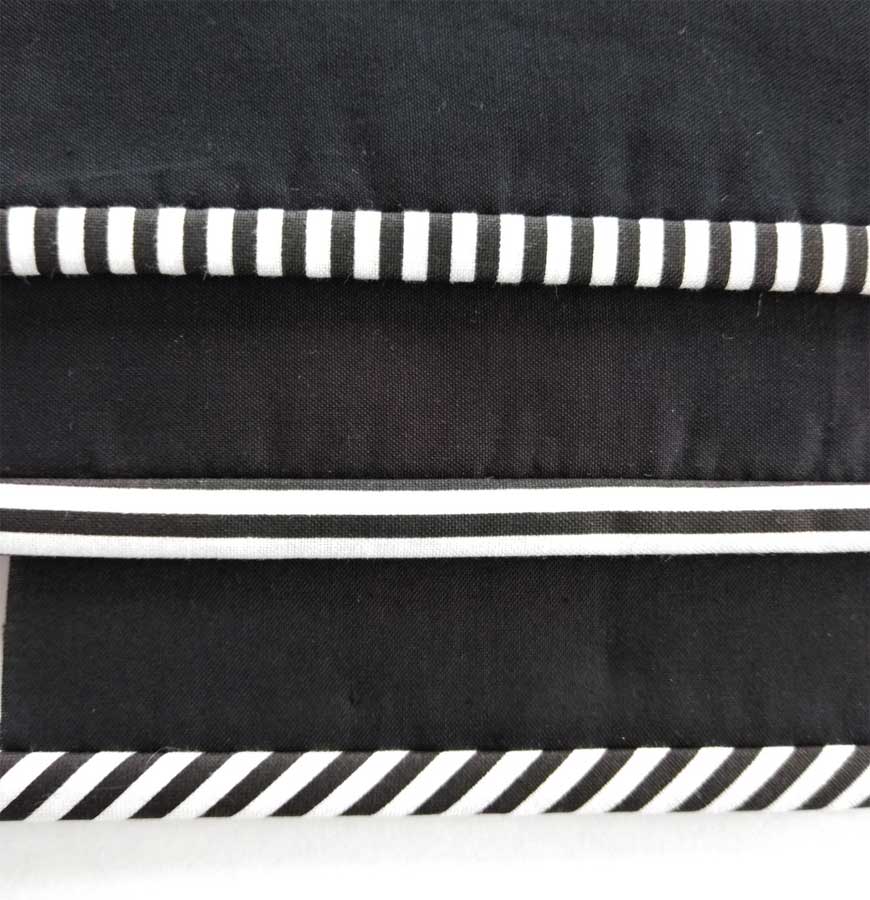
Stripes can be used three different ways for binding an edge: lengthwise, crosswise or on the bias. The choice depends on the desired finished look.

Using a stripe lengthwise on a binding showcases only about ¼” of the patterning, so for wide stripes, this use really isn’t a good option as you’ll likely see only one color. However, for tiny stripes, you can showcase three or four lines. Using a stripe lengthwise requires more yardage than cutting crosswise and/or more frequent seaming. You can use the entire fabric width and less yardage, but that strategy requires more seaming and matching end to end. The fun part—you can decide which stripes to showcase, but remember you’ll need to allow for seam allowances, so place the featured stripes accordingly.

Cutting binding crosswise is another option that showcases stripe repeats at right angles to the project edge. It allows for more visibility of stripe patterning and fewer seams are required with less yardage.

Many stripe aficionados prefer to cut striped binding on the bias (a true 45° angle) for some diagonal interest. The amount of yardage required depends on how frequently you want to piece the strips, matching the stripes. Cutting striped binding on the bias allows it go smoothly around curves, which is not the case with the horizontal or crosswise cutting, as those grains are suitable only for straight edges (like most quilts) rather than curves.

Piecing

In almost all instances, unless you have a short edge to cover, binding needs to be pieced to make enough length for the project. It can be pieced in two ways: with diagonal or horizontal seams.

Diagonal Seaming: While diagonal seaming makes for flatter binding because seam allowances are offset and not on top of themselves with multiple layers, it can be more difficult to align stripes with this bias seaming.

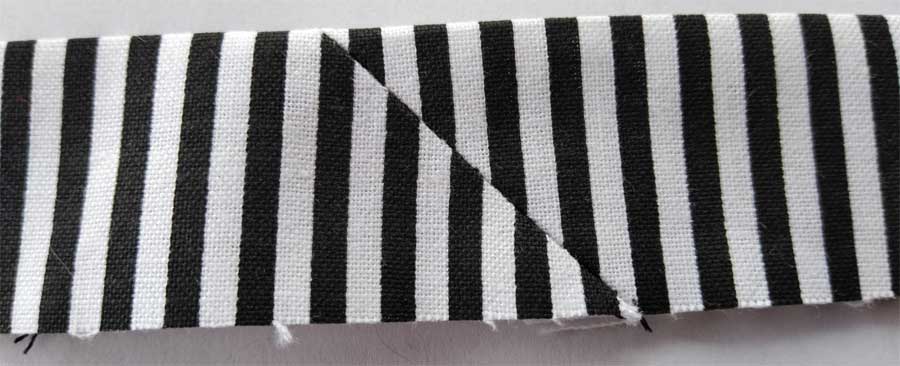
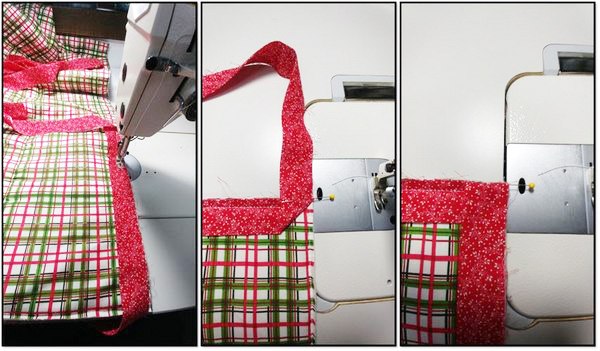
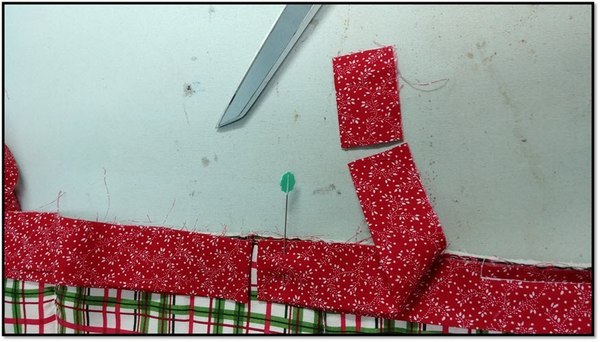
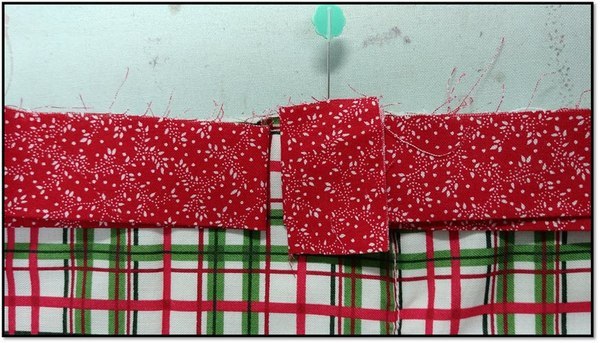
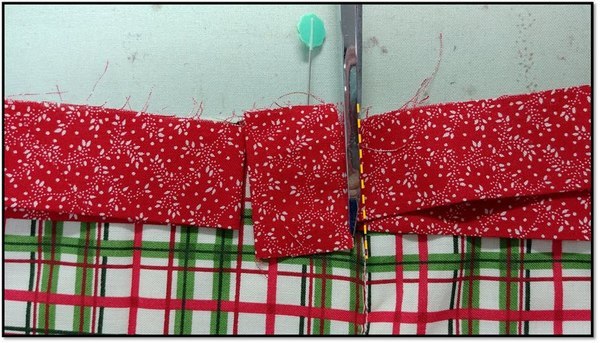
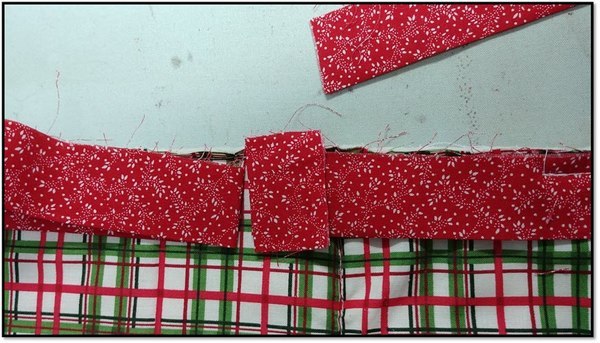
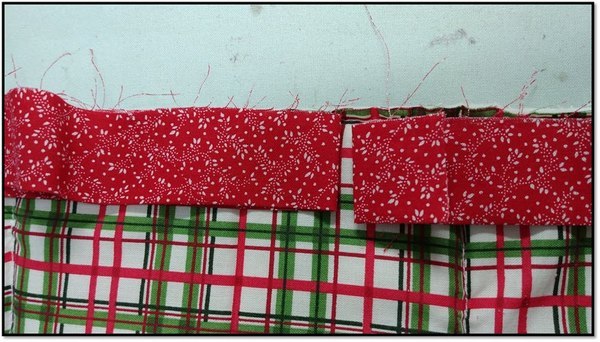
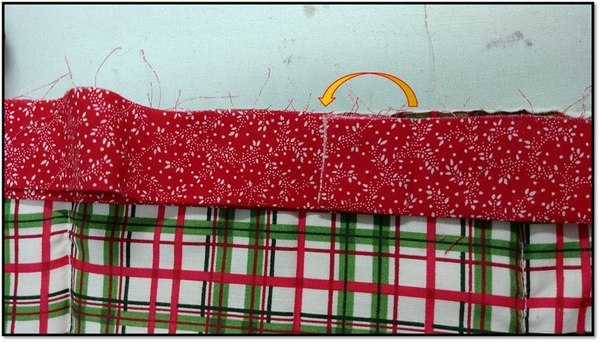
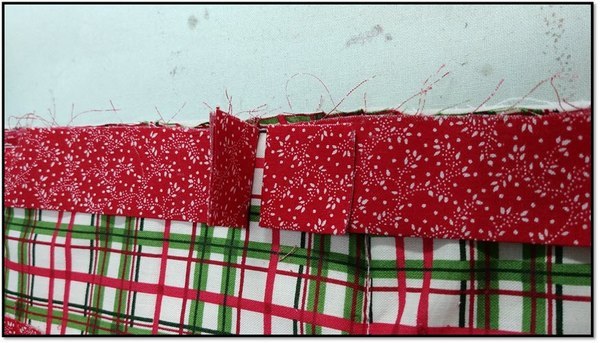
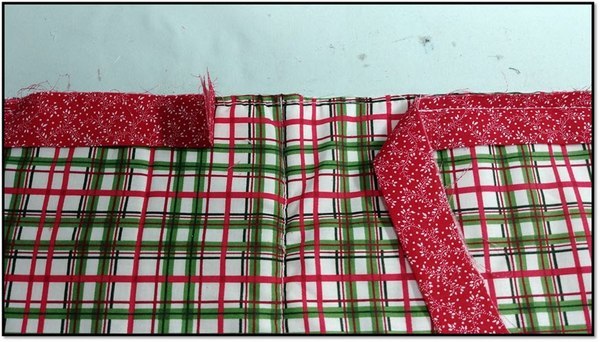
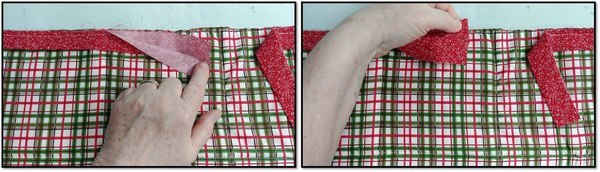
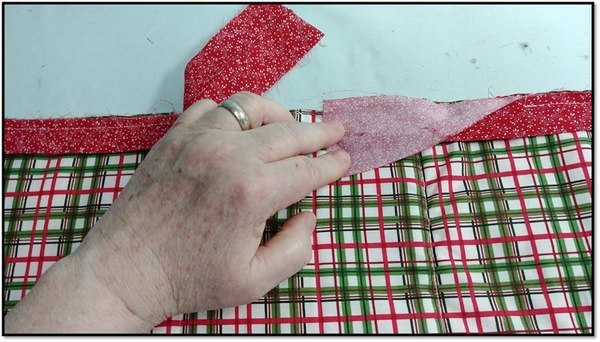
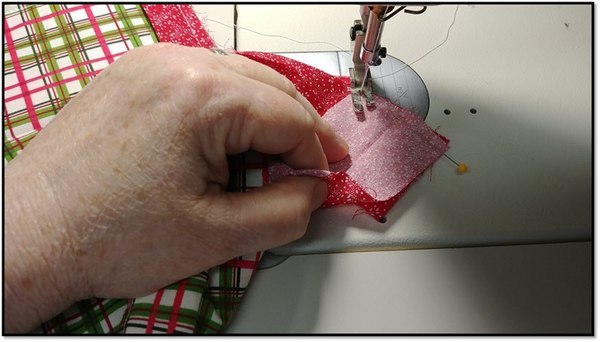
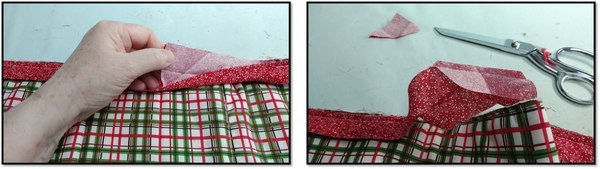
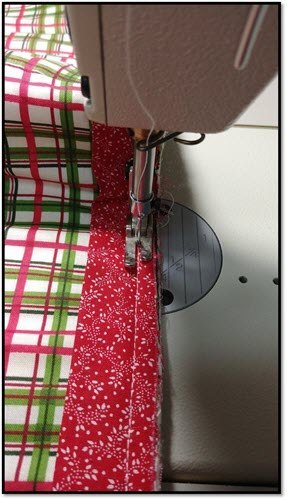
Crosswise Seaming: For crosswise stripe fabric strips, it’s easier to get a more invisible seam if you use horizontal piecing, sewing strips end to end. This technique also allows for a regular repeat of the stripe. To create a horizontal seam, place strips right sides together matching the same stripe on both layers. Stitch down the center of the stripe, trim the seam allowances to ¼” and press open. If you stitched accurately, the seam should be almost invisible and show a continuous stripe pattern along the binding.

Finishing

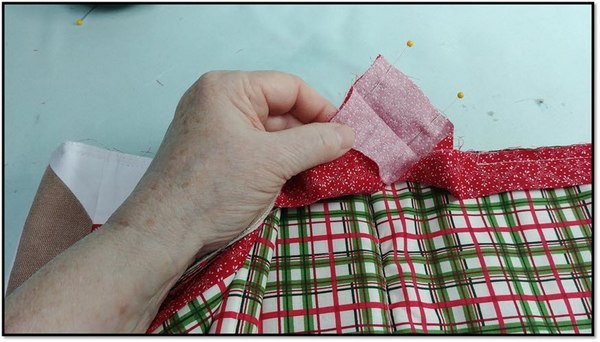
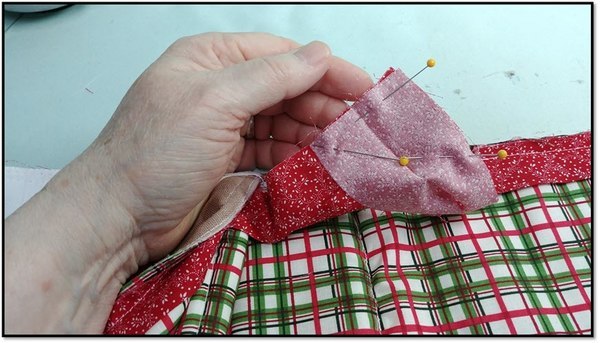
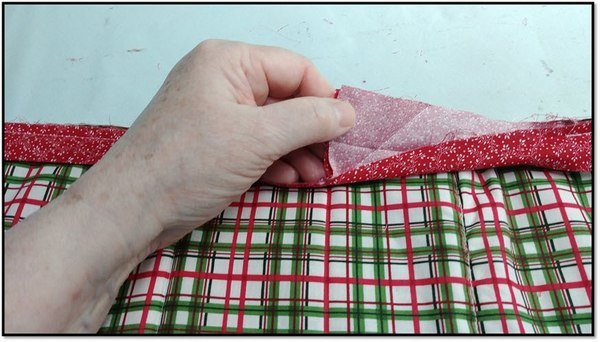
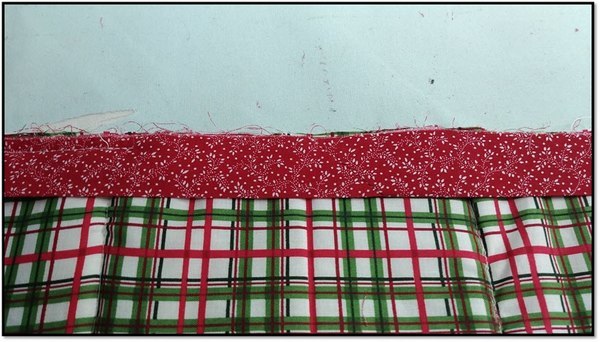
Once you’ve pressed your binding in half and sewn it the edge, first press it toward the edge you’re covering. Then fold it to the underside and hand-stitch the folded edge of the binding to the back side of the garment, quilt, etc.

For a quicker finish, fold the binding to the underside, pin or clip securely so that the underlayer is slightly wider than the top binding, and stitch in the ditch of the seamline where you initially attached the binding. Because the binding underside is slightly wider than the top, your stitching should easily catch the folded edge to secure it. Using transparent thread (either smoke or clear) works well for this, especially if your project is multi-color.


~Linda Griepentrog
Linda is the owner of G Wiz Creative Services and she does writing, editing and designing for companies in the sewing, crafting and quilting industries. In addition, she escorts fabric shopping tours to Hong Kong. She lives at the Oregon Coast with her husband Keith, and two dogs, Yohnuh and Abby. Contact her at .

Did you enjoy this article?
Are you an ASG member?
This field is for validation purposes and should be left unchanged.

Tagged With: binding, garment sewing, quilt, sewing

January 31, 2020

A Cut Above: Laser Cut Designs

If you’re a quilter, perhaps cutting out all those tiny precise pieces for your appliqué work might not be one of your favorite tasks—you’d rather get going to complete the design. I sure feel that way, and alas, someone heard my plea.

Laser Cut Quilts

Recent advances in the quilting realm have brought us the advent of laser-cut designs. Whether it’s an intricate appliqué motif with zillions of pieces, or a more traditionally pieced work, precision cutting is key to fit and the overall look.

And, as an added bonus, the fabrics have been pre-selected for you, so there’s no scrambling to find just the right piece for your design. Appliqué pieces are pre-fused as well.


Did you know? Laser cutting has been used for years in the ready-to-wear industry where garments are cut in production quantities. It provides superior accuracy for factory sewing.


How does it work?

Laser Cut Quilts

For appliqué designs, fabrics are backed with the fusible web prior to cutting, so when you get the pieces in your kit, they’re ready to have the backing paper peeled off and the designs fused in place. But, how do you know where to put them? There’s a printed guide for the pieces, so pretty foolproof.

When you get the kit, simply open the pattern placement guide and either trace it onto your base fabric if it’s a dark color, or if it’s a light color, position the fabric over the guide and you’ll be able to see the lines through it. A light box or sunny window is helpful when tracing onto dark colors.

Laser Cut Quilts

Place your marked base fabric onto a pressing surface, peel off the backing paper on each piece and position it in place on the background. It’s akin to completing a jigsaw puzzle. If you have trouble peeling off the backing paper, use a pin to get it started at one edge.

Pressing Matters

Hummingbird Highway

When all the pieces are positioned, follow the manufacturer’s instructions to fuse them in place. If you don’t have a large enough pressing surface for the entire design, fuse one section at a time. Be careful—if you’ve marked with a heat-sensitive pen, don’t remove markings in an area you haven’t fused yet. Using a small craft iron can be handy, as it’s easier to secure tiny corners and work in small areas at a time.

Some companies recommend using a pressing cloth when securing pieces to protect the iron from errant fusible. Press both sides of the design to fully secure the pieces.

Finishing Touches

Once all the pieces are fused in place, your design work is completed. There’s no need to stitch around each piece (unless you really want to). Just move on to adding borders, quilting and binding. Easy peasy!


Building Bridges: Sometimes small and delicate pieces are connected to either larger fabric pieces or to a fabric frame to keep them from getting damaged, so they appear not fully cut. If that’s the case and you get pieces with bridges, simply carefully cut the connection points away from the larger base fabric to create the piece size/shape needed for your design.


Pieced Designs

Hummingbird Highway

Some laser cut kits are not for appliqué, but for traditional piecing instead. The accuracy of laser cutting ensures that the pieces will fit together with precision.

With these types of kits, there will be a guide included showing a piece number and shape, and both will be referenced in the assembly directions. There may even be a notch into the seam allowance to indicate the upper edge of the piece in the construction process.

Laser-cut pieced designs may also include some fusible-backed pieces for features appliquéd on the surface, like animal eyes, feet, etc.


~Linda Griepentrog Linda is the owner of G Wiz Creative Services and she does writing, editing and designing for companies in the sewing, crafting and quilting industries. In addition, she escorts fabric shopping tours to Hong Kong. She lives at the Oregon Coast with her husband Keith, and two dogs, Yohnuh and Abby. Contact her at .

Tagged With: laser cut fabric, quilt, quilting

October 3, 2017

Create a Smooth Quilt Binding Join

I consider myself a very novice quilter although others have said I’m more intermediate to beginner-advanced. I’ve been sewing for years, I can read a pattern, sew an accurate seam allowance, and love using software and a long-arm to do my quilting. My goal has been to “perfect” (for my little quilting world) a quilt binding “join.” That said, I have tried various different methods (see videos in the members only area) and think I’ve landed on something that pretty much comes out correctly time and again.

Developing my own method

Years ago I was watching Marianne Fons (Fons & Porter) demonstrate her method of binding. I didn’t care for the trial-and-error methodology but used that as a base to create a method that works for me every single time. I use a low-loft cotton batting in most of my projects; if I were to use a different batting, a little more experimentation would be needed to figure out the measurement of the gap to leave to be sure the join is smooth.

1. Start by applying the binding as you normally would, mitering the corners.

Quilt binding how-to

2. Sew the binding to the quilt sandwich leaving about a 12″ area un-sewn. Find the center of the un-sewn area and place a pin.

Quilt binding how-to

3. Turn the piece so the un-sewn binding is now at the top facing you. Bring the right side binding to the center pin and create a fold in the binding at the pin as shown.

Quilt binding how-to

4. Bring the left side binding to within 3/16″ of the right side binding and fold in place. After trial and error, I figured out this measurement works for the low-loft cotton batting I use for most of my projects. If I were using a higher loft batting like a wool, I would test and discover what that measurement would be for that particular batting.

Quilt binding how-to

5. Now cut off a section from the end of the binding—about a 2”-3” piece will do. This little piece is going to be used as a measuring tool.

Quilt binding how-to

6. Lay the folded edge of the piece just cut, on top of the right binding, at the fold line. Make sure the folds align exactly.

Quilt binding how-to

7. Cut the loose part of the right binding even with the cut edge of the measuring piece.

Quilt binding how-to

8. Remove the excess right binding and the measuring piece; they are no longer needed.

Quilt binding how-to

9. Next, take the end of the right binding

Quilt binding how-to

10. and flip it to the left over the left binding.

Quilt binding how-to

11. Trim the excess left binding loose-piece even with the cut edge that was just flipped from the right.

Quilt binding how-to

12. Remove the excess left binding.  Next will be to sew the join.

Quilt binding how-to

13. Position the right binding out of the way. We’ll work with the left binding section first.

Quilt binding how-to

14. Open up the left binding piece. Flip the left binding piece over so the right side of the fabric is facing up.

Quilt binding how-to

15. Open up the right binding piece.

Quilt binding how-to

16. Meet the right binding piece over the left, right sides should be together, and cut edges should match as shown; pin the binding sections together.

Quilt binding how-to

17.  The seam will be sewn from the upper left corner to the lower right corner.

Quilt binding how-to

18. Using a 2mm stitch length, sew from the upper left corner to the lower right corner. Be sure the cut edges remain aligned.

Quilt binding how-to

19. This is what the sewn seam looks like. Before trimming the binding,

Quilt binding how-to

20.  Fold the binding down as it will be once finished. The join should be smooth and the binding should match the quilt sandwich 1:1 with no extra ease nor should the binding and join be too short to cause the quilt sandwich to bunch up.

Quilt binding how-to

21. If everything is satisfactory, then open up the binding again and trim away the excess fabric leaving a ¼” seam allowance. Press the seam allowance open.

Quilt binding how-to

22. Fold the binding back into position and stitch the remaining section to the quilt sandwich. Begin a few stitches from where the stitching ended,

Quilt binding how-to

23. and continue to sew the seam, sewing a few stitches over the beginning stitches. Complete the the binding by sewing it to the project as you normally would either by hand or by machine.

Quilt binding how-to

I hope the few additional steps of actually measuring the gap left and using the binding itself to measure and cut, will result in a smoothly joined binding for you as it does for me.

Sew ‘til next time…enjoy the journey of sewing!

~Ramona

P.S. If you’d like to learn more sewing, machine embroidery, and quilting tips and tricks, join an ASG Chapter! There are free classes on the website and the chapters have events, classes; neighborhood group have members eager to share and help with your sewing.


Tagged With: quilt, quilt binding, sewing

  • « Previous Page
  • 1
  • 2

Become a Member

Join the only national organization dedicated to Advancing Sewing as an Art and Life Skill.

Join Now button

Blog Article Categories

  • ASG Conference
  • Chapter Stories
  • Embroidery
  • Fitting
  • Learn to Sew
  • National Sewing Month
  • Products, Books, & Patterns
  • Projects
  • Quilting
  • Sewing
  • Sewing Techniques
  • Sewing Tips
  • Sewing Tours
  • Videos
  • Disclaimer
  • Privacy Policy

American Sewing Guild
National Headquarters
9660 Hillcroft, Suite 230
Houston TX 77096
713-729-3000 | 713-721-9230 Fax
www.ASG.org

ASG wordcloud - education, conference, discounts, videos, special offers, tours and more

Copyright © 1998–2025 · American Sewing Guild · All Rights Reserved