The allure of the classic French jacket – its mystique has captivated for years.
Long before rediscovering garment sewing several years ago, I admired this garment for its timeless elegance on the outside, never understanding that the magic on the inside is the real story. Quilting lofty bouclé to silk lining with rows of stitches that are all but invisible from the outside produces a sumptuous quality double-layer that hugs the body almost like a sweater and feels like heaven to wear.
While creating this garment is a lengthy process with a great deal of hand sewing, (many have estimated it to take anywhere from 70 to over 100 hours), none of the steps are particularly difficult. Many find the slow and steady pace to be relaxing and contemplative, thoroughly enjoying the rhythmic repetition, the time-honored techniques and the effort of perfecting one stitch after another.
If one were ever to splurge on materials and trims, this is the time!
Given the amount of labor invested, only the best will do. Quality bouclé can be sourced at many online retailers – some of the more popular are:
Linton Direct UK
Elliott Berman
Mendel Goldberg
B&J
Emma One Sock
You’ll still be thousands of dollars ahead in the end. Did you know that the price of an off-the-rack Chanel original averages around $5,000 and the made-to-measure haute couture version begins at upwards of $15,000 to $20,000?
For anyone interested in trying these techniques for the first time, Blueprint’s class (formerly Craftsy) “The Iconic Tweed Jacket” by Lorna Knight offers great value and an approachable starting point. I was thrilled with the success achieved on my first jacket and came away with the confidence to move to the next level.
For a full-on couture experience, Susan Khalje’s class, in-person or on-line, is thought by many to be the gold standard. True haute couture methods are employed throughout and her three-piece sleeve with vent allows for prominent placement of featured trim and fancy buttons, both authentic hallmarks of Chanel.
It starts with a muslin
A perfectly fitted muslin (or toile) is your best friend when beginning this project. Vogue 7975 is the pattern many use since its shoulder princess seams permit the best opportunity for bust adjustments.
Time for Adjustments
Once necessary adjustments have been made and the muslin fit perfected, it is cut apart on the seam lines and used as the jacket’s actual pattern. For optimum accuracy, each piece is thread traced along the seam lines on a single layer of fabric. Measured seam allowances are not used in couture sewing; large rough borders are cut around each piece and the thread traced lines are matched throughout construction.
Machine Quilting the Sections
Each bouclé section is then machine quilted to silk charmeuse lining and the bouclé layer is sewn by machine while keeping the lining edges free to be hand fell-stitched together on the inside. Next, each lining seam is carefully pinned and hand fell stitched closed.
The control one has by hand stitching is truly unmatched. Before falling in love with couture sewing, I would have avoided hand stitching at all costs but I now find myself including some on nearly everything I sew. Collars, cuffs, facings and basting of any sort; they all benefit greatly from the accuracy of hand stitching.
On to the Sleeves
Once the “vest” has been completed, the sleeves are similarly assembled then attached to the jacket entirely by hand. Front hook and eye closures are added and the jacket’s trim is hand applied before fell-stitching the outer edges of the lining closed.
Pockets
The desired number of pockets and their placement is determined and they are constructed and trimmed in the same manner as the jacket. Each is backed with hand stitched silk lining and matching trim is applied.
Buttons
Finally, decorative buttons are added to the sleeve vents and pockets and the iconic chain is stitched along the inner hemline. The chain is said to counterbalance the weight of heavy buttons and prevent the jacket from slipping forward on the shoulders but, primarily, it adds that special touch of luxury on the inside!
Not just for Suits
While I’ve made a matching skirt for all but one of my six French jackets, they are most often worn with jeans, proving there is a place in every wardrobe for this classic you will be proud to say you’ve created yourself. No one will believe you’ve made it!
~ Post by Julie Starr – Julie is the co-author of the Tunic Bible with Sarah Gunn.
I consider myself a very novice quilter although others have said I’m more intermediate to beginner-advanced. I’ve been sewing for years, I can read a pattern, sew an accurate seam allowance, and love using software and a long-arm to do my quilting. My goal has been to “perfect” (for my little quilting world) a quilt binding “join.” That said, I have tried various different methods (see videos in the members only area) and think I’ve landed on something that pretty much comes out correctly time and again.
Developing my own method
Years ago I was watching Marianne Fons (Fons & Porter) demonstrate her method of binding. I didn’t care for the trial-and-error methodology but used that as a base to create a method that works for me every single time. I use a low-loft cotton batting in most of my projects; if I were to use a different batting, a little more experimentation would be needed to figure out the measurement of the gap to leave to be sure the join is smooth.
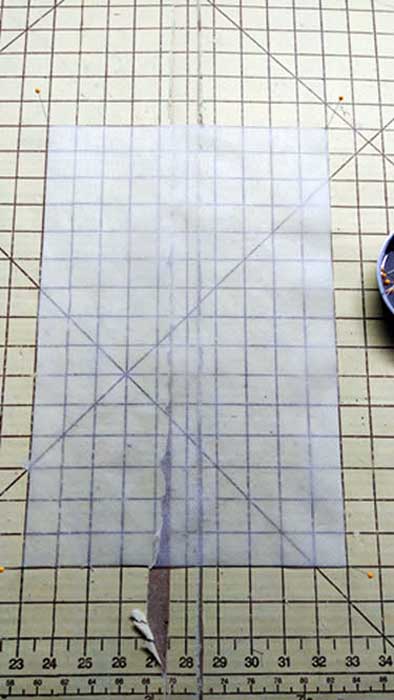
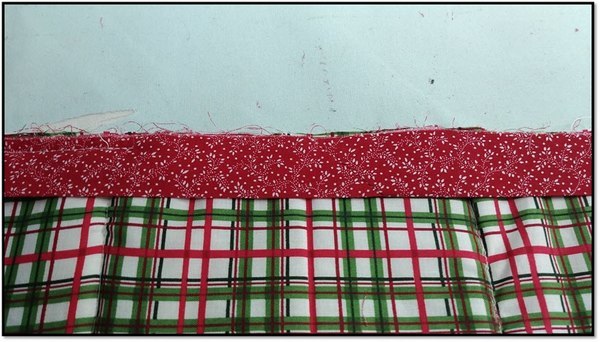
1. Start by applying the binding as you normally would, mitering the corners.
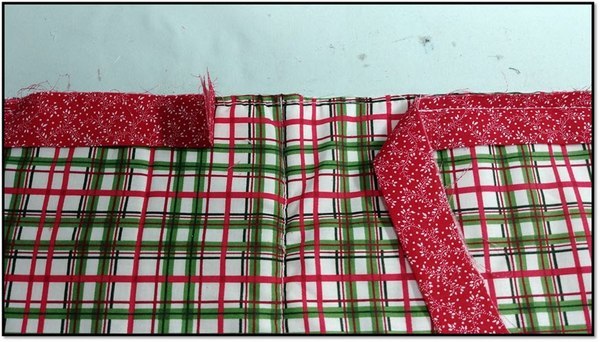
2. Sew the binding to the quilt sandwich leaving about a 12″ area un-sewn. Find the center of the un-sewn area and place a pin.
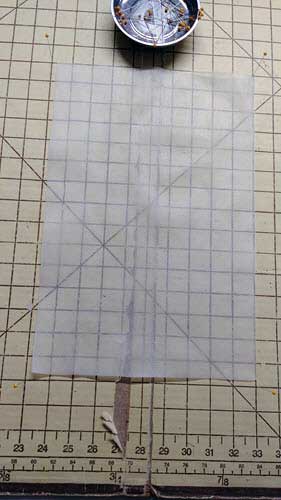
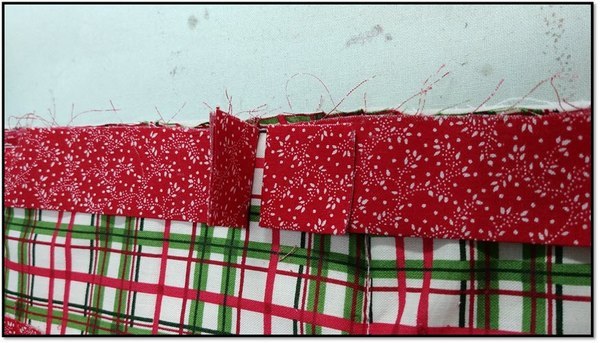
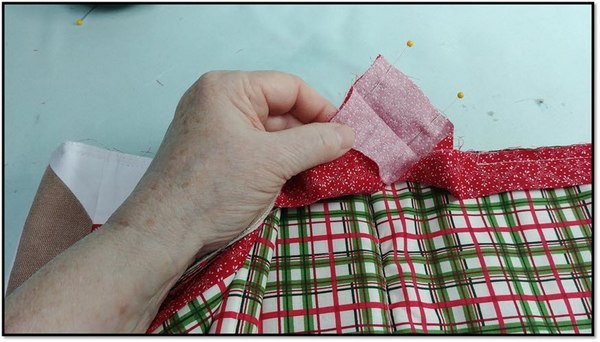
3. Turn the piece so the un-sewn binding is now at the top facing you. Bring the right side binding to the center pin and create a fold in the binding at the pin as shown.
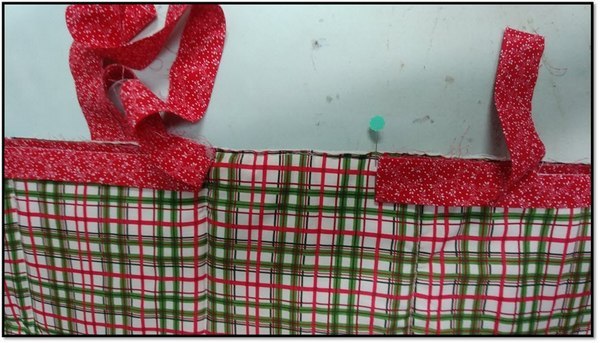
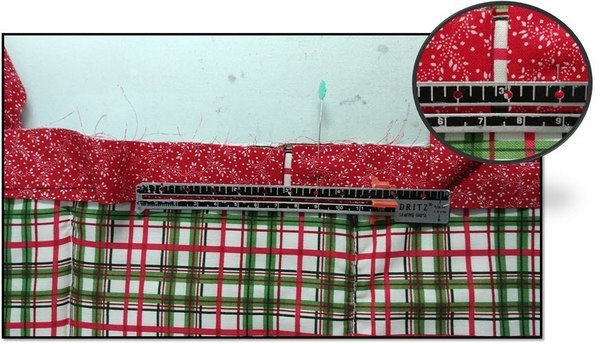
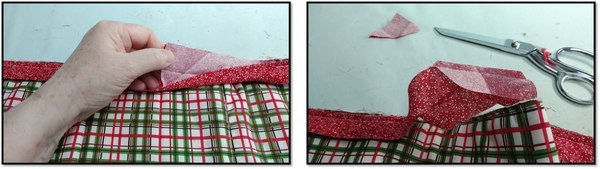
4. Bring the left side binding to within 3/16″ of the right side binding and fold in place. After trial and error, I figured out this measurement works for the low-loft cotton batting I use for most of my projects. If I were using a higher loft batting like a wool, I would test and discover what that measurement would be for that particular batting.
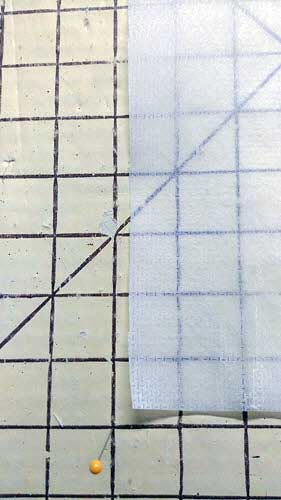
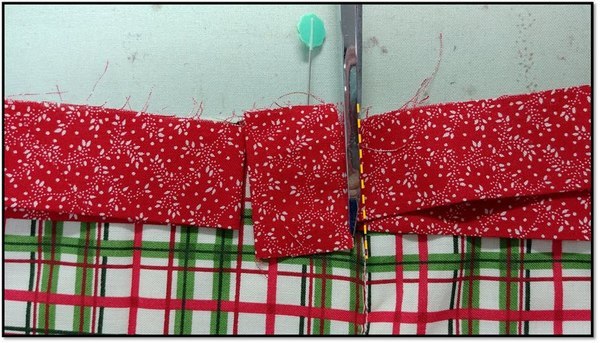
5. Now cut off a section from the end of the binding—about a 2”-3” piece will do. This little piece is going to be used as a measuring tool.
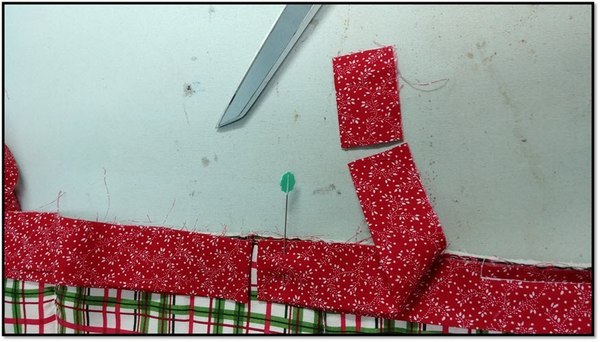
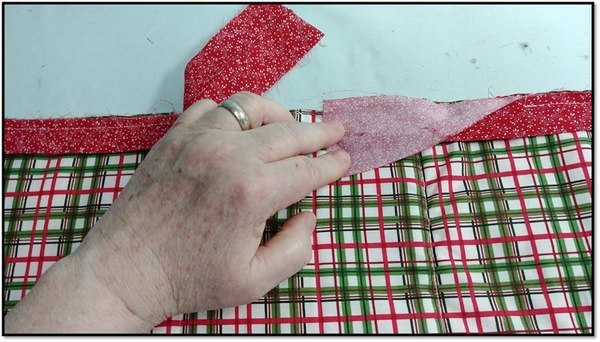
6. Lay the folded edge of the piece just cut, on top of the right binding, at the fold line. Make sure the folds align exactly.
7. Cut the loose part of the right binding even with the cut edge of the measuring piece.
8. Remove the excess right binding and the measuring piece; they are no longer needed.
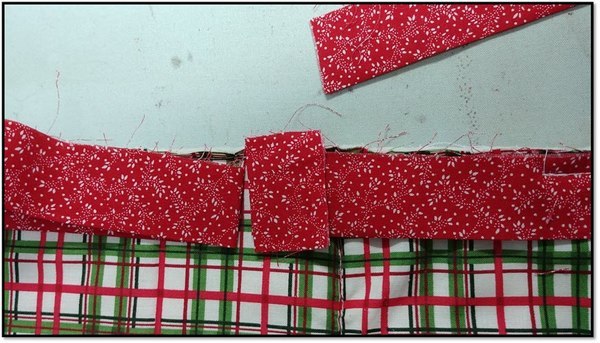
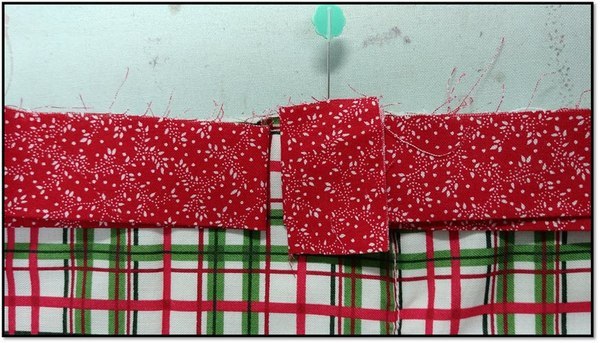
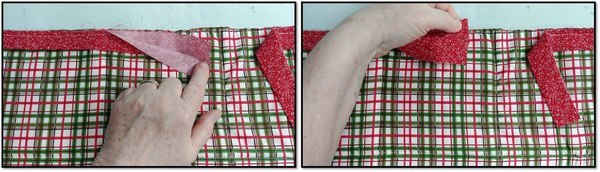
9. Next, take the end of the right binding
10. and flip it to the left over the left binding.
11. Trim the excess left binding loose-piece even with the cut edge that was just flipped from the right.
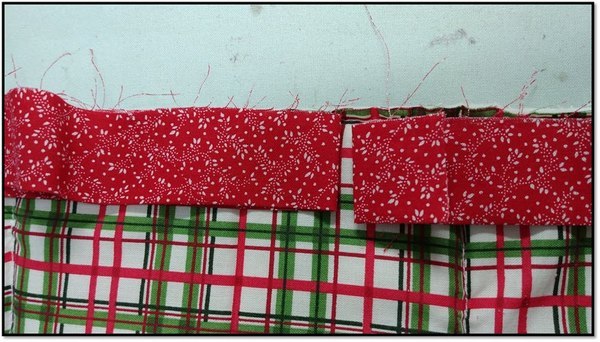
12. Remove the excess left binding. Next will be to sew the join.
13. Position the right binding out of the way. We’ll work with the left binding section first.
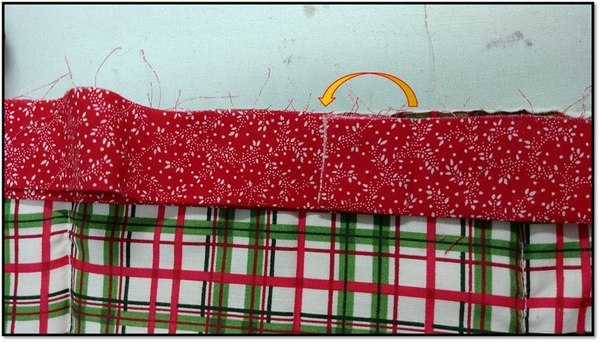
14. Open up the left binding piece. Flip the left binding piece over so the right side of the fabric is facing up.
15. Open up the right binding piece.
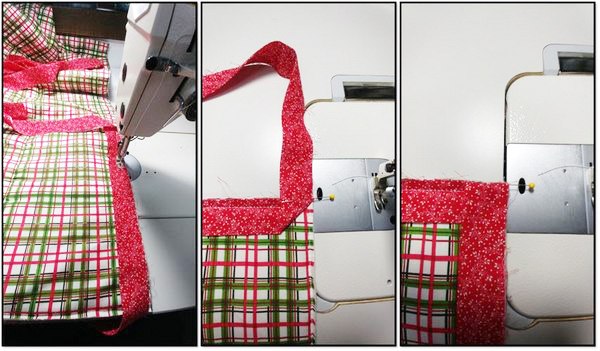
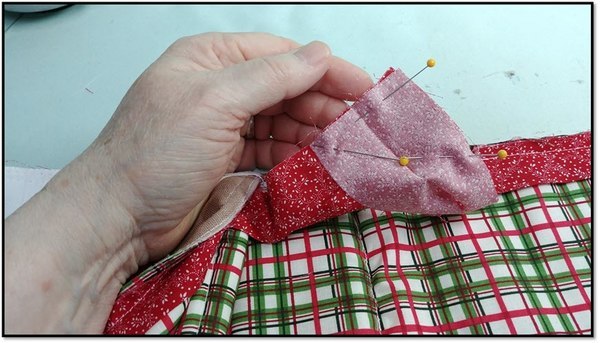
16. Meet the right binding piece over the left, right sides should be together, and cut edges should match as shown; pin the binding sections together.
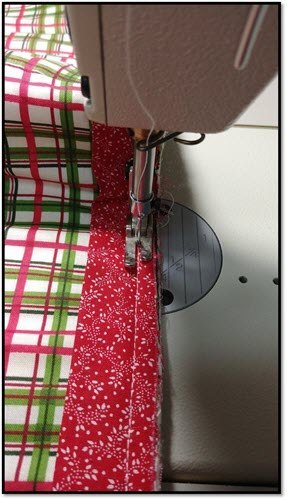
17. The seam will be sewn from the upper left corner to the lower right corner.
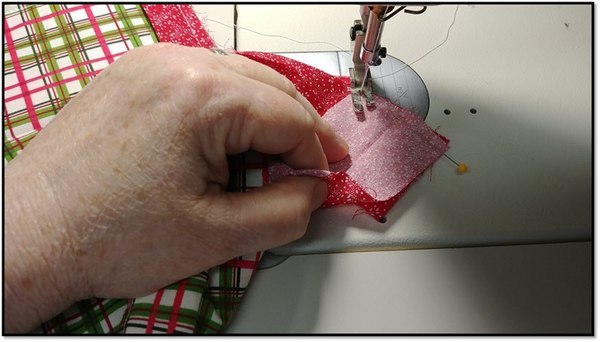
18. Using a 2mm stitch length, sew from the upper left corner to the lower right corner. Be sure the cut edges remain aligned.
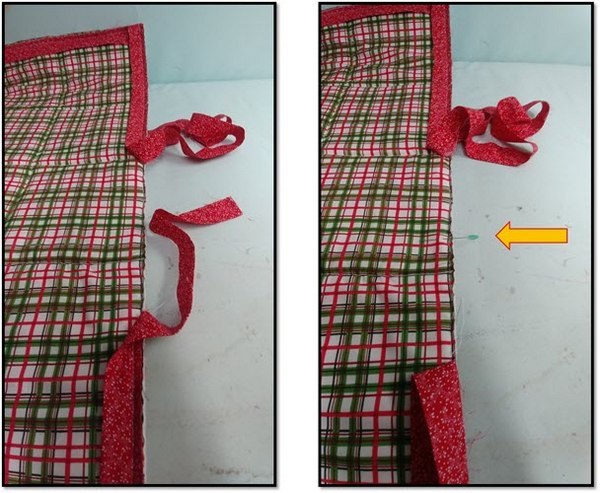
19. This is what the sewn seam looks like. Before trimming the binding,
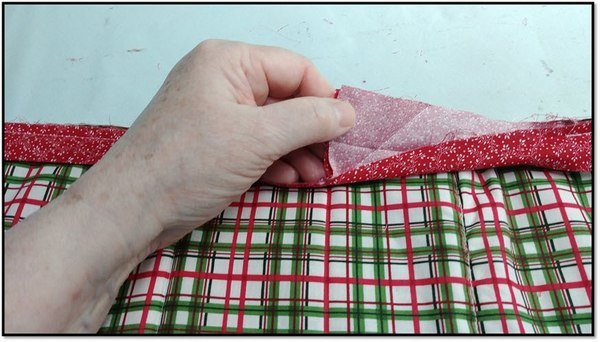
20. Fold the binding down as it will be once finished. The join should be smooth and the binding should match the quilt sandwich 1:1 with no extra ease nor should the binding and join be too short to cause the quilt sandwich to bunch up.
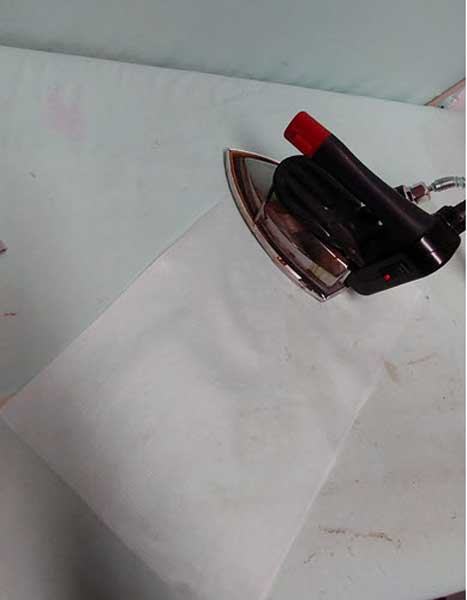
21. If everything is satisfactory, then open up the binding again and trim away the excess fabric leaving a ¼” seam allowance. Press the seam allowance open.
22. Fold the binding back into position and stitch the remaining section to the quilt sandwich. Begin a few stitches from where the stitching ended,
23. and continue to sew the seam, sewing a few stitches over the beginning stitches. Complete the the binding by sewing it to the project as you normally would either by hand or by machine.
I hope the few additional steps of actually measuring the gap left and using the binding itself to measure and cut, will result in a smoothly joined binding for you as it does for me.
Sew ‘til next time…enjoy the journey of sewing!
~Ramona
P.S. If you’d like to learn more sewing, machine embroidery, and quilting tips and tricks, join an ASG Chapter! There are free classes on the website and the chapters have events, classes; neighborhood group have members eager to share and help with your sewing.
I love to do embroidery and when I work with cotton fabrics, I always starch them well before hooping. The starch makes the fabric crisp and the embroidery clean. After stitching, I then press again—without starch. After pressing a couple of the quilt blocks, I noticed some wrinkles along the stitching lines that I hadn’t noticed before. I pressed the second block and the same thing occurred. So, I starched the fabric again for the next block, stitched it, pressed and the same thing—only not quite as bad. This was perplexing so I began to do some investigating. I finally discovered that the poly mesh stabilizer I was using was SHRINKING when it was being pressed! It wasn’t a lot—about ¼” all around— but was enough to distort the embroidery and make me very unhappy.
My shrinking poly mesh stabilizer
Here I cut the piece of poly mesh stabilizer, placed it on a cutting board and placed pins at the corners so you can see the original size.
I then took the piece of stabilizer to the ironing board and pressed it well (I used lots of steam, too) leaving the pins in the board so I could check the size after pressing.
The piece was flipped and pressed again. Now I must admit, I press with a hotter iron than most folks to do because I work very quickly and I work with a professional iron—but, I also tested with a household iron and basically got the same results. I pressed well in all directions and all over the stabilizer.
After the pressing, I let the stabilizer cool off and then I placed it back on the cutting surface, aligning the top and right sides to the original lines.
You can see how much this piece of stabilizer shrunk—it is enough to make a difference in the finished piece of embroidery.
If you find your pieces have wrinkles around the outer (and even sometimes inner) edges of your work, check your stabilizer by pre-shrinking it. I’ve been using this same stabilizer for years and had not had this problem before so I wonder if the production of the stabilizer has changed in some way—either the brand changed manufacturers or perhaps changed the fiber content in some manner (maybe less expensive fibers to make more profit to cut production costs?) I’ll never know unless I write to the manufacturer and chances are they will not tell me anything.
So, now every time I get a new bolt of stabilizer—any kind of stabilizer (except water soluble, of course) — I will be heat testing it to be sure it can hold up to washing and drying and pressing.
Radial Grading, also known as Radial Projection, was a method used by pattern companies many years ago and I’ve often wondered why it’s not used any longer — it certainly would save a lot of paper and printing butt does require a little more effort on the part of the user. During the first part of the last century and before, magazines were printed with fashion illustrations and included were tiny little pattern templates of the pattern pieces needed for the garment all on a page or two. The fashion illustrated on the page was sewn from the pattern drafted from those tiny templates — clever, isn’t it! Honestly, once learned, the method can be used for any pattern and for any size as long as the pattern template is accurately drafted and printed.
This method is not new. The “Lady’s Godey” magazines used illustrated fashion “plates” and often included the patterns to make the garments. The University of Vermont has an extensive collection of Lady’s Godey books; they have scanned excerpts of patterns and illustrations. Some full editions may also be found online in the Hathi Trust Collection.
Costume makers use this method. It just requires using the template (small scale pattern) of a pattern piece and a ratio method to draft a pattern to full scale, as seen in this video.
Costuming Books
There are many costuming books available with pattern templates (check Dover Publications).
Scale Rulers and Charts: Not only can patterns be graded up, but they can be graded down using this method, as demonstrated by Don McCunn
Using this method is all about “ratios,” but it’s not that hard or complicated. Just use the ratio of the pattern to the person as illustrated in the videos and go to it!
How would this come in handy? Well, if you create a sloper for yourself, you can radial grade it down to a quarter or half scale pattern. Because it is a “personal” sloper, you already know it fits. It is sometimes easier to design in quarter or half scale either by flat pattern or draping on a half or quarter scale form. Once a newly design pattern in quarter or half scale is finalized, then all you’d have to do is radial grade the final pattern up and you’d have an actual full-size pattern in your size — how wonderful is that! Now, it won’t be “perfect.” There will still be some alterations depending upon the accuracy of your drafting, radial grading, and also the fabric used for the garment — there is always tweaking and editing as we know. You’ll be able to determine alterations while making a mock-up of the garment.
There are companies that have taken this method of pattern making and made companies. For instance: The Sunburst Pattern System,The Dot Pattern System, and Lutterloh — hot here in the U.S. in the 1980’s — they called it the”Golden Rule” system of pattern making.
Can you begin to see how beneficial this type of pattern making would be? Mr. McCunn has a downloadable and printable PDF of “scale” rulers used in his video at the bottom of the page—print them and try this method.
I think this might be a fun Neighborhood Group project for an ASG chapter, don’t you?
Clothing and Textile Manufacturer Registration Numbers
Mom needed a new pair of jeans. She gave me a pair that has a hole worn in the knee and asked that I just put a patch on them because they are good enough to wear around her apartment. As a dutiful daughter, I brought them home to repair them. The fabric is worn in more areas than the knee, though—Mom! You need some new jeans! Like many of us, Mom has had some medical issues and has a hard time finding a pair that had a looser elastic waist and simple, no fuss fit that she can just wear around her home.
I looked for a brand tag, there wasn’t one; however, there was a tag with an RN number, the registration number filed with the government by a manufacturer of clothing and textiles. It’s not a required function, but is certainly nice when done by the manufacturer. The one we’ll explore here is finding mom her jeans. Now, in doing this, one never knows what they’ll find. As we all know, manufacturers do sometimes keep clothing pieces from season to season, but many times things are made only for a season or two and then changed or removed from the line altogether. No matter, I wanted to see if I could find Mom the jeans she enjoys.
I started at the Federal Trade Commission website, entered the RN number from the tag, and clicked the search button. The system returned one record, for VF Jeanswear Limited Partnership.
I now have a manufacturer’s name. Clicking the blue link brings up additional information about the company and the location.
I then Googled the manufacturer’s name, clicked the first link and went straight to the website for the manufacturer. The home page listed the company’s brands but did not show where the brands are sold.
I went back to Google and searched the company name and included the number at the bottom of the tag—which I surmised was the garment style or inventory or some other number used by the company to identify the style as being an elastic waist, pull on jean… and on the right of the search page, I found a link to the style number by the manufacturer!
I clicked on the link and and was taken to the store’s website (Blain’s) where I was able to order mom two new pair of jeans.
I could have asked her where she got them, but then I wouldn’t have an educational blog to share with you and most of all, these new jeans wouldn’t be a surprise for Mom! Shhhhhh—please don’t tell her! I know she’ll be thrilled when they arrive in her mailbox next week.