American Sewing Guild (ASG)

Visit our blog Visit the ASG Facebook page Visit ASG on Pinterest Visit ASG's YouTube channel Visit ASG on Instagram
  • Home
  • Join ASG
    • Join Online
    • Chapter Locations
    • Member Benefits
    • Member Brochure
    • Join by Mail
  • Conference & Education
  • Resources
    • Contests & Awards
    • Giving Back
    • Hall of Fame
    • Links
    • Travel and Tours
    • Measurement Chart
  • Shop
    • ASG Store
    • Chapter Products
    • Video Resources
  • Blog
  • About
    • About Us
    • Donate to ASG
    • ASG Sensitivity Statement
    • FAQ’s
    • Start a Chapter
  • Contact
  • Member Login
    • Login First!
    • Members Only
    • Leadership Only
    • Website FAQ’s
    • Logout
  •  

September 23, 2022

Decorative Stitches: Accenting a Print

Who doesn’t love a great print fabric? But, sometimes, it might “just need a little something” to make it pop. Enter the myriad decorative stitches found in your sewing machine…those that often sit unused and those you’ve always wanted to use but didn’t quite know where.

Accenting a print is easy! Just look at the lines and pick a place to embellish.

Preparation

Most cotton prints will require some kind of stabilization to avoid puckering, especially if you plan to use a dense satin-stitch type design. The stabilizer can be as simple as a fusible interfacing added to the underside, or an “official” stabilizer you may have in your machine embroidery supplies. Some sewers use a liquid stabilizer to saturate the fabric and when it’s dried and pressed, the fabric becomes paper-like to better support the stitches. After stitching, it’s simply washed away.

The choice of stabilizer is also influenced by the fabric’s final use. If it’s part of a tote or bag, or even a quilt, batting or fusible fleece on the underside may suffice to stabilize the fabric. But, if it’s a pocket, cuff or yoke of a garment, batting isn’t a likely option, so select something else.

If you do a lot of decorative stitching, you likely have a stash of various types of stabilizers to experiment with.

Planning

Whenever possible, it’s best to end any accent stitching in seam allowances. This eliminates the need to tie off thread ends, and crossing the stitching with another seaming ensures no pull-out issues.

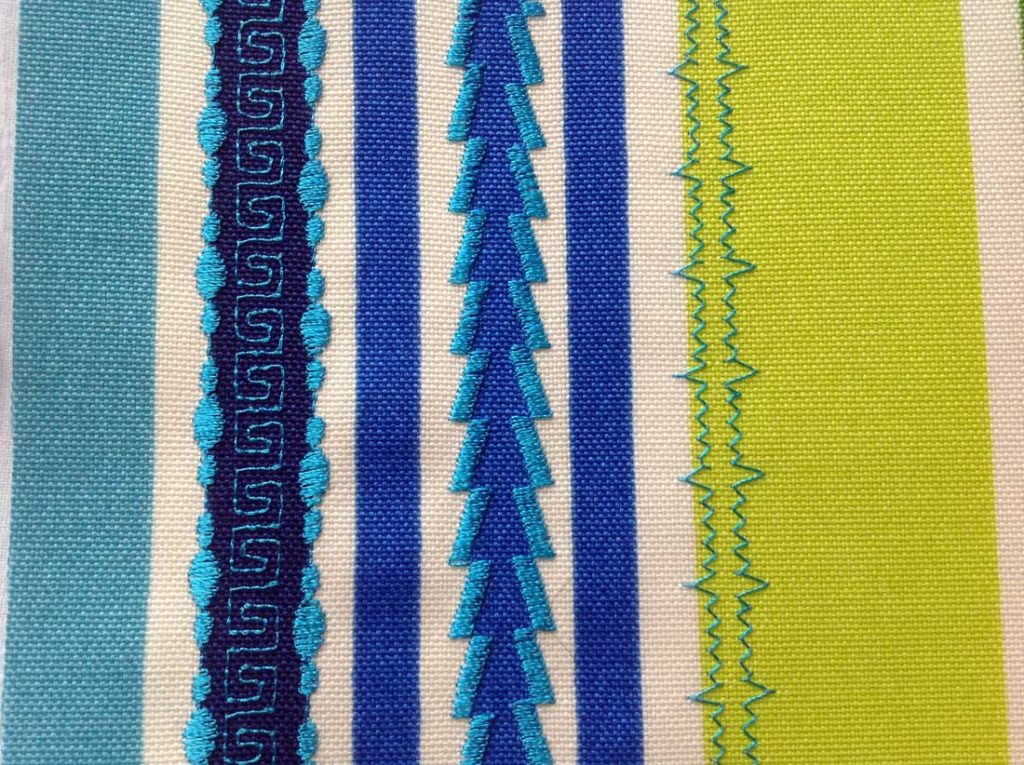
Stripes are one of the easiest prints to accent, as there are already lines and spaces to follow. Simply pick a place on your presser foot to follow the printed stripe with the added stitching.

Decorative stitch - stripes

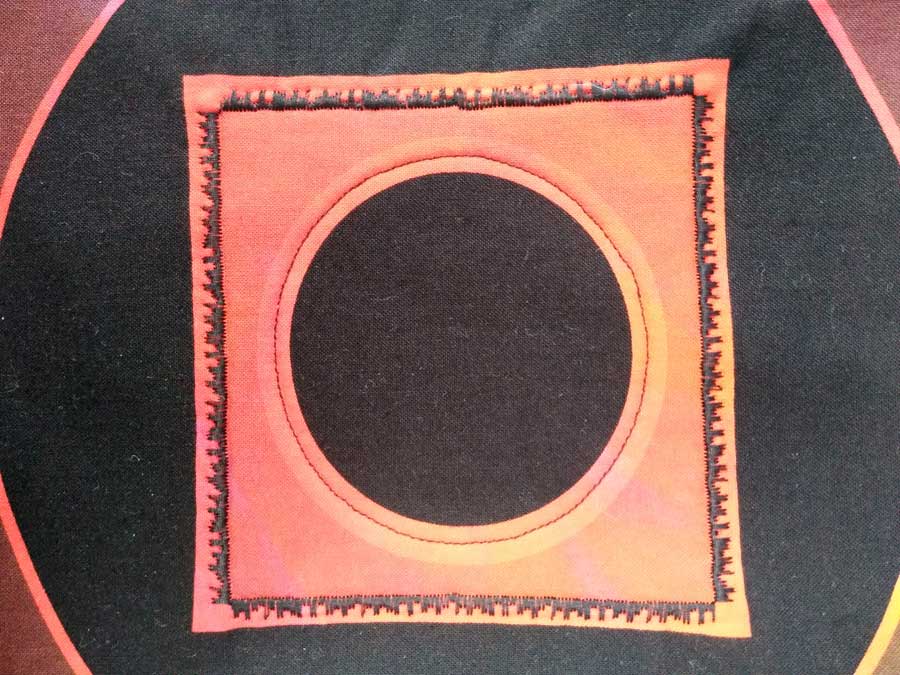
Does your fabric have circles or squares on it? If so, think about what will happen if you outline the design area and the stitches come together to complete the shape… it’s almost impossible to plan an exact match, and you may have a “blip” in the design area. Are you OK with that? Can you cover it with another type of embellishment, like a tassel, button, or charm, to hide the mismatch? If that’s not in your plan, select a stitch without distinct motifs—one that looks continuous—so there’s no visible mismatch at the joining.

If your print motifs have corners, how will you handle those? Again, it’s a good idea to choose embellishing stitches that don’t have distinct motifs and look continuous, then stop the needle on the inside of the stitch, turn and continue on, leaving an open corner.

If your machine has programmable features, it’s possible to figure out exact lengths of repeats to outline a print motif with whole stitched motifs, or you can combine stitches to have, for example, a line of straight stitches with five flower repeats and another line of straight stitches, making it a no-brainer for corner turning with aplomb.

At the end of the outline stitching, do not overlap the motifs but instead stop stitching exactly at the beginning point. Pull threads to the underside and tie off to secure, or use a lock-stitch feature on your machine to sew a few stitches in place to anchor the thread ends.

It’s a good idea to use a bobbin thread that matches the top thread to avoid any visible tension issues and, of course, you should test-stitch on the same fabric/stabilizer you plan to embellish before actually committing to the project.

Accent Options

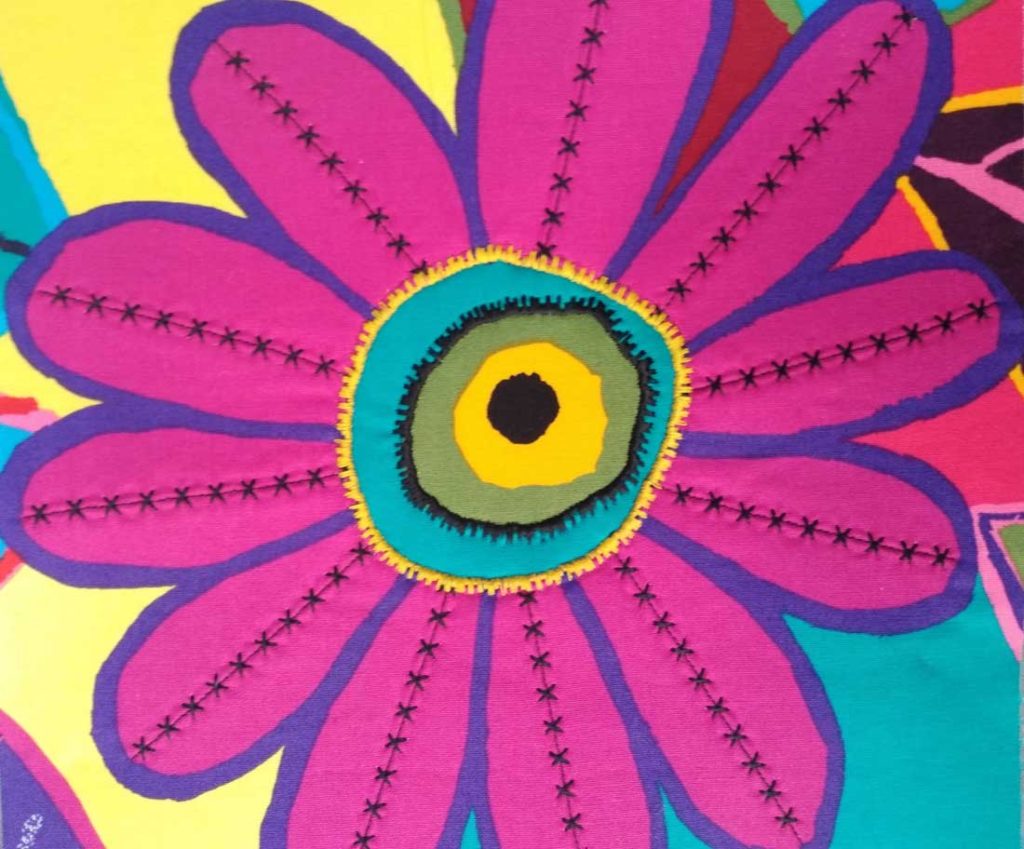
For large flower petals, like our funky daisy, consider stitching down the petal centers for accents, then around center printed motif(s) for additional color.

Decorative stitch application

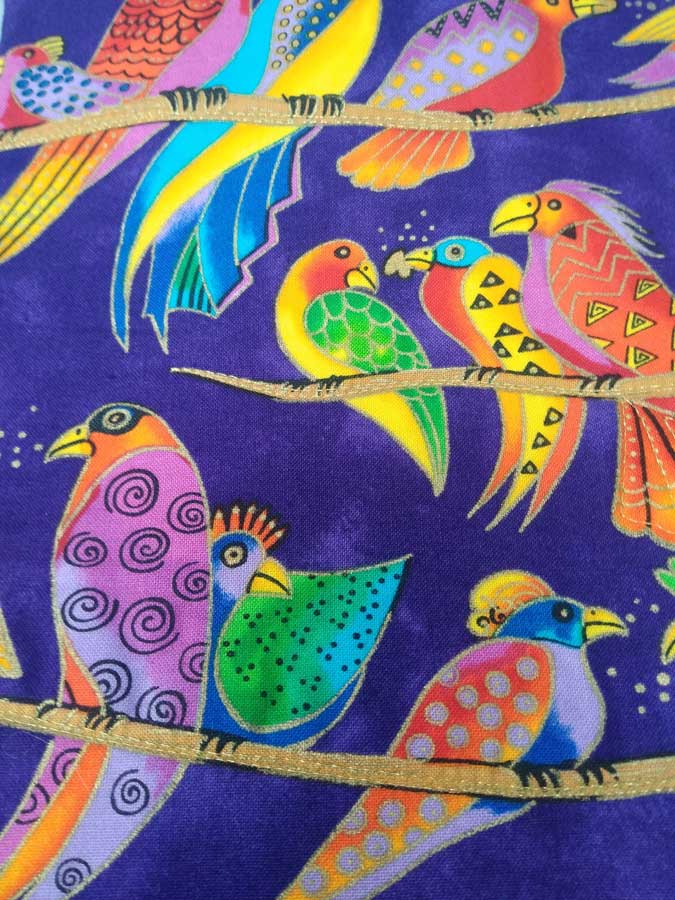
Some prints look great with simply a straight-stitch accenting. On the parrot fabric, a straight stitch with gold metallic thread accents their perches and adds just a small touch of bling to the fabric. Be sure to use a metallic needle with a larger eye to avoid shredding delicate metallic threads. Straight stitch accents can be done using the presser foot, or with free-motion techniques.

Decorative stitching on parrot-themed fabric

Finally, a simple zigzag stitch can be used to accent any geometric print.
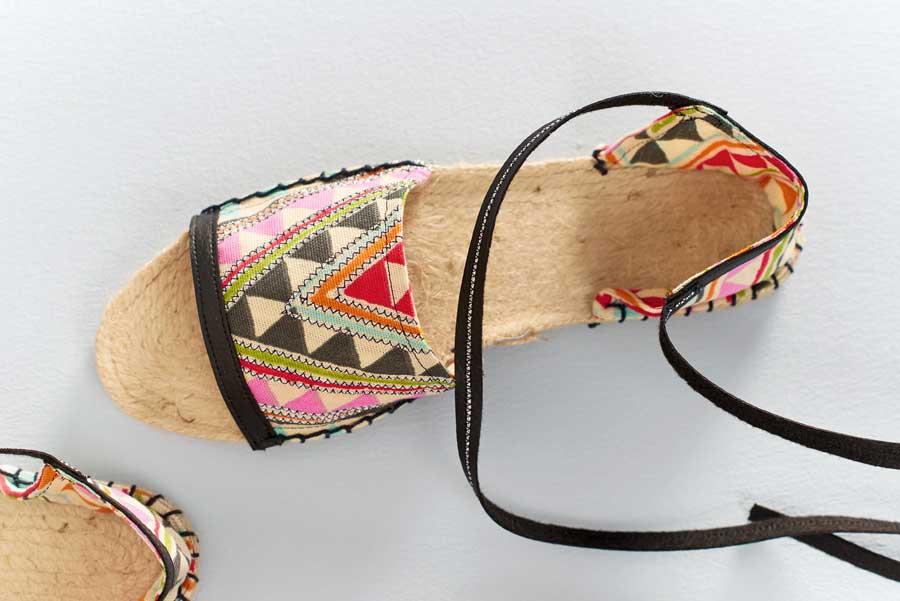
Photo courtesy of Bernina

Stitch Options

More articles on using decorative stitches:

  • Sewing Machine: Using the Built-In Specialty Stitches
  • Decorative Stitches, Part 2: In the Hoop
  • The Triple Straight Stitch

~Linda Griepentrog Linda is the owner of G Wiz Creative Services and she does writing, editing and designing for companies in the sewing, crafting and quilting industries. In addition, she escorts fabric shopping tours to Hong Kong. She lives at the Oregon Coast with her husband Keith, and three dogs, Yohnuh, Abby, and Lizzie. Contact her at .

Did you enjoy this article?
Are you an ASG member?
This field is for validation purposes and should be left unchanged.

Tagged With: decorative stitches, embellishment, fabric, stitching

September 16, 2022

Sewing Tips for Perfect Trousers (preview)

Great looking trousers, like all successful sewing projects, requires a bit of specialized attention. Here’s a collection of tips and techniques to help you achieve the best possible results:

Stitching Order

Stitch all vertical seams before stitching the crotch seams, except when making jeans, making sure to stitch the inseams and outseams in the same direction.

Helpful hint: stitch and press the outseams first because it will make it easier to get a sharp press while the legs are still flat.


To learn more about tips for sewing trousers, the complete version of this article is available on the ASG Members Only blog and requires member login.
CLICK HERE to read the full article. Not a member? Join online!

September 9, 2022

Handy Notions: Tracing Wheels

The tracing wheel may be a sewing notion you were first introduced to when you began sewing, as it’s a handy way to transfer construction markings from the pattern to the fabric. Whether it’s patch pocket locations, a zipper opening, buttonholes, darts or pleats, using a tracing wheel is a quick way to get accurate markings for sewing.

Tool Styles

Tracing wheels come in several different styles, depending on their use. All should be used on a hard, flat surface for best marking visibility.

Double Wheels

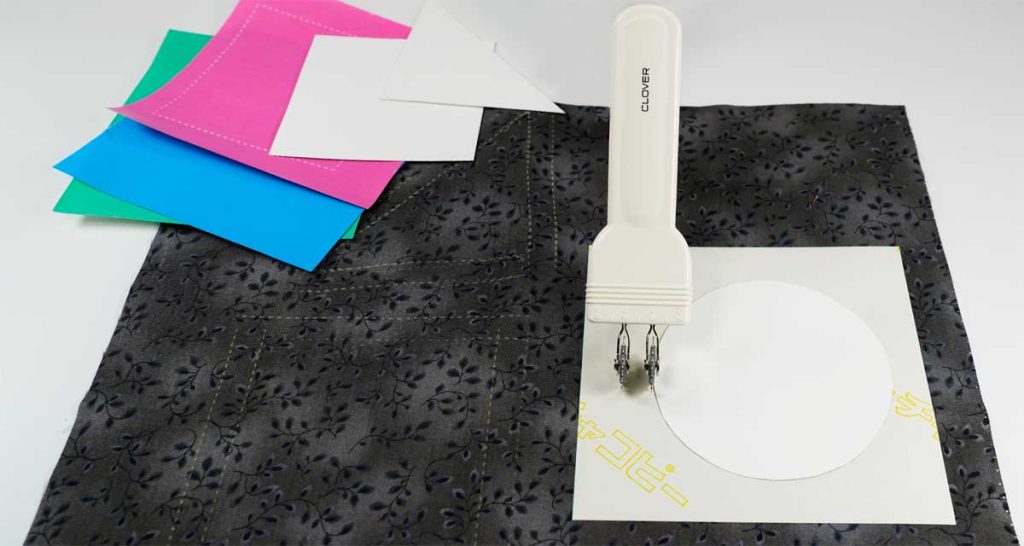
If you’re working with a pattern that doesn’t include seam allowances, you will need to add them before cutting your fabric. An adjustable double wheel uses two heads and you can select the spacing between them, depending on the desired seam allowance, from ¼” to 1 ¼”. The heads snap into a handle and remain parallel to each other for accurate marking outside the original pattern outline to add fabric for seams.

In addition to being able to add seams, a double wheel allows you to mark the original pattern outline, so you have a marked line to follow for sewing. This is especially helpful for beginners, and for any garments that may require some fitting adjustments.

A double tracing wheel can also be used to enlarge or decrease a pattern size, by adjusting an even amount in the needed areas.

Clover double tracing wheel

This type of tool is versatile, as you can also use it with just one head if you prefer.

Smooth Wheels

Looking like a tiny pizza cutter, only not sharp, a smooth tracing wheel makes a continuous, unbroken marked line. On fabrics that are impressionable (i.e. the marked line shows without using marking paper), the smooth wheel can be used to trace the pattern outline for cutting without pinning. This is especially handy for things like leather or vinyl, where pin marks are permanent. Just wheel around the pattern outline and cut on the impression line.

Dritz 746 Smooth Tracing Wheel on Amazon

Serrated Wheels

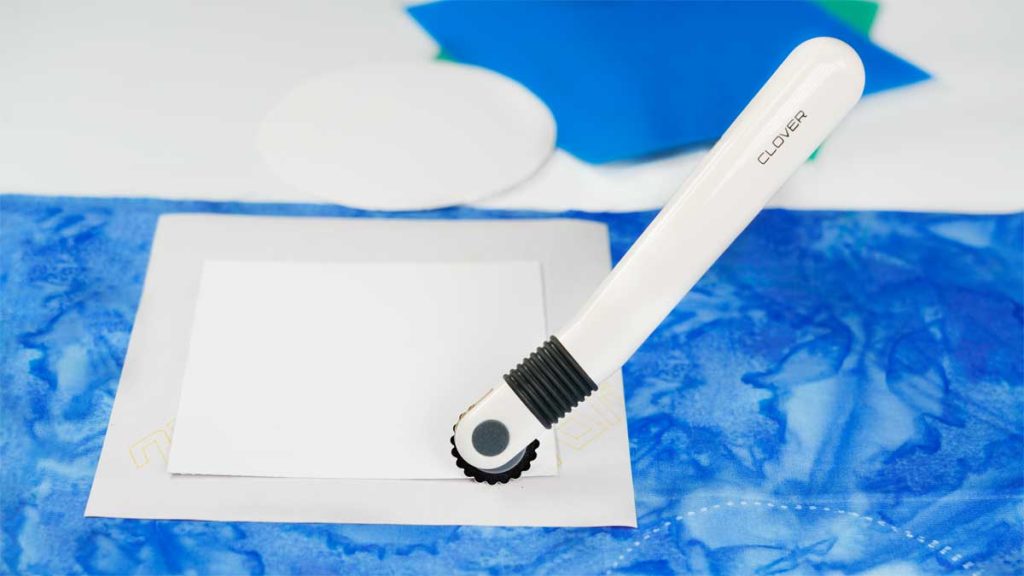
If you don’t need a continuous line, but a dotted or dashed one will do, the serrated wheel with its tiny spiked head points, will make that happen. Because there are spaces between the points, the marked lines come out the same way.

Clover serrated tracing wheel

Blunt-point Wheels

On more fragile and lightweight fabrics, a serrated wheel may cause some surface damage, so switch instead to the blunt-point wheel. The small scallops are gentler on delicate fabrics, but produce an equally visible line as their spikey counterparts.

Clover blunt edge wheel

Needle-point/Spiked Wheels

Made with long spikes, these wheels are best used not for marking, but for tracing patterns onto tag board or crisp paper. Simply trace the original pattern outline to create a more permanent pattern, handy for reusing multiple times. It can also be used to perforate leather for easier stitching. If you use this wheel on fabric, most will become damaged from the small holes it creates.

Tihood needlepoint tracing wheel on Amazon.

Using a Tracing Wheel

Tracing wheels are most often used with some type of tracing or transfer paper. The paper is available in multiple colors, and today, most tracing paper markings wash out. If you plan to use the tracing paper on the fabric right side, be sure it’s designated as “wax-free.”

Caution: Some tracing paper markings become permanent once they are pressed as they’re heat-set into the fabric, so be sure to test products first on your fabric before use.

To transfer markings to a project that’s cut double (with fabric wrong sides together), place the tracing paper between the layers so that color is exposed to both layers. Trace the markings with the designated tracing wheel, remove the paper, and the markings will show on the wrong side of both layers.

If you cut with the fabric right sides together, encase both layers in the tracing paper with the colored side against the fabric wrong sides, and then trace the markings.

If you cut a single-layer pattern, place the colored paper under the layer with the color against the fabric wrong side, then mark.


~Linda Griepentrog Linda is the owner of G Wiz Creative Services and she does writing, editing and designing for companies in the sewing, crafting and quilting industries. In addition, she escorts fabric shopping tours to Hong Kong. She lives at the Oregon Coast with her husband Keith, and three dogs, Yohnuh, Abby, and Lizzie. Contact her at .

Did you enjoy this article?
Are you an ASG member?
This field is for validation purposes and should be left unchanged.

Tagged With: learn to sew, sewing notion, sewing tip

September 2, 2022

3 Steps to Perfecting the Princess Line Seam (preview)

Why Princess-Line?

Example of princess-line seams with pipingPrincess-line seams often result in a smoother line that allows for a body-skimming fit. They can also be more flattering than typical darts, especially if you have a large bust or shoulders as they not only help to flatter curves, but allow for more opportunities for fitting. They can also be used to create a unique style to the garment by using contrasting fabric or color blocking, or even to add a piped contrasting trim.
Do you love the look of a princess-line seam but hate the task of fitting it? The solution is a method called “dart conversion.” The name may sound intimidating, but it’s really quite easy once you start out with a sloper with well-placed darts.

The complete version of this article is available on the ASG Members Only blog and requires member login.
CLICK HERE to read the full article. Not a member? Join online!

August 26, 2022

Suit-ability: Repurposing Suits for Other Projects

Not all fabric we use in our projects comes from the fabric store—some comes from our own closets or from the closets of others near and dear.

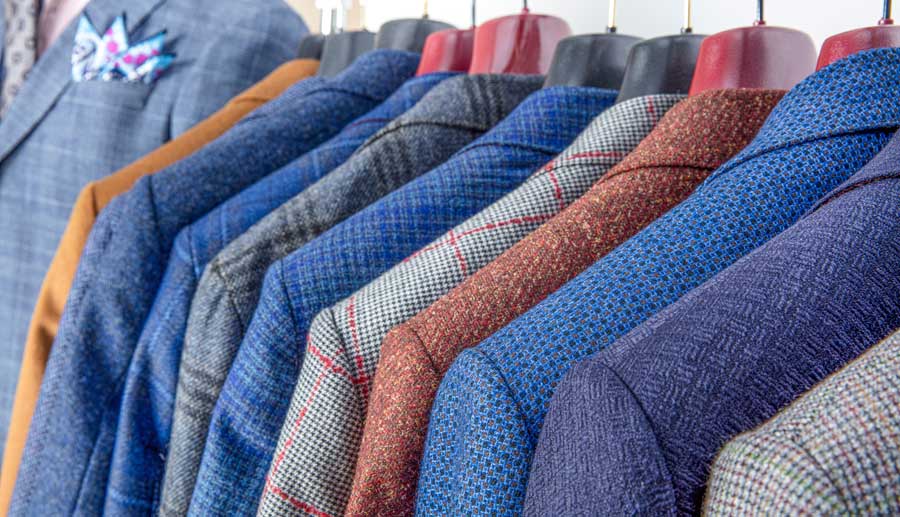
Have you noticed in the past few years that there are fewer and fewer men wearing suits? Blame it on the popular work-from-home phenomena or simply the trend toward more casual dressing. But, that trend can create a gold mine, as suit jackets are relegated to the back of the closet, or shipped off to the local thrift store for retrieval by savvy sewers.

men's suits

Why, you might say? Suit jackets offer a lot of quality fabric that can be repurposed for other projects. In particular, some ready-made construction details that you may think are beyond your skill level to create, like welt pockets and keyhole buttonholes are already done. So why not “harvest” those niceties for another project or two, or three, or four, depending on the size of the jacket.

What to look for

If you’re shopping thrift stores for men’s suit jackets, look for the largest size to garner more fabric. Choose a worsted weight, as it’s not as bulky as the woolen cousins. Be sure to inspect the item for any stains, moth holes or other damage and look for name brand labels and quality fabrics. In many cases, the suit coat may be almost new and worn only on one or two occasions before discard.

Thrift stores often have sales, so shop smartly. If you qualify, check for senior discount day with savings up to 50%. Or for similar discounts, check the tag color of the day. If you’re shopping for suit coats at rummage sales, ask if there’s a half-off-the-tag-price day or a sale where everything you can fit into a bag is only $1. These usually happen on the last day of the sale and it’s a great time to go crazy for suits and sport jackets.

Deconstruction

Watching the news or listening to podcasts is a great time to disassemble a suit jacket. First, decide which parts you might like to keep for other projects—patch pockets, welt pockets, front buttons/buttonholes, lapels, sleeve plackets, labels, etc.–and take apart the seams leaving those areas intact. Lining can be separated or left with its original construction detail, depending on how the area will be reused. While you’re taking apart the suit, note the inner construction details—the process can be a major tailoring learning experience, especially on high-end jackets. If you’re into tailoring, you may even be able to harvest some of the jacket’s structural materials like sleeve heads, hair canvas chest pieces, shoulder pads, etc. for reuse.

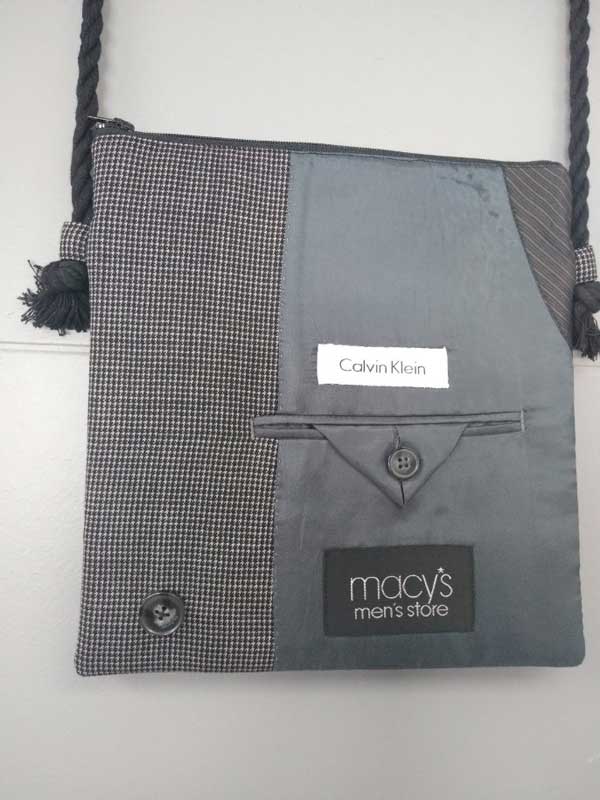
Don’t forget that the inside of the suit jacket can offer some fun details, like bold labels, lining welt pockets and tabs, and accent stitching, so put those to work on the outside of your project.

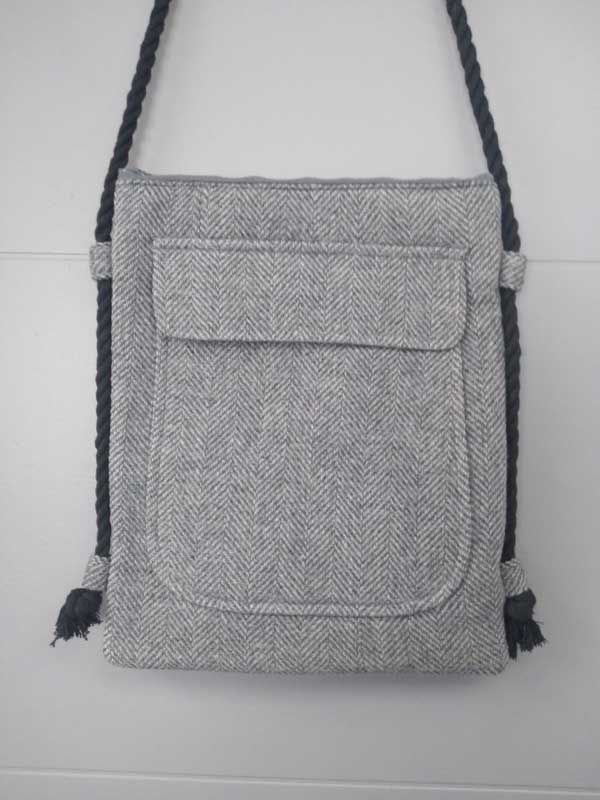
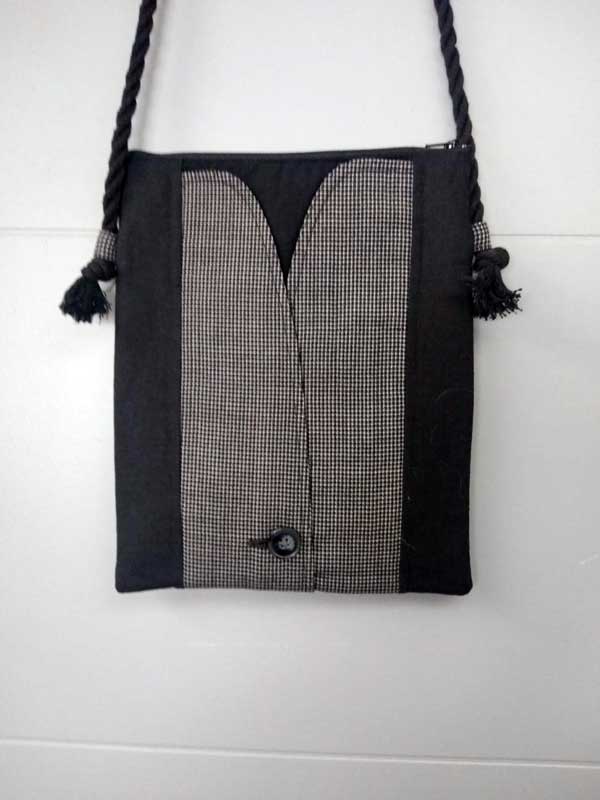
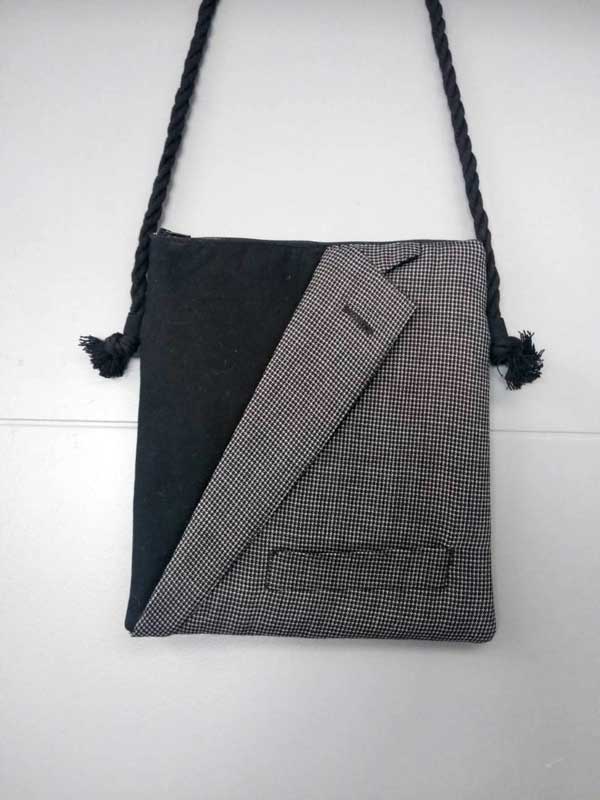
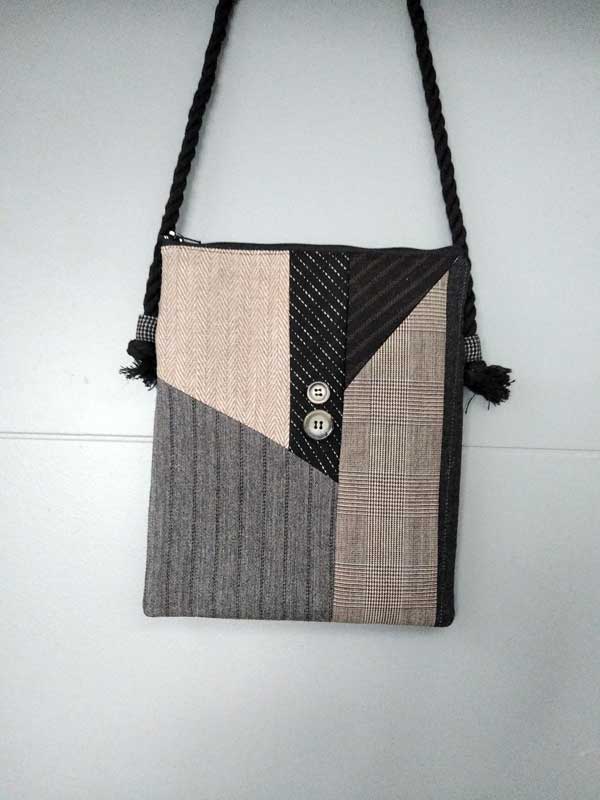
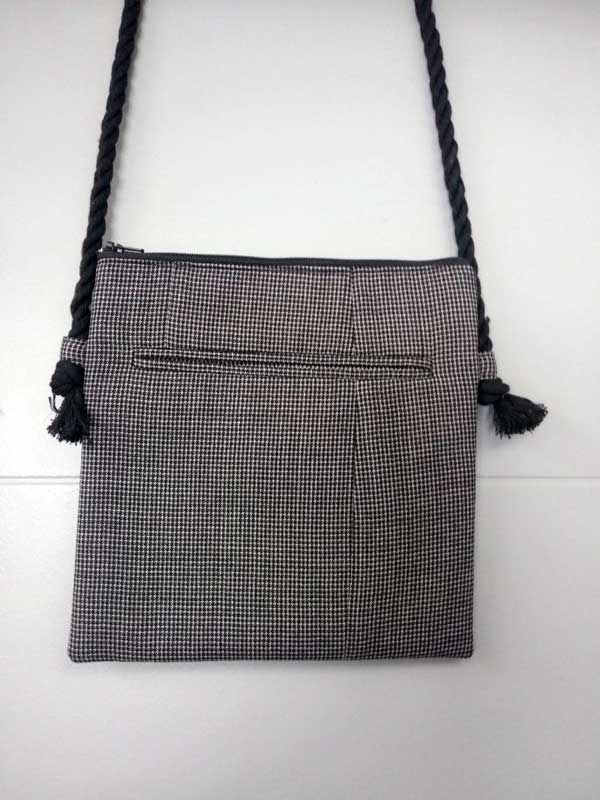
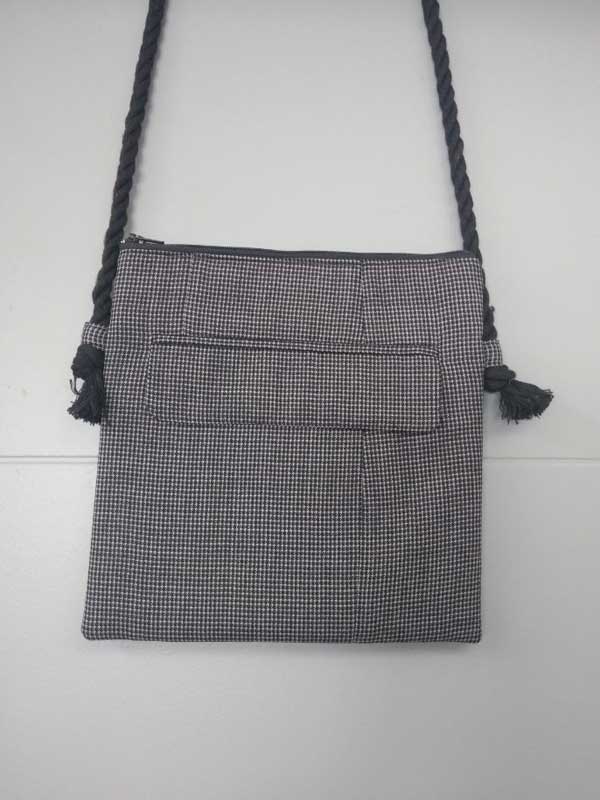
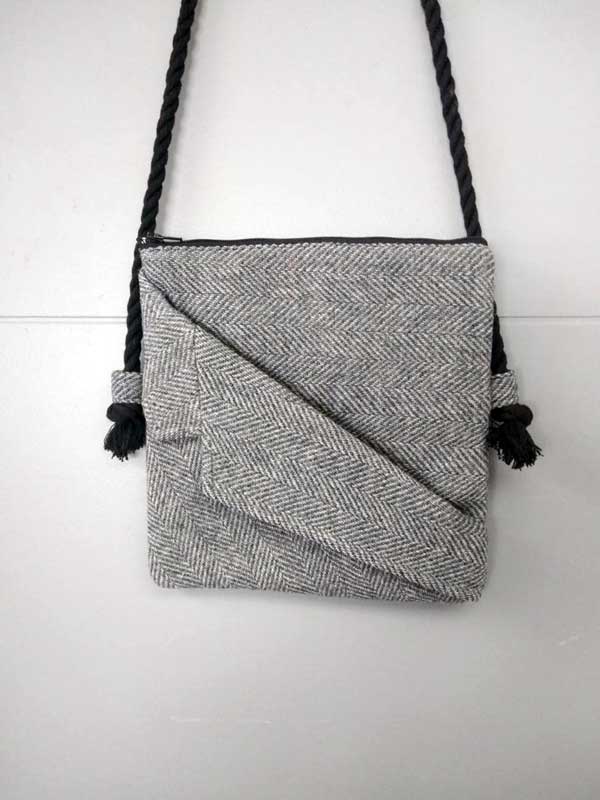
Small projects, like bags, allow for utilizing many details from one jacket and it’s fun to figure out how to make them work to maximize the fun. Check out our featured bags using several different suit details.

Herringbone Lapel
Herringbone Patch Pocket
Jacket Closure
Lapel
Lining
Pieced Wools
Welt Pocket
Welt Pocket with Flap

Tie Tactics

Not far from suit jackets, you may also find some wonderful ties being discarded. Whether they’re silk, polyester or wool, there’s yardage to be garnered. If you’re thrifting or repurposing ties from a loved one, creative options abound.

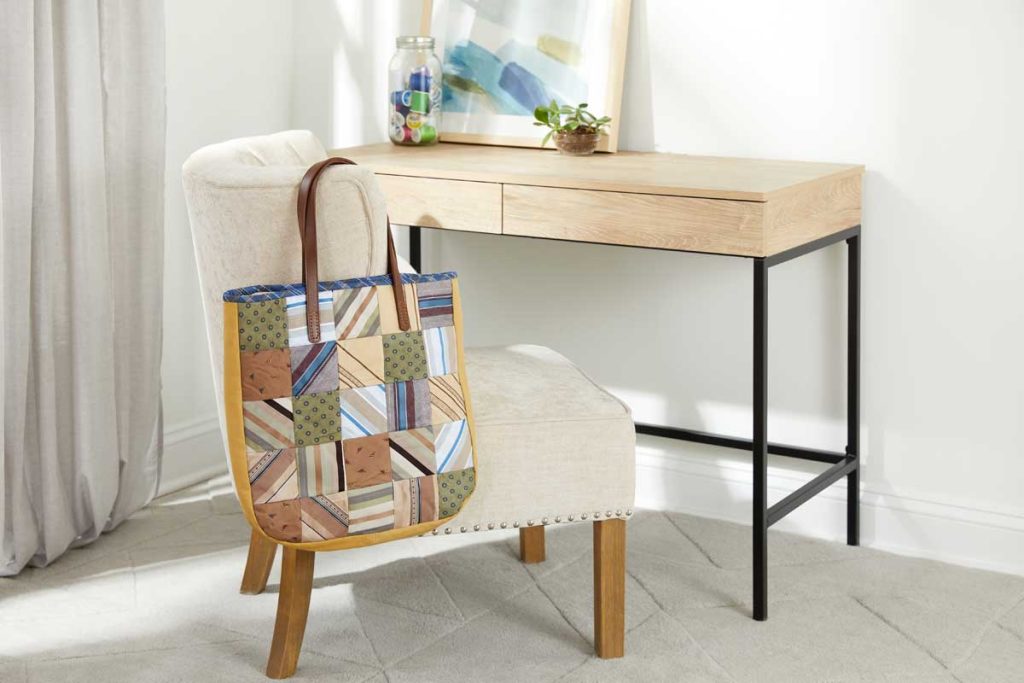
One idea—this pieced tote made is not only a great project to reuse old or discarded ties, but also can be a wonderful way to remember a special person whose ties you may have inherited. Get the instructions and free pattern from Yarspirations.

Make a tote with ties
Image compliments of Coats & Clark

~Linda Griepentrog Linda is the owner of G Wiz Creative Services and she does writing, editing and designing for companies in the sewing, crafting and quilting industries. In addition, she escorts fabric shopping tours to Hong Kong. She lives at the Oregon Coast with her husband Keith, and two dogs, Yohnuh and Abby. Contact her at .
Did you enjoy this article?
Are you an ASG member?
This field is for validation purposes and should be left unchanged.

Tagged With: fabric, recycle, remake, reuse, sewing, textiles, thrift store sewing

  • « Previous Page
  • 1
  • …
  • 26
  • 27
  • 28
  • 29
  • 30
  • …
  • 82
  • Next Page »

Become a Member

Join the only national organization dedicated to Advancing Sewing as an Art and Life Skill.

Join Now button

Blog Article Categories

  • ASG Conference
  • Chapter Stories
  • Embroidery
  • Fitting
  • Learn to Sew
  • National Sewing Month
  • Products, Books, & Patterns
  • Projects
  • Quilting
  • Sewing
  • Sewing Techniques
  • Sewing Tips
  • Sewing Tours
  • Videos
  • Disclaimer
  • Privacy Policy

American Sewing Guild
National Headquarters
9660 Hillcroft, Suite 230
Houston TX 77096
713-729-3000 | 713-721-9230 Fax
www.ASG.org

ASG wordcloud - education, conference, discounts, videos, special offers, tours and more

Copyright © 1998–2025 · American Sewing Guild · All Rights Reserved