American Sewing Guild (ASG)

Visit our blog Visit the ASG Facebook page Visit ASG on Pinterest Visit ASG's YouTube channel Visit ASG on Instagram
  • Home
  • Join ASG
    • Join Online
    • Chapter Locations
    • Member Benefits
    • Member Brochure
    • Join by Mail
  • Education & Classes
  • Resources
    • Contests & Awards
    • Giving Back
    • Hall of Fame
    • Links
    • Travel and Tours
    • Measurement Chart
  • Shop
    • ASG Store
    • Chapter Products
    • Video Resources
  • Blog
  • About
    • About Us
    • Donate to ASG
    • ASG Sensitivity Statement
    • FAQ’s
    • Start a Chapter
  • Contact
  • Member Login
    • Login First!
    • Members Only
    • Leadership Only
    • Website FAQ’s
    • Logout
  •  

August 18, 2021

Meet JoAnn Krause

JoAnn Krause 2021
JoAnn Krause 2021

During the summer of 2019, I first heard of JoAnn Krause and began my quest to learn more about this behind-the-scenes sewing icon. You may not recognize the name, but as a sewer, you have probably benefited from some of her pioneering efforts.

The story of JoAnn Krause of JKOriginals, is of a woman whose contribution to the home sewing industry was innovative in the development of educational material, the introduction of serger machines, industry sewing techniques, product resources, and the use of emerging media technology such as VHS-taped lessons. The sheer industriousness and resourcefulness of this woman makes her a giant in the home sewing industry.

Where It Began

Born JoAnn Jascor in Owen, WI in 1937, she grew up in an era when most women made their own clothing as well as that for their families. “My mom was always a sewer. I picked up the talent from her,” explained JoAnn. She married Donald Krause in 1962 and soon began a family. Eventually she began to work part-time in the apparel industry for a company called Fashion Services, Inc, owned by Nancy Olson. It was here that JoAnn learned pattern design and grading. “I believe Nancy pioneered multi-sized patterns,” JoAnn asserts.

After Nancy moved her business to California, JoAnn decided to strike out on her own. “I started teaching in community education programs in the evenings. I loved teaching because all the students were so eager to learn. Most were middle aged, but I had all ages, even men.” She began with lingerie classes, then went to everything from bras and girdles to sportswear and swim suits. The popularity of her classes brought her invitations to go to different school districts, and then came the demand for printed material of the instructions. Along the way she developed patterns for hats and purses using Ultrasuede, as well as ski outfits inspired by her entire family.

Joining ASG

JoAnn Krause circa 1980's
JoAnn Krause circa 1980’s

JoAnn became a member of ASG in 1984 after attending the conference in San Francisco “Getting involved with the American Sewing Guild and other sewing expos, I decided I had to upgrade the quality of my manuals. With the help of my husband who was a typesetter; a niece who was a graphic artist; and my very talented sister-in-law, I wrote all the instructions and drew all the illustrations. Because I disliked commercial pattern instructions, all my techniques were taken from the industry… I teach industrial techniques. They’re fast and efficient, and are completed by machine for a more professional appearance.”

“In all the years of teaching,” she reflects, “I had over ten thousand student names on my mailing list. I made all my own garments and samples in the 80s and 90s. I devoted all my time to learning the craft.” Sewing wasn’t just a business, it was a social network of like-minded folks enjoying time together and learning their craft.

Concerning her use of industry techniques, JoAnn said in an ABC Newspaper article Sew Like a Pro in Half the Time, “When you are making a blouse with a collar, for example, why start with a 5/8″ seam around the neckline? First, you have to staystitch the neck edge so it doesn’t stretch. Then you sew the seam. Then you trim and grade it. Why not just sew with a quarter inch seam to begin with? You eliminate all those extra steps. In the industry, they start with quarter-inch seams to save time and money.”

Starting JKOriginals

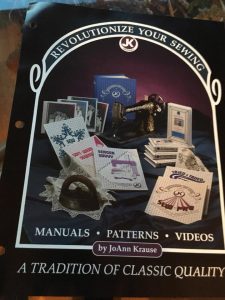
Thus began JKOriginals which consisted of several sewing seminars and ran from 1986 through 1994. The in-person classes covered jackets, blouses, skirts, and pants with easy to follow illustrations and creative ideas on redesigning these basics, as well as lessons on VHS tapes.

  • Sew For Snow was for an outerwear jacket and pants and featured the new Thinsulated material.
  • Stretch Your Imagination used a combination of knit and woven fabrics to create a family’s entire casual wardrobe. It allowed the student to create numerous styles of tops, pants, shorts, skirts, and jumpsuits from a basic pattern, much like many of the current independent designers are doing today.

By 1990, she was introducing the home sewer to the then new serger and highlighted its features, sewing techniques, and trouble shooting. She also produced a catalog of tools, patterns, and new products that JoAnn considered the best, most unique, and lowest priced items.

JoAnn was firm about her “no handwork” rule and her patterns used industry construction techniques. Her tips highlighted the way fashion trends moved darts, created necklines and collar variations, modified sleeves and lapels, and added pockets and trims.

In a 1990 Sew News article titled “New Again Heirlooms,” JoAnn offered a pattern and design inspiration for creating garments from Battenberg lace table cloths and linens. The article became her signature teaching technique during this fashion trend. The JKOriginals brand was known across the United States and into Canada.

JoAnn spent decades teaching and bringing new sewing techniques to the sewing public. When VHS gave way to DVDs, USB sticks, and direct downloads, and typeset publishing yielded to computer desktop published and pdf files, sadly JKOriginals did not transition with technology and the lesson manuals and educational videos are no longer available. Yet, the material is timeless for garment sewers as is her enduring story of the spirit of a sewing entrepreneur.

JKOriginals books


~Kathleen DeMuth

Tagged With: JoAnn Kraus, sewing educator

August 13, 2021

What to Do With All Those Fabric Scraps

If you sew, let’s face it, you create fabric scraps. With a world focus on going green, it’s not acceptable anymore to simply send leftovers to the landfill. So what can you do with all those pieces you no longer need?

Giving scraps a new home

If you just have to get the scrap fabric out of your house, try looking for someone who may need them:

  • Car mechanic with a rag
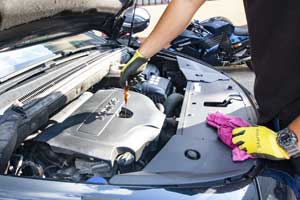
My local mechanic loves getting cotton weight fabric to use for rags. Anything that will sop up a spill or wipe off greasy hands is welcome. This helps him save the cost of buying rags, plus he then burns the used ones in his wood stove to heat his shop. Scraps — or even used clothing minus buttons, zippers, etc. — should be at least 12 inches square. Clean fabric that is sun faded, misprinted, or even stained works fine, and he doesn’t even mind wrinkles!
  • Schools, recreation centers, day care, and senior centers that offer art programs are often looking for donations of scraps that can be incorporated into their projects.
  • With the increased interest in sewing due to the pandemic, some libraries have begun holding sewing classes as part of their programming. Scraps are especially appreciated for their beginning quilting projects. Some libraries even accept sewing machines in working order so that patrons can check them out to use either on site or at home.

Libraries are also looking for volunteers to teach sewing in a one-time or on-going program. It’s a great way to promote sewing and ASG, especially during National Sewing Month in September.

  • Colleges with Fashion Design programs often have cash-strapped students who need fabric to complete collections and gratefully accept donations of those pieces that no longer seem to fit your style. Smaller pieces are also needed for the early sewing classes when they are just learning zipper insertion, plackets, etc.
  • Women’s shelters may have a sewing room for residents to use. Scraps can be used for patching clothes and creating items for little ones.

Giving scraps a new life

Photo by Erik Mclean from Pexels
  • The most obvious answer is to create a scrap quilt. I had a friend who would cut her scraps into equal sized squares and throw them in 3 bags: lights, mediums, and darks. When she felt like sewing but didn’t have a project in mind, she would alternately reach into each bag and stitch the squares together into 9 patch squares, then stitch those squares together in a random fashion. She was not a purist, so she wasn’t worried about 100% cotton. She used blends and anything that felt appropriate. Not only did she get rid of those scraps, she was able to donate the quilts to veterans homes, shelters, and foster children’s programs.
  • Another friend told me she likes to use her scraps to make little zippered bags for cosmetics, jewelry, or even credit cards. If the piece is large enough, the entire bag can be made from the same fabric, or separate scraps can be pieced together to create a quilted look. These little bags can be kept on hand for quick little gifts.
  • If you hate wasting money on wrapping paper that just gets crumpled up and thrown away, why not make reusable gift bags? Large scraps can be used for the entire bag, or smaller ones can be strip pieced to create the desired size. And they can be any size from those that hold a ring to an extra large package. I like to take leftover pieces of lace and sew it to the top edge, then fold the fabric in half and stitch down the side and across the bottom. Sometimes I even tuck two scraps of ribbon (at least 12” long) into the side seam to use as a tie and create a pretty self bow. In just a matter of minutes you can have a gift bag done to use the next time you need to wrap a present. Your recipient will be so impressed. Just don’t tell them it was made from scraps.

Scraps for Charity

  • What about those batting scraps that quilters often produce? Take simple pictures from a coloring book and cut out animal or geometric shapes from fabric. Stuff with leftover batting and donate to first responders to give to children at the scenes of accidents or domestic violence cases.
  • A neighborhood groups in my chapter is dedicated to charity work. One of their projects is a fidget quilt that they donate to a local visiting nurse program for their Alzheimer’s and dementia patients. They create the quilts by taking 4” to 6” squares of brightly patterned or textured fabric and sewing them together to create a small laptop quilt of approximately 18-24”. The fabrics are sewn together to create the top and backed with a solid fabric. Batting may be used, but it is not required. The two pieces are quilted together along the block lines. Patients are attracted to the bright colors and textures and are often soothed by touching them.
  • My personal favorite (because it uses up every tiny scrap bit) is to create animal bed pillows. I use heavier weight fabric to create the pillow by cutting an 18” square or larger (or piece several smaller scraps together to achieve the desired size). Then I sew two of these squares together, stitching around the four sides and leaving an opening of about 5 inches. I always have one of these “pillows” in progress in my sewing room. As I cut out each new project, I take the leftovers and trim them into small 1” pieces and throw them into the “pillow.” I even use the trimmings from the serger. When it is loosely filled to about 2/3 to ¾ capacity, I machine stitch the opening closed. Animal shelters and veterinarians accept these pillows and send them home with the animals. It’s a great way to use up scraps and help our four- legged friends at the same time.

What do you do with your leftover scrap fabric? Hopefully some of these ideas will challenge you to accept the go green concept and you are creatively using those scraps instead of stuffing our landfills.


~Rosemary Fajgier

Did you enjoy this article?
Are you an ASG member?
This field is for validation purposes and should be left unchanged.

Tagged With: charitable sewing projects, fabric scraps

August 11, 2021

Using a Wing Needle

Do you know how to use a wing needle? This 1 minute video gives you a sneak peak on using this specialty needle

August 6, 2021

Hot Pad Helpers

Whether you call them hot pads or potholders, the purpose is the same—to protect hands and table surfaces from the heat of a pan just removed from the stove or oven.

Hot pads are an ideal beginner sewing project (perfect for kids), and they’re a fun way to use up scraps since they don’t take much fabric. Because of their size, they’re also ideal to experiment with new sewing techniques you may want to try out before using on a larger project.

Hot pads are so much fun, we bet you can’t make just one!

Photo courtesy of Bernina

Size-wise

Hot pads can be made in many sizes and shapes, but one thing’s for certain, whatever shape you choose, be sure they’re large enough to keep your hands from getting burned when in use.

Many potholders are simple squares—from 5” to 10”, though the larger sizes offer better protection. Some are circular and of similar sizes, while others are rectangular and designed to be folded over a warm pot handle. There are also patterns for holiday themed shapes, like Easter eggs, Valentine hearts or Christmas trees.

Potholder shape ideas

In addition to their padded selves, most potholders offer an extended loop for hanging. The loop can be made of the same fabric as the holder or from the binding used around the shape’s edge. Loops can be along one side, or at a corner.

Layer Up

The anatomy of a potholder is simple—two layers of fabric with heat-resistant protective layers between. It’s important that the outer fabric layers are not synthetic, as they should be able to withstand heat up to 400° Fahrenheit. Cotton is a good choice for the outer layers as it’s heat resistant and readily washable.

Between the outer layers is the main source of heat protection. Some sewers like to use multiple layers of preshrunk wool for its insulative qualities, others use layers of cotton batting, and perhaps most effective is a batting with an insulative layer, like Insul-Bright®, made by the Warm Company or Pellon Insul-Fleece™. (Product links lead to Amazon and any purchases you make may make us a small commission at no additional cost to you). This specialized product has a metallicized polyester film needle-punched into batting. This heat-protective layer should then be sandwiched between two layers of cotton batting.

Artful Additions

Because of their small size, potholders are the perfect canvas to try a new sewing technique like appliqué, machine embroidery or decorative stitching (with cotton threads), strip piecing, scrappy piecing, etc.

Simply draw the shape of your potholder onto the right side of one fabric layer, do your embellishing and trim the piece to size. If you’re piecing the potholder front and/or back, do that sewing before cutting the shapes.

Back to Basics

To make a hot pad, layer the back and front pieces wrong sides together with your choice of the inside insulative layer(s). Pin the layers and quilt them together. Quilting can be done in straight lines, free-motion designs, or using an embroidery machine. If you choose not to quilt the layers together, baste around the perimeter about 1/8” from the cut edges.

Cut a 2 ¼”-wide strip of binding fabric to go around the potholder. Depending on the size, it may be necessary to piece together two width-of-fabric strips. Note: If your potholder has curved corners, cut the binding on the bias. Fold the binding in half wrong sides together and press.

Bind the potholder, mitering the binding at any corners. When you come back to the starting point, stop just before the original stitching, but do not trim of the extra binding length.

Turn the binding to the underside and hand- or machine-stitch the folded edge in place. At the original start point, fold the binding and extend it to form a hanging loop and stitch the edges together, tucking the raw end under the end of the binding portion. Finish the stitching to anchor the loop base.

Once you’ve mastered the basics of potholder making, consider adding a pocket to one side. Slide your hand inside for easier gripping with the padded portion of the hot pad.


~Linda Griepentrog
Linda is the owner of G Wiz Creative Services and she does writing, editing and designing for companies in the sewing, crafting and quilting industries. In addition, she escorts fabric shopping tours to Hong Kong. She lives at the Oregon Coast with her husband Keith, and two dogs, Yohnuh and Abby. Contact her at .

Did you enjoy this article?
Are you an ASG member?
This field is for validation purposes and should be left unchanged.

Tagged With: easy project, hot pads, insulated fabric

August 4, 2021

Fireside Chat: Sarah McFarland from Threads Magazine

Enjoy our 40 minute chat with Sarah McFarland of Threads Magazine. Shara shares her journey to her role as Editorial Director, as well as the incredible opportunity she has to mingle with some of the greatest talents the sewing world has to offer.


~Sheryl Belson

Did you enjoy this article?
Are you an ASG member?
This field is for validation purposes and should be left unchanged.

Tagged With: Threads Magazine, video

  • « Previous Page
  • 1
  • …
  • 41
  • 42
  • 43
  • 44
  • 45
  • …
  • 83
  • Next Page »

Become a Member

Join the only national organization dedicated to Advancing Sewing as an Art and Life Skill.

Join Now button

Blog Article Categories

  • ASG Conference
  • Chapter Stories
  • Embroidery
  • Fitting
  • Learn to Sew
  • National Sewing Month
  • Products, Books, & Patterns
  • Projects
  • Quilting
  • Sewing
  • Sewing Techniques
  • Sewing Tips
  • Sewing Tours
  • Videos
  • Disclaimer
  • Privacy Policy

American Sewing Guild
National Headquarters
9660 Hillcroft, Suite 230
Houston TX 77096
713-729-3000 | 713-721-9230 Fax
www.ASG.org

ASG wordcloud - education, conference, discounts, videos, special offers, tours and more

Copyright © 1998–2025 · American Sewing Guild · All Rights Reserved