American Sewing Guild (ASG)

Visit our blog Visit the ASG Facebook page Visit ASG on Pinterest Visit ASG's YouTube channel Visit ASG on Instagram
  • Home
  • Join ASG
    • Join Online
    • Chapter Locations
    • Member Benefits
    • Member Brochure
    • Join by Mail
  • Conference & Education
  • Resources
    • Contests & Awards
    • Giving Back
    • Hall of Fame
    • Links
    • Travel and Tours
    • Measurement Chart
  • Shop
    • ASG Store
    • Chapter Products
    • Video Resources
  • Blog
  • About
    • About Us
    • Donate to ASG
    • ASG Sensitivity Statement
    • FAQ’s
    • Start a Chapter
  • Contact
  • Member Login
    • Login First!
    • Members Only
    • Leadership Only
    • Website FAQ’s
    • Logout
  •  

July 12, 2021

What I’m Sewing: Alyce Blouse

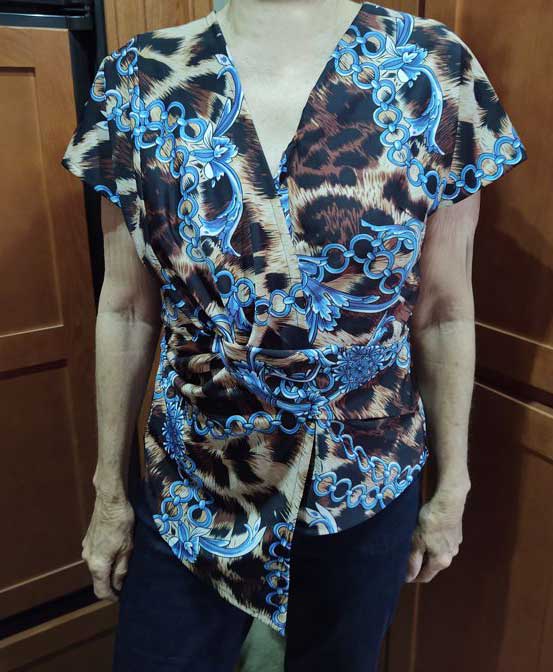
Linda Jensen from the ASG Lake County Chapter shares her experience making this great-fitting blouse from Silhouette Patterns.

Alyce Blouse Q. Item Created 
A. Blouse

Q. Independent Pattern Designer
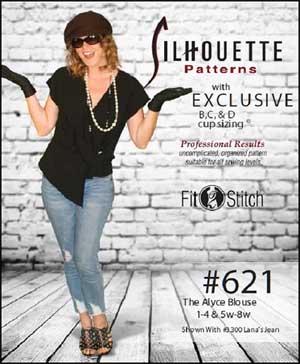
A.
Silhouette Patterns

Q. Name and Number of Pattern
A.
Alyce Blouse #621

Q. Fabric Used:
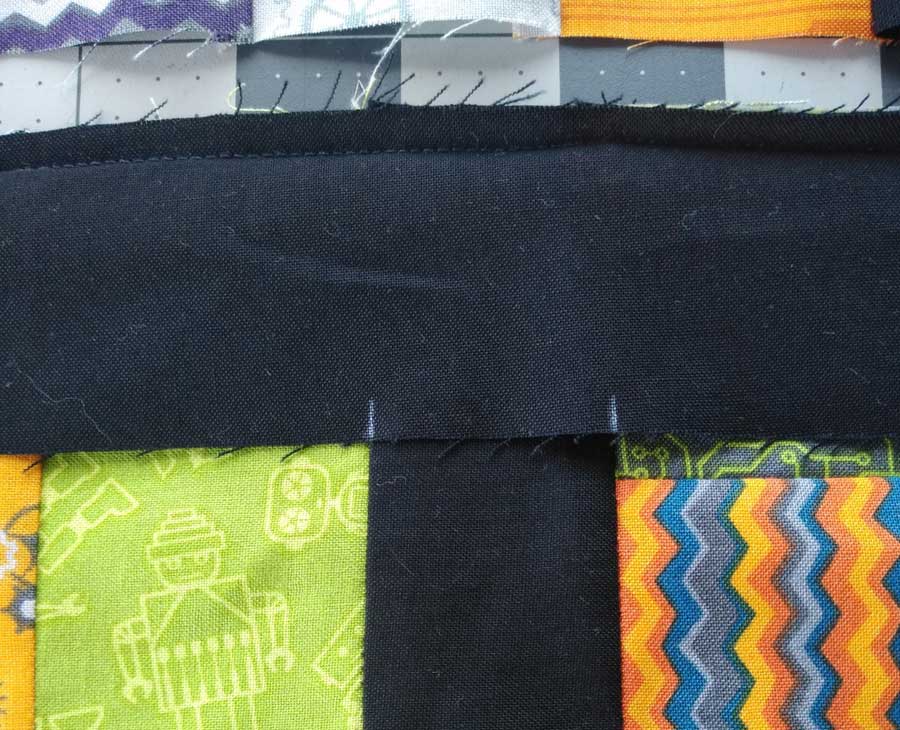
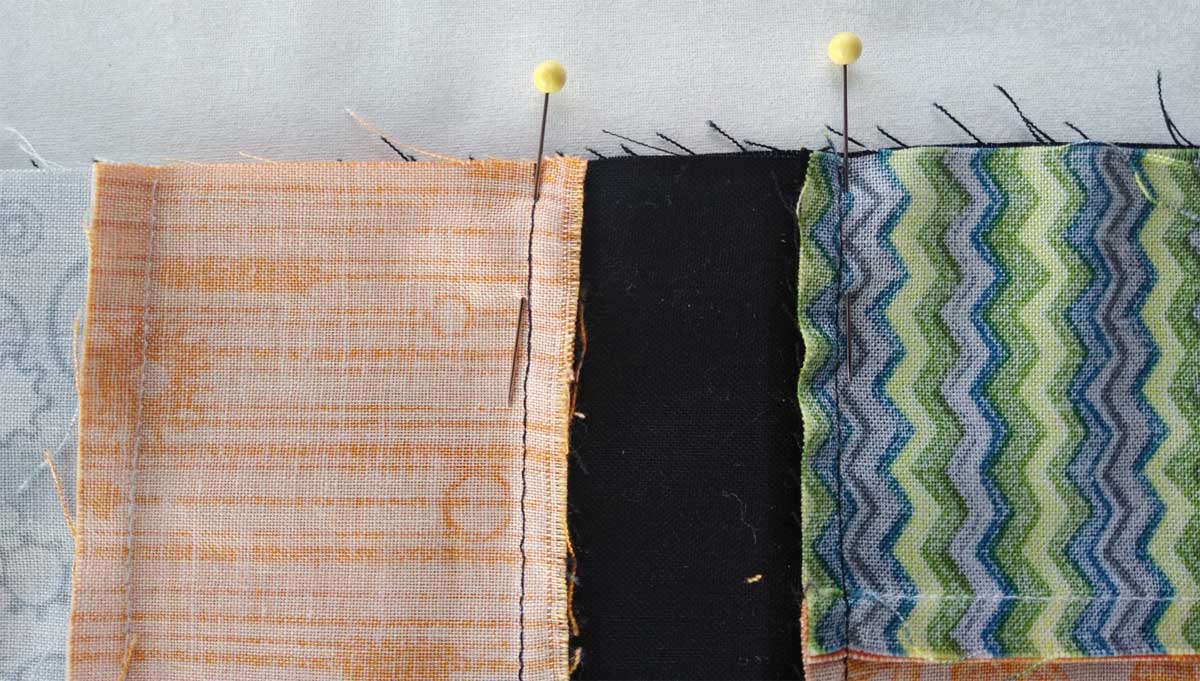
A. Stretchy knit, but a wide variety of fabrics can be used

Q. Special Embellishments/Notions Used
A. None

Q. Skill level required?
A.
All levels

Q. Are the instructions easy to follow?
A.
Yes, they are easy to follow. There is also a YouTube of making the top that is helpful. Be sure you mark all notations of the letters to put it together.

Q. Are you pleased with the finished result?  Did it meet your expectations?
A.
I got a blouse that was very different from the usual plain blouse, which is what I wanted.

Alyce Blouse Pattern from Silhouette Patterns
Alyce Blouse Pattern from Silhouette Patterns. Sold exclusively at Fit2Stitch.com

Q. Did it look like the picture?
A.
Yes

Q. Did you make any modifications in the pattern?
A.
No

Q. Are there any changes you would have made?
A. No

Q. Did the pattern teach you any unique or special techniques?
A.
I learned that I needed to use knit interfacing when using very stretchy fabric.

Q. Would you make this again?
A.
Yes

Q. Would you recommend this pattern to others?
A.
Yes

Pattern Link: https://www.silhouettepatterns.com/html/patterns/p_621.htm
* Pattern found exclusively at http://www.fit2stitch.com/p_621.html


~Linda Jensen, ASG Lake County Chapter

Did you enjoy this article?
Are you an ASG member?
This field is for validation purposes and should be left unchanged.

Tagged With: blouse, pattern, sewing

July 9, 2021

Sewing: An Improbable Match of Math and Creativity

I teach Algebra

There, I said it. Go ahead, I’m used to the rolling of the eyes as well as both the internal and external groans. Such a pronouncement usually has one of two effects on the conversation:  It either stops it dead or leads to everyone sharing their horror stories of trying to learn algebra.

At first I try to redeem myself by quickly adding that I used to teach Accounting, but that usually resulted in adding to the drama, or clearing the room completely. So, for years I have tried to hide my association with anything mathematical. I’m actually not a real math geek. I majored in business and worked my way through college as a stenographer, but I found that math came easy to me and had a logic and balance that went well with my personality and love of sewing.

Yes, I just matched math with SEWING.

Thanks to my math ability, when I look at a pattern, the logic and sequencing of algebra helps me anticipate the steps in construction. I can almost see a garment coming together before I ever look at the instructions. It’s great for fitting — being able to quickly and accurately manipulate fractions allows me to tackle the most complicated adjustments over multiple pattern pieces. This quirky talent puts me in high demand during any fitting workshop.

Image of a sewist working with a pattern

My association with math also helps me to easily draw quilting patterns and design purses, tote bags, placemats, table runners, and more. While my non-mathematical friends are limited to patterns on the market that have predetermined sizing, I can accurately create items to fit the size I want rather than make do with what’s available. Math also helps in determining ahead of time if a piece of fabric is large enough to accommodate my design or I’ll need to adapt the pattern to fit the fabric. And when it comes to mass production, math allows me to calculate how many items I can get from a yard of fabric so that I can purchase just the right amount. (OK, so I rarely limit myself to just the right amount, but it does keep me from purchasing too little.)

Of course, blessings can quickly turn to curses and, more than once, math has made me the pariah at an ASG meeting. For example, many years ago when a friend discovered kaleidoscope quilts, she shared this wonderful new idea at our neighborhood group meeting and offered to order the plastic template we’d need to create the kaleidoscope effect. While everyone else was scampering around to pay the $25 for the template, I sat and stared at her pictures. Before I realized it, I heard the following words come out of my mouth, “That’s just an equilateral triangle with 60 degree angles.”

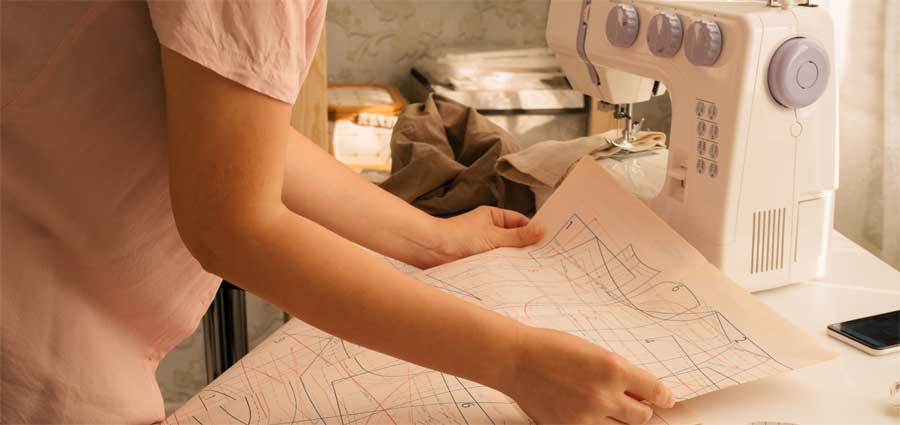
Silence. Dead silence.

My friend assured me I was wrong, and the only way we could create the true kaleidoscope was to purchase the template. On my 45 minute drive home, I reviewed my logic and calculations over and over and couldn’t see any flaws. At home, I got to work drawing a cardboard template and proceeded to make my own kaleidoscope motif. Then I set aside the $25 for more fabric. Yay me!

Who said geometry would never be useful?

As much as I tout the benefits of math, I must admit that its logic and balance occasionally get in the way of my sewing. That’s when the other side of my brain wants to take over the creative process. It’s often an internal struggle to allow myself the freedom to ignore symmetry and place an embroidery design off center or to color block with an abandon of precision. But when I’m fortunate enough to win this struggle, sewing becomes my blank canvas and I can see the many possibilities a piece of fabric provides. What does it want to become?  Does it want to be paired with another color, many colors?  What accent pieces will give it that “bling” that makes my project “pop?”  Making these decisions requires thinking outside the box. It’s not simply following the rules and balancing equations, but making decisions based on emotions rather than pure logic.

When I see the finished product, what pride and feelings of accomplish I achieve! And the more I create, the more inspired I become. Do you use all of your abilities and talents when you sew? Even the ones that aren’t “sewing” related? Remember that structure and rules don’t always have to be followed. Don’t just think outside the box, sew outside of it as well. For me, the blending of math and creativity activates both the right and left brain and keeps me alert and alive. That’s a high that’s worth experiencing, one that only sewing provides.


~Rosemary Fajgier

Did you enjoy this article?
Are you an ASG member?
This field is for validation purposes and should be left unchanged.

July 2, 2021

Beyond the Basics: Serger Accessory Feet

If you use your serger only for finishing seams and you never change the foot, you could be missing a world of opportunities for other fun sewing adventures.

Cording FootLike your conventional machine, many sergers have accessory, or special-function feet available for a variety of stitching tasks. It’s important to know what feet you might have already included with your serger, so check the manual and any accessory boxes first. Then, do a little research with your dealer to see what other feet might be available. In addition to the brand-name feet, sometimes generic feet may fit your model.

If you’re shopping for specialty feet, you’ll need to know your serger’s model number, whether it takes screw-on or snap-on feet, and any stitch width limitations. Also, note that some tension adjustments might be needed when using some specialty feet, so be sure you’re comfortable with that.

Let’s take a look at a few available options, keeping in mind that all feet may not be available for all brands and models of sergers, and names may be slightly different between brands.

These feet were made for serging

Elasticator/Tape Foot

This handy foot not only helps guide elastic for you, but it also stretches it as you sew. Most feet allow you to adjust the amount of stretch, as it varies by the type of elastic. This foot is ideal for sewing lingerie, swimwear and athletic garments of all sorts. Note the elastic widths compatible with the foot, as some have a wider range than others. The foot can either serge over the elastic, or along one edge depending on the position adjustment.

Elasticator foot, image courtesy of Bernina

Blindstitch Foot

If you love making invisible hems by machine, but you hate guessing exactly where the fold should go and where the needle should be, this foot is for you, as it has an adjustable guide to keep things consistent as you stitch the hem in place. It guides the fold and can cut the extending edge in one pass for a neat hem on many fabrics. Note that serger blind hems work best on knits and other textured fabrics.

Blindhem foot, image courtesy of Bernina

Beading and Sequin Foot

Beaded edges are a piece of cake with this foot as it guides strings of beads or sequins along the edge of garments, bridal veils, etc. as it stitches them in place. Invisible thread works well with this foot for a no-see application.

Beading & sequin foot, image courtesy of Bernina

Beading & sequin foot, image courtesy of Bernina

Piping Foot

Who doesn’t love a beautifully piped seam? This foot is a slam dunk for both making the piping and inserting it into a seam. Note that there is a maximum diameter for the piping to fit the foot groove, so double check before purchasing. Some brands offer multiple sizes of piping feet to accommodate different cord sizes.

Piping foot, image courtesy of Bernina

Piping foot

Gathering Foot

Whether you’re ruffling sheer fabric or adding a ruffle to a flat fabric piece, this foot is helpful for both functions. Most are adjustable so you can control the gathering fullness while you finish the fabric edges at the same time.

Gathering foot, image courtesy of Bernina

Wavy Edge Foot

If you’re into dance costuming, eveningwear or bridalwear, this may be a must-have foot for you. There’s a hole to guide clear fishing line or wire so you can serge over it to create undulating edges, from smaller lettuce edging to full-on giant waves. It saves having to hold and guide the line on your own to be sure that the serging encases it without any nicks.

Lace/Trim Foot

No more trim wrestling needed with this foot, as the built-in guide places flat lace or trim along the edge with aplomb, allowing you to serge it in place. It’s adjustable for precise placement.

Clear Foot

Nothing beats a clear view no matter what you’re serging, and many brands offer a clear foot for better visibility with general serging.

All photos courtesy of Bernina. Used with permission


~Linda Griepentrog

Linda is the owner of G Wiz Creative Services and she does writing, editing and designing for companies in the sewing, crafting and quilting industries. In addition, she escorts fabric shopping tours to Hong Kong. She lives at the Oregon Coast with her husband Keith, and two dogs, Yohnuh and Abby. Contact her at .

Did you enjoy this article?
Are you an ASG member?
This field is for validation purposes and should be left unchanged.

Tagged With: serger feet, serging

June 25, 2021

Matching Points

Nothing causes quilters more angst than getting perfect points on their blocks. With multiple small pieces often combined into a single block, keeping points and seams aligned can be tricky, but there are a few tricks that help with the task. If you’re not a quilter, never fear, these same principles can apply to garment sewing where seams come together and opposing parts need to align. Think about a pieced bodice, a yoke/bodice joining, or an artful pieced jacket.

Match points in quilt blocks examples
Matched points on a quilt block

Point to Point

Lining up adjacent seams is easier if the opposing seam allowances are pressed in different directions. For example, on the upper half of a 4-patch block, press the seam allowances to the left; on the lower half of the block, press the seam allowances to the right.

Image showing seam allowances in opposite direction
Seam allowances in opposite direction

When the sections are placed right sides together, the sewn seams will be on top of each other and the seam allowances will nest together for a perfect match. Place a pin through the sewn seam so that it falls in the same place on the lower layer and then stitch, removing the pin as you come to it. Most machine manufacturers do not recommend stitching over pins.

Example of aligned corners
Aligned corners

This same process works for stitching together half-square triangle blocks. Press seams for adjacent blocks/rows in opposite directions so the seam allowances will nest during the joining process. Place a pin through to match the seams, then stitch, and you should come out with a perfect match {B-1, B-2}.

To test before stitching, fold back the seam allowances and check for the point match.

Image checking point alignmnet
Checking point alignmnet

Some quilters prefer to press seams open instead of to one side. In this instance, careful pinning if required for matching points as there isn’t the nesting seam allowance advantage.

Quilt seams pressed open. Image courtesy of Bernina

What if?

What if your points or seams don’t match? In most instances, taking out a few inches of the seam on either side of the mismatched seam allows for some readjustment and easing to realign the seam matching, then you can just restitch the open area.

Example of mismatched points on a quilt block
Mismatched points on a quilt block

If you’re comfortable leaving the mismatched seam, an easy way to camouflage it to simply tie the quilt at the corners. The yarn ties will hide the seam matching issues and no one will be the wiser. It won’t win you any awards in a quilt show, but it may still be a great quilt to please a child or loved one.

Sashed Seams

Many quilt patterns have strips placed between rows of blocks. These strips, whether vertical or horizontal, are called sashing. Many quilt patterns have sashing strips in both directions; if so, sew the vertical strips between the blocks first, then add the horizontal ones between the rows.

Example of sashing
Blocks aligned with sashing between

Getting blocks lined up on both sides of the sashing strip is much the same as aligning within the block or row, except that there’s now a strip between the rows.

To keep things aligned, sew a row of blocks to one side of the sashing strip, matching center points. Then fold down the sashing strip onto the blocks and mark the adjacent seamline locations on the wrong side of the sashing. Mark at each vertical sashing strip location across the quilt top width.

Markings on fabric
Mark adjacent sashing seamlines

Pin the next row of blocks in place, matching the vertical sashing seams to the marks across the quilt width. Stitch, removing the pins as you come to them and voila, perfectly aligned blocks.

Example of lining up sashing
Pin sashing at markings

~Linda Griepentrog
Linda is the owner of G Wiz Creative Services and she does writing, editing and designing for companies in the sewing, crafting and quilting industries. In addition, she escorts fabric shopping tours to Hong Kong. She lives at the Oregon Coast with her husband Keith, and two dogs, Yohnuh and Abby. Contact her at .

Did you enjoy this article?
Are you an ASG member?
This field is for validation purposes and should be left unchanged.

Tagged With: matching points, quilt blocks, quilting, sewing

June 23, 2021

How To Use a Bamboo Point Turner

In this short sewing basics video, we show you how to use a bamboo point turner. If you think this tool is only used for one thing, think again! See what else it can do and why you need it in your sewing space.


~Sheryl Belson


Tagged With: point turner, sewing basics

  • « Previous Page
  • 1
  • …
  • 42
  • 43
  • 44
  • 45
  • 46
  • …
  • 82
  • Next Page »

Become a Member

Join the only national organization dedicated to Advancing Sewing as an Art and Life Skill.

Join Now button

Blog Article Categories

  • ASG Conference
  • Chapter Stories
  • Embroidery
  • Fitting
  • Learn to Sew
  • National Sewing Month
  • Products, Books, & Patterns
  • Projects
  • Quilting
  • Sewing
  • Sewing Techniques
  • Sewing Tips
  • Sewing Tours
  • Videos
  • Disclaimer
  • Privacy Policy

American Sewing Guild
National Headquarters
9660 Hillcroft, Suite 230
Houston TX 77096
713-729-3000 | 713-721-9230 Fax
www.ASG.org

ASG wordcloud - education, conference, discounts, videos, special offers, tours and more

Copyright © 1998–2025 · American Sewing Guild · All Rights Reserved