When shopping for fabric, we’re accustomed to seeing rows of bolts with an allover print. But look a little deeper and you’ll find some with unique features—border prints! Border prints are fun to work with and allow you to showcase this print feature in creative ways.
What is a border print?
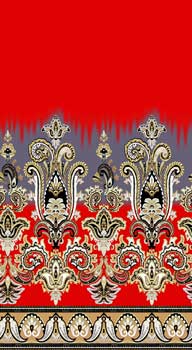 Instead of a fabric having the same patterning across the full width of the fabric, border prints have a different pattern along one or both edges. The bands of distinct prints can be narrow or wide, and can extend their emphatic look across the fabric’s full width in some instances creating a beautiful graphic element.
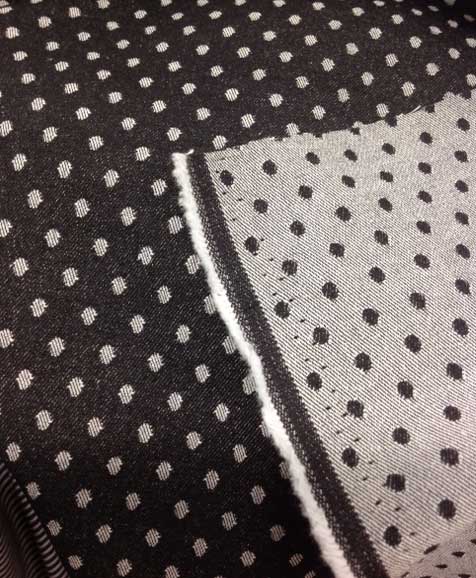
- A double border print may have the same or differing designs along each fabric edge. A common pairing is to have one narrow border and one wider one.
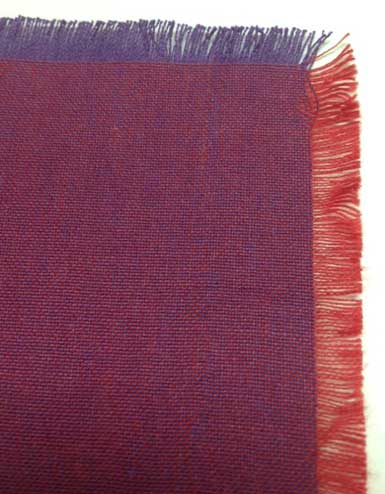
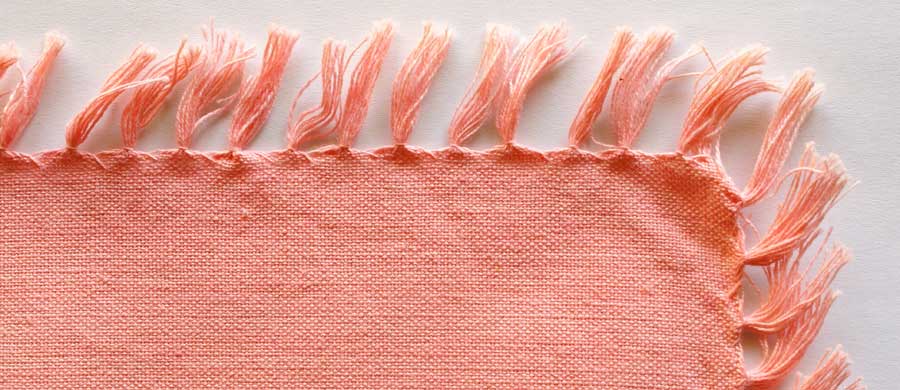
- A border print is parallel to the fabric’s selvage, ready for showcasing in a garment, accessory or quilt and can be found on a woven fabric or along the cut edge of a knit.
- Another type of fabric considered a border print has a lengthwise edge detail like scallops or fringe along one or both sides.
Working with a Border Print
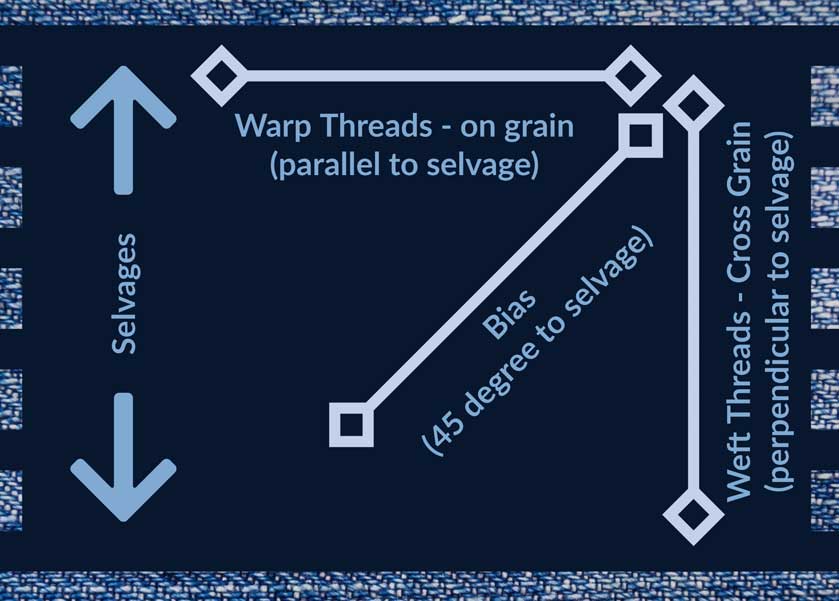
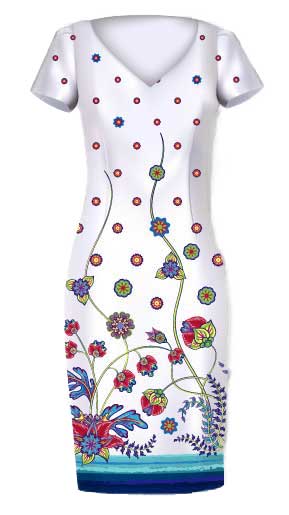
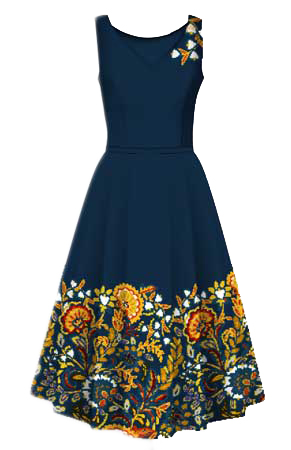 The primary difference in working with a border print is that the project needs to be on the crosswise grain of the fabric, rather than the traditional lengthwise spec. The design area is best showcased along a straight edge, like a skirt or sleeve hemline, pant leg, jacket hem, etc., though it doesn’t need to be at the bottom of a garment. The border can also be used along a pocket edge, in a bodice area or even at the waistline.
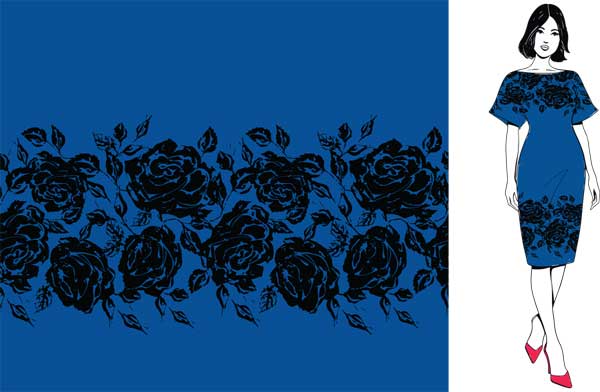
If you prefer to use the border vertically instead of horizontally, think about a jacket front, wrap skirt or side-seam accent. If you choose this orientation, be sure the border design isn’t directional—for example, you probably don’t want flower stems horizontal on a jacket front, or people lying down along a wrap skirt edge. The print should really be non-directional for vertical use.
Border prints can also be used to accent small areas, like collars and cuffs, totes, etc., and are also ideal for home décor projects, like on a curtain hem, pillow or quilt border.
Like any distinct print, matching is always a good idea, so consider where you may need to match a distinct pattern before you begin cutting. A hemline border should match at the side seams to avoid breaking the visual patterning.
Pattern Adaption
 Some patterns are designed specifically to be used with border prints, but most are not. Look for designs with straight edges, like a gathered or pleated skirt, if you want to feature the print along the hemline.
- If the area you want to use the print in is curved, you’ll need to straighten it or risk losing part of the border to the curve.
- Redraw your pattern’s grainline to reflect the new orientation on the fabric. Use a ruler to change up the standard grainline 90°. Double check the fabric width to accommodate the new orientation.
- Since some border prints are close to the selvage, it may be necessary to modify a hem depth if you want to use the print along the bottom of a skirt. A narrower hem, or a faced hem, could both be options depending on the design placement.
Yardage Adaptation
The amount of yardage needed for a border print will likely differ from what was originally called for if the garment was originally cut on the lengthwise grain. After redrawing the grainline on the pattern pieces, do a test layout to refigure the fabric before purchasing. Keep in mind that it’s best to cut all the garment pieces on the same grain to avoid any variance in directional prints or shading.
The width of the fabric may limit the use of the border on certain garments, or require you to piece a garment if you’re intent on using a particular fabric.
Note that you can also trim off the border and reattach it if needed, to get the look you want in your project.
Now that you know more about them, when you see a border print fabric, think about how you can showcase it in your next project!
~Linda Griepentrog
Linda is the owner of G Wiz Creative Services and she does writing, editing and designing for companies in the sewing, crafting and quilting industries. In addition, she escorts fabric shopping tours to Hong Kong. She lives at the Oregon Coast with her husband Keith, and two dogs, Yohnuh and Abby. Contact her at gwizdesigns@aol.com.