American Sewing Guild (ASG)

Visit our blog Visit the ASG Facebook page Visit ASG on Pinterest Visit ASG's YouTube channel Visit ASG on Instagram
  • Home
  • Join ASG
    • Join Online
    • Chapter Locations
    • Member Benefits
    • Member Brochure
    • Join by Mail
  • Education & Classes
  • Resources
    • Contests & Awards
    • Giving Back
    • Hall of Fame
    • Travel and Tours
    • Measurement Chart
  • Shop
    • ASG Store
    • Chapter Products
    • Video Resources
  • Blog
  • About
    • About Us
    • Donate to ASG
    • ASG Sensitivity Statement
    • FAQ’s
    • Start a Chapter
  • Contact
  • Member Login
    • Login First!
    • Members Only
    • Leadership Only
    • Website FAQ’s
    • Logout
  •  

October 7, 2022

Pattern Weights

Tatuo round cloth pattern weights available on Amazon and other sewing retailers.

What’s’ your preferred method for cutting out projects—pins or pattern weights? There are sewists who swear by one or the other, but most of us tend to love both, depending on the fabric being used.

Pins hold pattern tissue firmly in place for cutting, but there are some fabrics where pins can leave permanent marks and, lo and behold, if you’re not pinning within the seam allowance, there could be those telltale marks. Vinyls and some faux suedes are prime examples of fabrics that benefit from the use of weights over pins.

Weights hold fabric flat against the cutting surface and if you cut with a rotary cutter instead of scissors, nothing moves. However, you do need to protect the surface with a special mat to avoid damage to the table top.

You can cut a weighted pattern with scissors, but it’s a bit tricky since the scissor blade tends to “pick up” the fabric as you cut, potentially shifting the weights around the perimeter.
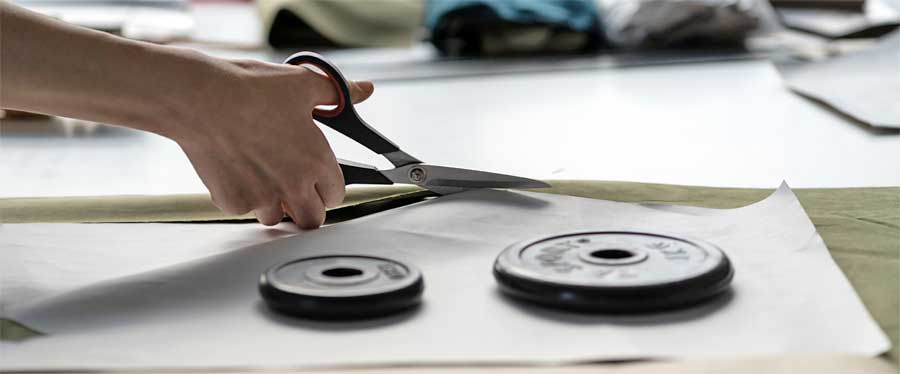
Cutting around a pattern with weights

In addition to eliminating the potential of pin marks, weights help secure slippery fabrics in place—a task  much harder with pinned pieces that can slide around. Weights are also preferred on thick fabrics where pinning is near impossible—think wool coating or mohairs.

So, bottom line—there’s a place to use both methods of securing the pattern to the fabric.

Small weights can also be used at your machine to keep slippery fabrics from driving you crazy while seaming.

Let’s take a look at weights…

Many companies make pattern weights, from tiny rounds to large, heavy, flat metal rectangles used in the garment industry to secure multiple thicknesses on long tables.

Cast iron

If you’re cutting large pieces, like draperies or curtains, these iron weights can be handy for holding layers together without shifting. The raised handle makes them easy to move around as needed, and because of their weight, they stay in place with aplomb.
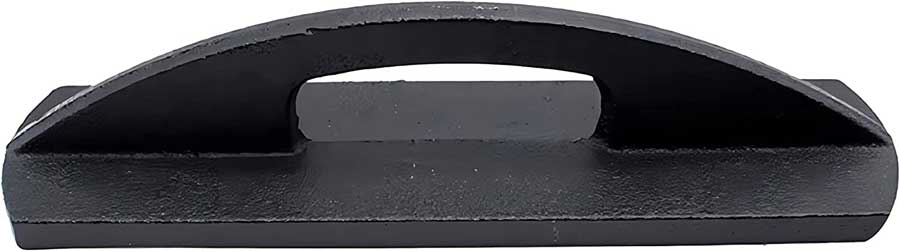
Cast iron pattern weight.

Glass

Circular glass weights are ideal for holding smaller spaces, and they have the advantage of being able to see through them in case you’re matching plaids, prints, etc. Just line up the pieces and weight them in place while you align adjacent pattern pieces.
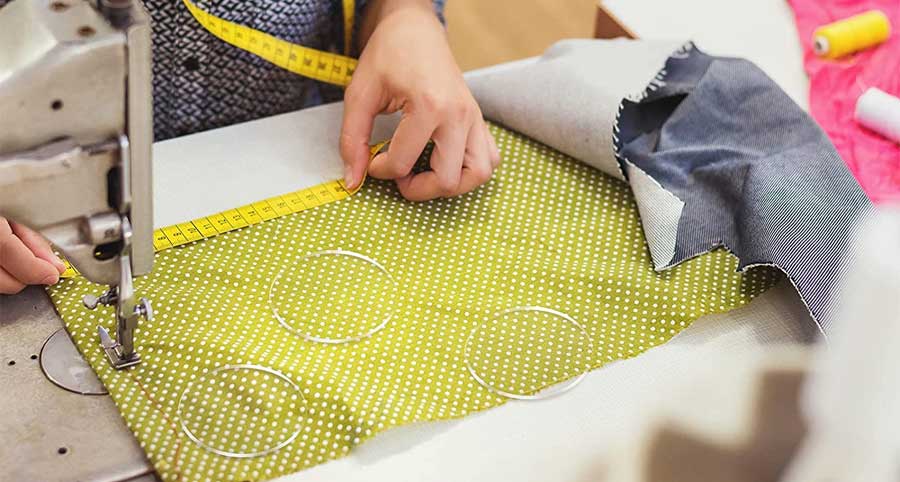
Glass pattern weights

Fabric Bags

Weighted fabric bags in various sizes and shapes are another option for pattern weights. Usually filled with metal shot or shavings for weight, these handy little notions can be stacked atop each other if you need more weight in a particular area of the pattern piece you’re cutting.
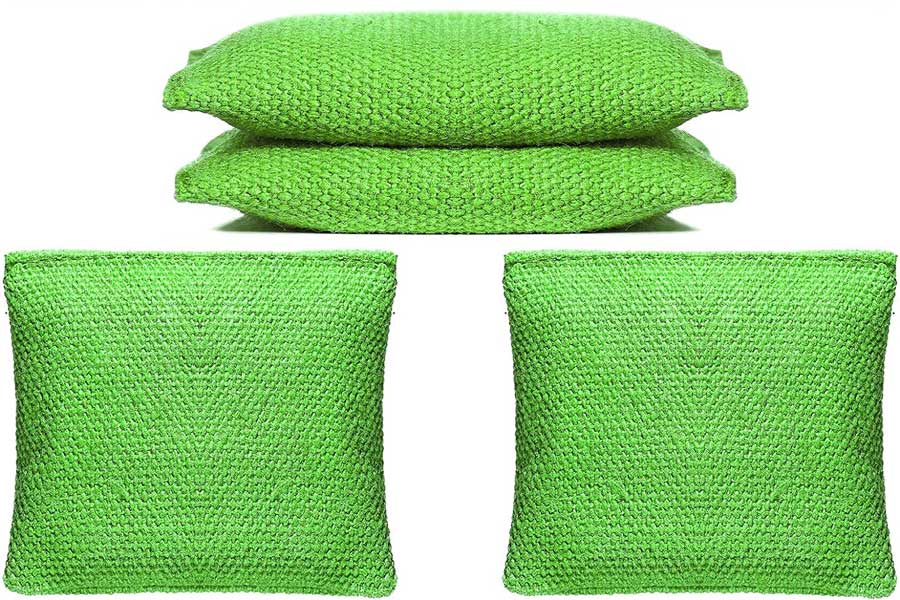
Fabric pattern weights

DIY Weights

While available readymade, handy little fabric pillows or bags are easy to make yourself in any size or shape you need for your work. Just be sure the outer fabric is densely woven to keep the filler safely inside. If you use clean sand (from the pet store) or ground walnut shells for filler, it’s best to add a liner as well to ensure no leakage, but that’s not needed if you use metal shot or rice, beans, etc. for the weight you need.

  • Other options suggested by guild members include using rolls of pennies for weight—especially handy for narrow pattern spaces like straps and facings, but note that they can roll too.
  • Open the pantry and check out sardine and tuna cans for potential weights. While these are larger in size than many weights, they are readily available and of course the contents are edible after use in case it’s near lunch time. Can-size weights are better used with large patterns, like home décor items.
  • Out on a beach walk? Pick up some large flat stones to create weights. Again, paintable for fun.
  • Small ceramic tiles are also perfect for pattern weights. A tile store always has scrap pieces and sometimes they just give them away.
  • Either covered or uncovered fishing weights are another DIY option—available in various shapes, sizes and weights depending on your needs.
  • Head to the hardware store and look at flat metal washers—available in many sizes, these are ideal to use for pattern weights. For more fun, paint them bright colors, wrap them with yarn or fabric strips, or decoupage some fun fabrics to the surface.
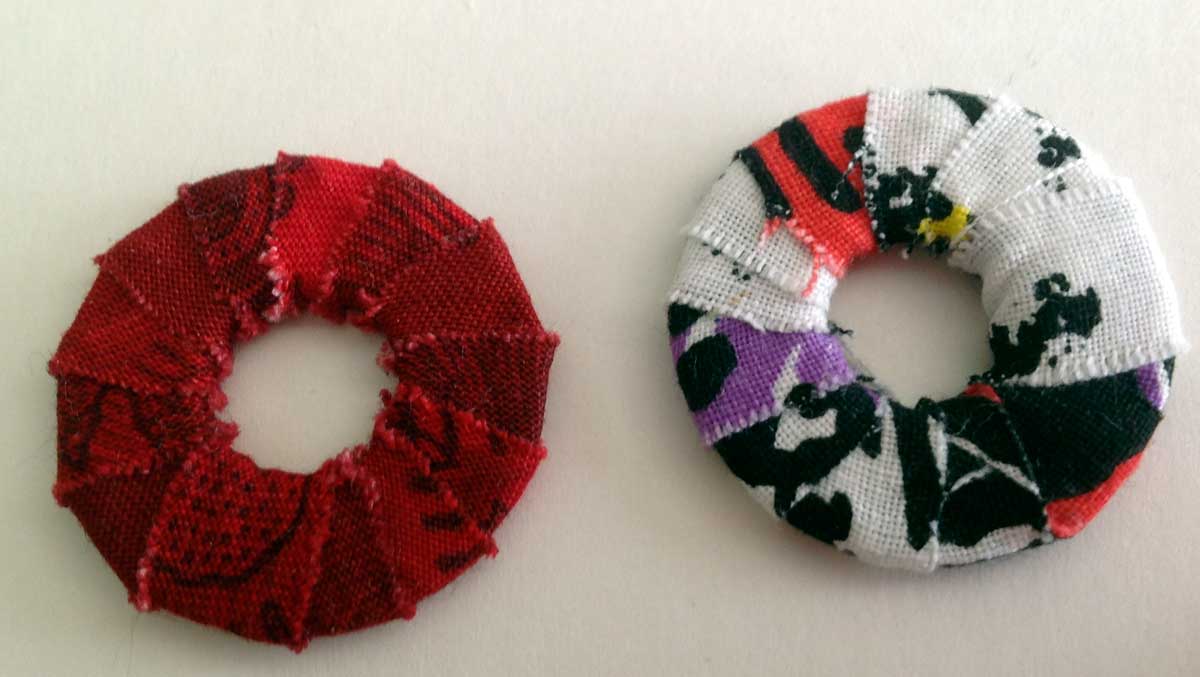
Pattern weights - wrapped washers

Using Weights

  • Just as we pin near the pattern edge, weights are best positioned in the same area. Depending on the shape of the pattern pieces and the weights, position the pieces near the corners for added hold.
  • If your fabric is larger than your cutting surface, use weights on the fabric around your pattern pieces to help keep it from sliding.
  • Weights can also be used on paper—like for tracing patterns from a multi-size sheet master. They help to keep both from sliding and keep lines continuous.

~Linda Griepentrog Linda is the owner of G Wiz Creative Services and she does writing, editing and designing for companies in the sewing, crafting and quilting industries. In addition, she escorts fabric shopping tours to Hong Kong. She lives at the Oregon Coast with her husband Keith, and three dogs, Yohnuh, Abby, and Lizzie. Contact her at gwizdesigns@aol.com.

This field is for validation purposes and should be left unchanged.
Did you enjoy this article?
Are you an ASG member?

Tagged With: cutting fabric, patterns, sewing

September 9, 2022

Handy Notions: Tracing Wheels

The tracing wheel may be a sewing notion you were first introduced to when you began sewing, as it’s a handy way to transfer construction markings from the pattern to the fabric. Whether it’s patch pocket locations, a zipper opening, buttonholes, darts or pleats, using a tracing wheel is a quick way to get accurate markings for sewing.

Tool Styles

Tracing wheels come in several different styles, depending on their use. All should be used on a hard, flat surface for best marking visibility.

Double Wheels

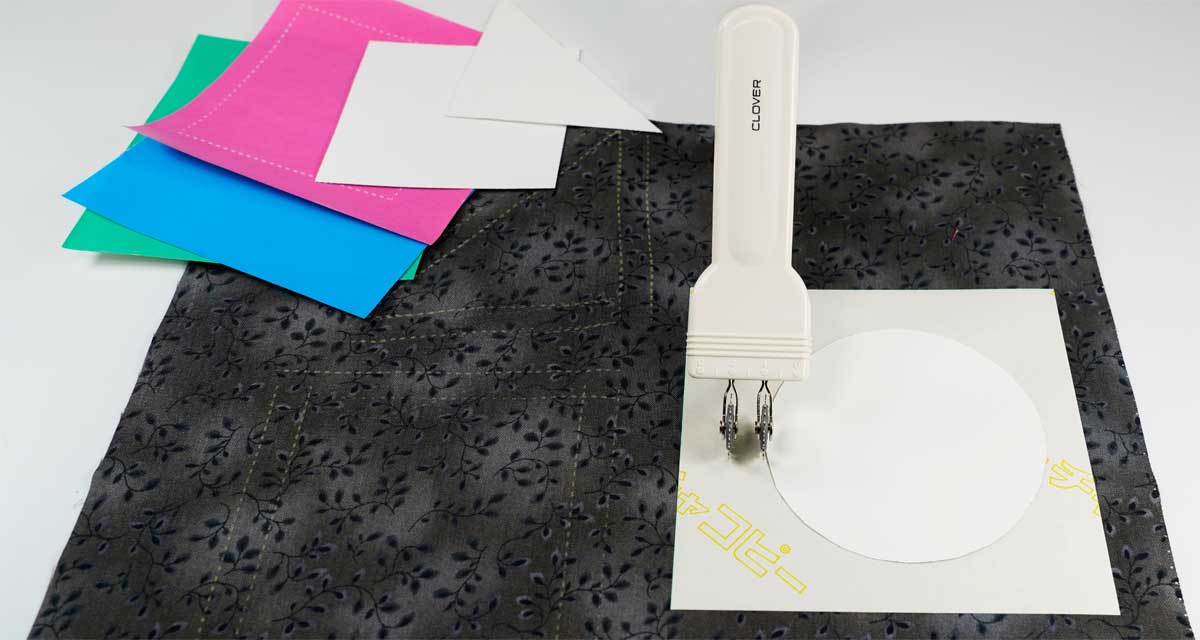
If you’re working with a pattern that doesn’t include seam allowances, you will need to add them before cutting your fabric. An adjustable double wheel uses two heads and you can select the spacing between them, depending on the desired seam allowance, from ¼” to 1 ¼”. The heads snap into a handle and remain parallel to each other for accurate marking outside the original pattern outline to add fabric for seams.

In addition to being able to add seams, a double wheel allows you to mark the original pattern outline, so you have a marked line to follow for sewing. This is especially helpful for beginners, and for any garments that may require some fitting adjustments.

A double tracing wheel can also be used to enlarge or decrease a pattern size, by adjusting an even amount in the needed areas.

Clover double tracing wheel

This type of tool is versatile, as you can also use it with just one head if you prefer.

Smooth Wheels

Looking like a tiny pizza cutter, only not sharp, a smooth tracing wheel makes a continuous, unbroken marked line. On fabrics that are impressionable (i.e. the marked line shows without using marking paper), the smooth wheel can be used to trace the pattern outline for cutting without pinning. This is especially handy for things like leather or vinyl, where pin marks are permanent. Just wheel around the pattern outline and cut on the impression line.

Dritz 746 Smooth Tracing Wheel on Amazon

Serrated Wheels

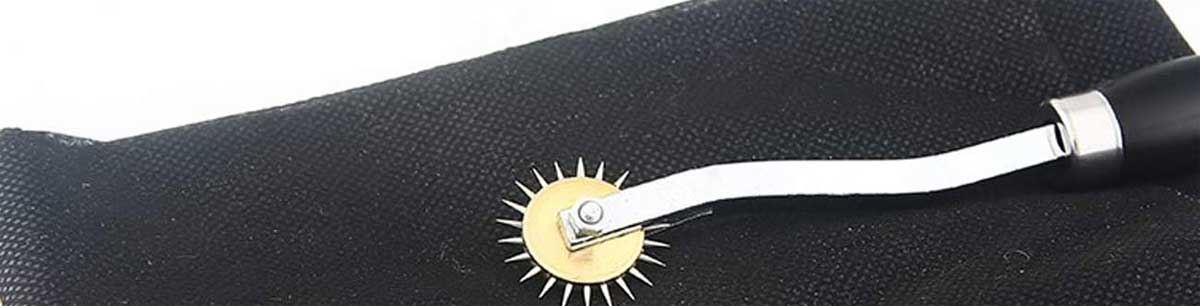
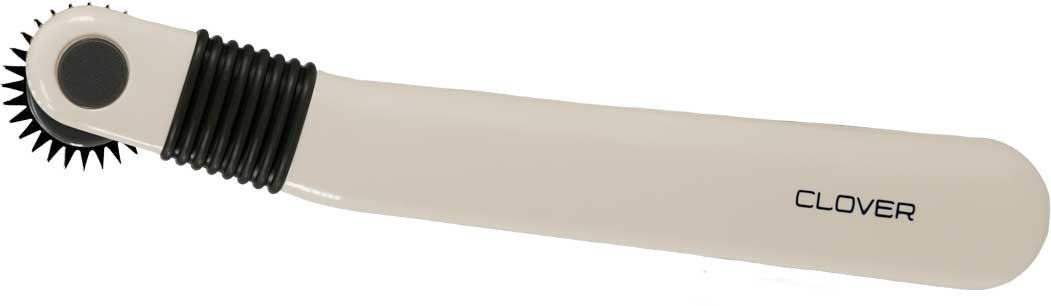
If you don’t need a continuous line, but a dotted or dashed one will do, the serrated wheel with its tiny spiked head points, will make that happen. Because there are spaces between the points, the marked lines come out the same way.

Clover serrated tracing wheel

Blunt-point Wheels

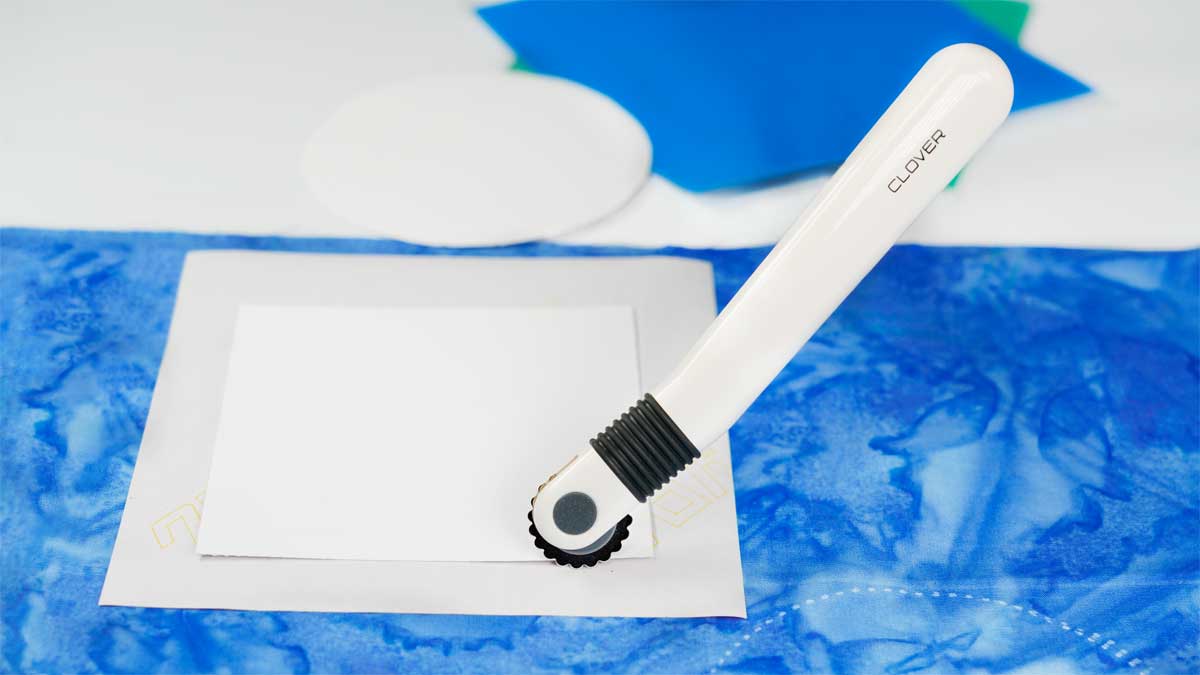
On more fragile and lightweight fabrics, a serrated wheel may cause some surface damage, so switch instead to the blunt-point wheel. The small scallops are gentler on delicate fabrics, but produce an equally visible line as their spikey counterparts.

Clover blunt edge wheel

Needle-point/Spiked Wheels

Made with long spikes, these wheels are best used not for marking, but for tracing patterns onto tag board or crisp paper. Simply trace the original pattern outline to create a more permanent pattern, handy for reusing multiple times. It can also be used to perforate leather for easier stitching. If you use this wheel on fabric, most will become damaged from the small holes it creates.

Tihood needlepoint tracing wheel on Amazon.

Using a Tracing Wheel

Tracing wheels are most often used with some type of tracing or transfer paper. The paper is available in multiple colors, and today, most tracing paper markings wash out. If you plan to use the tracing paper on the fabric right side, be sure it’s designated as “wax-free.”

Caution: Some tracing paper markings become permanent once they are pressed as they’re heat-set into the fabric, so be sure to test products first on your fabric before use.

To transfer markings to a project that’s cut double (with fabric wrong sides together), place the tracing paper between the layers so that color is exposed to both layers. Trace the markings with the designated tracing wheel, remove the paper, and the markings will show on the wrong side of both layers.

If you cut with the fabric right sides together, encase both layers in the tracing paper with the colored side against the fabric wrong sides, and then trace the markings.

If you cut a single-layer pattern, place the colored paper under the layer with the color against the fabric wrong side, then mark.


~Linda Griepentrog Linda is the owner of G Wiz Creative Services and she does writing, editing and designing for companies in the sewing, crafting and quilting industries. In addition, she escorts fabric shopping tours to Hong Kong. She lives at the Oregon Coast with her husband Keith, and three dogs, Yohnuh, Abby, and Lizzie. Contact her at gwizdesigns@aol.com.
This field is for validation purposes and should be left unchanged.
Did you enjoy this article?
Are you an ASG member?

Tagged With: learn to sew, sewing notion, sewing tip

August 12, 2022

Triple Straight Stitch

Often overlooked because the machine icon doesn’t really look like the actual stitch, the triple straight stitch is a fun one, both for utility use and for embellishments. Depending on the machine brand, the stitch may also be called a straight stretch stitch or a backstitch.

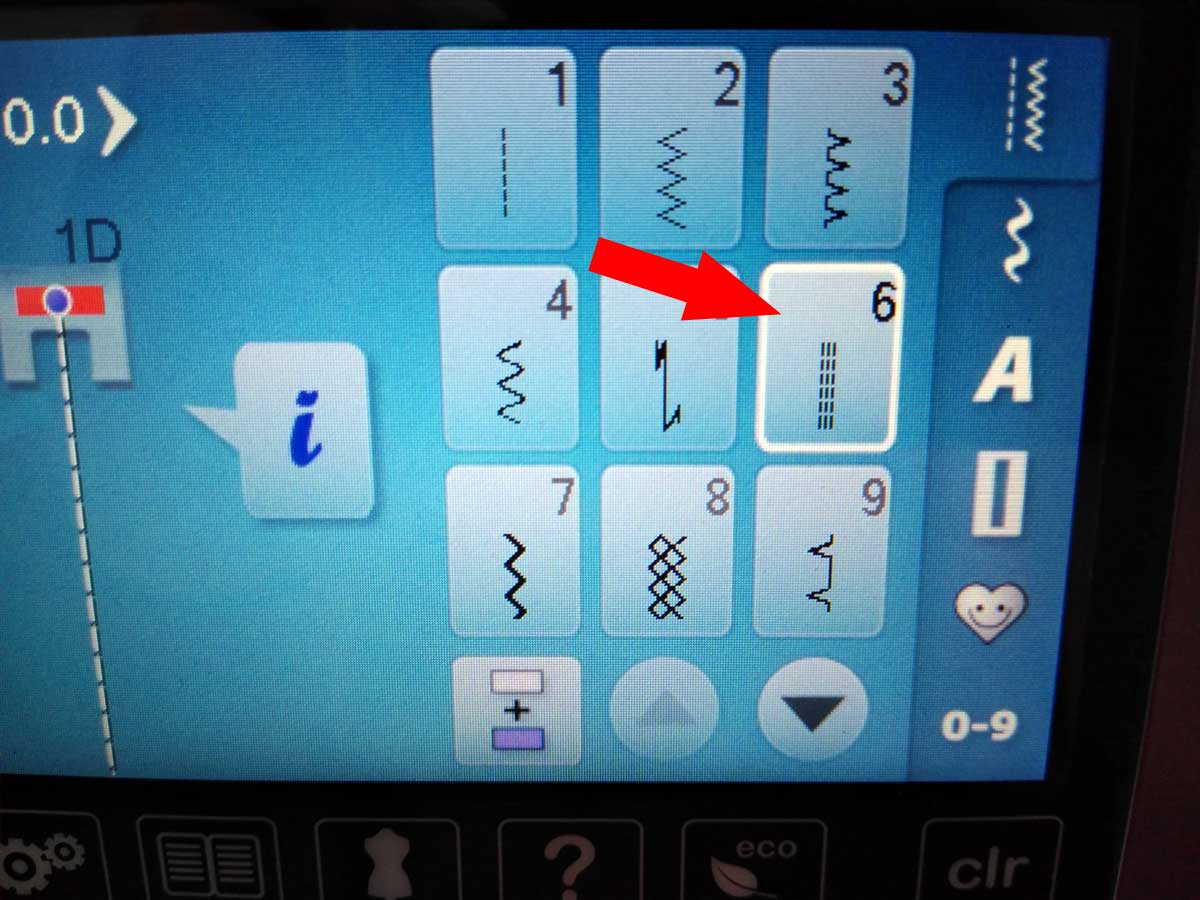
On the stitch screen or dial, it appears as three rows of straight stitching side by side. But in fact, that’s not how it sews out. Instead, it’s really three stitches on top of each other with the needle penetrating the same hole at each end of the stitch. Whether your machine sews it as two stitches forward and one back, or one stitch forward, one stitch back and another stitch forward depends on the brand, but the look is the same—a bold straight stitch.

Triple straight stitch on the machine

What’s it for?

Because the machine is sewing back and forth to create this stitch, there is some inherent stretch built into it. It’s great for sewing seams or hems in knit fabrics to maintain flexibility without popping stitches, as often happens with just a regular straight stitch. And ideal as well for use on leggings or swimwear where stretch is needed for fit.

It’s also perfect for use where there is extra reinforcement needed, like on tote bag handles, pant crotches, armhole seams, etc. Outdoor gear is another perfect place to utilize this stitch. It’s essentially three times as strong as an ordinary straight stitch.

Because the stitches are sewn on top of each other, it still allows you to press a seam allowance open and flat.

With the backward and forward motion of the machine as it sews out this stitch, it’s a good idea to slow your sewing speed, using either the speed regulator or a lighter touch on the foot pedal.

Beyond the Basics

Even though its intended purpose is for utility use, this stitch can take on a totally new persona when used decoratively.

Like most machine stitches, you can vary the look by changing the stitch length. While the default length might be ideal for sturdy seam sewing, lengthening it makes it ideal for other uses.

The triple straight stitch is ideal for topstitching. You can sew a well-defined and prominent line of stitches to accent a seam, garment edge or outline an appliqué. Because you’re getting three stitches on top of each other, the stitching line appears heavy without having to invest in a heavy weight or novelty thread and a specialty needle. You can simply sew with the same thread you used to construct the garment, or a contrast.

You can even sew this stitch with metallic thread. Or, use a shiny rayon or polyester embroidery thread for a bit of extra sheen. Opt for a variegated thread for an even more interesting look.

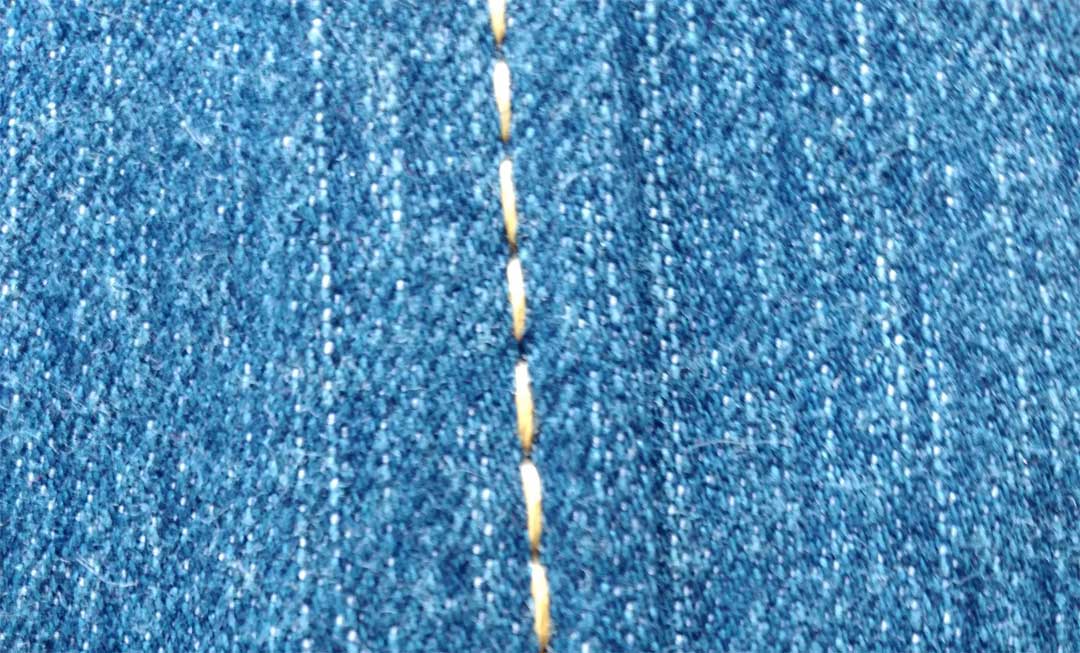
When used on denim, the triple straight stitch can mimic the topstitching found on ready-to-wear jeans.

Topstitching on jeans

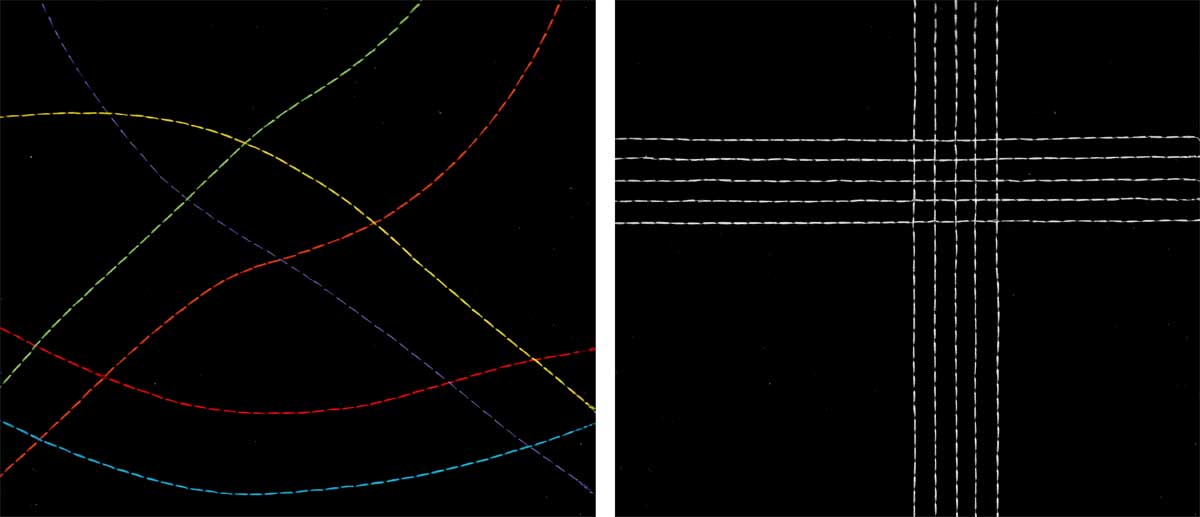
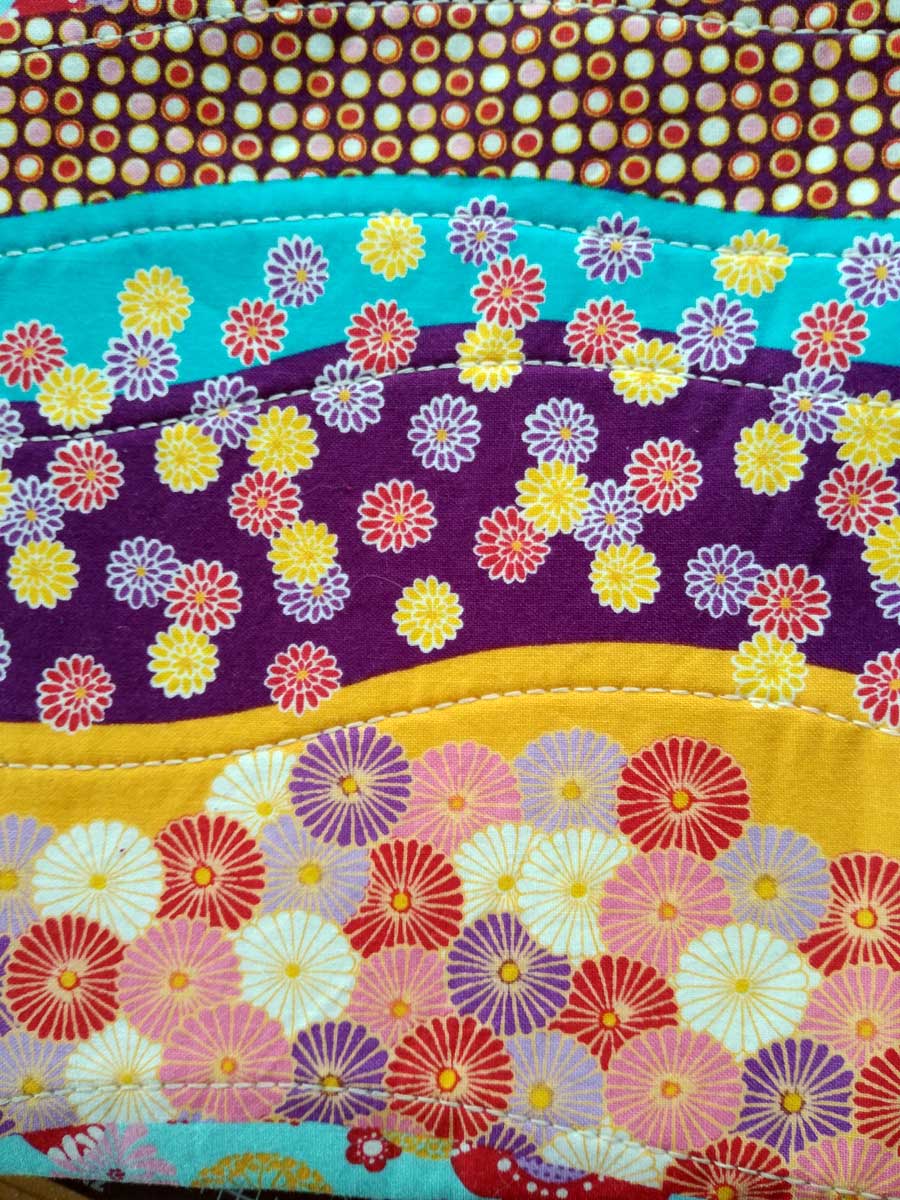
In addition to topstitching, the stitch can be used to create designs on its own—from free-flowing curves to a precise grid, as shown in the photos below.

When used with white thread on a dark background, this stitch can look similar to Sashiko stitching. It’s also ideal for quilting, whether following the design in a printed fabric for accent or sewing in channels or grids. It can also be used as an outline for pieced motifs, as shown in the next image.

One note of caution: Because the fabric moves forward and backward as it forms this stitch, stick to gentle curves as opposed to tight curves which are harder to control.

And, there’s more…

You can sew the triple straight stitch with a double needle to create perfectly aligned stitch lines, or with a wing needle to leave tiny holes often used by heirloom sewers as accents and for attaching other trims. In both instances, it’s a good idea to sew slower than normal for consistent stitching.

If you add width to this stitch, you get an entirely different stitch—a triple zigzag—which is great for embellishing as well, as the three threads make the stitch much more prominent than a simple zigzag.

Think you might need a little play time with this great stitch?


~Linda Griepentrog
Linda is the owner of G Wiz Creative Services and she does writing, editing and designing for companies in the sewing, crafting and quilting industries. In addition, she escorts fabric shopping tours to Hong Kong. She lives at the Oregon Coast with her husband Keith, and two dogs, Yohnuh and Abby. Contact her at gwizdesigns@aol.com.
This field is for validation purposes and should be left unchanged.
Did you enjoy this article?
Are you an ASG member?

Tagged With: learn to sew, sewing machine, stitches, triple stitch

July 8, 2022

Sloper: Adding Darts to a Skirt (preview)

Secrets of Good Fit

Making your own clothing is fun, but making your own pattern makes it much more fun! Why make your own sewing patterns? For the same reason you sew — to get what you want, to be unique, to save or make money, for the fun of fit, and to get a good fit. Another good reason to learn patternmaking is to better understand and work with purchased patterns.

Skirt dart

Patternmaking and fitting are closely related subjects. If you learn sloper drafting and patternmaking, you will greatly improve your fitting skills. There is no need to feel intimidated or overwhelmed though, patternmaking isn’t a complex skill. If you can sew without using a purchased pattern’s instruction sheet, you’re ready for patternmaking.

The complete version of this article is available on the ASG Members Only blog and requires member login.
CLICK HERE to read the full article. Not a member? Join online!

Tagged With: darts, skirt, sloper

April 22, 2022

Preparing Your Fabric

Even though it may seem inconvenient and a waste of time, preparing your fabric before sewing ensures that your finished garment will look, hang, and wear well.

  • Laundering: Many fabrics will shrink or pucker along the seams the first time they’re laundered, so it’s a good idea to wash or dry-clean it before you cut out your pattern pieces.
  • Straighten the Grain: After preshrinking, straighten the grain of the fabric by pulling or pressing to ensure that the finished garment will look its best.

Preshrinking and Pressing

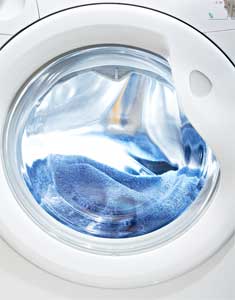
washing machineTo preshrink, use the same method that you plan to use to launder your finished item. For example, if you’ll be washing and drying a garment by machine, preshrink by machine. If you’re unsure of the best care for the fabric, check the bolt for laundering information (this is a handy. Alternatively, some fabrics also have care symbols on the selvage edge that show care information. Note that there are also some fabrics that have been pre-shrunk or may not be in danger of shrinking. For example, many wools and silks are “needle-ready” and need nothing more than a touch up with an iron before you layout and cut the pattern pieces. With these fabrics, keep in mind that you will need to eventually clean most items regardless. Another item to note is that new fabric is treated with a finishing process to give it that lovely shine and polish. While it does make the fabric easier to work with for cutting and sewing, the finish will disappear after the first cleaning whether you do it as a pre-shrink or if you wait until it’s time for the item to be laundered.
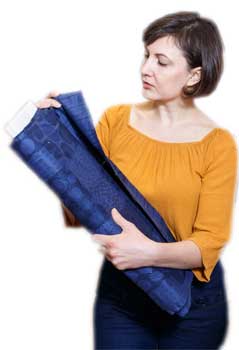

  • Washing by hand is often the best way to launder hand-sewn garments. To preshrink the fabric, either wash and dry it by machine this first time only or simply wash it by hand. If you plan to do it by hand, fold the fabric and submerge it in warm to hot water with a little detergent. The detergent will work to remove any excess dye or finishing substance. Then rinse and air-dry the fabric.
  • Undyed white and off-white wools tend to shrink at an alarming rate and should always be  preshrunk. Lay the fabric on a large terry towel that has just been washed in the machine. The towel should be damp, but not sodden. Roll the fabric and damp towel together like a jelly roll, then leave them overnight. The next day, press the fabric smooth to remove the moisture.
  • Some fabrics, such as wool crepe, must be dry cleaned. In this case, have your dry cleaner process the fabric as if it were a finished garment.

Press your preshrunk fabric before you cut out your pattern pieces and hang it on a hanger so that it won’t wrinkle. Be especially careful when working with fabrics such as crepe as uneven pressing could lead to the width and length becoming uneven and the grainlines no longer straight. While you’re at it, press and hang your pattern pieces, too — they’ll be easier to  work with!

Straightening the Grain

Fabric grain refers to the direction in which the threads run. It’s important for the lengthwise and crosswise threads to meet at right angles, or the project will twist or hang crooked. Even though fabric is woven straight, with the lengthwise and crosswise threads at right angles to each other, it is often pulled off-grain during the finishing process or as it is wound onto the bolt. If you cut and sew a garment off-grain, it may never hang the way you expect it to.

To combat this potential problem, check that the fabric is on the straight of the grain. That is with all edges, selvage, and cross-grain straight and at right angles. Start by making a snip through the selvage about 1″ to 2″ from one of the raw edges. Then do one of the following:

  • If the fabric tears easily, tear the fabric from the cut point
  • Take hold of one crosswise thread and pull it until the fabric gathers. Keep pushing the gathers along until you reach the other end or selvage of the fabric. You should see a fine line being created in the fabric. If the thread breaks, smooth out the gathers and cut on that line until you each the thread end, then pull a new thread from that line and continue working towards the opposite end. When you’re finished, carefully cut through that line to the end.

Now that you have a straight grainline, fold your fabric, matching the selvages and the cut edges. It’s a good idea to press the fabric and then place it on a flat surface. The selvage and cross-grain should be straight and at right-angles to each other. Cross-grain threads should lie on top of one another. If your fabric lays smoothly and your cut edges are even with each other, you’re ready to lay out your pattern and begin cutting out the pieces.

If the fabric is off-grain, pull the fabric firmly from the corners along the bias to straighten it. If you have a lot of yardage to work with, work slowly down the length of the fabric, pulling every 12″ from corner to corner. It helps to have another pair of hands to help with this, but if you are working alone, you can press the fabric while stretching it along the bias as you work.

Do you understand fabric grain, why it’s important and how to work with it? This video will help to explain it.


This field is for validation purposes and should be left unchanged.
Did you enjoy this article?
Are you an ASG member?

Tagged With: fabric care, grainline, preshrink

  • « Previous Page
  • 1
  • 2
  • 3
  • 4
  • 5
  • …
  • 15
  • Next Page »

Become a Member

Join the only national organization dedicated to Advancing Sewing as an Art and Life Skill.

Join Now button

Blog Article Categories

  • ASG Conference
  • Chapter Stories
  • Embroidery
  • Fitting
  • Learn to Sew
  • National Sewing Month
  • Products, Books, & Patterns
  • Projects
  • Quilting
  • Sewing
  • Sewing Techniques
  • Sewing Tips
  • Sewing Tours
  • Videos
  • Disclaimer
  • Privacy Policy

American Sewing Guild
National Headquarters
9660 Hillcroft, Suite 230
Houston TX 77096
713-729-3000 | 713-721-9230 Fax
www.ASG.org

ASG wordcloud - education, conference, discounts, videos, special offers, tours and more

Copyright © 1998–2026 · American Sewing Guild · All Rights Reserved