American Sewing Guild (ASG)

Visit our blog Visit the ASG Facebook page Visit ASG on Pinterest Visit ASG's YouTube channel Visit ASG on Instagram
  • Home
  • Join ASG
    • Join Online
    • Chapter Locations
    • Member Benefits
    • Member Brochure
    • Join by Mail
  • Education & Classes
  • Resources
    • Contests & Awards
    • Giving Back
    • Hall of Fame
    • Links
    • Travel and Tours
    • Measurement Chart
  • Shop
    • ASG Store
    • Chapter Products
    • Video Resources
  • Blog
  • About
    • About Us
    • Donate to ASG
    • ASG Sensitivity Statement
    • FAQ’s
    • Start a Chapter
  • Contact
  • Member Login
    • Login First!
    • Members Only
    • Leadership Only
    • Website FAQ’s
    • Logout
  •  

November 3, 2023

Stabilizers: Not Just for Embroidery

Firming Things Up

Embroidery Stabilizer
View on Amazon. We may earn a small commission on your purchase at no extra cost to you.

If you own an embroidery machine, chances are good you have a drawer full of various types of stabilizers needed for your embellishing. However, if you don’t have an embroidery machine, you may not think you need stabilizers—but think again!
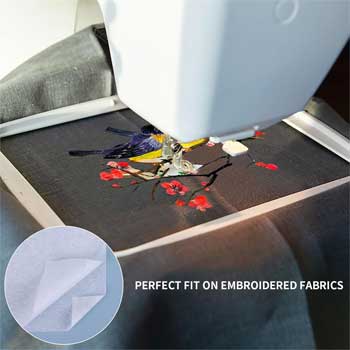
What is stabilizer?

Simple answer—something to put behind or over fabric temporarily to well, stabilize it, while stitching. Because machine embroidery uses dense stitches and lots of thread, stabilizers help to eliminate puckering.

Stabilizers come in a variety of constructions—from woven and non-woven to mesh, film and liquid. They have a variety of application methods, from sew-in to fusible to self-adhesive. And, they have a variety of removal methods, from cut-away and tear-away to heat-away and water-soluble. Check out your store’s offerings for a multitude of mix-and-match construction, application and removal methods.

Note that most stabilizers are designed to be temporary, while similar products called interfacings are meant to be permanent. Stabilizers can also become permanent additions to your project.

So, even if you don’t do embroidery…you need stabilizer too! Here’s why:

Decorative stitching can cause some fabrics to pucker and distort, and if the stitches are especially wide, they can cause “tunneling” which means the edges of the stitches pull in toward each other. Using a stabilizer underneath can help eliminate these issues. Another option is to use liquid stabilizer to stiffen the fabric prior to stitching, then wash it out after stitching.

Appliqué, especially on lightweight fabrics or knits, can also cause puckering, so place stabilizer under the area you’re working with to keep the appliqué and the base fabric pucker-free.

Beading and sequins can cause distortion due to the added weight, so adding a stabilizer under the area will help with support. This is one area where a stabilizer can be left in permanently.

Add stabilizer to support the weight of beading

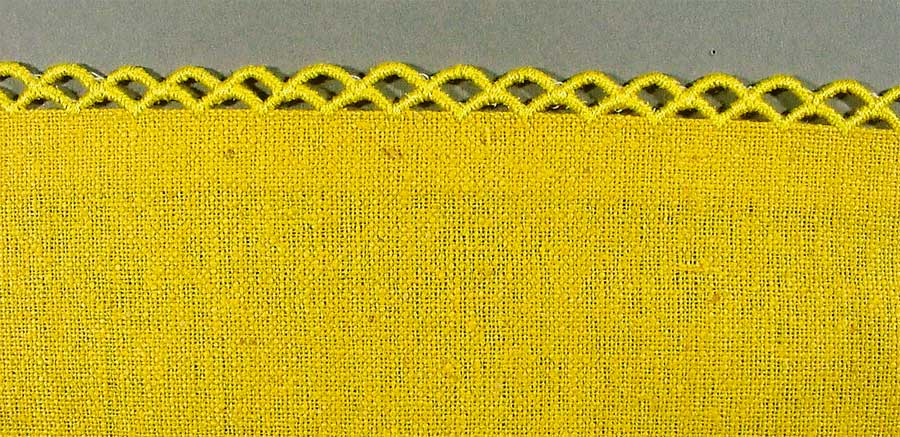
Off-the-edge stitching can play havoc with your sewing machine, as well as the fabric edge, so if you’re trying to stitch scalloped or picot edging, lay a piece of wash-away stabilizer under the edge and extending about ½”. After the stitching is complete, remove the stabilizer, leaving only your delicately stitched edge.

Picot Edge (image compliments of Bernina)

Serger rolled hems sometimes leave pesky fabric threads poking through the serger threads, but if you wrap the edge in a narrow strip of water-soluble stabilizer before sewing, those troublesome threads will be contained. If you’re serging a regular stitched edge, liquid stabilizer along the fabric edge will help keep it flat.

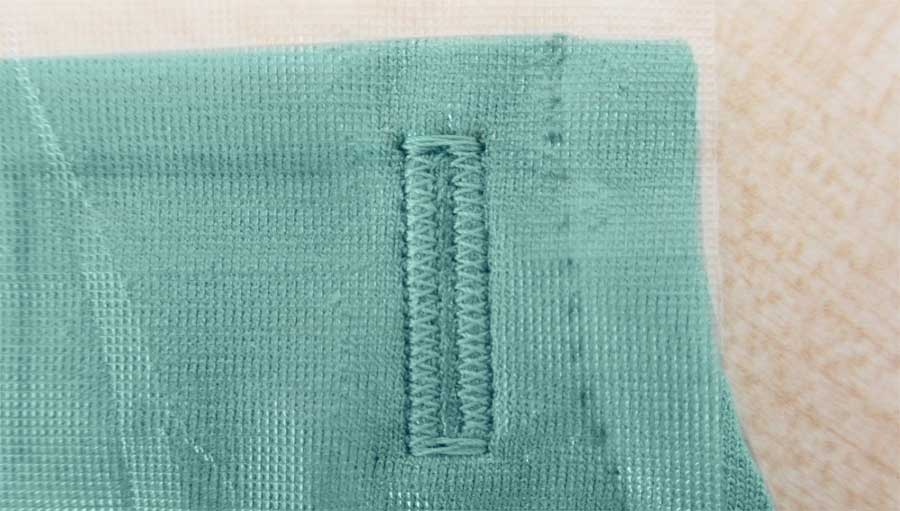
Buttonholes sometimes stretch, despite our best interfacing efforts, but adding a strip of stabilizer on the top and bottom of the fabric can help minimize distortion. A clear film stabilizer is ideal for this purpose. This technique also works well for buttonholes and seams on a textured fabric, like bouclé or loosely woven suiting, where the fabric threads or nubs may catch on the presser foot toes. Stabilizer makes for smooth stitching lines by compressing the surface texture.

Stabilizing a buttonhole

Sewing sheer fabrics can sometimes be a wrestling match, as they tend to slip, slide and stretch during construction. But with the addition of a liquid stabilizer, seamlines can be stable for stitching, and edges firmed for hemming. Stabilizing the fabric itself can also make for easier and more accurate cutting. This assumes your sheer fabric is washable to remove the stabilizer after construction.

Couching—the addition of yarns, ribbons and trims with either controlled or free-motion stitching—can also cause distortion in the base fabric, but adding a stabilizer firms up the surface for easier attachment.

Creating your own free-form fabric or scarves using just yarns is easy–just sandwich the fibers between layers of clear wash-away stabilizer. Stitch in place, then rinse away.

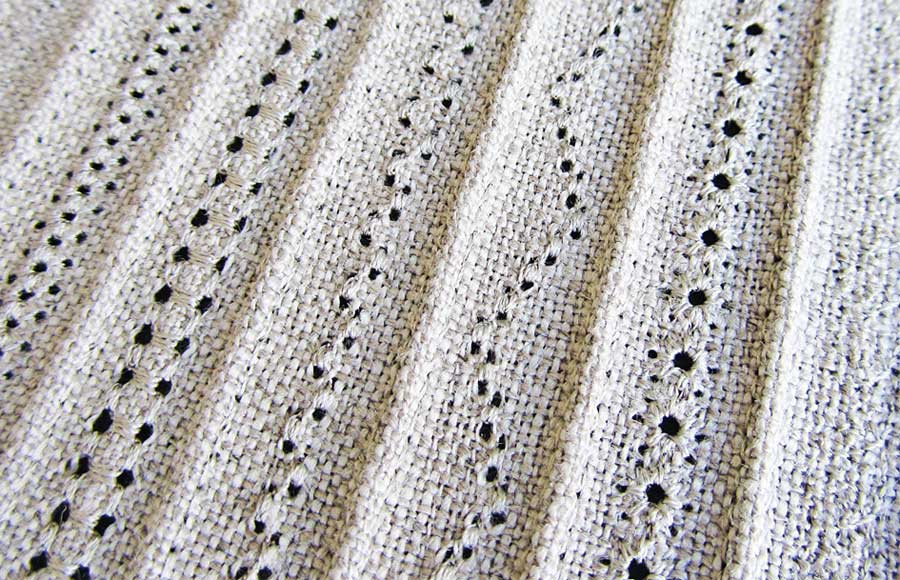
Hemstitching with a wing needle can sometimes damage the fabric as the needle “wings” can catch on fabric threads, pulling them into the needle hole. Liquid stabilizer can eliminate that and create well-defined holes for your design.

Wing Needle (image compliments of Bernina)

Die-cutting is a great place to use stabilizer for cleaner edges on lightweight cottons. Some stabilizers come in pre-cut sheets specifically for this purpose.

Paper-piecing is an ideal place to use an inkjet-printable stabilizer. Just print multiples of your quilt blocks and you’re ready to stitch on clearly printed lines.

So, even if you’re not a machine embroiderer, you will need a drawer of various stabilizers—trust me!


~Linda Griepentrog is the owner of G Wiz Creative Services and she does writing, editing and designing for companies in the sewing, crafting and quilting industries. In addition, she escorts fabric shopping tours to Hong Kong. She lives at the Oregon Coast with her husband Keith, and three dogs, Yohnuh, Abby, and Lizzie. Contact her at .

Did you enjoy this article?
Are you an ASG member?
This field is for validation purposes and should be left unchanged.

Tagged With: buttonholes, embroidery, stablizers

March 11, 2022

Thinking Outside the Sewing Store — Ideas for Tools & Notions

Some tools/notions used in sewing are not necessarily purchased as “sewing” items. ASG member, Judith Weyl shared some of her favorite innovative notion ideas with us:

Home Improvement Stores

Handrail 
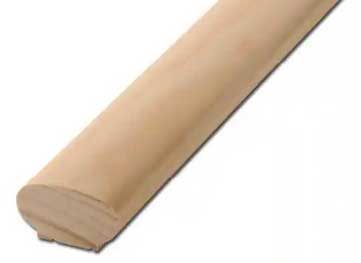
A 3′ Section of Wood Handrail makes a wonderful tool for pressing seams open without leaving an imprint on the garment. It’s round on one side and flat on the other, which keeps it from rolling off the ironing board. The 3′ length is great for pressing seams in a pant leg but you could have it cut any length.

Galvanized or Zinc-Plated Washers (about 2” diameter) make great pattern weights. They have a hole in the center and can be stored on a small dowel or hook. Judith rarely use pins to hold pattern to the fabric any longer. An added bonus to using the washers is that they are so thin, you can place an acrylic ruler on top of them along the edge of the pattern and there’s enough clearance to use a rotary cutter to glide along the ruler’s edge.  Don’t stop there though! When Judith made drapes for her dining room, she sewed a small pocket from the lining fabric for each washer and pinned them as weights at the hem of the drapes.

Painter's tape
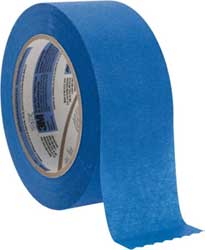
Blue Painter’s Tape makes a handy guide for seam allowances. Using a razor, carefully make two deep cuts into the roll about 2” apart and remove the entire cut area which should be about 1/8” to ¼” thick. Place this on the bed of your machine the required distance from the needle. Even if you use specialty feet or attachments, adding the tape gives you a further marking and lets the fabric  ride along it well before reaching the needle. And because it doesn’t leave a residue, you can reposition the tape as needed. When it loses its stickiness, just remove the bottom layer of tape to rejuvenate your strip.

Office Supply Store

sorterVertical Mail or File Sorters are great for storing acrylic rulers. Judith says this multi-slotted desktop sorter doesn’t have enough slots for all the rulers, but they are still held conveniently in one place.

Supermarket or Drug Store

Toothpicks can be used as shank spacers when sewing on buttons. When sewing a button on by machine, slip a toothpick under the foot directly over the buttonholes before stitching, making sure to hand-turn the wheel to be sure the zigzag stitch is clearing the toothpick.

Wooden Skewers or Chopsticks are excellent for guiding your fabric to the needle and holding that final edge when piecing. You can’t get your fingers that close! A bonus is that you can share the extras at your next ASG meeting.

Tweezers are a great tool to help when unpicking a seam. Use them to grasp the cut end of threads and you will easily be able to yank a long thread out of the fabric.  It also helps when clipping or trimming embroidery threads as you can hold the thread with the tweezers and get very close to the fabric.

Other Ideas

We loved Judith’s ideas so much, we decided to poke around the house and see if we could channel similar creative-outside-the-box thinking department as she did. Here’s what we came up with:

  • Hair curlersPipe Cleaners would make a great brush to remove dust and debris from under your presser foot and in the bobbin case. You may want to double it up or even make a loop with it.
  • A Portable Book Light velcroed or taped (use Painter’s Tape to avoid tape residue) to your machine can add some additional light and you can swing the little arm to where you need it.
  • Velcro Hair Rollers (oh, remember the days?!) would make a great tool for picking up loose threads.
  • Magnet tape to pick up stray pins.

Thanks so much to Judith for these fabulous sewing room ideas! She advises that when you see tools and notions advertised, look around your home or in non-sewing stores for similar items that are non-traditional but will still serve the purpose.


~ Judith Weyl, Greater Lehigh Valley ASG Chapter

Did you enjoy this article?
Are you an ASG member?
This field is for validation purposes and should be left unchanged.

Tagged With: Notions, sewing tools

February 16, 2022

What I’m Sewing: Silhouette Patterns #3400

ASG member, Carolyn Meyers, recently created a pair of yoga pants using a pattern from Silhouette Patterns and shared her experience working with the pattern:

Sillhouette-3400Q. Item Created 
A. Yoga Pants

Q. Independent Pattern Designer
A.
Peggy Sagers

Q. Name and Number of Pattern
A.
Silhouette #3400

Q. Fabric Used:
A. Ponte knit

Q. Special Embellishments/Notions Used
A. n/a

Q. Skill level required?
A.
Beginner-Intermediate

Q. Are the instructions easy to follow?
A.
Yes, but I recommend watching the YouTube video for the pattern before you start, just to get a feel for the project.

Q. Are you pleased with the finished result?  Did it meet your expectations?
A.
Absolutely, I have now made three pair and having made a few fitting tweaks am ready to commit my pattern to permanent pattern material.

Q. Did it look like the picture?
A.
Absolutely.

Q. Did you make any modifications in the pattern?
A.
Just fit to my size. I’m short so some “petit-ing” is always required.

Q. Are there any changes you would have made?
A.  No

Q. Did the pattern teach you any unique or special techniques?
A.
No, but it helped me bond with my serger.

Q. Would you make this again?
A.
Again and again. I found three more pieces of Ponte knit in my stash that will be just perfect for these pants.

Q. Would you recommend this pattern to others?
A.
Yes! I was sew excited to make my first pair, slip them on, and they fit and felt wonderful. The only tweak I had to make was to slim the leg a bit and shorten the length. Not bad.

Pattern Link: https://silhouettepatterns.com


~Carolyn Meyers

Did you enjoy this article?
Are you an ASG member?
This field is for validation purposes and should be left unchanged.

Tagged With: pattern, yoga pants

November 19, 2021

Special Offer: Carpe Diem Dress and Tunic Pattern from Fit For Art Patterns

Carpe Diem dress & tunic patternFit for Art Patterns is introducing its fourth core pattern, the Carpe Diem Dress and Tunic. It features a scoop neckline, natural shoulder, and square armhole construction for woven fabrics. Choose sleeveless, cap sleeve or ¾ length sleeve view. Each view can be sewn in one of three lengths — tunic, above the knee, or below the knee dress — with an optional back belt and pleat insert. Fashion the Carpe Diem loosely to be pulled over the head or more fitted with a back keyhole opening or zipper. Pattern includes AB or CD fronts and straight or flared side panels for customizing the fit in the bust and hips. The instruction book includes design tips for choosing materials, personalizing and finishing your dress or tunic.  Carpe Diem is a multi-size pattern in XS – 3XL, available in print or digital format.

ASG Members can take advantage of our special offer for 20% off the Carpe Diem Dress & Tunic and all other Fit for Art Patterns through Friday, Nov. 26 (EST) with the coupon code found on the Special Offers page in the Members Only area.

The Carpe Diem Dress complements our other core patterns; wear it with a Tabula Rasa Jacket and Eureka! Pants that Fit. Visit the Fit for Art website to purchase the pattern, view the photo gallery of Carpe Diem samples, and find links to great resources in Helpful Hints for Dresses. 


This is an advertisement from Fit for Art Patterns

Tagged With: patterns

October 6, 2021

What I’m Sewing: Alba Jacket

Pink jacketThank you to Kim Caywood from the Central Illinois chapter for sharing her information on working with the Alba Jacket pattern from Sinclair Patterns. We love this unique jacket. And it looks quite cozy, too!

Q. Item Created 
A. Jacket

Q. Independent Pattern Designer
A.
Sinclair Patterns

Q. Name and Number of Pattern
A.
Alba Jacket

Q. Fabric Used:
A. French Terry and Quilted Knit

Q. Special Embellishments/Notions Used
A. Zipper

Q. Skill level required?
A.
Confident Beginner

Q. Are the instructions easy to follow?
A.
Instructions are easy to follow and have step by step pictures. They also have a Facebook group where you can ask questions if you have an issue with construction.

Q. Are you pleased with the finished result?  Did it meet your expectations?
A.
I love the way this turned out. I am always skeptical about installing zippers but this turned out great

Q. Did it look like the picture?
A.
Yes it did

Q. Did you make any modifications in the pattern?
A.
As this was a pattern test, modifications were not allowed

Q. Are there any changes you would have made?
A. I might have used a fabric with less drape for the collar

Q. Did the pattern teach you any unique or special techniques?
A.
Inserting an asymmetrical zipper

Q. Would you make this again?
A.
I would make this again

Q. Would you recommend this pattern to others?
A.
I would highly recommend Sinclair Patterns to anyone. They come in Petite, Regular and Tall sizing and in sizes from XXS to 4XL

Pattern Link: https://sinclairpatterns.com/products/alba-zip-up-knit-asymmetrical-jacket-with-a-cowl-and-side-pockets-pdf?_pos=1&_sid=3c9c05b83&_ss=r


Did you enjoy this article?
Are you an ASG member?
This field is for validation purposes and should be left unchanged.

Tagged With: alba jacket, pattern

  • 1
  • 2
  • 3
  • Next Page »

Become a Member

Join the only national organization dedicated to Advancing Sewing as an Art and Life Skill.

Join Now button

Blog Article Categories

  • ASG Conference
  • Chapter Stories
  • Embroidery
  • Fitting
  • Learn to Sew
  • National Sewing Month
  • Products, Books, & Patterns
  • Projects
  • Quilting
  • Sewing
  • Sewing Techniques
  • Sewing Tips
  • Sewing Tours
  • Videos
  • Disclaimer
  • Privacy Policy

American Sewing Guild
National Headquarters
9660 Hillcroft, Suite 230
Houston TX 77096
713-729-3000 | 713-721-9230 Fax
www.ASG.org

ASG wordcloud - education, conference, discounts, videos, special offers, tours and more

Copyright © 1998–2025 · American Sewing Guild · All Rights Reserved