American Sewing Guild (ASG)

Visit our blog Visit the ASG Facebook page Visit ASG on Pinterest Visit ASG's YouTube channel Visit ASG on Instagram
  • Home
  • Join ASG
    • Join Online
    • Chapter Locations
    • Member Benefits
    • Member Brochure
    • Join by Mail
  • Education & Classes
  • Resources
    • Contests & Awards
    • Giving Back
    • Hall of Fame
    • Links
    • Travel and Tours
    • Measurement Chart
  • Shop
    • ASG Store
    • Chapter Products
    • Video Resources
  • Blog
  • About
    • About Us
    • Donate to ASG
    • ASG Sensitivity Statement
    • FAQ’s
    • Start a Chapter
  • Contact
  • Member Login
    • Login First!
    • Members Only
    • Leadership Only
    • Website FAQ’s
    • Logout
  •  

March 26, 2021

Quilting Terms: Quilting, Borders and Sashing

This article is part of a two-part Quilting Basics series. Part one is available here.

Quilting

Quilting is the stitching that holds the quilt top, batting, and backing together.

The quilting (stitching) of the three layers of fabric can be done simply by tying the three layers together with yarn or heavy thread. Most quilts are quilted utilizing one of these common methods of:

Free Motion Quilting

This is usually performed utilizing a domestic sewing machine (the kind that you use to sew the top). This is where the quilt sandwich (quilt top, batting, and backing) is moved “under” the sewing machine needle. To learn a few of the basics of Free Motion quilting, watch this short video by Leah Day.
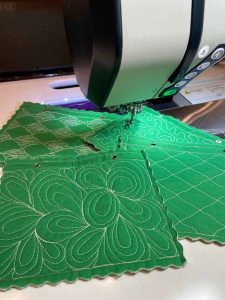
Free Motion Quilting on a Domestic Sewing Machine

Long Arm Quilting

Another method of quilting is using a “sit down” Long Arm machine. These machines have a large arm opening and large table surrounding the sewing machine head that allows for the ease of moving the quilt around. these are specialized quilting machines designed specifically for the quilting process. Long Arm Quilting machines have a large frame where the quilt layers are attached to rollers. The sewing machine head is driven “over” the quilt sandwich. These machines can be driven manually by the quilter or be fitted with a computer that drives the sewing machine head.
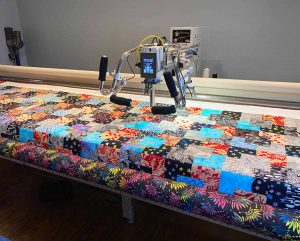
Source: Diana Quinn


Hand Quilting

Hand quilting is the oldest method of quilting and is still done today. The quilter assembles the quilt “sandwich” and then will baste or pin the three layers together loosely to hold it in place. The quilting pattern is then marked with a removable marker. The quilter places the sandwich loosely in a frame or hoop and a very short quilting needle called a “between” is used to stitch the quilting pattern.
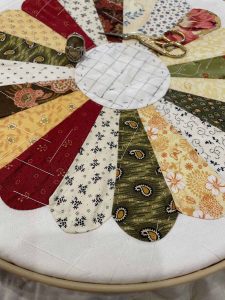
Hand Quilting Hoop

Quilting Patterns

Quilting patterns can be very simple, such as just straight lines, or can be very fancy and intricate.

Simple Grid Quilting Example
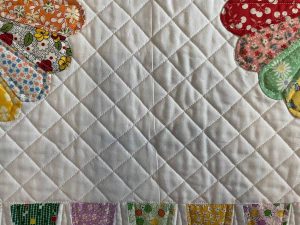
Quilt made and quilted by Diana Quinn, Marietta, GA


Custom Intricate Quilting Example

Quilt made by Diana Quinn, Marietta GA; Quilting by Terri Taylor, Marietta, GA

Binding

Binding is strips of fabric that wrap from the front to back of the quilt, finishing the raw edges.
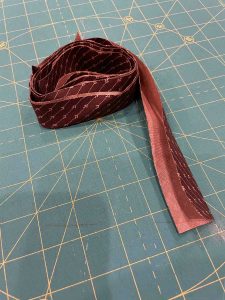
Quilt binding strip before being sewn onto quilt

Once the three layers of a quilt are quilted, the quilt is then trimmed to remove any excess batting and backing fabric. That leaves “raw edges” that need to be covered to finish the quilt.

To create the binding, strips of fabric are sewn together to be one long piece of fabric. The most common widths of binding strips are 2 ¼” and 2 ½”.

After being sewn together, the strips are pressed in half creating a “double fold.” The double folded fabric is then sewn to the front of the quilt and wrapped around to the back of the quilt.
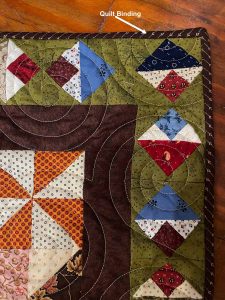
Quilt with Binding attached; Quilt by Diana Quinn, Marietta GA


There are many different methods of making and attaching binding. To learn more on how to Make Quilt Binding and How to Bind and Finish a Quilt here a couple of videos from Sew Very Easy:

  • How to Make Quilt Binding
  • How to Bind and Finish a Quilt

Border

The border is strips of fabric that surround the center of the quilt top.

Borders are used to “frame” a quilt much like one would frame a picture. The border around the center of the quilt may be a single piece of fabric or may be made of up of pieced pieces of a fabrics (blocks). Some quilts may have multiple borders to provide more interest. Not all quilts will have borders, and that decision is left up to the discretion of the quilt maker.

Quilt with single Fabric Border
Quilt with NO Border
Quilt with Multiple Borders
Quilt with a pieced border

Quilts by Diana Quinn, Marietta. GA

Sashing

Sashing is the strips of fabric between the quilt blocks.

Sometimes quilt blocks are stand alone and are not connected to adjacent blocks in the quilt. To give each block its own space strips of fabric are sewn in between the blocks and this is known as sashing. In the sashing example below, it should be noted that the square blocks (dark red) in between the sashing strips are known as “Corner Stones.” Corner Stones are used to keep the blocks aligned.
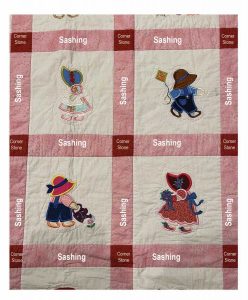
Quilt by Diana Quinn, Marietta, GA

Quilting is such an artistic expression of the art and skill of sewing and there is much to say and learn about the topic. Hopefully, this discussion of a few of the fundamentals has piqued your interest in quilting. To begin learning, reach out to your local ASG Chapter to meet members who quilt or look up local quilts shops in your area and start taking classes!


~Diana Quinn, ASG Atlanta Chapter

Did you enjoy this article?
Are you an ASG member?
This field is for validation purposes and should be left unchanged.

Tagged With: quilt binding, quilt borders, quilting, sashing

March 19, 2021

Quilting Terms: Backing, Blocks, and Batting

What is a Quilt?

This is Part One of a two-part series. Part Two will be published on March 26, 2021.

According to the Merriam-Webster dictionary: a bed coverlet of two layers of cloth filled with padding (such as down or batting) held in place by ties or stitched designs

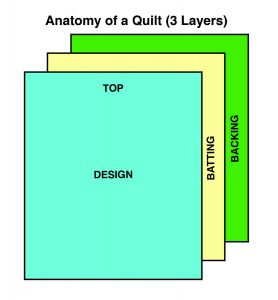
Anatomy of a QuiltA quilter’s definition is simply three layers of fabric that are stitched together that consist of:

  • Top – is the design of the quilt or the front of the quilt.
  • Batting – is the layer of padding between the Top and the Back
  • Backing– is the layer of fabric on the back of the quilt that covers the batting

So, if a quilter’s definition is not confined to a bed coverlet, what is a Quilt?  Bed coverlets are certainly included, quilts may consist of wall hangings, table coverings (table toppers and table runners), artistic renditions of people, places or anything that the quilt artist may conceive. Bottom line, if it has three layers of fabric and it is stitched together it is a quilt!

The Parts of a Quilt

Backing

The backing is a layer of fabric on the back of a quilt that covers the batting.

The Back of a quilt generally is a single fabric that covers the batting of the quilt making up the third layer of the quilt. Quilters choose for various reasons to have several fabrics that may make up the backing. This may be a design choice, or simply because they don’t want to purchase a large piece of fabric and may choose to stitch together leftover fabric from other projects.

Block

A block is one square of the quilt design.

The Block is the foundation of a quilt’s design. The exception to this is a quilt that is an artistic rendition of something.

The Design of the quilt may consist of multiple blocks that are combined to make up the TOP of the quilt. Blocks may be very simple (just consisting of a single square of fabric) to very complex designs what may include 60 or more pieces.

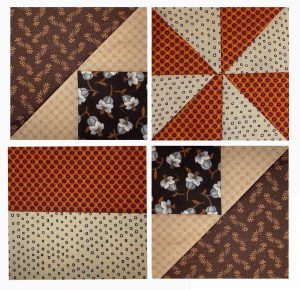
Here is an example how different 3 “foundation” blocks can be put together to make one block that can be replicated to create an interesting quilt design.

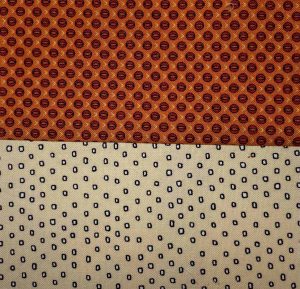
Block 1 – Rectangle block containing two different fabrics.

Rectangle block

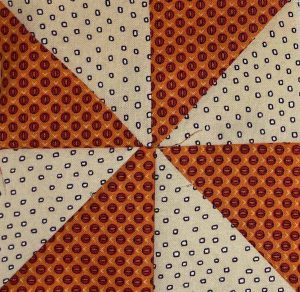
Block 2 – Pinwheel Block is made up of 4 smaller quilt blocks called Half Square Triangles and those pieces are arranged to make the pinwheel. Note, that the fabrics chosen to match the same fabrics in the Rectangle block.

Pinwheel block


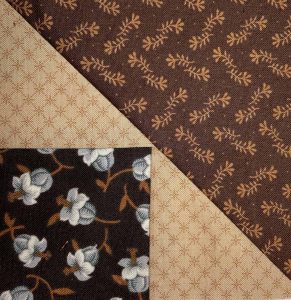
Block 3 – Mary G’s Block
is made with a one large triangle, a square surrounded by two triangles. This block is an alternate color scheme to provide some variety. A pair of these blocks is made to be placed into the larger block.

Mary G’s Block


Quilt Block
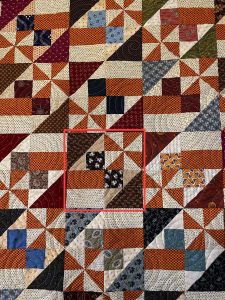
– The four blocks (rectangle, pinwheel and two Mary g’s) are then placed into the desired layout.

Quilt design — multiple blocks are made and then arranged into the desired pattern. Here is how that one single block now fits into the design of the quilt top. Note that the Rectangle and Pinwheel blocks with the cheddar and cream background are in each of the blocks, while Mary G’s blocks are made up of different fabrics in the blocks.

Batting

Batting is a layer of padding between the quilt top and the backing.

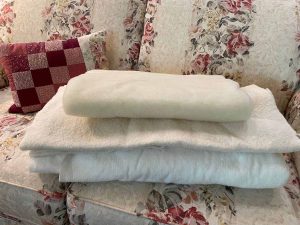
The Batting provides a cushion or layer between the top and back that gives the quilt some warmth, thickness, and weight. The choice of batting in a quilt may provide varying degrees of warmth, ease of quilting, or the ability for the quilting to stand out. There are many different types of batting available in the marketplace. The choice of batting usually depends on the intended use of the quilt.

Batting:  Top is Wool batting, bottom two are cotton batting.

Stay tuned for Part Two of this 2-part Quilting Basics article. Part Two covers Quilting, Borders, and Sashing and will be published March 26, 2021.


~Diana Quinn, ASG Atlanta Chapter
Did you enjoy this article?
Are you an ASG member?
This field is for validation purposes and should be left unchanged.

Tagged With: backing, batting, quilt, quilt block, quilt design, quilt terms, quilting

December 11, 2020

What I’m Embroidering: Tile Embroidery

Gorgeous! Amazing! Exquisite! So detailed!
But how LONG did it take?

Diana Latino of the Princeton Chapter is getting used to comments like these that come every time she shares one of her completed tile embroideries. And she has a number of them done already.
What’s Tile Embroidery?

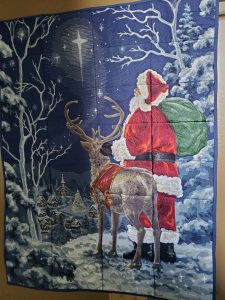
Tile embroidery is a complex design done on an embroidery machine in which up to 32 separate, usually very dense designs are stitched independently  and then sewn together to create a complete picture for a wall size quilt.

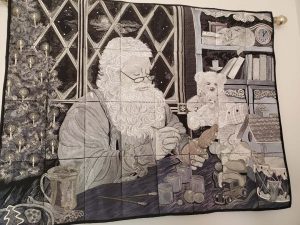
Diane’s holiday design, Starry Night Santa from OESD is the perfect example of this intricate style. With the light just right, you can see where the separate tiles have been sewn together to create the image of Santa standing on a snowy landscape looking up at the Christmas star. Each tile is created by the embroidery stitches with a myriad of threads to create the subtle shadings. The entire design was more than a million stitches with about 32 thread changes per tile. And as for how long did it take, Diana claims to have completed the embroidery in just a week. Then she added, “But that was stitching 8 hours or more a day, every day,” and credits husband Mike with doing all the cooking which allowed her to focus on the stitching. With 32 tiles and each tile taking up to 3 hours to embroider, that was an intense 96 hour work week! But the results are spectacular.

Getting Started

Diana began embroidering in 2005, and discovered the tiles in 2010 when she got tired of just sewing for her kids and wanted something more challenging. She says she gets such a feeling of accomplishment when she puts the finishing touches on one of these designs, and even though many are holiday themed, she leaves them hanging all year. Her Santa’s Workshop, also from OESD, is another Christmas themed design. This one appears to be in black and white, but achieves its detail and subtle shadings through the use of 18 different shades of gray thread. Keeping the thread names, numbers, and spools coordinated is one of her biggest challenges. In fact, she once relied on the color name that came up on her machine and ended up with a blue ear on Santa!  Now she lines up all her threads and labels them BEFORE she begins her first tile.

Adding Machine Appliqué

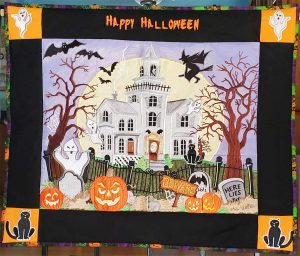
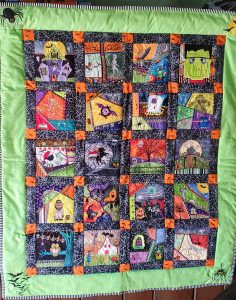
Some of the designs like Poppy also incorporate machine appliqué with the stitching. The use of fabrics cuts down the embroidery time and gives a more traditional quilting look to the finished project. Her Halloween from Molly Mine designs is another example of the use of appliqué. And another Halloween design this time from Anita Good is Haunted House.

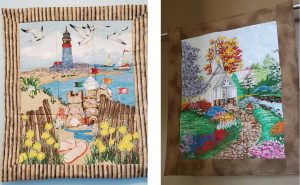
Not all of her efforts go into holiday designs. Diana shared some pictures of floral designs from Anita Good, Connecting Flowers and County Church as well as the landscape, Beach.

Tips

If you have been inspired to try a tile embroidery, Diana has a few suggestions.

  • Organization is essential for any project, but especially when working with tiles.
  • Be sure to have the right threads and label them so you can easily select the correct color.
  • To save fabric, instead of cutting out and hooping separate blocks, cut fabric into longstrips the required width for the hoop.  This allows you to hoop the next design without the large areas of wasted fabric outside the hoop.
  • To make stitching the tiles together easier, on each completed tile, label the back with the number of the tile to make sewing the project more organized.
  • To line up the tiles more accurately, a bright colored thread in the bobbin for the outline stitch makes the alignment more visible.
  • Trim the blocks to a ½” seam allowance instead of the ¼” recommended.  The ½” is more manageable.

Diana regularly shares her embroidery projects with the online embroidery group of the Princeton Chapter where she has inspired and motivated members to experience the fun of machine embroidery.

~Diana Latino, Princeton Chapter
Did you enjoy this article?
Are you an ASG member?
This field is for validation purposes and should be left unchanged.

Tagged With: embroidery, quilt, wall quilt

June 26, 2020

Quilting Quandary

You’ve spent hours, days or weeks (OK, maybe years) tediously piecing your quilt top. It’s layered, basted and ready to go. It doesn’t matter if it’s a traditional look or totally mod, the next step toward the finish line—how to quilt it.

You can, of course, hire a longarm quilter to do it for you. You can free-motion quilt it from edge to edge. Or, you can use your walking foot to quilt it. Let’s take a look at a few walking-foot options.

Stitch-in-the-Ditch Quilting

When you constructed your blocks, you probably pressed the seam allowances in one direction, perhaps so they could nest with adjoining seams and because it makes a stronger seam than pressing them open. With the seam allowances pressed in one direction, it creates a “well” in the seam—a small indentation. That’s the perfect location to stitch through the three layers of your quilt (top, batting, backing).

Stitch-in-the-ditch quilting can be done with transparent thread, either smoke or clear, or with a thread color to coordinate with adjacent pieces. Choose a bobbin color that coordinates with the quilt backing. This type of quilting is an ideal way to hold the layers together without creating new design lines and it lets you highlight the piecing itself. Stitch slowly and stay in the ditch.

Sample of stitching in the ditch
Example of stitching in the ditch

If you have a machine with an adjustable needle position, try moving the needle to exactly sit in the ditch of the seam for invisible stitching.

Echo Quilting

If stitching in the ditch seems a bit scary, think about echo quilting. This process uses the presser foot width to keep your quilting lines an even distance from the piecing seams—it’s akin to topstitching on a garment. This simple method allows you to highlight the shapes you’ve intricately pieced, and it’s a great way to hold the layers together.

Sample of echo quilting
Example of echo quilting

ANCHORING THREADS: If you’re doing either stitch-in-the-ditch or echo quilting, it’s likely that you won’t be starting and finishing your stitching in a place where you can simply cut the threads. You can start and end your stitching sections by shortening the stitch length to near zero to anchor the threads. If you opt not to do that, then simply pull the top threads to the underside, knot them, thread the ends into a needle and bury them in the quilt layers.

Channel Quilting

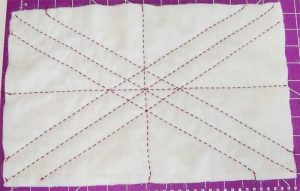
Some designs work well with overall quilting parallel rows of stitches. It’s fun, easy and pretty quick to complete. The channels can be spaced as desired, but a simple way is to use the presser foot width as a guide for the row spacing. Mark the first stitching line in the center of the quilt, then work outward from the center to the left and the right. For a more artsy look, vary the spacing of the stitching rows. If you want them further apart than the presser foot width, use a quilting guide for spacing.

Sample of channel quilting
Example of channel quilting

Tape Tricks

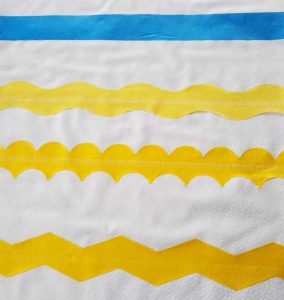
3 tape shapes
Painter’s tape

If you’re looking for a quick and easy, no-mark method to prep your quilt, look no further than the paint aisle of your favorite home improvement store. Painter’s tape is designed to mask edges and trim when changing the color of a room, but quilters have taken it to another level. The low-tack tape is available in several widths, and some shapes (scallops, zigzag and waves) and it’s perfect for “marking” quilting lines on your quilt sandwich.

Adhere the tape strips in the pattern you’d like to quilt—parallel lines, diverging lines, crisscross patterning or even diamonds or triangles. Finger-press the tape in place and you’ve got a perfect edge to follow with your stitching. Stitch your first line along the tape edge or a presser foot width away, and subsequent stitching lines using either the presser foot width for spacing, or a quilting guide for wider spacing. You can stitch on either the inside of the tape, outside or both.

When you’re done stitching, simply pull off the tape—there’s no residue. If your lines go edge to edge, there’s no need to secure the threads, as they’ll be caught under the binding. If shapes are within the quilt, tie off the threads as noted above.


~Linda Griepentrog
Linda is the owner of G Wiz Creative Services and she does writing, editing and designing for companies in the sewing, crafting and quilting industries. In addition, she escorts fabric shopping tours to Hong Kong. She lives at the Oregon Coast with her husband Keith, and two dogs, Yohnuh and Abby. Contact her at .

Did you enjoy this article?
Are you an ASG member?
This field is for validation purposes and should be left unchanged.

Tagged With: channel, echo, quilting, stitch in the ditch

January 7, 2019

An Easy and Precise Technique for Hand Quilting

This easy technique for hand quilting requires limited skills and mimics the precision of machine quilting.

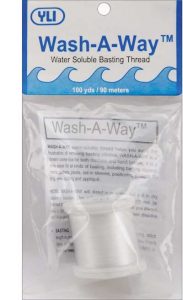
YLI Wash-A-Way Thread
YLI Wash-A-Way Water Soluble Basting Thread

1.  Load the machine, both top and in the bobbin, with water soluble thread.

2.  Set the machine stitch length for the desired hand-stitch length. For the stitches to show up in this demonstration, the stitch length will be set at 4 mm. If hand-stitching for a quilt were to be done, perhaps a stitch length of 10-12 stitches per inch would be used.

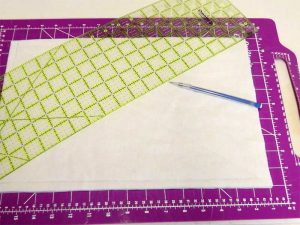
3.  Cut the quilt sandwich (back, batting, top) and mark the design on the top fabric. For this demonstration, simple straight lines were used, but you can use any design of your choosing.

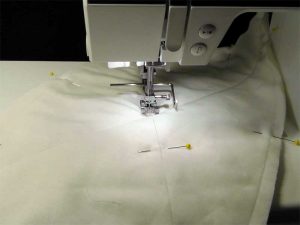
4. Stitch along the marked design lines with the water soluble thread. Optionally,  you can mark and stitch the design on the top only, then layer the quilt and stitch through all layers during the hand-stitching process.


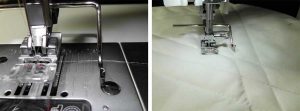
5.  For straight stitching, use the quilting guide that comes with your machine. Set it for the distance from the center needle position and allow the guide to follow along the previous line of stitching.

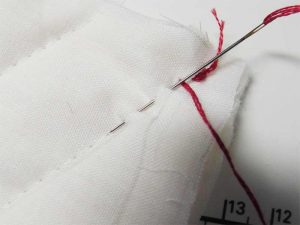
6. The stitching lines provide a guide for the hand stitching. Thread your needle using either hand quilting thread or a colorful embroidery floss (using as many strands as you’d like).

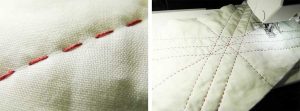
7. Following the stitching line, insert the needle in and out the holes created by the machine stitching. Mak sure the stitching goes through the back side, catching all layers.


8. Complete all the rows of hand-stitching, following along the machine-stitched line.

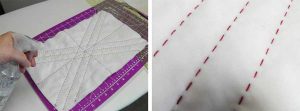
9.  Spritz the water soluble thread with water and the thread will dissolve away leaving only the hand stitching.

The end result is beautiful, straight and consistent hand stitching.

Adapted from an original post by Ramona Baird


Tagged With: hand quilting, water soluble thread

  • « Previous Page
  • 1
  • 2
  • 3
  • Next Page »

Become a Member

Join the only national organization dedicated to Advancing Sewing as an Art and Life Skill.

Join Now button

Blog Article Categories

  • ASG Conference
  • Chapter Stories
  • Embroidery
  • Fitting
  • Learn to Sew
  • National Sewing Month
  • Products, Books, & Patterns
  • Projects
  • Quilting
  • Sewing
  • Sewing Techniques
  • Sewing Tips
  • Sewing Tours
  • Videos
  • Disclaimer
  • Privacy Policy

American Sewing Guild
National Headquarters
9660 Hillcroft, Suite 230
Houston TX 77096
713-729-3000 | 713-721-9230 Fax
www.ASG.org

ASG wordcloud - education, conference, discounts, videos, special offers, tours and more

Copyright © 1998–2025 · American Sewing Guild · All Rights Reserved