American Sewing Guild (ASG)

Visit our blog Visit the ASG Facebook page Visit ASG on Pinterest Visit ASG's YouTube channel Visit ASG on Instagram
  • Home
  • Join ASG
    • Join Online
    • Chapter Locations
    • Member Benefits
    • Member Brochure
    • Join by Mail
  • Conference & Education
  • Resources
    • Contests & Awards
    • Giving Back
    • Hall of Fame
    • Links
    • Travel and Tours
    • Measurement Chart
  • Shop
    • ASG Store
    • Chapter Products
    • Video Resources
  • Blog
  • About
    • About Us
    • Donate to ASG
    • ASG Sensitivity Statement
    • FAQ’s
    • Start a Chapter
  • Contact
  • Member Login
    • Login First!
    • Members Only
    • Leadership Only
    • Website FAQ’s
    • Logout
  •  

October 7, 2022

Pattern Weights

Tatuo round cloth pattern weights available on Amazon and other sewing retailers.

What’s’ your preferred method for cutting out projects—pins or pattern weights? There are sewists who swear by one or the other, but most of us tend to love both, depending on the fabric being used.

Pins hold pattern tissue firmly in place for cutting, but there are some fabrics where pins can leave permanent marks and, lo and behold, if you’re not pinning within the seam allowance, there could be those telltale marks. Vinyls and some faux suedes are prime examples of fabrics that benefit from the use of weights over pins.

Weights hold fabric flat against the cutting surface and if you cut with a rotary cutter instead of scissors, nothing moves. However, you do need to protect the surface with a special mat to avoid damage to the table top.

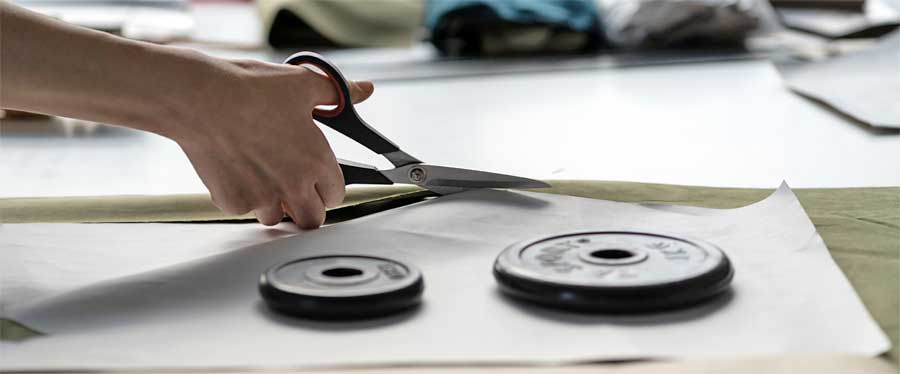
You can cut a weighted pattern with scissors, but it’s a bit tricky since the scissor blade tends to “pick up” the fabric as you cut, potentially shifting the weights around the perimeter.

Cutting around a pattern with weights

In addition to eliminating the potential of pin marks, weights help secure slippery fabrics in place—a task  much harder with pinned pieces that can slide around. Weights are also preferred on thick fabrics where pinning is near impossible—think wool coating or mohairs.

So, bottom line—there’s a place to use both methods of securing the pattern to the fabric.

Small weights can also be used at your machine to keep slippery fabrics from driving you crazy while seaming.

Let’s take a look at weights…

Many companies make pattern weights, from tiny rounds to large, heavy, flat metal rectangles used in the garment industry to secure multiple thicknesses on long tables.

Cast iron

If you’re cutting large pieces, like draperies or curtains, these iron weights can be handy for holding layers together without shifting. The raised handle makes them easy to move around as needed, and because of their weight, they stay in place with aplomb.

Cast iron pattern weight.

Glass

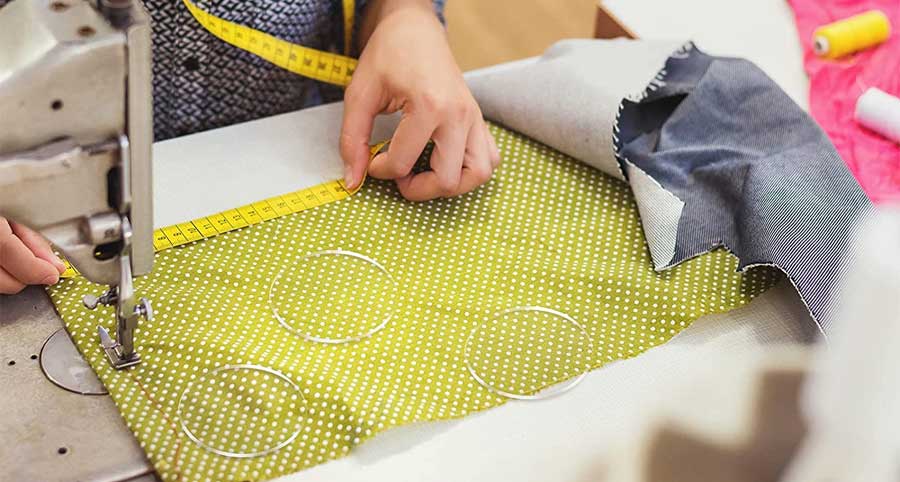
Circular glass weights are ideal for holding smaller spaces, and they have the advantage of being able to see through them in case you’re matching plaids, prints, etc. Just line up the pieces and weight them in place while you align adjacent pattern pieces.

Glass pattern weights

Fabric Bags

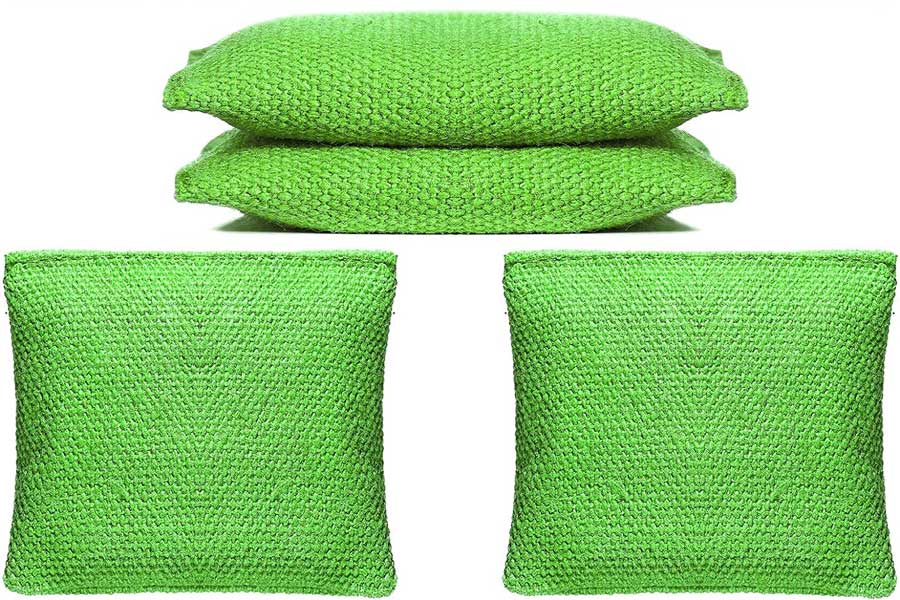
Weighted fabric bags in various sizes and shapes are another option for pattern weights. Usually filled with metal shot or shavings for weight, these handy little notions can be stacked atop each other if you need more weight in a particular area of the pattern piece you’re cutting.

Fabric pattern weights

DIY Weights

While available readymade, handy little fabric pillows or bags are easy to make yourself in any size or shape you need for your work. Just be sure the outer fabric is densely woven to keep the filler safely inside. If you use clean sand (from the pet store) or ground walnut shells for filler, it’s best to add a liner as well to ensure no leakage, but that’s not needed if you use metal shot or rice, beans, etc. for the weight you need.

  • Other options suggested by guild members include using rolls of pennies for weight—especially handy for narrow pattern spaces like straps and facings, but note that they can roll too.
  • Open the pantry and check out sardine and tuna cans for potential weights. While these are larger in size than many weights, they are readily available and of course the contents are edible after use in case it’s near lunch time. Can-size weights are better used with large patterns, like home décor items.
  • Out on a beach walk? Pick up some large flat stones to create weights. Again, paintable for fun.
  • Small ceramic tiles are also perfect for pattern weights. A tile store always has scrap pieces and sometimes they just give them away.
  • Either covered or uncovered fishing weights are another DIY option—available in various shapes, sizes and weights depending on your needs.
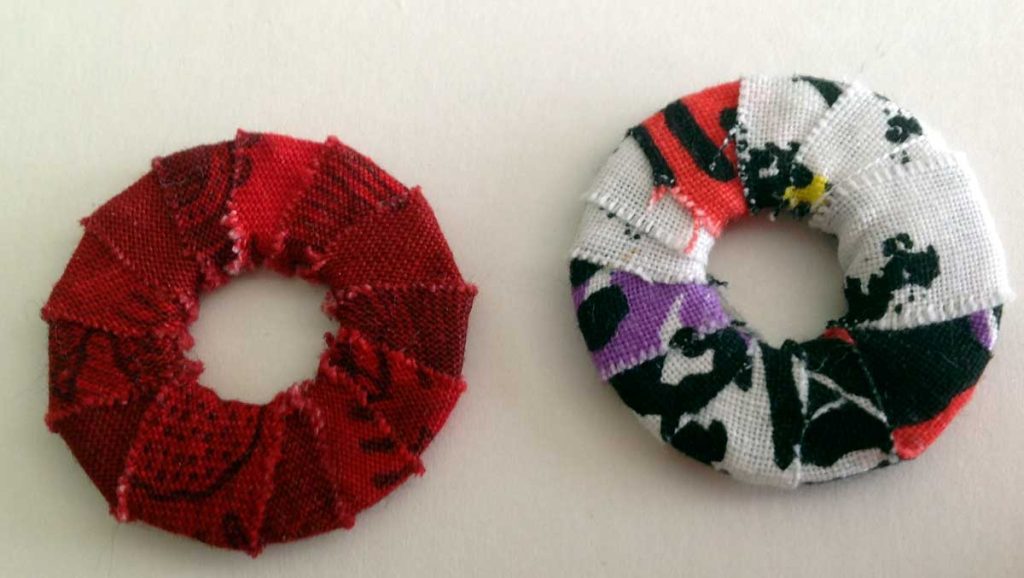
  • Head to the hardware store and look at flat metal washers—available in many sizes, these are ideal to use for pattern weights. For more fun, paint them bright colors, wrap them with yarn or fabric strips, or decoupage some fun fabrics to the surface.

Pattern weights - wrapped washers

Using Weights

  • Just as we pin near the pattern edge, weights are best positioned in the same area. Depending on the shape of the pattern pieces and the weights, position the pieces near the corners for added hold.
  • If your fabric is larger than your cutting surface, use weights on the fabric around your pattern pieces to help keep it from sliding.
  • Weights can also be used on paper—like for tracing patterns from a multi-size sheet master. They help to keep both from sliding and keep lines continuous.

~Linda Griepentrog Linda is the owner of G Wiz Creative Services and she does writing, editing and designing for companies in the sewing, crafting and quilting industries. In addition, she escorts fabric shopping tours to Hong Kong. She lives at the Oregon Coast with her husband Keith, and three dogs, Yohnuh, Abby, and Lizzie. Contact her at .

Did you enjoy this article?
Are you an ASG member?
This field is for validation purposes and should be left unchanged.

Tagged With: cutting fabric, patterns, sewing

August 19, 2022

Sewing Swimwear: The Details (preview)

Sew a swimsuit in August? Of course! It’s still swimsuit season in many locations; however, a recent visit to a new gym with an indoor pool was a good reminder that aquatics classes are becoming more popular. This is  especially true when they have titles like Aqua Fitness and Aqua Arthritis Movement.

For those who have tried on a swimsuit in a brightly LED-lit fitting room with what surely is a funhouse mirror, it’s easy to turn your back, remove the offending garment, and make the snap decision to make your own suit. If this sounds like you, rest assured you can make a well-fitting suit that dips, curves, minimizes — and maybe even hides — some areas in about half a day.

Pattern

In the “good old days,” Kwik-Sew and Stretch & Sew were the go-to companies for great results. You may still be able to find some of these patterns online but the choices are still endless when it comes to available swimsuit patterns and an online search will yield many results to choose from. A few things to note when choosing patterns:

  • If you’re looking to hide certain areas, shirred or gathered details flatter and hide wherever they are.
  • Neckline ruffles will draw the eye up and away from the hips.
  • Bias cut stripes will slenderize the figure.

To learn more about sewing swimwear, including choosing fabric and patterns, which elastic to use, lining, fitting, sewing tips, and more, the complete version of this article is available on the ASG Members Only blog and requires member login.
CLICK HERE to read the full article. Not a member? Join online!

Tagged With: bathing suits, swimsuits

March 16, 2022

How to use the Piping Foot (video)

Watch this 60 second video on how to use a piping foot.


Did you enjoy this article?
Are you an ASG member?
This field is for validation purposes and should be left unchanged.

Tagged With: piping foot

March 11, 2022

Thinking Outside the Sewing Store — Ideas for Tools & Notions

Some tools/notions used in sewing are not necessarily purchased as “sewing” items. ASG member, Judith Weyl shared some of her favorite innovative notion ideas with us:

Home Improvement Stores

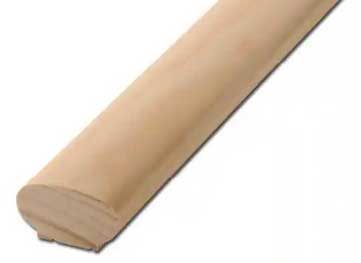
Handrail A 3′ Section of Wood Handrail makes a wonderful tool for pressing seams open without leaving an imprint on the garment. It’s round on one side and flat on the other, which keeps it from rolling off the ironing board. The 3′ length is great for pressing seams in a pant leg but you could have it cut any length.
Galvanized or Zinc-Plated Washers (about 2” diameter) make great pattern weights. They have a hole in the center and can be stored on a small dowel or hook. Judith rarely use pins to hold pattern to the fabric any longer. An added bonus to using the washers is that they are so thin, you can place an acrylic ruler on top of them along the edge of the pattern and there’s enough clearance to use a rotary cutter to glide along the ruler’s edge.  Don’t stop there though! When Judith made drapes for her dining room, she sewed a small pocket from the lining fabric for each washer and pinned them as weights at the hem of the drapes.

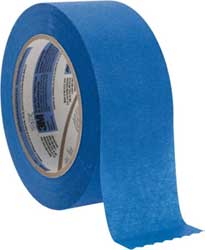
Painter's tapeBlue Painter’s Tape makes a handy guide for seam allowances. Using a razor, carefully make two deep cuts into the roll about 2” apart and remove the entire cut area which should be about 1/8” to ¼” thick. Place this on the bed of your machine the required distance from the needle. Even if you use specialty feet or attachments, adding the tape gives you a further marking and lets the fabric  ride along it well before reaching the needle. And because it doesn’t leave a residue, you can reposition the tape as needed. When it loses its stickiness, just remove the bottom layer of tape to rejuvenate your strip.
Office Supply Store

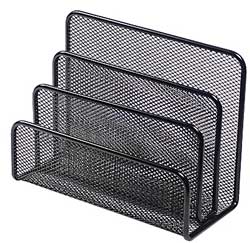
sorterVertical Mail or File Sorters are great for storing acrylic rulers. Judith says this multi-slotted desktop sorter doesn’t have enough slots for all the rulers, but they are still held conveniently in one place.
Supermarket or Drug Store

Toothpicks can be used as shank spacers when sewing on buttons. When sewing a button on by machine, slip a toothpick under the foot directly over the buttonholes before stitching, making sure to hand-turn the wheel to be sure the zigzag stitch is clearing the toothpick.

Wooden Skewers or Chopsticks are excellent for guiding your fabric to the needle and holding that final edge when piecing. You can’t get your fingers that close! A bonus is that you can share the extras at your next ASG meeting.

Tweezers are a great tool to help when unpicking a seam. Use them to grasp the cut end of threads and you will easily be able to yank a long thread out of the fabric.  It also helps when clipping or trimming embroidery threads as you can hold the thread with the tweezers and get very close to the fabric.

Other Ideas

We loved Judith’s ideas so much, we decided to poke around the house and see if we could channel similar creative-outside-the-box thinking department as she did. Here’s what we came up with:

  • Hair curlersPipe Cleaners would make a great brush to remove dust and debris from under your presser foot and in the bobbin case. You may want to double it up or even make a loop with it.
  • A Portable Book Light velcroed or taped (use Painter’s Tape to avoid tape residue) to your machine can add some additional light and you can swing the little arm to where you need it.
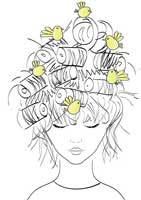
  • Velcro Hair Rollers (oh, remember the days?!) would make a great tool for picking up loose threads.
  • Magnet tape to pick up stray pins.

Thanks so much to Judith for these fabulous sewing room ideas! She advises that when you see tools and notions advertised, look around your home or in non-sewing stores for similar items that are non-traditional but will still serve the purpose.


~ Judith Weyl, Greater Lehigh Valley ASG Chapter

Did you enjoy this article?
Are you an ASG member?
This field is for validation purposes and should be left unchanged.

Tagged With: Notions, sewing tools

February 11, 2022

Moving the Dart to Create a Princess Line

Bust dark drawingsIf good fit is important to you, especially when sewing with woven fabrics, you already know the significance of a properly placed and well-fitting bust dart. Darts shape that two-dimensional fabric to fit around your three-dimensional body. Even for the less-endowed figure, when darts are the correct size and pointed to the correct location, they can add shape and flatter your frame.

When they are incorporated into special design lines, darts also have wonderful attributes beyond fitting and shaping. Fashion designers have always known and utilized these skills for creating different styles with special design lines. For your own design explorations, here are some guidelines for moving the standard side seam bust-fitting dart and converting it into the always flattering princess line. This design line can originate from the shoulder line or from the armscye—that choice is yours.

When the princess design line extends from the shoulder line, it creates a vertical line which gives more visual height to the wearer. It is the easiest version to sew. When it comes from the armscye, the tighter the armscye curve, the more challenging those curved seams can be to stitch together particularly for the full-busted figure. However, the closer the starting point is to the shoulder point, the easier it will be to sew.

Basic Dart Fit

Princess lines flatter most figure shapes. However, they can end up being ill-fitting and unsightly if your bust dart is not the correct width for your cup size and is not aimed toward your apex. If the original bodice sloper doesn’t conform properly to your apex contours, then the curvature of the princess line could ride above or below your actual apex level, creating a poor fit. When you begin with a pattern that is fit exclusively to your body contours, where the side bust-fitting dart is the correct shape and is pointed toward your apex, you can rest assured that the resulting princess line fashion detail will also fit as it should and be flattering on your body.

Make sure you have the correct size dart for the fullness of your bust and that the dart is pointing toward your apex. Sure-Fit Designs offers an Adjust-A-Bust template with A through E-cup dart sizes. This template is found within the Sure-Fit Designs Dress Kit. If you’re full busted, this solves the problem for the traditional FBA (full bust adjustment).

Creating the Shoulder Princess Seam

Now, let’s begin to move that dart.

1. Beginning at the top and bottom legs of the side seam dart, draw a designer’s dart, which is one that extends to the apex cross mark. The tip of this dart, which is now at your apex, will become a pivot point.

2. Stabilize the apex with a piece of clear plastic tape. Then, cut on the designer’s dart lines to remove this dart.

3. Approximately mid-shoulder, mark a point where the princess detail will begin. Draw a straight line from this point to your apex marking. Continue this line down through the center of the waist-fitting dart. Mark X’s above and below the apex which will become the princess seam matching notches. Cut on this line down to the apex only.

4. Close the original side-fitting bust dart, allowing the pattern to pivot at the apex hinge. Tape original side seam dart in this closed position.

5. Continue cutting from the apex down through the waist-fitting dart. Separate the Center Front panel from the Side Front panel. Add 5⁄8″ (1.6cm) seam allowances to both cut edges. Extend the X’s to create the matching notches.

6. If you want the princess line to fit with more shaping at the waistline, you can always stitch on the side legs of the waist-fitting dart to tighten the bodice.


This article appeared in a previous issue of Notions
~ Glenda Sparling is president of Sure-Fit Designs, an international company specializing in pattern fitting and designing. Canadian-born, her background includes 10 years as a home economics educator and 30 years in the sewing industry. Based in Eugene, Ore., she has traveled extensively, teaching in the U.S., Canada, Australia, New Zealand, and Great Britain. Glenda has written pattern fitting, designing, and embellishment books, including “Wrapped in Fabrique,” and a series of how-to fitting videos that have been converted recently to DVD format. She is a member of the ASG Willamette Valley, Ore. Chapter. www.surefitdesigns.com

Did you enjoy this article?
Are you an ASG member?
This field is for validation purposes and should be left unchanged.

Tagged With: bust dart alteration, dart, sewing

  • « Previous Page
  • 1
  • 2
  • 3
  • 4
  • 5
  • …
  • 10
  • Next Page »

Become a Member

Join the only national organization dedicated to Advancing Sewing as an Art and Life Skill.

Join Now button

Blog Article Categories

  • ASG Conference
  • Chapter Stories
  • Embroidery
  • Fitting
  • Learn to Sew
  • National Sewing Month
  • Products, Books, & Patterns
  • Projects
  • Quilting
  • Sewing
  • Sewing Techniques
  • Sewing Tips
  • Sewing Tours
  • Videos
  • Disclaimer
  • Privacy Policy

American Sewing Guild
National Headquarters
9660 Hillcroft, Suite 230
Houston TX 77096
713-729-3000 | 713-721-9230 Fax
www.ASG.org

ASG wordcloud - education, conference, discounts, videos, special offers, tours and more

Copyright © 1998–2025 · American Sewing Guild · All Rights Reserved