American Sewing Guild (ASG)

Visit our blog Visit the ASG Facebook page Visit ASG on Pinterest Visit ASG's YouTube channel Visit ASG on Instagram
  • Home
  • Join ASG
    • Join Online
    • Chapter Locations
    • Member Benefits
    • Member Brochure
    • Join by Mail
  • Education & Classes
  • Resources
    • Contests & Awards
    • Giving Back
    • Hall of Fame
    • Travel and Tours
    • Measurement Chart
  • Shop
    • ASG Store
    • Chapter Products
    • Video Resources
  • Blog
  • About
    • About Us
    • Donate to ASG
    • ASG Sensitivity Statement
    • FAQ’s
    • Start a Chapter
  • Contact
  • Member Login
    • Login First!
    • Members Only
    • Leadership Only
    • Website FAQ’s
    • Logout
  •  

April 19, 2024

Quilting Q&A: Borders, Miters, and Fussy Cuts

Today we offer a triple treat of quilting trivia. From understanding mitered corners, to explaining fussy cuts, and finally, navigating the width of a quilt border. Grab your rotary cutter and let’s patch together some knowledge that’s as snug as a perfectly quilted blanket!
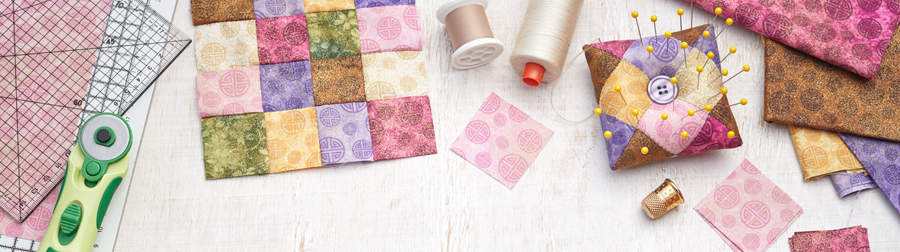
Quilting tools

How wide should a quilt border be?

A quilt border can be any width you want, depending on the finished look you like. There can a single border around the outer quilt top edge or there can be multiple borders of varying widths, again depending on the look you like or the pattern you’re following. Several factors should be considered when choosing border widths.
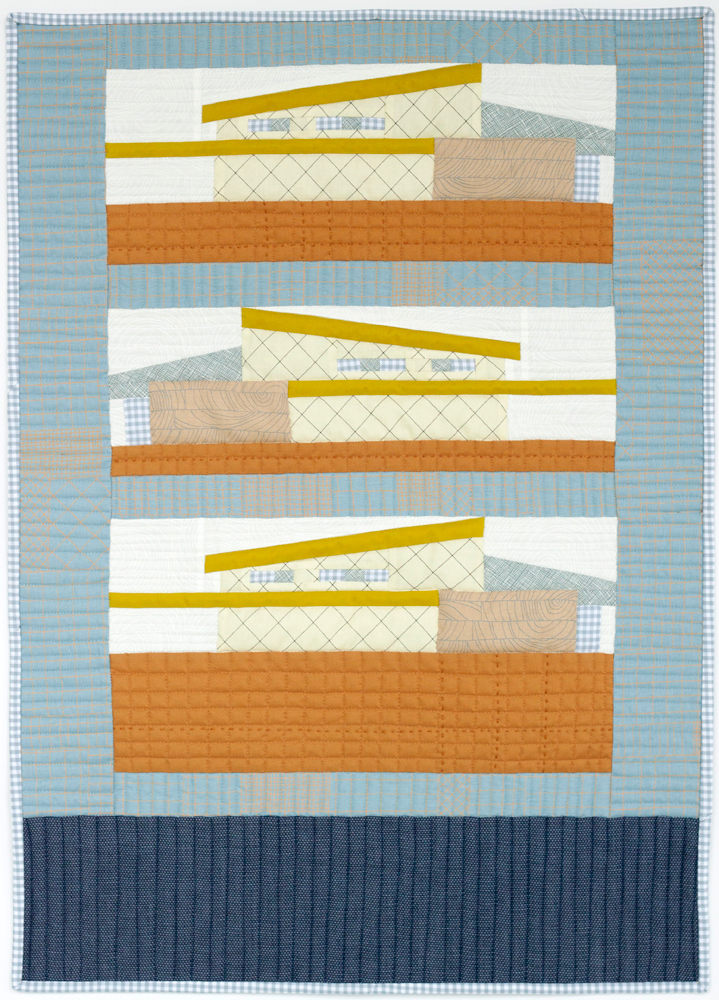
Austin House Quilt by Carolyn Friedlander

The first question to ask yourself might be how much bigger you want the quilt to be, as this can help determine how many and what width of borders you need to add to the pieced center.

The size of the fabric print can influence the border width. Larger prints beckon wider borders to showcase the design. If you use a narrow border with an oversized print, you can’t discern the beauty of the print motifs. The border fabric itself can help determine the width, as often stripes or floral stripes are used for borders and they’re a specific width to showcase an entire pattern.

If you plan to do custom quilting on the border, you may want a wider area to showcase the stitching.

When using multiple borders, a common rule of thumb for determining widths is that a border should be about 1 ½ times larger than the previous border. For example, if an inner border finishes at 1”, the second border should be approximately 1 ½”. In most instances, the narrowest border is on the inside, working outward to the widest.

For those who prefer numbers, outer borders can range from 3” wide on wall quilts up to 7” or more for king-size quilts.

Sometimes you may not want to put borders on all four sides of a quilt. Some modern quilters often use borders on only two sides, either adjacent or opposite, or they vary the border size from side to side and/or top to bottom, or even use different fabrics for different border locations.


Should I miter the border corners or lap them?

Again, this is a matter of preference. Lapped borders are easier to sew than mitered borders and they’re perfect for allover prints. But, if your border fabric is a stripe or floral stripe pattern, mitered borders are more attractive as the design comes together at a 45° angle, rather than lapping.
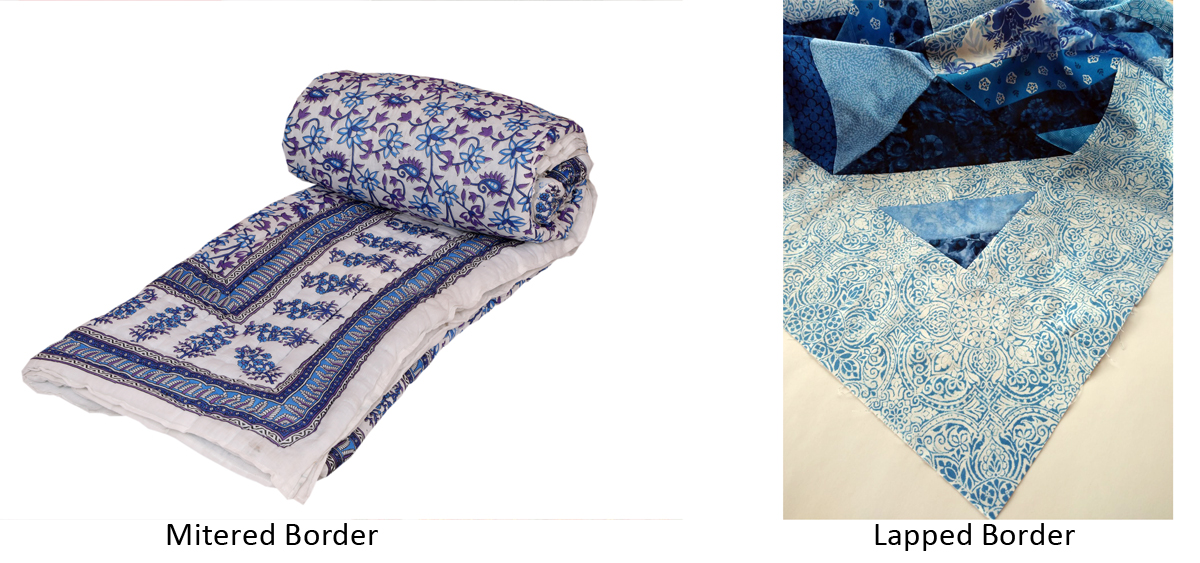
Image showing lapped and mitered corners on quilts

Borders can also be pieced, either purposefully or from scraps, and scrap borders can also be lapped or mitered, depending on the desired look.

Pieced border on a quilt
Pieced border

My quilt pattern says to fussy-cut the blocks. What does that mean?

Fussy-cutting is a technique in which a fabric motif is strategically placed within a quilt block. Most commonly, a design element is centered in a block for emphasis.
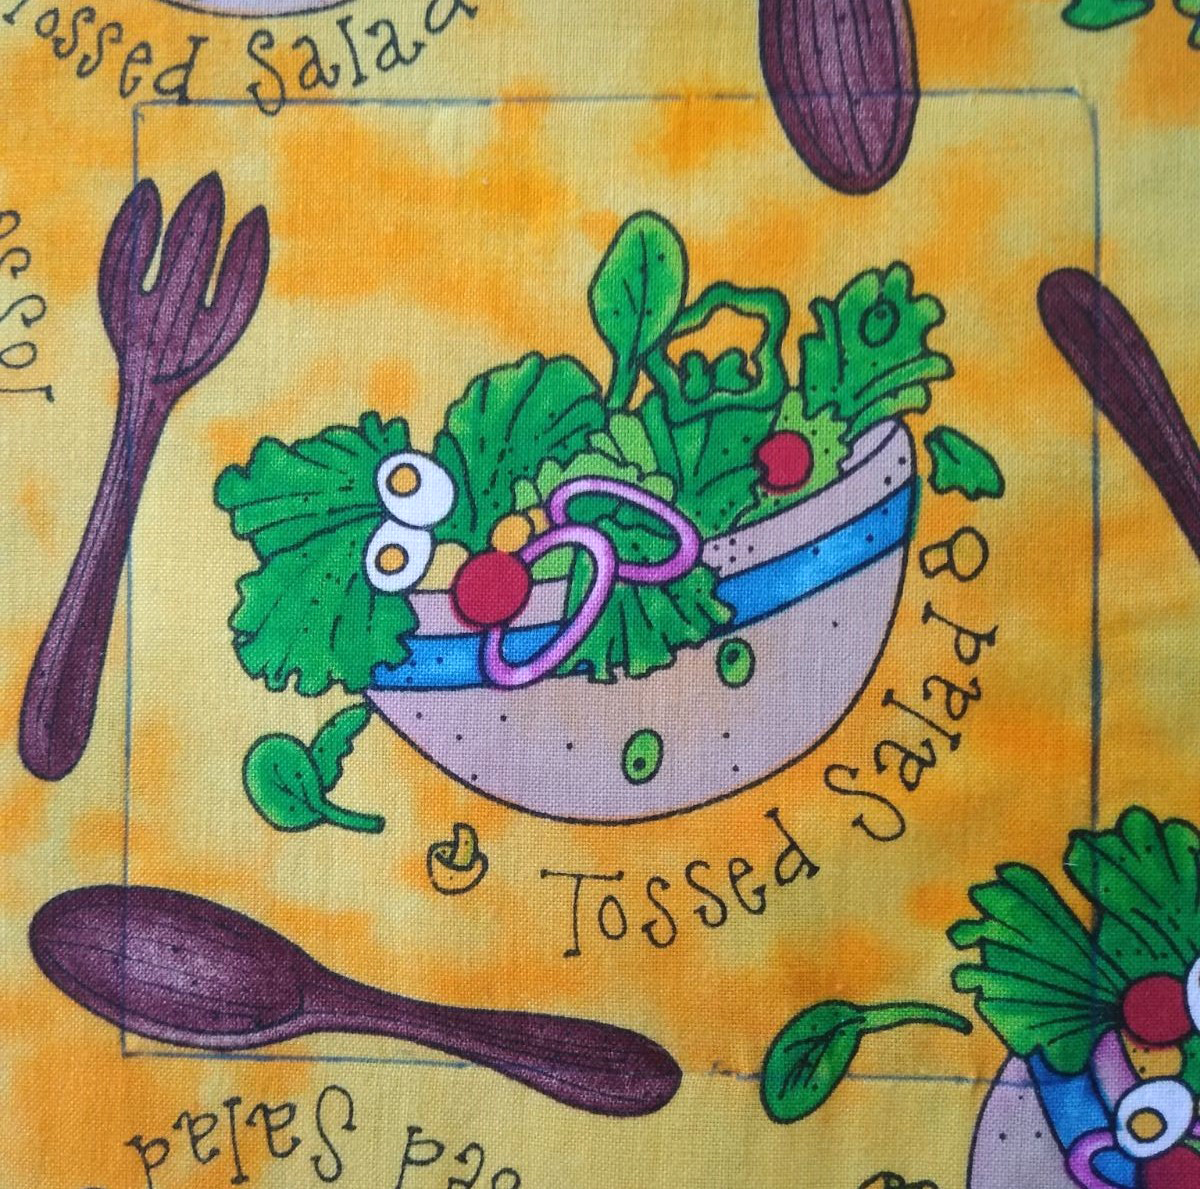
Fussy cut square

Garment sewers often fussy-cut fabric so that motifs are placed in a specific place on the garment—a collar, pocket, front band, etc.

Fussy-cutting requires a template or pattern piece you can see through for the easiest cutting. Just place it over the desired design and cut around it. DON’T FORGET that you need seam allowances, so make your template or pattern to include those.

Many prints are directional, so keep that in mind when cutting pieces, so that the design is oriented the proper way in the finished project. For example, all the elephants should be standing on their feet, not some on their heads.

Fussy-cutting normally takes more fabric than not fussy-cutting, as you may not be able to use the entire length or width, and you don’t want to end up with partial motifs during your cutting process. The extra amount needed depends on the repeat and size of the design motif you’re showcasing, so there’s no hard and fast rule about how much extra to buy. Bring your pattern to the store and see how many you can cut out of a given amount of yardage.

Some fabrics may offer multiple opportunities for fussy-cutting within the same piece. For example, a zoo animal may be the center for some blocks, a different animal for others and perhaps a rainbow motif from the same fabric for others. This allows for less waste than choosing a single motif focus.


~Linda Griepentrog is the owner of G Wiz Creative Services and she does writing, editing and designing for companies in the sewing, crafting and quilting industries. In addition, she escorts fabric shopping tours to Hong Kong. She lives at the Oregon Coast with her husband Keith, and three dogs, Yohnuh, Abby, and Lizzie. Contact her at gwizdesigns@aol.com.
This field is for validation purposes and should be left unchanged.
Did you enjoy this article?
Are you an ASG member?

October 27, 2023

Pin Weaving (preview)

Pin weaving is a form of small-scale weaving traditionally done on a frame made of pins with the warp and weft wrapping around the pins. Pin-woven textiles have a selvage edge all the way around.

The equipment needed for pin weaving is minimal, consisting of straight pins; a padded, pinnable board; a rectangle of fusible interfacing; pearl cotton to make the loom; and a tapestry needle which you will use to weave an assortment of textural yarns and perhaps fabric strips into your finished piece.

The Loom

The size of the weaving determines the board size. You can purchase the padded board in a retail shop, or you can make your own.

The complete version of this article is available on the ASG Members Only blog and requires member login.
CLICK HERE to read the full article. Not a member? Join online!

September 22, 2023

Tote Tactics

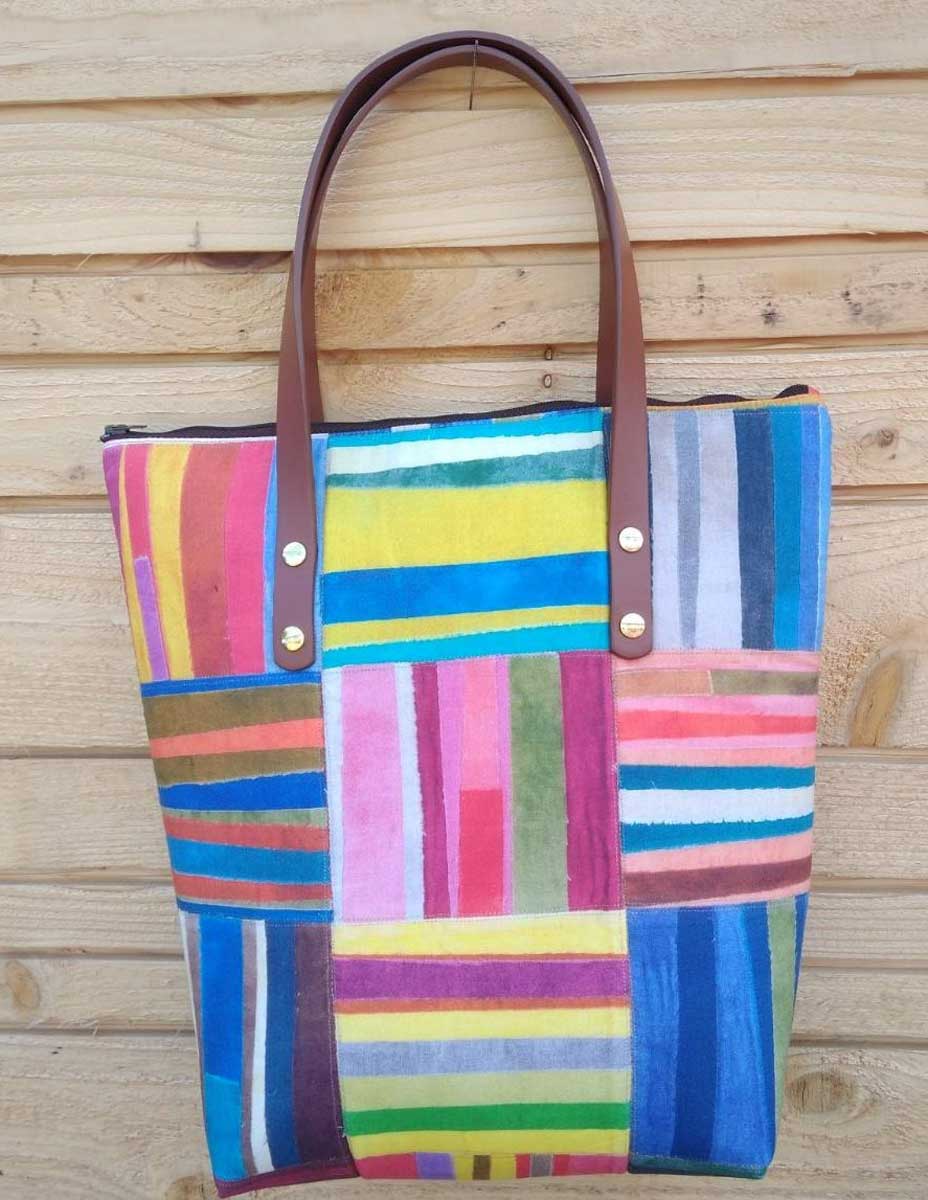
Colorful tote bagTotes are one of the easiest projects sewers can make and are often a first project for beginners. They can be lined, unlined, open-top, zipper-top or even closed with a magnetic fastener, and some offer inside and/or outside pockets as an extra convenience. Tote bags generally have flat bottoms and corner shaping, though they can also simply be flat. These handy carryalls have gained popularity in recent years as many shoppers sport their own bags to the store to carry home their purchases.

The simple design of a tote makes it ideal for many fabrics from canvas to ripstop, quilting weights and home décor styles, even leather. Unlined totes made in lightweights like ripstop are ideal for grocery hauling, as they fold totally flat, but are still strong for carrying cans, produce and other vittles.

There are many patterns available for tote bags, or you can easily make your own simple version with two rectangles and some straps. But, no matter the style, there are some handy tips for tote making.

Inside Scoop

Unless your tote is unlined, it’s a good idea to reinforce the bag sides with interfacing or sewable foam for added stability and shape retention. Judge the type of stabilization needed by the fabric weight—lighter weight fabrics require a sturdier interfacing.

Fusible interfacings, fleeces and foams are ideal backing for tote sides. Cut the pieces the same size and shape as the outer bag pieces. Some sewers like to trim the seam allowances from the backing pieces prior to fusing to reduce bulk. Be sure to follow the manufacturer’s instructions for proper fusing and always allow the pieces to cool before moving them.

Bottom Basics

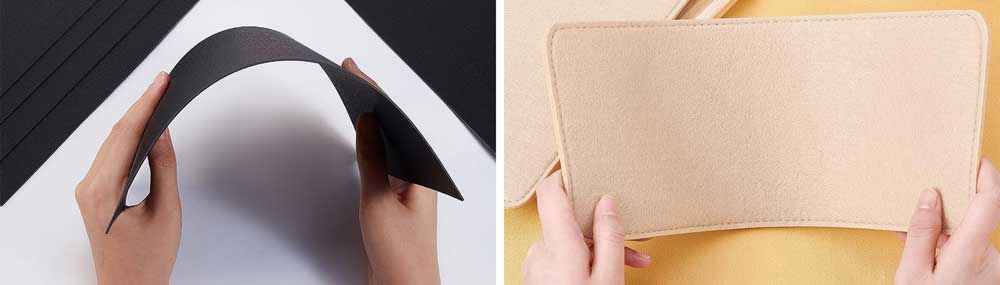
Flat tote bottoms can be further stabilized by adding an insert of the same size after constructing the bag. Materials available for inserts are acrylic shapes, very stiff interfacing or a rectangle of heavy plastic canvas and often come in various sizes, colors, and styles, or as cut-your-own. If the tote is unlined, simply cover the bottom insert with matching fabric. For lined totes, the stabilizer goes between the outer and lining layers. To keep the bottom insert from shifting, it’s a good idea to loosely tack it in place at the side seams.

Bottom of bags
Tote bag base shapers are available on Amazon.

Solid Footing

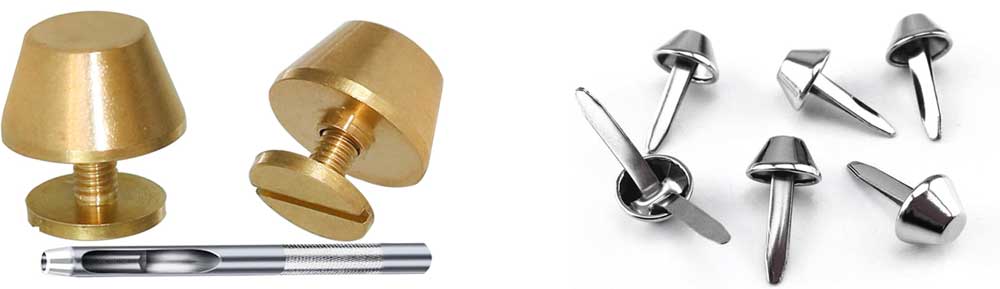
Adding bag feet to a tote bottom is a great way to help keep the tote cleaner, as it allows the fabric itself to stay off the ground. Bag feet come in a variety of shapes, colors and sizes, and they are applied prior to any lining, but after interfacing. Feet can be applied like a magnetic fastener with two prongs inserted into a small hole in the desired corner location on the finished bottom. A piece of foam or stiff interfacing is placed over the prongs for reinforcement, then the metal prongs are folded outward and flattened. To further protect the bag lining, a piece of fleece or interfacing can be placed over the prongs as a cushion. Feet are also available in screw-back versions and can be padded and reinforced as needed.

Bag feet available on Amazone
Bag feet available on Amazon.

Getting a Handle on it

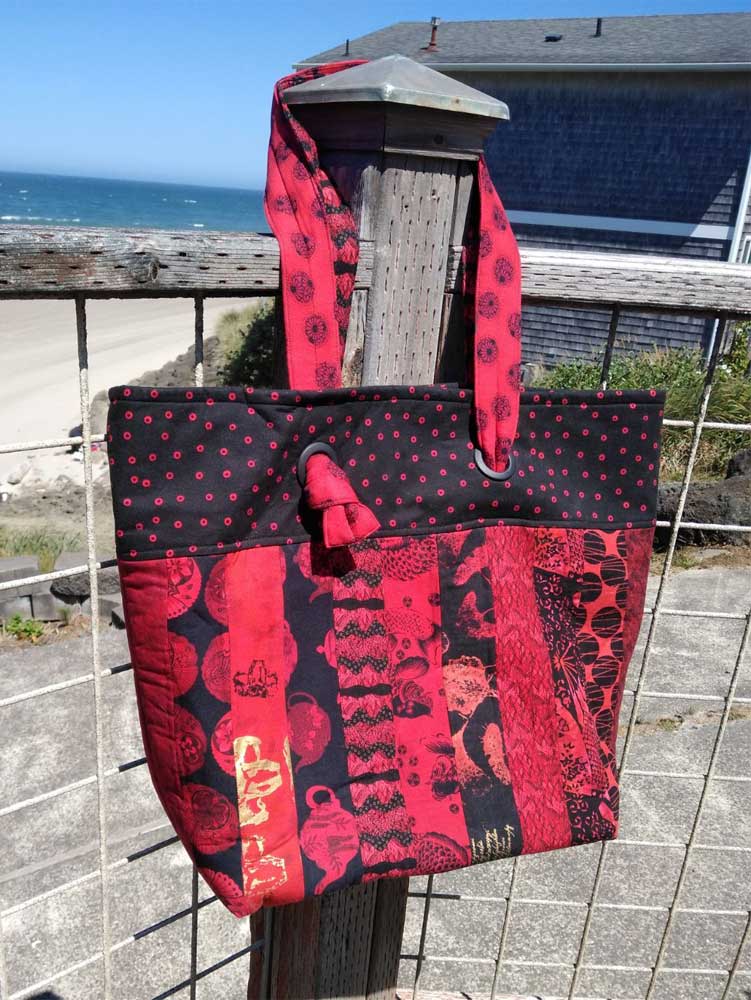
Tote bagThere are a wide variety of options for tote handles. They can be short or over-the-shoulder length, and made from self-fabric, webbing, rope or leather (real or faux). The handles can simply be sewn to the tote top hem, or they can straddle the entire length of the tote and included in the bottom seam. Or, they can be applied to the outside tote surfaces, depending on the desired look.

If the tote is unlined, it’s a good idea to have a double hem at the top for stability when attaching handles to the opening.

Tote handles made of fabric need some kind of reinforcement to make them sturdy—so insert interfacing or fleece inside and topstitch both edges to flatten.

If you’re attaching finished straps to the tote outside, turn under any unfinished ends, then sew a square at each strap end, reinforced with an x for added strength.

Any handles applied to the outside of the tote should be attached prior to lining it so that the stitching or attachment backings are hidden. If you plan to carry heavy items in the tote, add a piece of stiff interfacing behind any outside handle attachments for reinforcement.

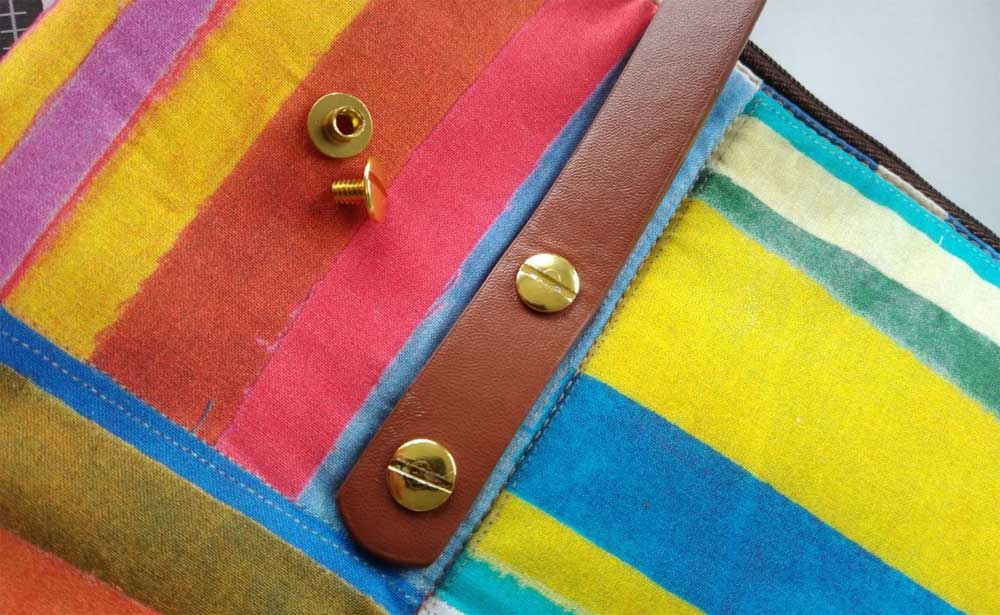
Leather handles can be attached several ways depending on the style. Some come with pre-punched holes for easy hand stitching; others require the use of screws or rivets to attach. One handy notion is called a Chicago screw—it’s a post and cap that fits into pre-made handle holes and, as the name implies, simply screws together to secure.

Flat leather handles attached with Chicago screws.

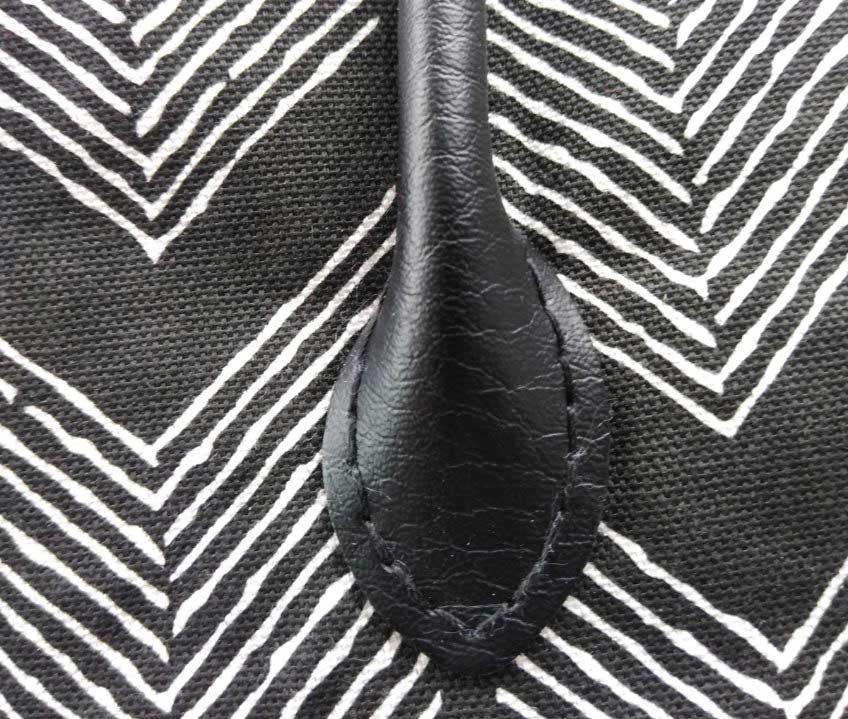
If you’re hand-sewing leather handles in place, use heavy thread and a backstitch for a sturdy application. Some lightweight leather handles can be machine stitched in place as well.

Leather strap on a tote
Rolled leather handles attached with hand-stitching.

Share your tote projects with us! Visit our Facebook page for today’s post and show us your own tote bag projects.


~Linda Griepentrog is the owner of G Wiz Creative Services and she does writing, editing and designing for companies in the sewing, crafting and quilting industries. In addition, she escorts fabric shopping tours to Hong Kong. She lives at the Oregon Coast with her husband Keith, and three dogs, Yohnuh, Abby, and Lizzie. Contact her at gwizdesigns@aol.com.
This field is for validation purposes and should be left unchanged.
Did you enjoy this article?
Are you an ASG member?

Tagged With: tote bags

September 1, 2023

Front Fly Zipper in Slacks or Jeans

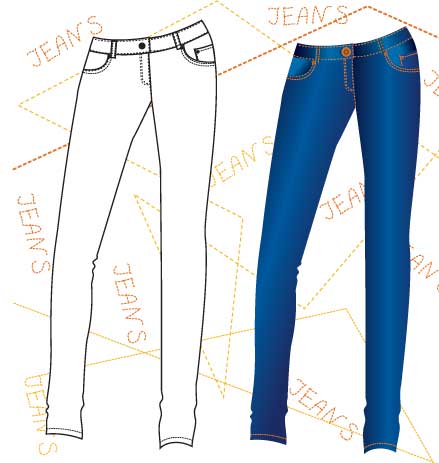
JeanThe traditional fly zipper you see on a commercially made pair of jeans or slacks works well in a manufacturing environment because special machines can make them very quickly, even though it is not necessarily the best technique or finished product. A mock fly is a great option for home sewers and is a good compromise that gives the same look but is much more practical. This method is a very deep-set version of a lapped zipper that requires little extra preparation to be successful.

Getting Started

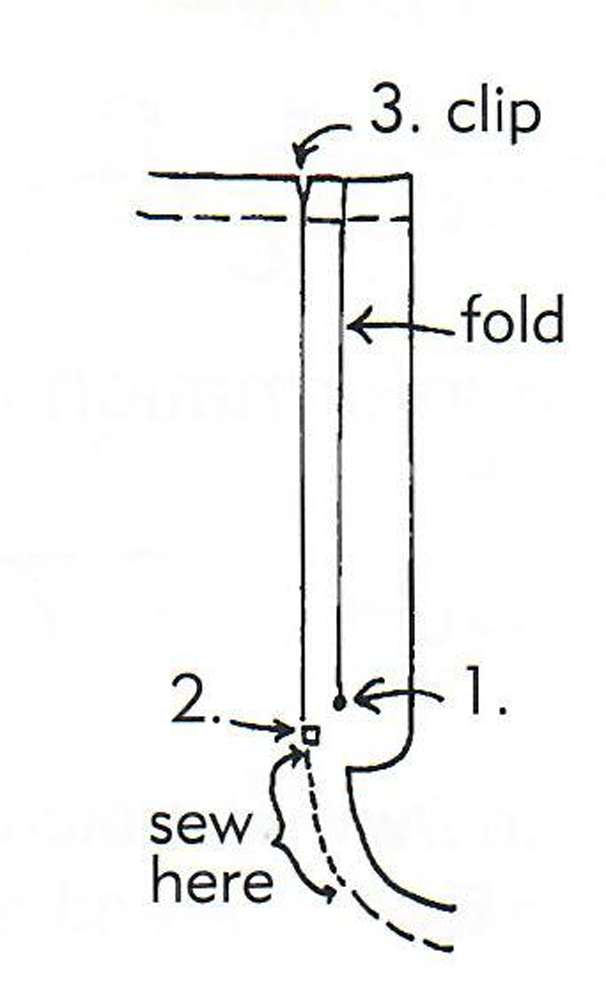
1. Make the following marks on the fabric section. (See Figure 1)

  • Make a dot at the Bottom of the zipper. (#1 on diagram)
  • Make a dot at the Beginning of Stitching. (#2 on diagram)
  • Make a clip at the top of the Center Front line. (#3 on diagram)

2. Stitch from the bottom opening dot (#2 on diagram) down 2 1/2″ towards the inseam using very small stitches. Do not sew the entire seam!

Figure 1

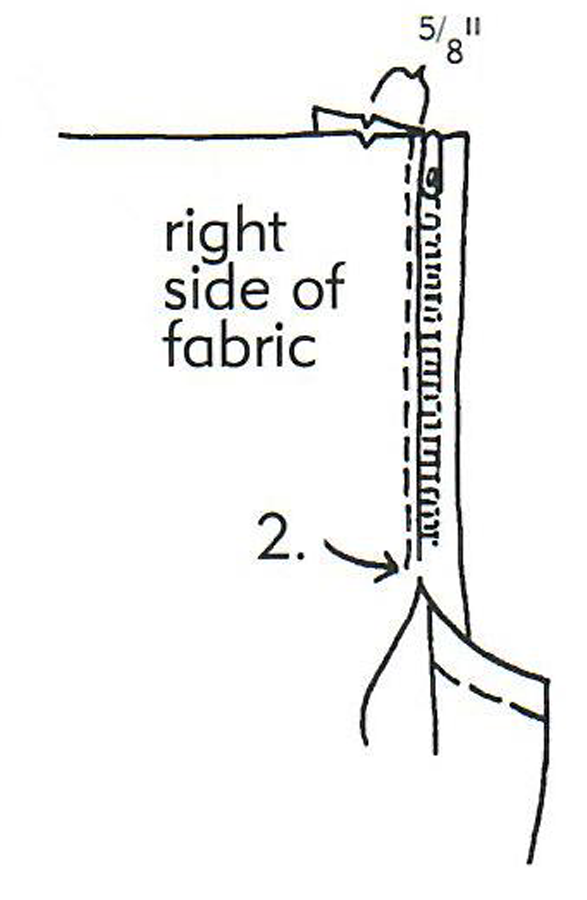
Underflap

3. Decide which will be the underflap of the zipper.

4. Fold the underflap wrong sides together from the seam allowance to 5/8″ from the clip at the top of the Center Front line. This should make the underflap fold evenly.

5. Apply glue stick to underside of the folded flap and attach to zipper as close to the teeth as possible.

6. Sew fabric to zipper as close to the teeth as possible.

Figure 2

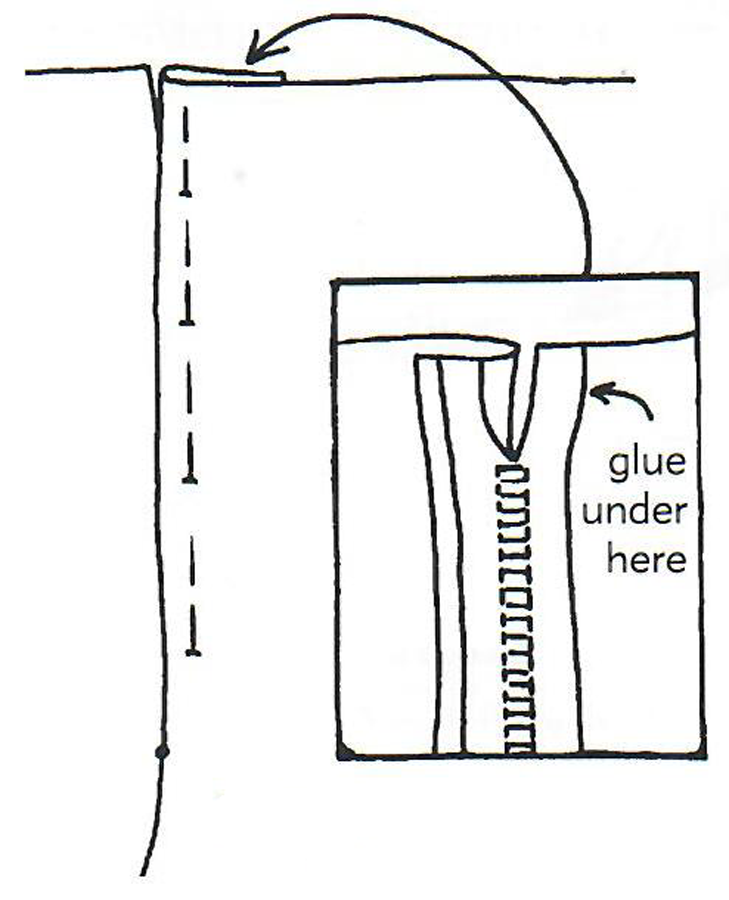
Overflap

7. Fold other flap under from center clip to bottom of opening. (Figure 3)

8. Match clips and pin folded edges flat to front.

9. Use a glue stick to apply glue stick to the loose top of the zipper and apply the top to the overflap, making the top parallel to the zipper.

Figure 3

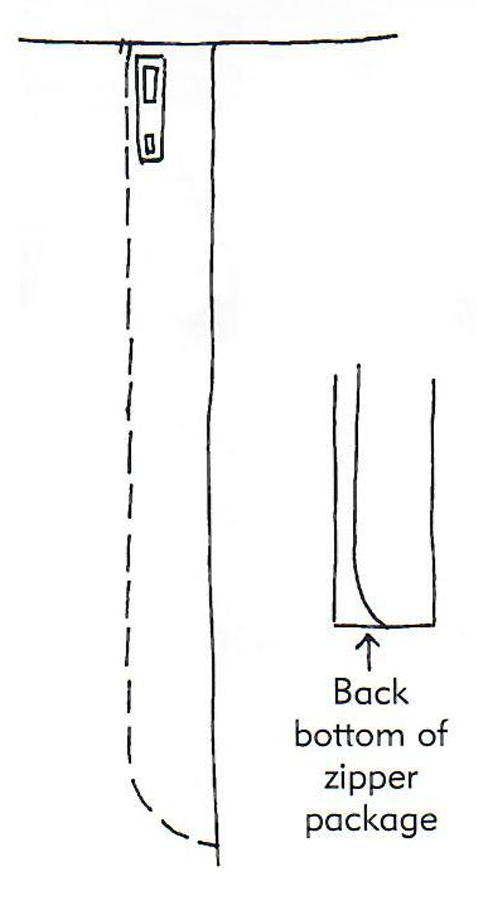
10. Lay garment flat, feel for edge of zipper. Using the zipper package as a straight edge, mark stitching line, stopping 3″ from the end with removable pen, pencil, or chalk (Figure 4).

11. Using the bottom curve of the zipper package as a template, finish drawing the stitching line, ending at the bottom of the opening.

12. Beginning at the top, sew over the drawn line for 2″ and stop.

Figure 4

Fabric Manipulation for Zippers

Practice manipulating the fabric while sewing to prevent wrinkles on the overlap section as shown in Figure 5.

As the foot slides on the fabric, it presses on one side of the needle only. This exerts an uneven push and shoves fabric on the foot side faster than the other, thus creating the diagonal wrinkles that often happen along the overlap piece.

Preventing this problem requires handling. Note that this hold will seem awkward at first, but with a little practice you will love the results.

  • After the zipper is in place, begin sewing from the top down and continue about 2″. Stop sewing and with your hands flat on the surface of the fabric, push the side that the foot rests on toward the back about 1″.
  • Wrinkles will form on the surface, but will equalize with the force of the foot.
  • Sew forward about 3″ allowing your hands to move evenly with the fabric.
  • Stop, readjust your hands in the same way for the next section, and repeat this process until you reach the end of the zipper.
  • Turn at an angle and sew to the seam.
  • Reduce the stitch length to 0 and make 3 or 4 stitches.
  • After removing from the machine, pull both threads to the back, then pull apart to cinch knot.

Trousers


~Gale Grigg Hazen, edited from an article that appeared in a previous issue of Notions

This field is for validation purposes and should be left unchanged.
Did you enjoy this article?
Are you an ASG member?

August 11, 2023

Basting Methods for Plaids

Plaid vestWhen selecting a basting method for plaids, consider the complexity of the plaid, the texture of the fabric, and the garment design, as well as your sewing skills. Here are a few basting methods that can help you achieve precise plaid matching:

First Step

For best results, baste with the right sides up. It’s also helpful to stay stitch the edges of your fabric pieces. This helps maintain the shape of your pieces while you work on matching the plaids.

Glue Sticks and Tapes

Glue sticks and water-soluble double-stick tape are easy basting techniques that could work well on some fabrics where, for example, needle punctures would not be appropriate. Position the glue or tape just inside the seam line on the right side of the unpressed section. Align the plaid bars and press the layers together. Let the glue dry before stitching.

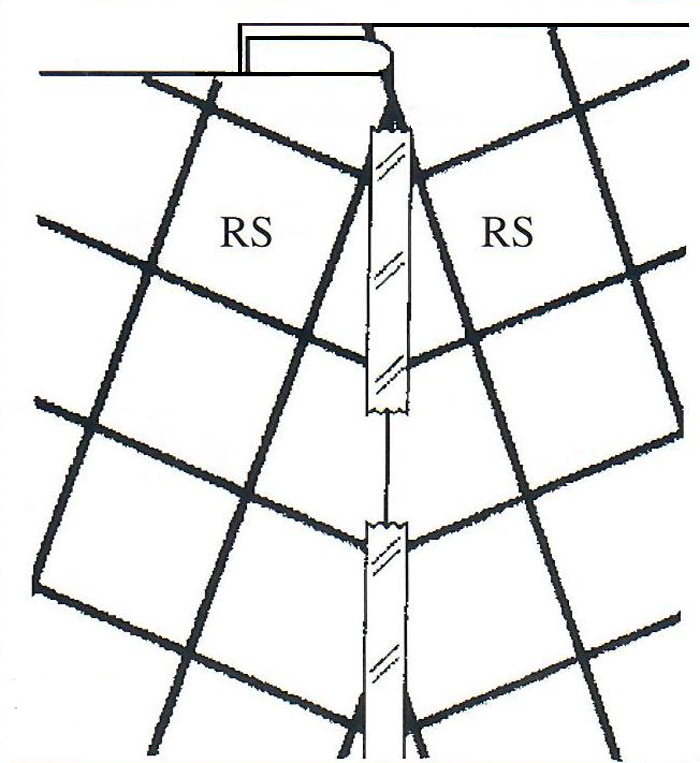
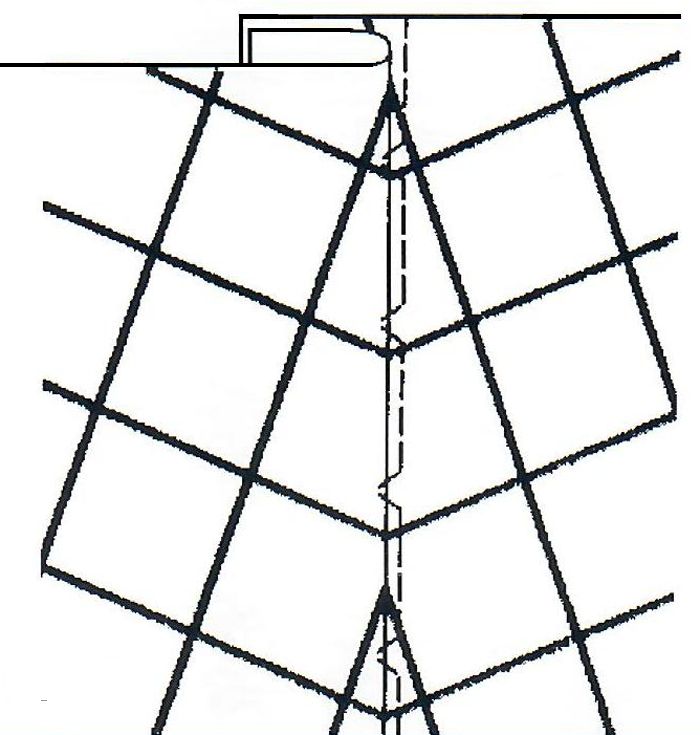
Another easy basting method is to use drafting tape. Match the color bars and tape the sections together. Then, right sides together, stitch from the wrong side on the seam line. (Figure 1).

Basting plaids
Figure 1

Tip: Before using drafting tape, test to be sure the tape won’t mar the fabric or pull off the nap.

Hand Basting

For difficult seams, hand-baste. With right sides up, align and pin the sections together. Then use a short slip stitch or fell stitch to baste. Use a contrasting thread color that’s easily visible against the plaid pattern.

  • The fell stitch tends to hold the fabric a little more securely; however, on the wrong side, the stitches are slanted and if you aren’t using a water-soluble thread in the bobbin, they are more difficult to remove.
  • If using the slip stitch, consider adding a safety by turning the garment over and putting in a second row of basting from the wrong side so that there are no spaces in between the stitches.

Machine Basting

Machine basting works well on fabric that won’t be damaged by extra needle holes. With right sides up, align the color bars and pin the sections together. Set the machine for a blind hemming stitch (Width: 2″, Length: 2.5″) and a loose tension, then stitch next to the fold line. Only the zig-zag stitch will catch the fold line (Figure 2). Consider using water-soluble basting thread in the bobbin, but remember that this thread could dissolve in hot, moist hands or when wound on to a bobbin at high speed. In this method, it could help to use a contrasting thread color that’s easily visible against the plaid pattern.

Matching plaids
Figure 2

Pin Basting

Pin the plaid pattern pieces together along the plaid lines, making sure the lines match up perfectly. Place the pins parallel to the plaid lines and about an inch apart, then place the pins in both vertically and horizontally to keep the pattern pieces aligned.

Clipping and Notching

When you have intersecting seams, clipping into the seam allowances or notching them can help align the plaid lines more accurately. Make small diagonal snips (clips) or triangular notches along the seam allowances, being careful not to cut into the stitching line.

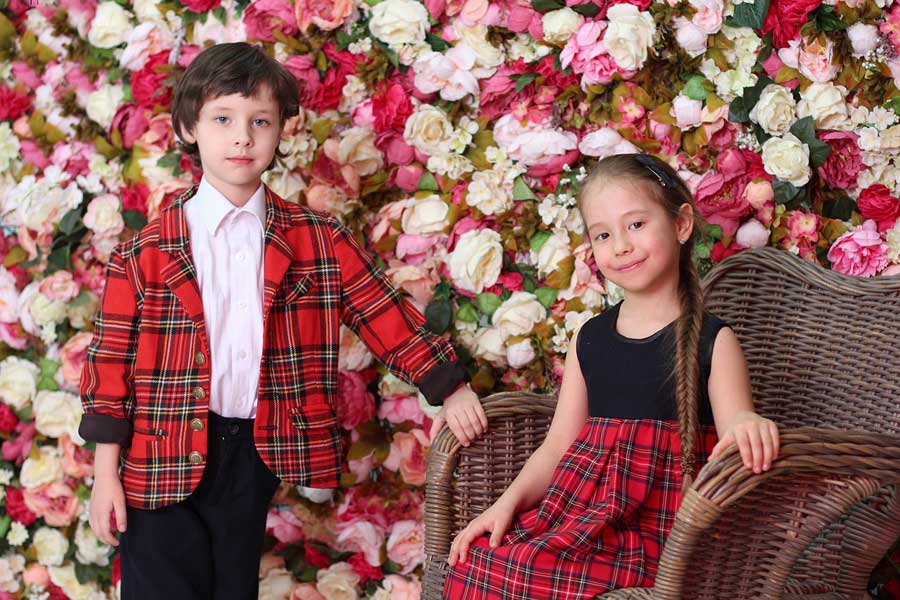
Plaid jacket and dress on children


~Partial contribution from an ASG article by Claire Shaeffer

This field is for validation purposes and should be left unchanged.
Did you enjoy this article?
Are you an ASG member?

  • « Previous Page
  • 1
  • 2
  • 3
  • 4
  • …
  • 11
  • Next Page »

Become a Member

Join the only national organization dedicated to Advancing Sewing as an Art and Life Skill.

Join Now button

Blog Article Categories

  • ASG Conference
  • Chapter Stories
  • Embroidery
  • Fitting
  • Learn to Sew
  • National Sewing Month
  • Products, Books, & Patterns
  • Projects
  • Quilting
  • Sewing
  • Sewing Techniques
  • Sewing Tips
  • Sewing Tours
  • Videos
  • Disclaimer
  • Privacy Policy

American Sewing Guild
National Headquarters
9660 Hillcroft, Suite 230
Houston TX 77096
713-729-3000 | 713-721-9230 Fax
www.ASG.org

ASG wordcloud - education, conference, discounts, videos, special offers, tours and more

Copyright © 1998–2026 · American Sewing Guild · All Rights Reserved