Are you tired of the same look for the front openings of your tops or jackets? These creative ideas to redesign those openings with different closures will elevate the look of your garments from basic to fashion-forward and are adaptable to a simple blouse, a casual top, or a jacket.
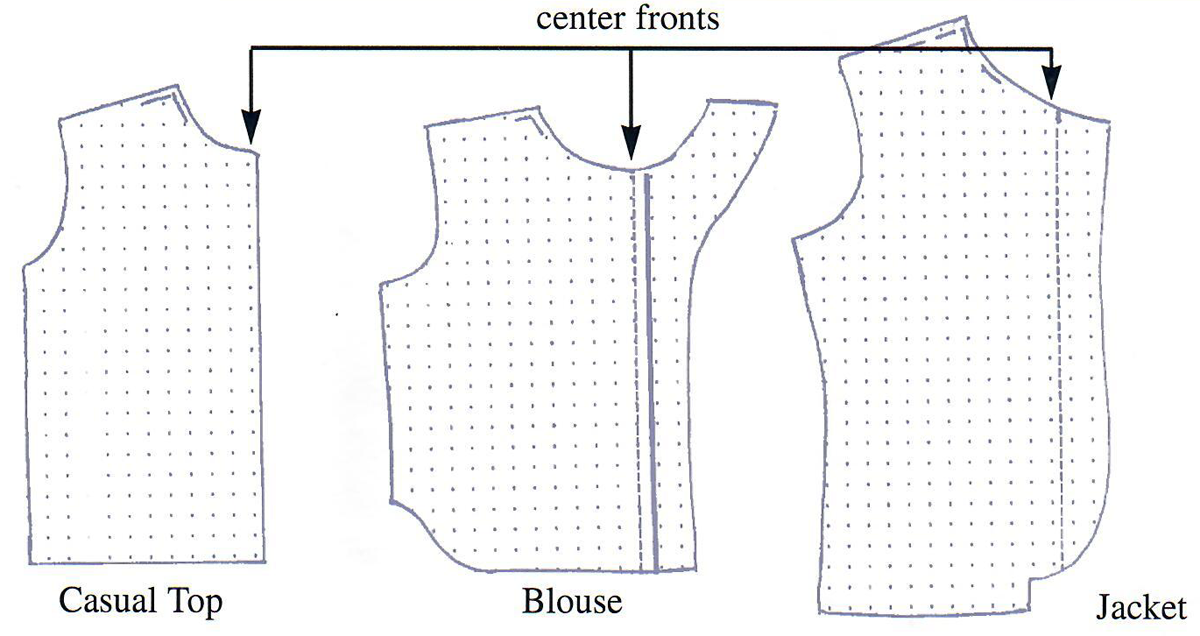
When making these adjustments, the most important marking is the center front. This is where you will make the changes to the pattern that will allow you to create many different styles. By focusing on the center front, the garment will always retain the same fit and when closed and buttoned, the center fronts will always meet. Select any one of these basic top patterns and create the design you choose.
The full article is in the Members area of the website. CLICK HERE to read the full article. Not a member? Join online!