


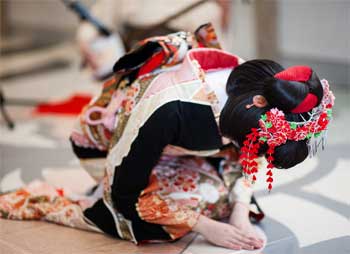
 One of my college classmates was a very recent immigrant from Korea and she once asked me to help her wash her “dance kimono.” Naturally I was eager as it is “common” knowledge that silks should never be washed. What I learned continues to influence my sewing today.
Her kimono was pieced of over 50 strips (up to 3″ in width) of silks, plus bindings (such as strips edging the collar) in different colors. Because the dyes were not colorfast, she had to take the entire kimono apart and wash every color separately, then press and sew back together with long stitches.
Lesson 1
Wash all fabrics separately until you determine whether the dyes are colorfast (like sweatshirts!).
Lesson 2
Don’t complain if a Western-style garment needs to be pressed after washing ─ doing laundry really could be worse.
The collar area was doubled fabric; it did not have a separate interfacing material and the excess was not secured so kimono collar would wrinkle and bunch up if washed.
Lesson 3
Baste or quilt any intact original kimono collar to wash. If making western style garments, make sure interfacings are secured. If deconstructing kimono to re-purpose fabrics, the collar probably has double the visible fabric.
Obi (belt) is generally the most elaborate part of the costume. It is also very stiff, the purpose is partly like a corset. For a light-weight silk, the stiffness is provided by covering a very dense canvas-like fabric, which is always blocked to retain the original size – unless you don’t plan to reassemble the obi.
Lesson 4
Unseen construction materials affect whether silk (or any) garments can be washed, so pre-shrink.
Some silks reveal textures that may not be apparent until wet. These fabrics may have quite subtle matte/shiny differences due to threads that are spun differently and thus shrink at different rates. All of these silks are intended to be blocked when washed.
Lesson 5
If you like texture, enjoy, even if you now have less fabric! Better to adjust plans than to finish and then shrink.
The following are things I’ve learned from deconstructing and re-purposing obi and kimono.
Both obi and kimono fabrics are woven in widths of 10-14 inches, and the garments utilize that to the fullest. The rounded corners of sleeves are left square and not trimmed, with the excess fabrics bunched up in the curved area.
If smaller sizes of kimono are made, seams are made extra wide but not cut off. If extra width is needed an entire extra panel of fabric may be sewn into the side and is not cut or could be half the width, with very wide seam allowances. Extra length will probably be turned up on the inside to replace some of the lining fabric. All of this is to take advantage of taking apart garments to wash, as when re-assembled fabrics can be turned to even out wear or to change the fit/size. No worries if you gain or lose a little weight; alter each time you wash!
Most of the rolls of fabric were made specifically for either obi or kimono, with pre-planned cutting marks. Bolts of fabric are a new concept. This means that the fancy portions of obi could be in the only area(s) that show, while plain fabric is woven for the rest. Do not assume the entire length is what is seen on the outside.
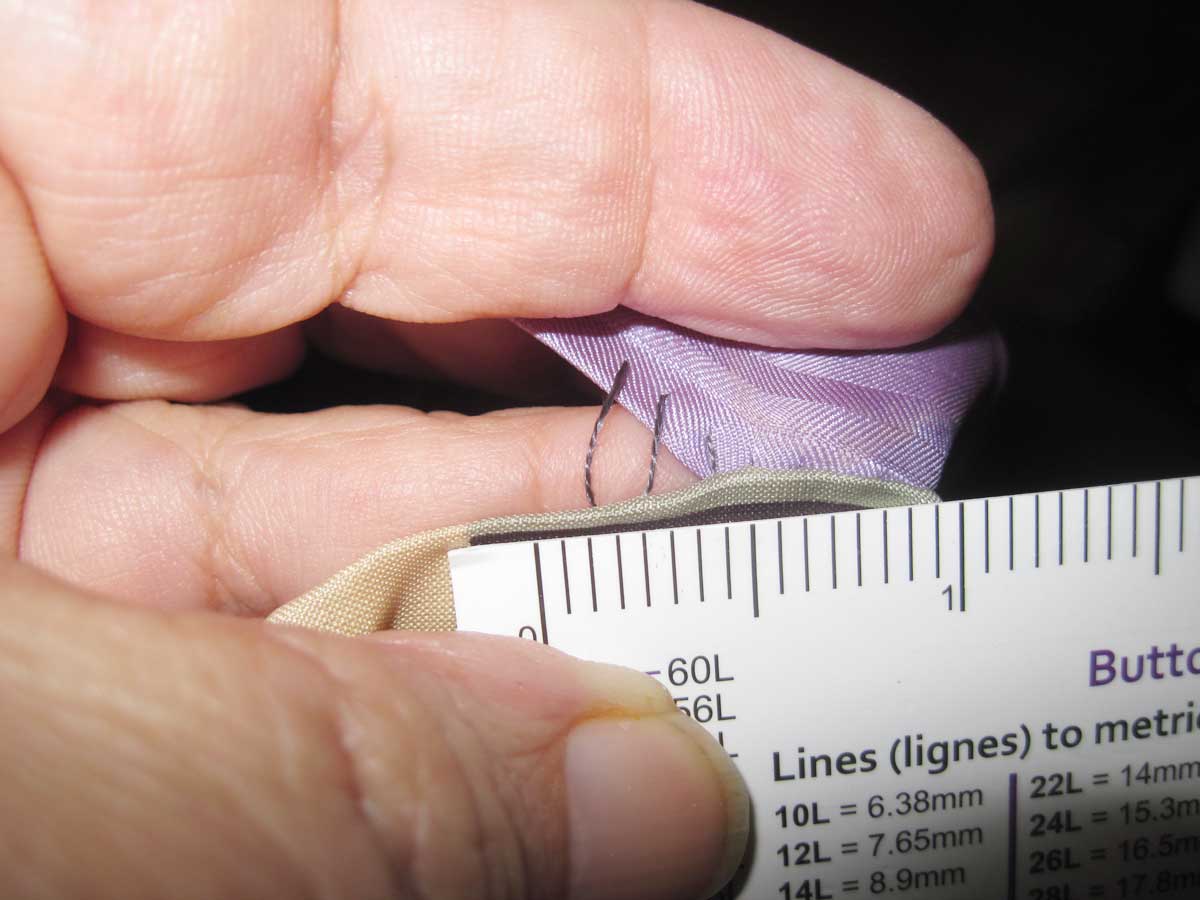
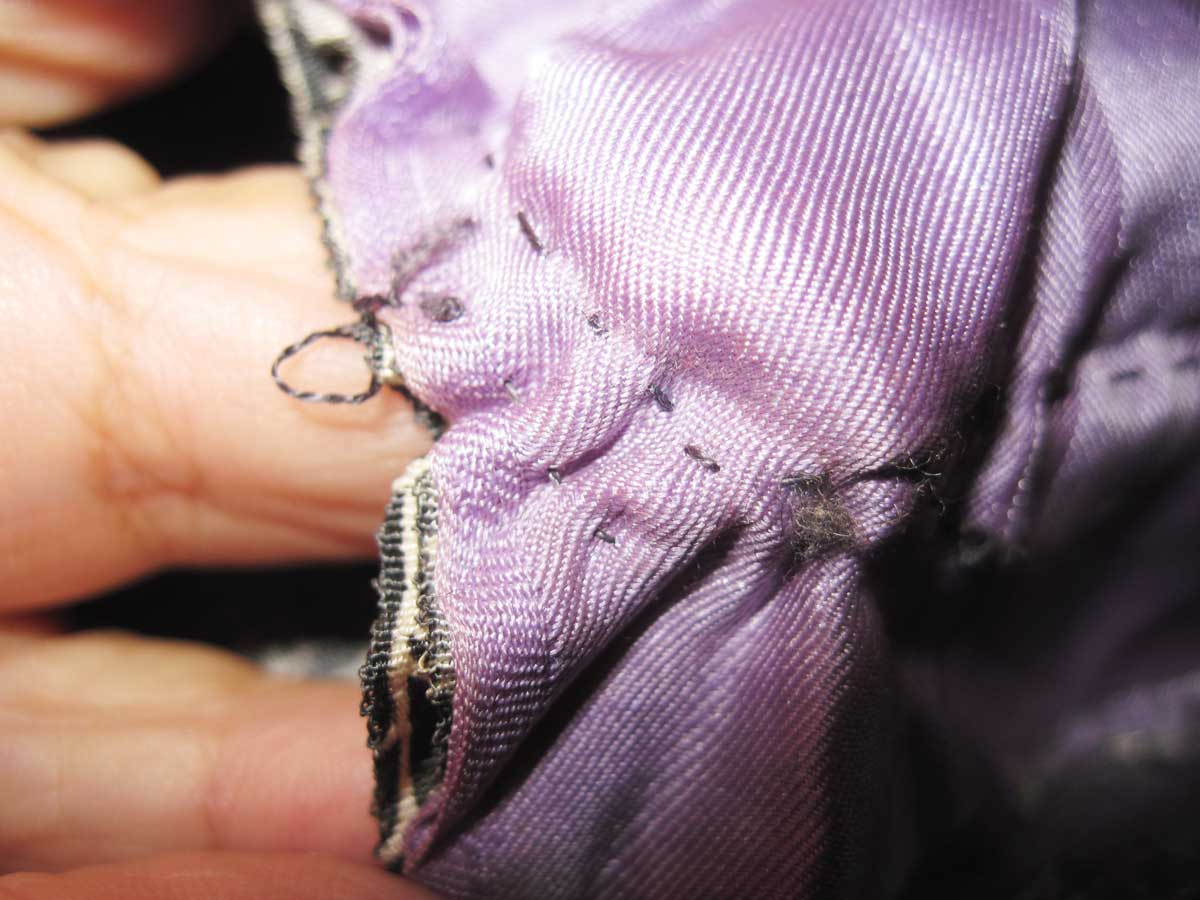
Some fabrics such as brocades and jacquards may fall apart or unravel if cut. This is not a problem for kimono or obi as the fabrics are nearly always left with selvages intact, with the exception of obviously pieced dance and fancy garments.
INSPIRED? Antique Pattern Library has antique kimono fabric designs and stencils in the “J” and “K” sections.
Lesson 6
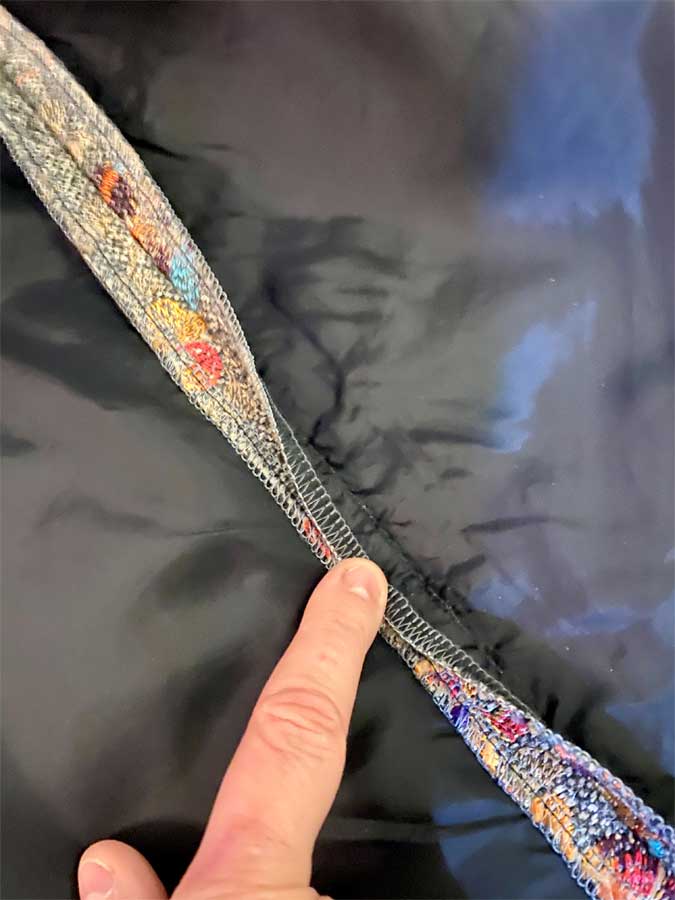
Test a small cut before re-purposing kimono or obi; particularly be careful if threads are carried on the back. Also examine carefully to locate any possible embroidery and avoid cutting through that area. Embroidery threads may not be colorfast so know it could possibly bleed when washed, particularly true on ornate garments.
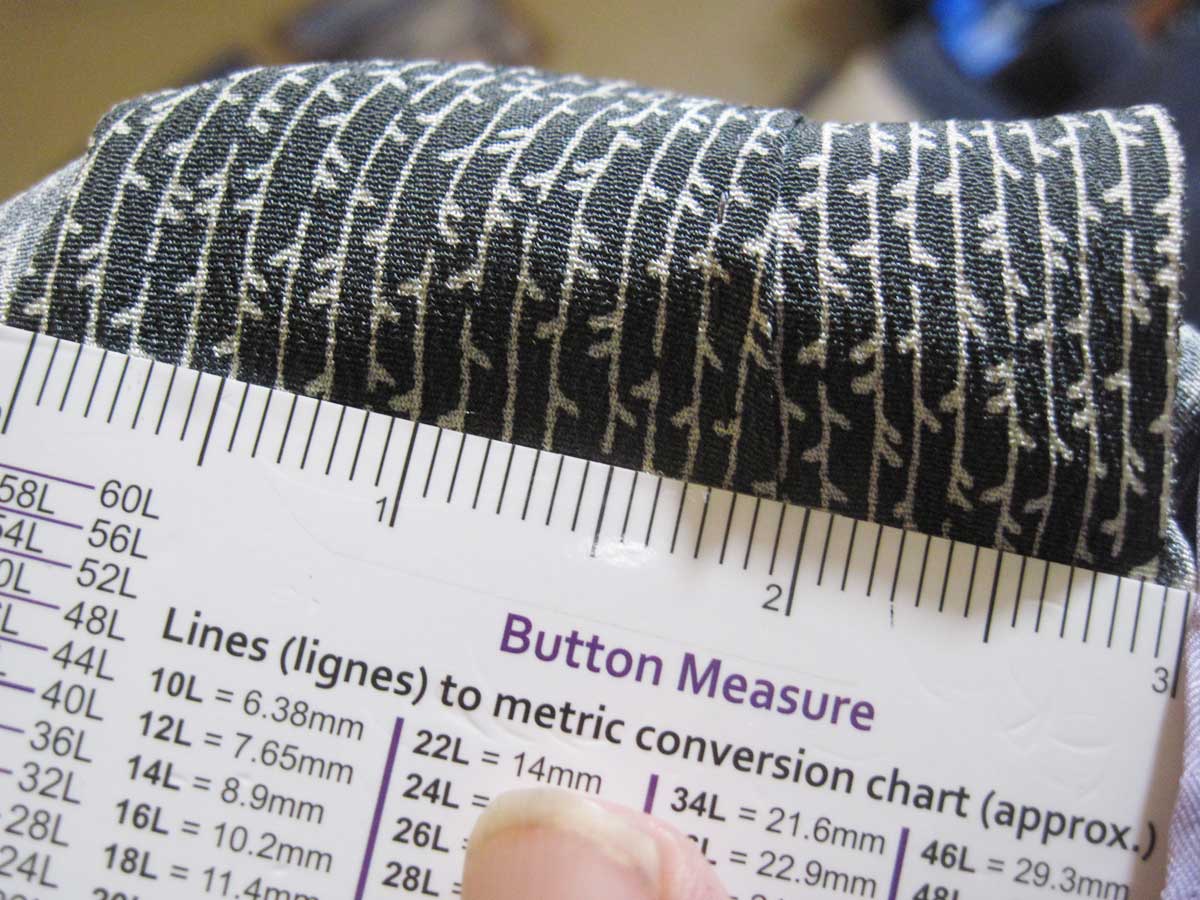
Examine carefully if there are any metallics. If painted/stenciled it could be metallic leaf that is not washable as it will flake off. If the metallic is woven in, test first but the threads are probably washable if of the same weight as the other threads. If the metallic threads are heavier or if embroidered, it is probably NOT washable due to the construction method of heavier metallic threads.
There are several ways to use for garments: (1) kimono are wrapped and tied, so many people can wear as open jackets/vests without altering; (2) side inserts can be added to keep the front area intact: use the bottom of long kimono, sleeves, linings, parts from a second kimono, other fabrics; (3) I’ve taken kimono apart completely and re-sewed into large enough blocks to cut Western-style blouses and jackets.
~Hope Wright, ASG Member, Springfield Lincolnland Chapter

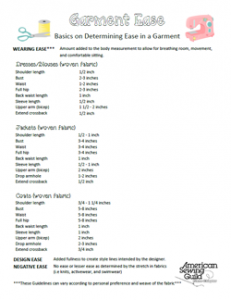
 As already stated, negative ease simply means that your finished garment measurements will be the same or smaller than your actual body measurements. When sewing with knits or stretch woven fabrics, the same accommodation for wearing ease is not required since the fabric will stretch as the body moves. Just because your finished garment is smaller than your actual body measurement doesn’t mean you won’t be able to get it over your head. The more negative ease you incorporate just means you will get a more fitted look in the final garment. In most cases, you will probably target no more than 1”-3” negative ease in your design. More than that and you may wander into that “Incredible Hulk” look that has people wondering if you will burst through the seams at any moment.