American Sewing Guild (ASG)

Visit our blog Visit the ASG Facebook page Visit ASG on Pinterest Visit ASG's YouTube channel Visit ASG on Instagram
  • Home
  • Join ASG
    • Join Online
    • Chapter Locations
    • Member Benefits
    • Member Brochure
    • Join by Mail
  • Education & Classes
  • Resources
    • Contests & Awards
    • Giving Back
    • Hall of Fame
    • Links
    • Travel and Tours
    • Measurement Chart
  • Shop
    • ASG Store
    • Chapter Products
    • Video Resources
  • Blog
  • About
    • About Us
    • Donate to ASG
    • ASG Sensitivity Statement
    • FAQ’s
    • Start a Chapter
  • Contact
  • Member Login
    • Login First!
    • Members Only
    • Leadership Only
    • Website FAQ’s
    • Logout
  •  

September 23, 2022

Decorative Stitches: Accenting a Print

Who doesn’t love a great print fabric? But, sometimes, it might “just need a little something” to make it pop. Enter the myriad decorative stitches found in your sewing machine…those that often sit unused and those you’ve always wanted to use but didn’t quite know where.

Accenting a print is easy! Just look at the lines and pick a place to embellish.

Preparation

Most cotton prints will require some kind of stabilization to avoid puckering, especially if you plan to use a dense satin-stitch type design. The stabilizer can be as simple as a fusible interfacing added to the underside, or an “official” stabilizer you may have in your machine embroidery supplies. Some sewers use a liquid stabilizer to saturate the fabric and when it’s dried and pressed, the fabric becomes paper-like to better support the stitches. After stitching, it’s simply washed away.

The choice of stabilizer is also influenced by the fabric’s final use. If it’s part of a tote or bag, or even a quilt, batting or fusible fleece on the underside may suffice to stabilize the fabric. But, if it’s a pocket, cuff or yoke of a garment, batting isn’t a likely option, so select something else.

If you do a lot of decorative stitching, you likely have a stash of various types of stabilizers to experiment with.

Planning

Whenever possible, it’s best to end any accent stitching in seam allowances. This eliminates the need to tie off thread ends, and crossing the stitching with another seaming ensures no pull-out issues.

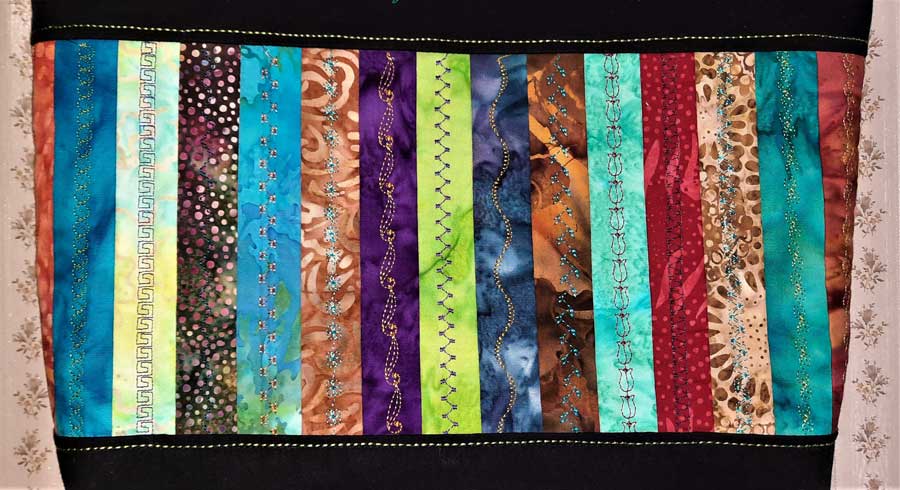
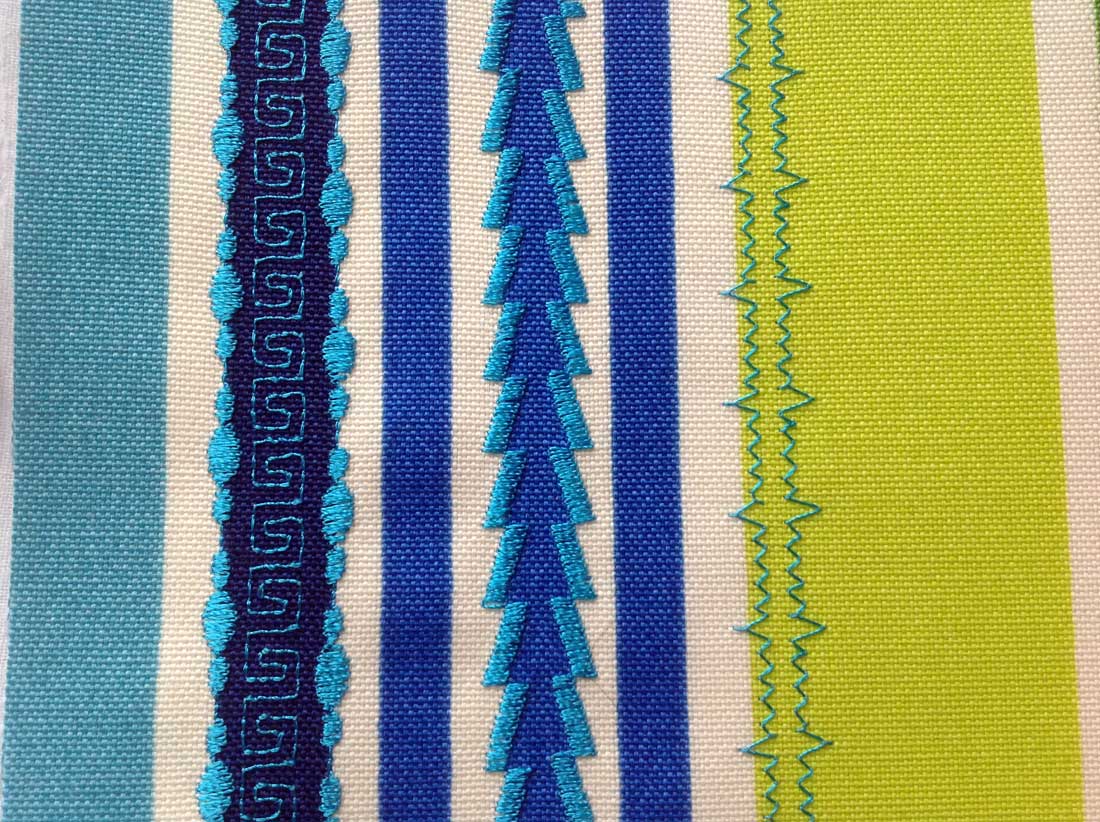
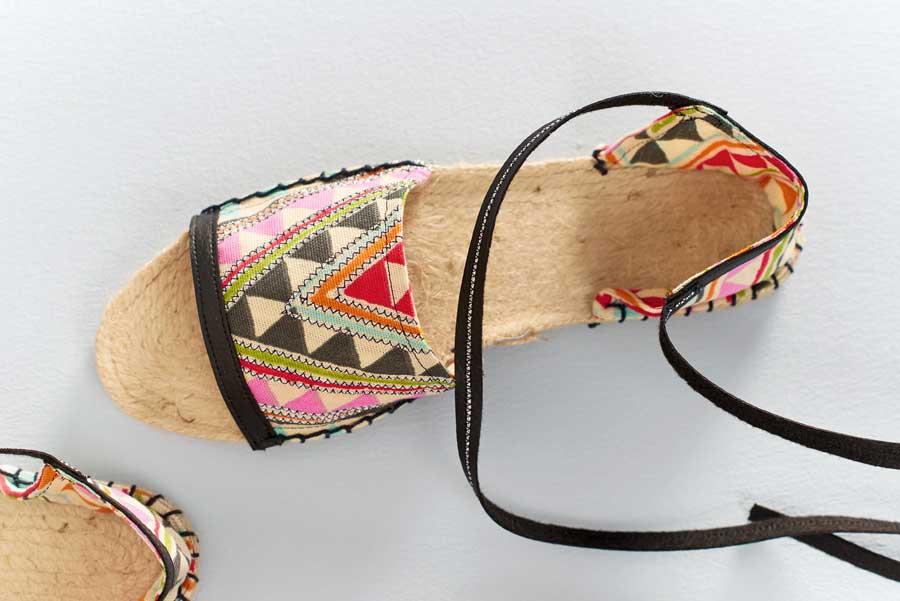
Stripes are one of the easiest prints to accent, as there are already lines and spaces to follow. Simply pick a place on your presser foot to follow the printed stripe with the added stitching.

Decorative stitch - stripes

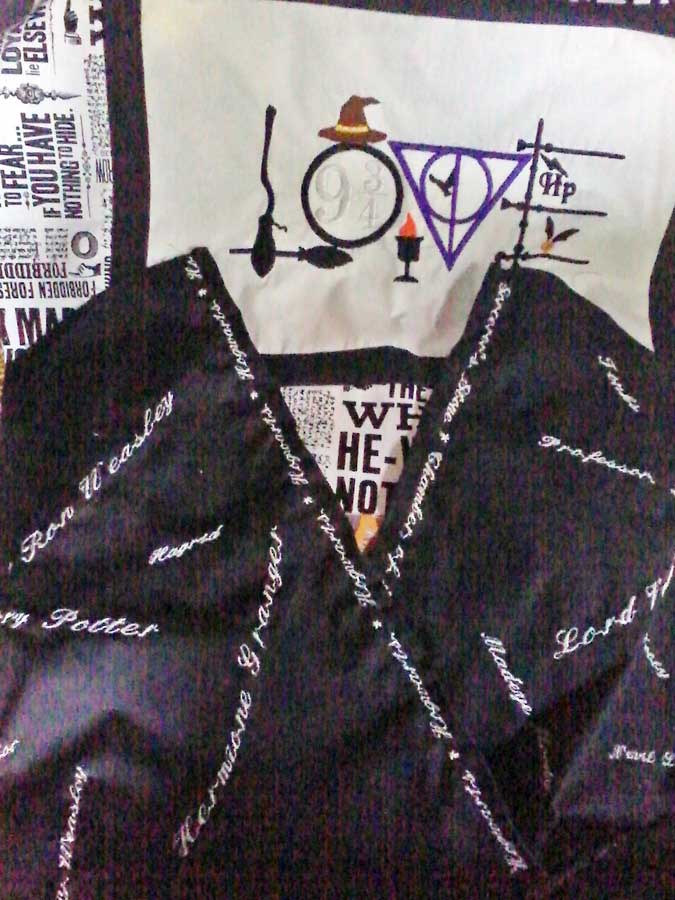
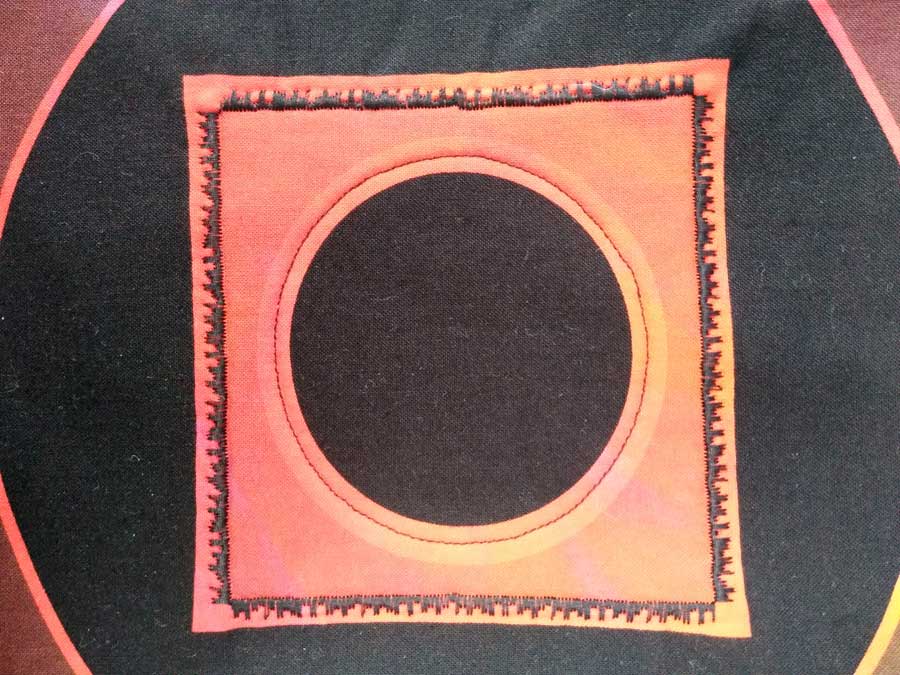
Does your fabric have circles or squares on it? If so, think about what will happen if you outline the design area and the stitches come together to complete the shape… it’s almost impossible to plan an exact match, and you may have a “blip” in the design area. Are you OK with that? Can you cover it with another type of embellishment, like a tassel, button, or charm, to hide the mismatch? If that’s not in your plan, select a stitch without distinct motifs—one that looks continuous—so there’s no visible mismatch at the joining.

If your print motifs have corners, how will you handle those? Again, it’s a good idea to choose embellishing stitches that don’t have distinct motifs and look continuous, then stop the needle on the inside of the stitch, turn and continue on, leaving an open corner.

If your machine has programmable features, it’s possible to figure out exact lengths of repeats to outline a print motif with whole stitched motifs, or you can combine stitches to have, for example, a line of straight stitches with five flower repeats and another line of straight stitches, making it a no-brainer for corner turning with aplomb.

At the end of the outline stitching, do not overlap the motifs but instead stop stitching exactly at the beginning point. Pull threads to the underside and tie off to secure, or use a lock-stitch feature on your machine to sew a few stitches in place to anchor the thread ends.

It’s a good idea to use a bobbin thread that matches the top thread to avoid any visible tension issues and, of course, you should test-stitch on the same fabric/stabilizer you plan to embellish before actually committing to the project.

Accent Options

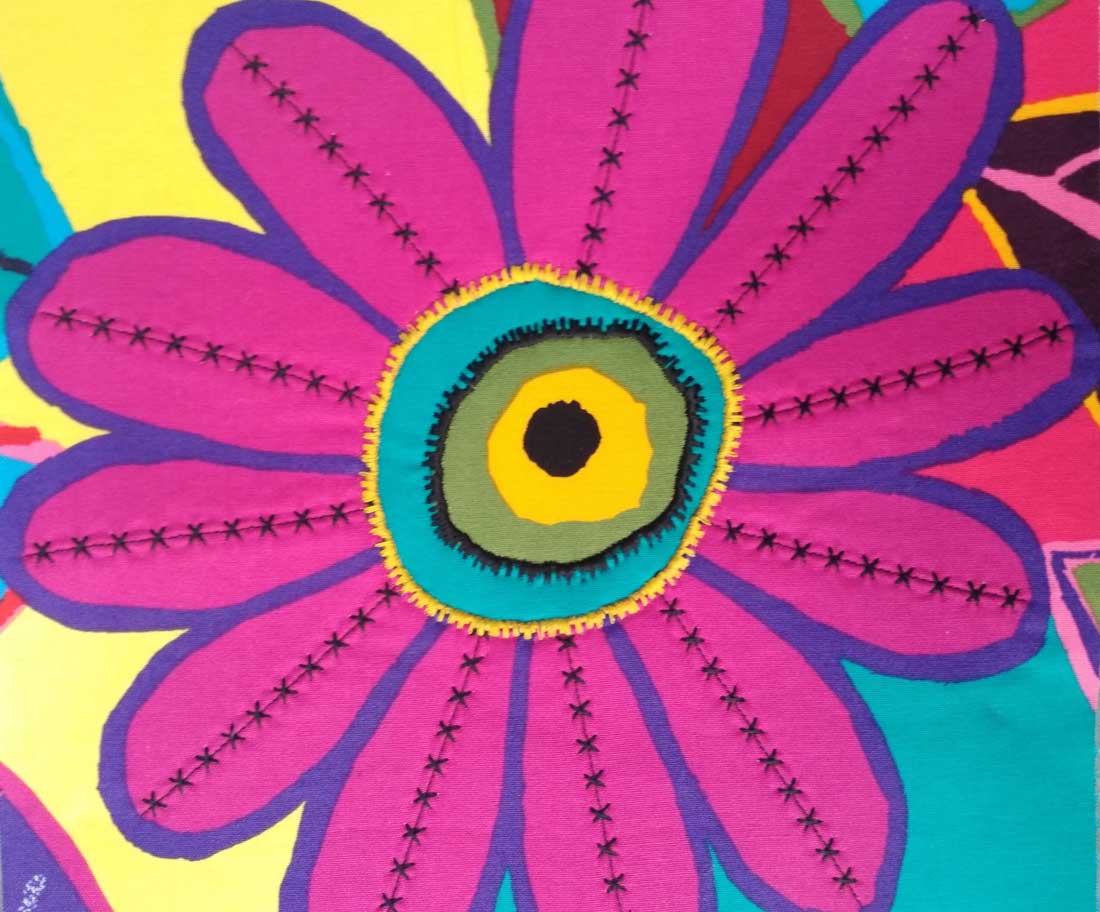
For large flower petals, like our funky daisy, consider stitching down the petal centers for accents, then around center printed motif(s) for additional color.

Decorative stitch application

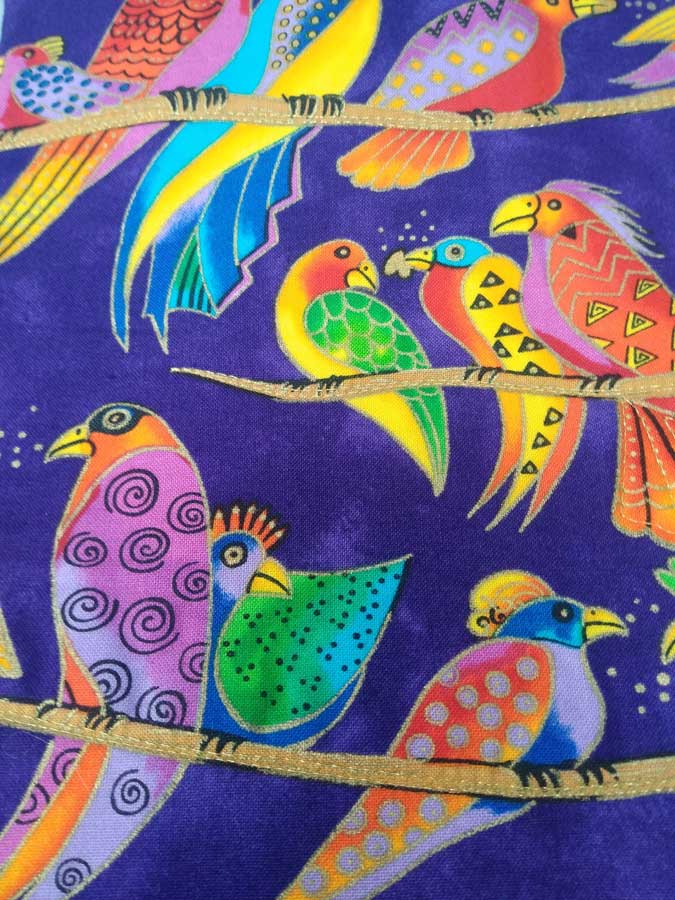
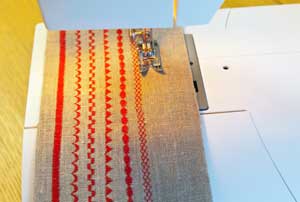
Some prints look great with simply a straight-stitch accenting. On the parrot fabric, a straight stitch with gold metallic thread accents their perches and adds just a small touch of bling to the fabric. Be sure to use a metallic needle with a larger eye to avoid shredding delicate metallic threads. Straight stitch accents can be done using the presser foot, or with free-motion techniques.

Decorative stitching on parrot-themed fabric

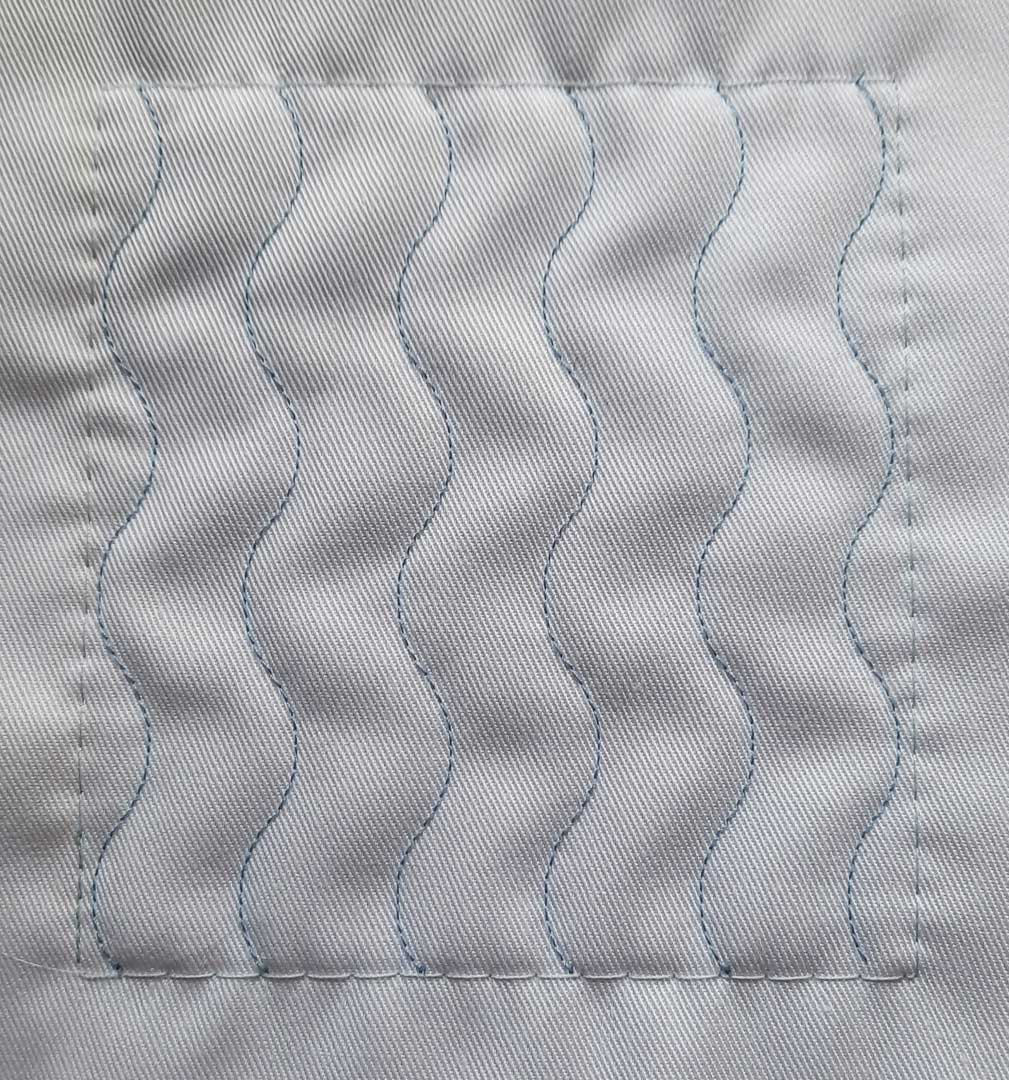
Finally, a simple zigzag stitch can be used to accent any geometric print.
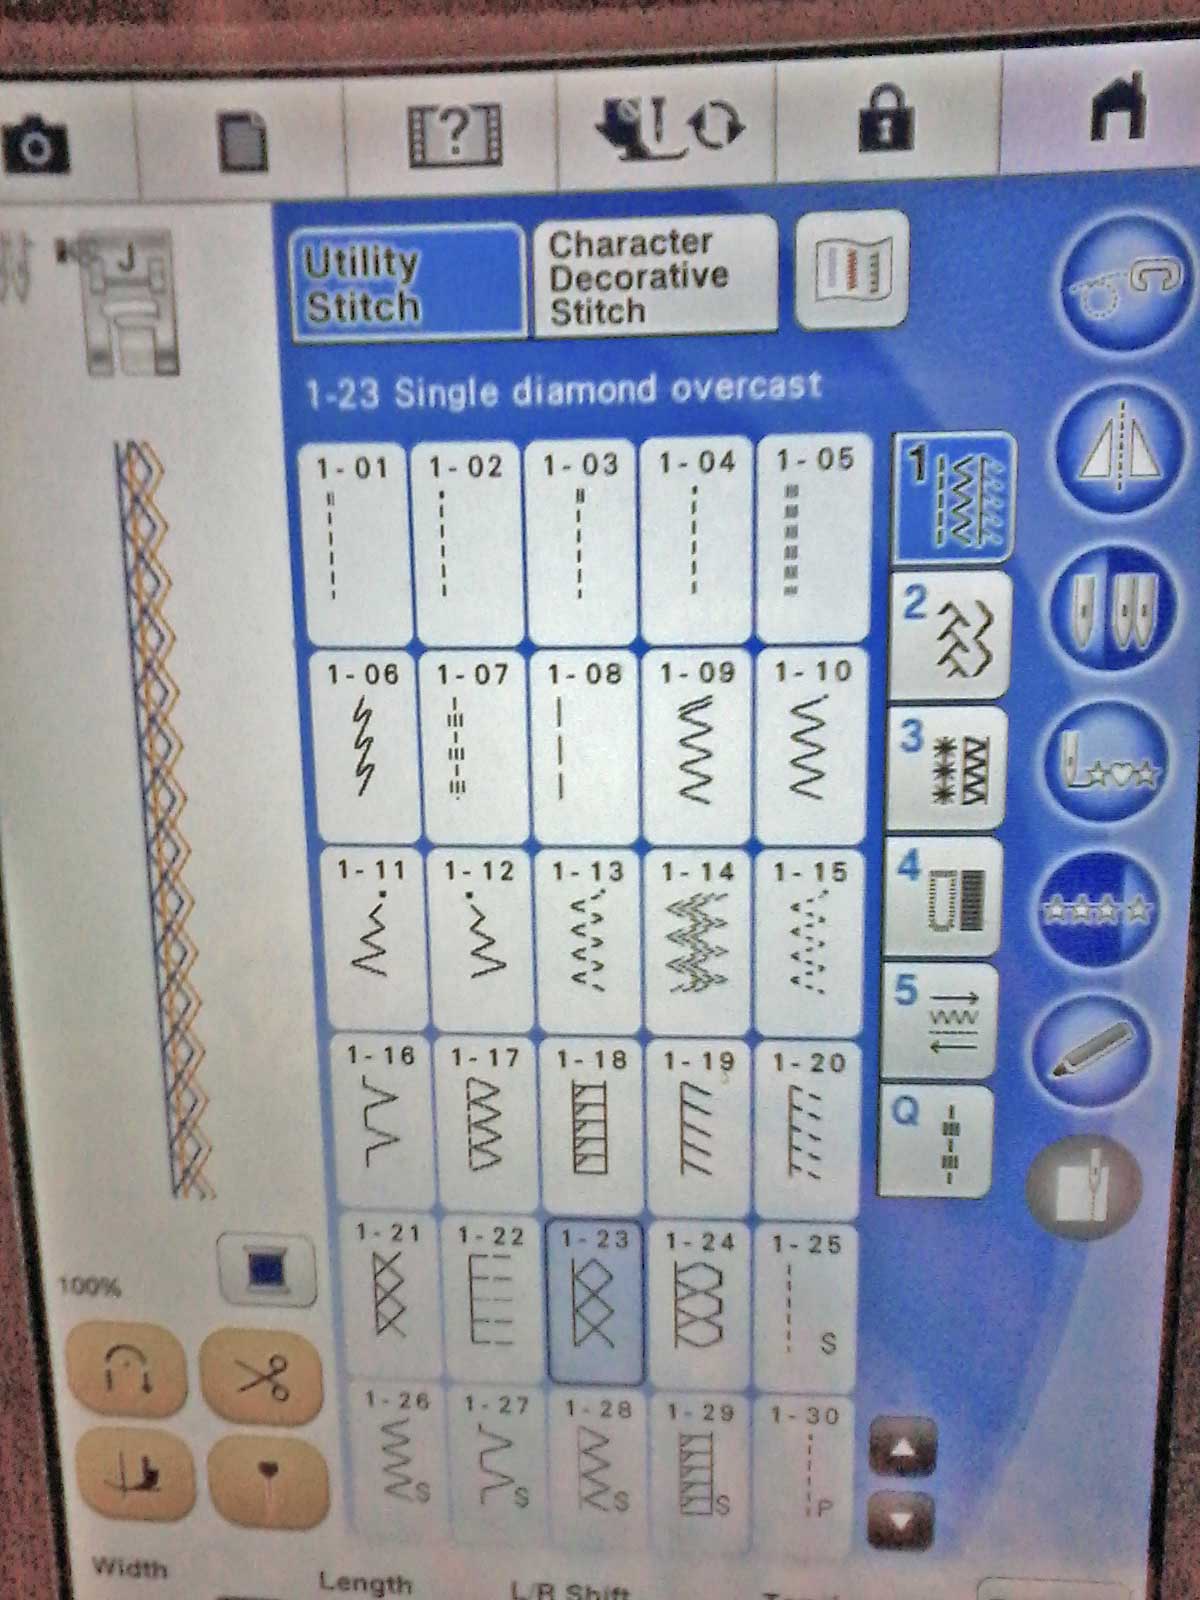
Photo courtesy of Bernina

Stitch Options

More articles on using decorative stitches:

  • Sewing Machine: Using the Built-In Specialty Stitches
  • Decorative Stitches, Part 2: In the Hoop
  • The Triple Straight Stitch

~Linda Griepentrog Linda is the owner of G Wiz Creative Services and she does writing, editing and designing for companies in the sewing, crafting and quilting industries. In addition, she escorts fabric shopping tours to Hong Kong. She lives at the Oregon Coast with her husband Keith, and three dogs, Yohnuh, Abby, and Lizzie. Contact her at .

Did you enjoy this article?
Are you an ASG member?
This field is for validation purposes and should be left unchanged.

Tagged With: decorative stitches, embellishment, fabric, stitching

October 22, 2021

Decorative Stitches, Part 2: In the Hoop

Decorative stitches on a sewing machine
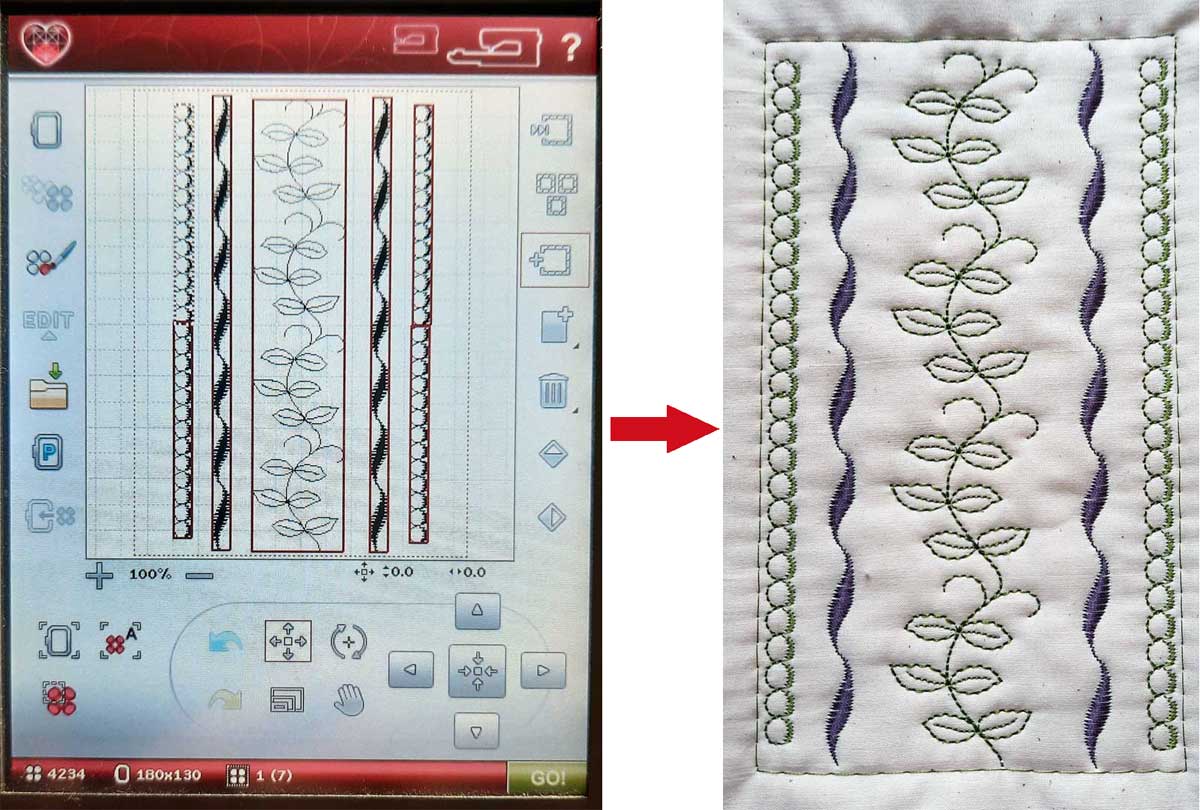
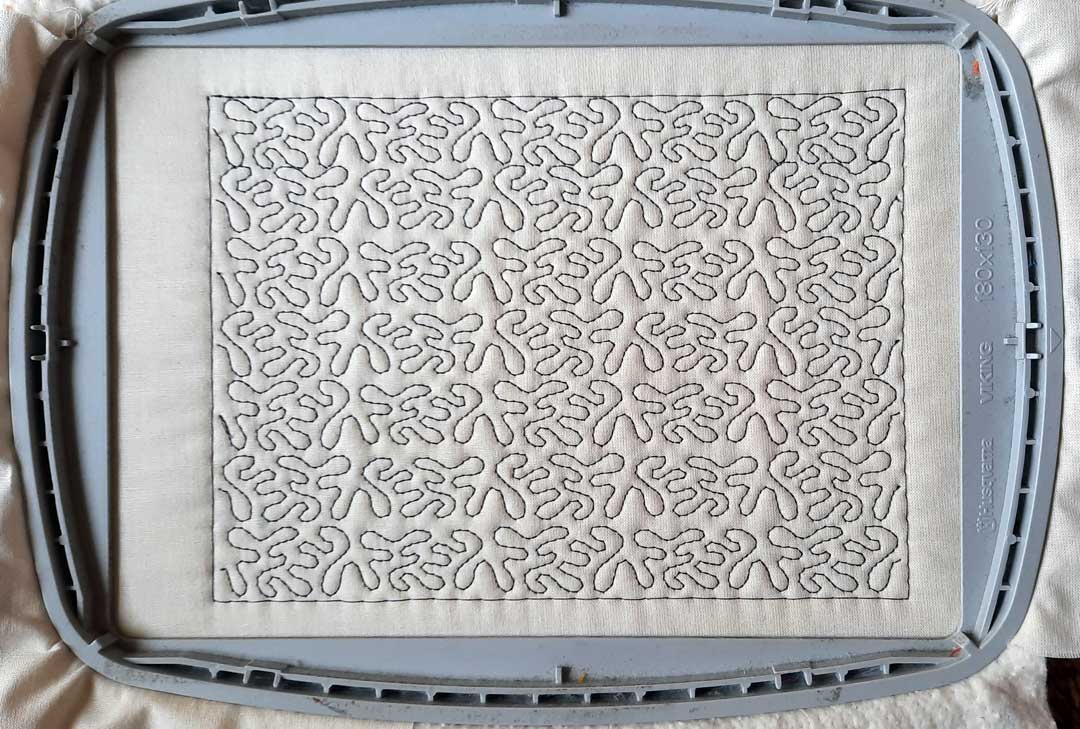
Have you ever tried to use the decorative stitches on your sewing machine and some of them bunched up or didn’t stitch evenly, or you ended up with crooked rows? The really wide stitches can be especially tricky to keep centered where you want them. The best option for a quality result is to bring them into the hoop. The result of using embroidery mode will be perfectly balanced columns of stitches, and you’ll be even happier with the ease of stitching and the precision-aligned results.

The first thing to do is check your manual to see if your machine can load sewing stitches into the hoop in embroidery edit mode. My Husqvarna-Viking Designer Ruby calls it “loading a stitch program.” On the Ruby, the stitches come into the hoop in vertical alignment but can be rotated to the horizontal position after they’re brought into the hoop. The Ruby also allows you to program how many times to repeat the stitch, as well as providing an opportunity to choose different stitches to use in a particular column of stitches. Alternatively, you can use just one of the fancy stitches by itself and then duplicate it and arrange them in the hoop. (Note that your machine may or may not have these options.)

Getting Started

Consider what hoop size you want to use and make note of the hoop’s stitch area measurement. For example, the Ruby’s 130 x 180 hoop would use a design that is just slightly smaller in size. It could fit a series of stitches that measured up to 178 mm. The Ruby also reports the size of one “stitch unit,” as well as the combined size of the column of stitches being created. In addition, you can edit the stitch length and width of an individual unit of stitches to make them fit, if needed, as well as tell it how many repeating units are desired.

Notes:

  • The machine automatically starts and ends with “tie off” stitches for the column of stitches. Check to see if you need to add that on your machine.
  • It is very helpful if you can zoom in on your machine’s screen when aligning multiple columns of stitches.

From the machine’s screen… to stitchout

Decorative Stitches

Some stitch units are merely running stitches and some may be triple stitch, or have some satin stitches, meaning some are more dense than others. For some of the samples that I created, I did not use stabilizer in the hoop, but just had a quilt sandwich of two fabrics with batting in the middle. If you are embroidering on one layer of fabric, you will need to use stabilizer in your hoop. Starching your fabric helps too.

  • It is highly recommended to stitch a sample before using on your final fabric.
  • Use a serpentine stitch to create wavy lines — arrange them in vertical or horizontal or diagonal rows to fill your hoop space.Sample serpentine stitches
  • Write words with built-in alphabet letters to use as background stitching.
  • If your machine has stitches that look like stippling, create rows of stippling using thread that matches your fabric and then add another design on top of that. (darker color thread was used in this sample so that it shows up)

Stippling effect

If you are not sure if your embroidery machine can do this, do a Google search on “using decorative stitches in the embroidery hoop,” and you should find links on how to do it for a variety of machine brands. You can also do a Google search using the term “stitch stacking.” Your sewing machine dealer may also be able to determine if your particular model has the ability to do this technique.

Check to see if your machine can create a hand look stitch (see image at right). The stitch symbol may look something like this. When stitched using the correct color threads, it looks like a row of small stitches sewn by hand. Thread the bobbin in a contrasting color so that the threads will show on the top of your fabric. Thread the needle with a thread color that matches the fabric or with clear/invisible thread. Select the stitch and try sewing a sample first. You may have to increase the needle tension so that the bobbin thread shows more. The stitch length may also need to be adjusted to get the effect you are looking for.  They are great for creating lines of stitches and may be brought into your hoop to give the look of quilting by hand.

For more information on using decorative stitches in the embroidery mode on machines, check out the following sources:

  • Quilting Using Decorative Stitches with Husqvarna-Viking Designer Epic
  • Decorative Stitches with Babylock Solaris
  • Brother Dream Machine – Stacking Decorative Stitches (video)


~Beverly Betz

Did you enjoy this article?
Are you an ASG member?
This field is for validation purposes and should be left unchanged.

Tagged With: decorative stitches, embroidery hoop

September 10, 2021

Sewing Machine: Using The Built-In Specialty Stitches

Have you looked at advertisements for new sewing machines lately? One boasts of 729 built-in stitches! The designs consist of holidays, seasonal references, geometrics, flowers, plants, bugs, scrolls, animals, lettering, and just about any topic you might be looking for. They are quite impressive, but where can they be used?

Sewing machine screen showing decorative stitchesIn this article, Beverly Betz and Rosemary Fajgier set out to not only find uses for these great designs, but also to explore their machines and find some of their little known features. Although these stitches can be found on traditional sewing machines, when using them, there are a few embroidery tips that should be followed.

Starting Out

First, begin with the proper foot installed on your machine. Some machines will indicate the foot by number or letter. Generally, this will be a foot that has a wider needle opening to allow the needle to move from side to side without hitting the foot and breaking. The second characteristic of the foot is on the underside. If you turn the foot over, you will see that the foot has a channel running from the needle opening to the back of the foot. This channel is especially important for those stitches that are dense and use more thread when created. The channel allows the extra space needed for the stitch to clear the foot without getting hung up under it.

Stabilize It

The extra stitches often overwhelm the fabric and cause it to pucker if not supported properly. To avoid this, use a stabilizer under the fabric. What kind of stabilizer? That depends on several factors:

  • Weight of the fabric—the lighter the fabric, the lighter the stabilizer
  • Use of the item—if it will be worn and laundered, use a cutaway, otherwise a tear-away may be used.

Which Thread?

Threads can make a big difference in the final appearance of the stitches. Embroidery threads have a glossy sheen to them and especially when contrasting colors are used, draw the eye to the stitching and make the design detail pop.

Tip: Before you begin stitching, always make sure you have enough thread on the bobbin to complete the line of stitching. Trying to realign your stitching once you change a bobbin is most frustrating!

Where to Use Them?

So where can these decorative stitches be used?

  • One of the more traditional ways is to use them for top-stitching — try placing them on hems or collars to give a bit of detail on the edges of garments or on home dec items like curtains.
  • Harry Potter pillowIf your machine has lettering capabilities, little kids love having their name stitched on the lining of their garment or as an accent around a pocket or other design detail It’s a great way to make that garment even more special because it will be personalized.
  • Lettering can also be used to upscale other items. For example, rather than using a plain black fabric for this Harry Potter pillow (right), randomly stitched character names on the fabric made it a one-of-a-kind pillow.
  • When putting in a zipper, top-stitching down the sides of the zipper gives a great accent and a pop of color.
  • Purse handles get attention when accented with specialty stitches.

Quilters have long used these kinds of stitches to accent crazy quilts and even bindings. In this tote bag, a number of different patterns were stitched down the centers of strips to give the tote an added detail. The stitches can be applied on the strips as a sewing detail or to quilt the layers together.

Just because we traditionally think of specialty stitches as long lines of stitching doesn’t mean that is the only way to use them. When this plain blue fabric got a new personality with embroidered snowflakes in a random pattern on the fabric. Note that some machines can be set to stitch single designs while others must be stopped manually after each motif. And instead of quilting in just straight lines, why not use the specialty stitches when you want to add a little creativity to plain fabric. Either way, it’s a great technique to use to create an all-over pattern or just a few random accents.

What’s on the Screen

StitchesThe way the stitch appears on the machine screen and the way it looks when stitched out is sometimes very different. Therefore, it’s a good idea to test out the stitches to see if you like them before placing them on your finished project. Even doing test stitches can spur some creativity, as shown here by placing a number of designs together to create an overall pattern. Starting in the center with tiny blue eyelets, a wavy pattern was added and stitched down either side of the eyelets. Then a utility stitch in yellow resulted in a heavier braid effect. Rows of stitches continued to be added until a desired width was achieved. This design is now slated to become the front of a peasant-style blouse, but it could just as easily become a decorative pocket, or used on the front on a purse. You can even take a plain piece of fabric and fill it with your pattern to create an entirely new look to the fabric.

To get a good design, it is important to align each new row of stitching in relation to the last. The width of the presser foot makes a great spacer, as does marking a line with chalk that you can follow when stitching. And if you have a laser pointer on your machine, here is a great use of that feature. But if you don’t want to keep sewing in straight lines, how about stitching in curvy lines from various directions to create a totally unique pattern. Placing decorative stitches on fabric in random patterns gives the impression of an all-over print.

Some machines provide the same stitch in both a small and large size. If the large design requires the feed dogs to move the fabric horizontally to achieve that wider width, accurate alignment with preceding rows can be very difficult. It is better to start with the narrower designs when first stacking straight rows. The wider width ones are best used when straight lines are not necessary.

Some machines allow the user to flip or mirror image designs. Mirror imaging allows you to create more symmetrical designs and achieve a framing effect.

Change Up Your Design

Now that you have the basics, how else might you change up your design?

  • Variegated thread is an easy way to add different colors without having to change spools. Testing is critical when using variegated threads. Some of the dense, satin stitch designs just don’t translate well into these threads. They produce awkward bands of color, depending on the length of each color in the thread. Generally they create the best effects with light, airy stitches.
  • Check to see if your machine allows the use of a double needle for specialty stitches. The double needle allows the use of two colors and gives a shadow effect while stitching. Not all stitches can be done with a double needle, so check your particular machine manual.
  • Try using a double eyed needle — one needle allows thread from two different spools to be stitched at the same time within the same stitch. When the same color thread is used, it gives the effect of a heavier thread without the hassles of requiring a larger eyed needle. When different colors are used, you can choose the exact blend of colors and are not restricted to those on variegated spools. Because the two colors are always present, there is no banding like the variegated thread. The randomized twisting of the two threads also presents an ever changing effect in the stitching.

While creating a manual stitching pattern manually is time consuming, it’s not especially hard. And watching a pattern emerge is exciting and rewarding. While playing with her decorative stitches, Rosemary discovered that these same stitches could also be used in her embroidery mode on her machine. Using the embroidery mode took all the tedium out of trying to align the stitches and allowed more focus on the creativity of the patterns. But that’s another story. Look for Part 2, Using Decorative Stitches in the Hoop coming soon. Until then, give the manual method a try a see what you can create.


~Beverly Betz and Rosemary Fajgier

Did you enjoy this article?
Are you an ASG member?
This field is for validation purposes and should be left unchanged.

Tagged With: decorative stitches, machine stitches

Become a Member

Join the only national organization dedicated to Advancing Sewing as an Art and Life Skill.

Join Now button

Blog Article Categories

  • ASG Conference
  • Chapter Stories
  • Embroidery
  • Fitting
  • Learn to Sew
  • National Sewing Month
  • Products, Books, & Patterns
  • Projects
  • Quilting
  • Sewing
  • Sewing Techniques
  • Sewing Tips
  • Sewing Tours
  • Videos
  • Disclaimer
  • Privacy Policy

American Sewing Guild
National Headquarters
9660 Hillcroft, Suite 230
Houston TX 77096
713-729-3000 | 713-721-9230 Fax
www.ASG.org

ASG wordcloud - education, conference, discounts, videos, special offers, tours and more

Copyright © 1998–2025 · American Sewing Guild · All Rights Reserved