American Sewing Guild (ASG)

Visit our blog Visit the ASG Facebook page Visit ASG on Pinterest Visit ASG's YouTube channel Visit ASG on Instagram
  • Home
  • Join ASG
    • Join Online
    • Chapter Locations
    • Member Benefits
    • Member Brochure
    • Join by Mail
  • Conference & Education
  • Resources
    • Contests & Awards
    • Giving Back
    • Hall of Fame
    • Links
    • Travel and Tours
    • Measurement Chart
  • Shop
    • ASG Store
    • Chapter Products
    • Video Resources
  • Blog
  • About
    • About Us
    • Donate to ASG
    • ASG Sensitivity Statement
    • FAQ’s
    • Start a Chapter
  • Contact
  • Member Login
    • Login First!
    • Members Only
    • Leadership Only
    • Website FAQ’s
    • Logout
  •  

October 28, 2022

Would You Use Wood for Machine Embroidery?

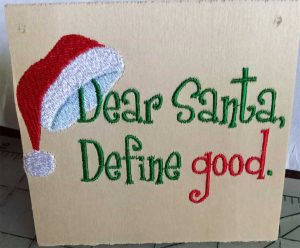
Holiday embroidery on woodIf you are a machine embroiderer, you are probably familiar with embroidering on cottons, knits, quilted fabrics, and even cork and some leathers, but have you ever tried embroidering on wood? Yes, I said WOOD!

We’re not talking 2 x 4’s here, but a thin, relatively-soft balsa wood makes a great medium for machine embroidery. And, believe it or not, it can be used in a regular sewing machine for free-motion thread painting style embroidery, as well as with electronic embroidery machines. The trick is using the right kind and thickness of wood and setting up the machine properly.

What Kind of Wood?

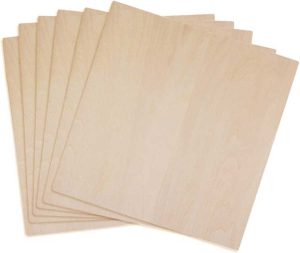
So what is the best wood for the job? The balsa wood mentioned is a relatively soft wood that allows the needle to penetrate easily, almost like stitching through card stock. It can be found in craft and hobby stores, home improvement centers, and discount department stores, as well as online. Balsa wood comes in different thicknesses and in multiple widths and lengths. Recommendations for the best thickness vary, but three are preferred: 1/32”, 1/16”, and 3/32”.

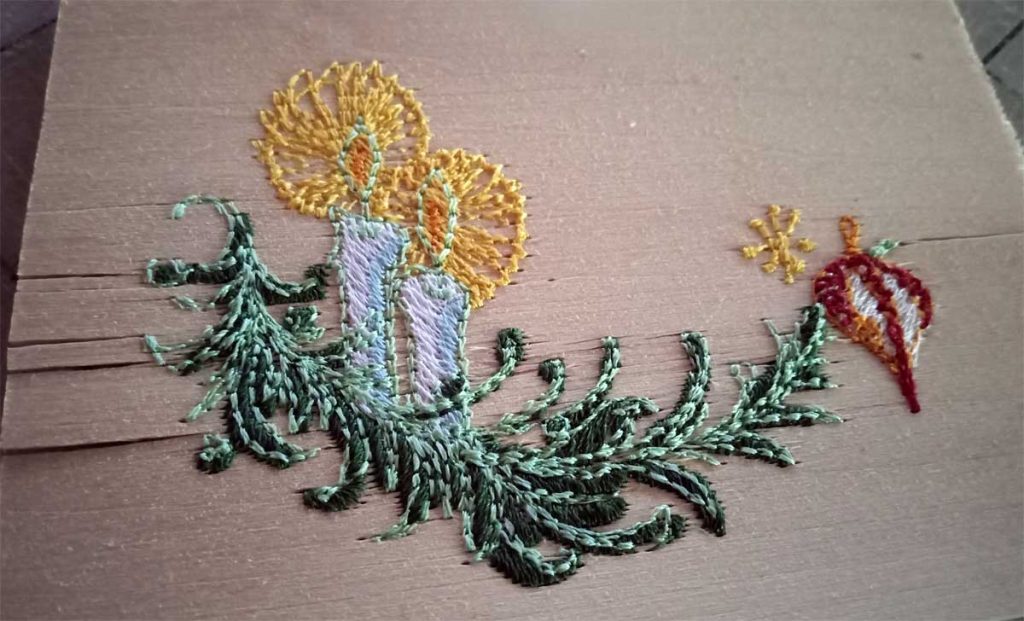
Your inclination might be to try the thinnest 1/32” first, but this may not be the best choice. While the machine can easily handle this thickness, the wood itself is so thin that it tends to bend with the pressure of the threads and will most likely break along the grain lines. If the wood doesn’t split during the stitching process, even the pressure of tearing away a stabilizer can cause it to split and ruin the embroidery. My preference is the 1/16” thickness.  The machine had no trouble going through the wood, the stitches sat on top of the surface and showed up beautifully, and yet the wood was strong enough to allow handling after stitching without any adverse effects.
Embroidery on wood

Cutting to Size

Balsa Wood available on Amazon.

If your board of choice is too narrow for your design, two boards can be butted together and taped on the lower side to create a wider surface. Trim it down to the desired size using scissors or a craft knife; however, while scissors easily do the job, the two blades tend to put stress on the wood and can cause the thinner boards to “run” along the grain lines. For this reason, a craft knife is a better choice and can make a more accurate cut. Even a rotary cutter with an old blade will do the trick. The wood does not have to be cut completely through to the other side. It can be deeply scored with several passes of the knife and then snapped at the score line. A light sanding along the edge can smooth out any splintered pieces. If the purchased board is slightly cupped, it is a good idea to flatten the wood before stitching. Simply put it under a heavy book on a flat surface and allow the weight of the book to straighten out the warp for a few hours or overnight. This same technique can be used afterward if the wood cups during stitching.

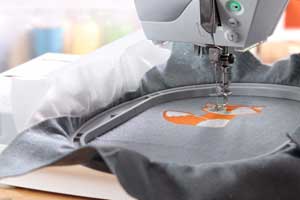
If you are using a designated embroidery machine, a hoop will have to be used. The piece of wood selected should fit within the boundaries of the embroidery hoop so that it remains flat during the stitching process. Since the wood cannot be hooped like fabric, hoop a stabilizer that is appropriate for your project and attach the wood to the stabilizer. A self-adhesive stabilizer is fine if you do not intend to remove the stabilizer outside the design afterward. The process of pulling the stabilizer away from the wood puts additional stress on the wood and could cause it to break. The same holds true with trying to remove a tear-away product. Cutting away the excess stabilizer puts less stress on both the stitches and the wood. To secure the wood to a tear-away or cutaway stabilizer while stitching, either use a spray adhesive, or place a low tack tape along the edges to keep it from moving.

Set up Your Sewing Machine

Computer and sewing machingEach penetration of the needle creates a hole in the wood that does not heal so it is best to use the smallest needle that can get the job done. The samples shown here were all stitched with a 75/11 universal needle. The needle will dull more quickly than normal stitching through fabric, so be sure to change it frequently and make sure to keep any that you use designated for wood. My needle did over 100,000 stitches and was still going strong! It is also a good idea to stitch at a slower speed — setting the machine at 600 stitches per minute should be fine in most cases. Begin each design by lowering the needle into the wood, then starting the stitch out. This small trick seems to anchor the wood to the stabilizer and helps reduce the impact of that first stitch, thus avoiding broken needles.

Choosing Thread

A 40-weight polyester or rayon thread works well on most designs. Cotton and some novelty threads tend to shred more easily on the wood and produce more lint before shredding. Metallics can be difficult to work with in the best of circumstances, and the abrasive surface of the wood makes them even more temperamental. If you decide you just have to add that touch of bling with a metallic, do so sparingly and with caution. As for the bobbin, either an embroidery bobbin thread or a matching rayon or polyester work well.

Choosing a Design

There any several aspects to consider when selecting designs to embroider, although they may not be what you expect. The density of the design is especially important when dealing with wood. Because the surface is rigid, a particularly dense design will place too much thread into the inflexible wood which could cause the wood to separate. However, this doesn’t mean that you should only use only line drawings. In fact, Redwork and other running stitch designs may be even more difficult to achieve an attractive outcome. The problem with running stitches is that they often run with the grain lines of the wood. When perfectly on grain, the stitches penetrate the surface and are brought down into the slight openings of the grain, effectively losing the stitches within the wood and possibly even causing the wood to split. Small lettering is a good example of these lost stitches and should be avoided.

Although it seems contrary to most advice, a denser, well-digitized fill design that has stitches that run predominantly across the grain lines produces a better effect.

Even a filled design with underlay stitches can be particularly effective if the underlay is an open stitch and if it follows the rule of running across the grain line. The underlay draws in those grain lines and tends to hold the wood together, providing a place for those parallel stitches to anchor. Just as a topper is used when embroidering plush fabrics, it may be used on wood as well. Be sure to carefully remove the excess topper and sparingly use water on a cotton swab to dab away the remaining wash-away topper. Never run the embroidery under running water or submerge in a bowl of water. Too much water could cause the wood to warp.

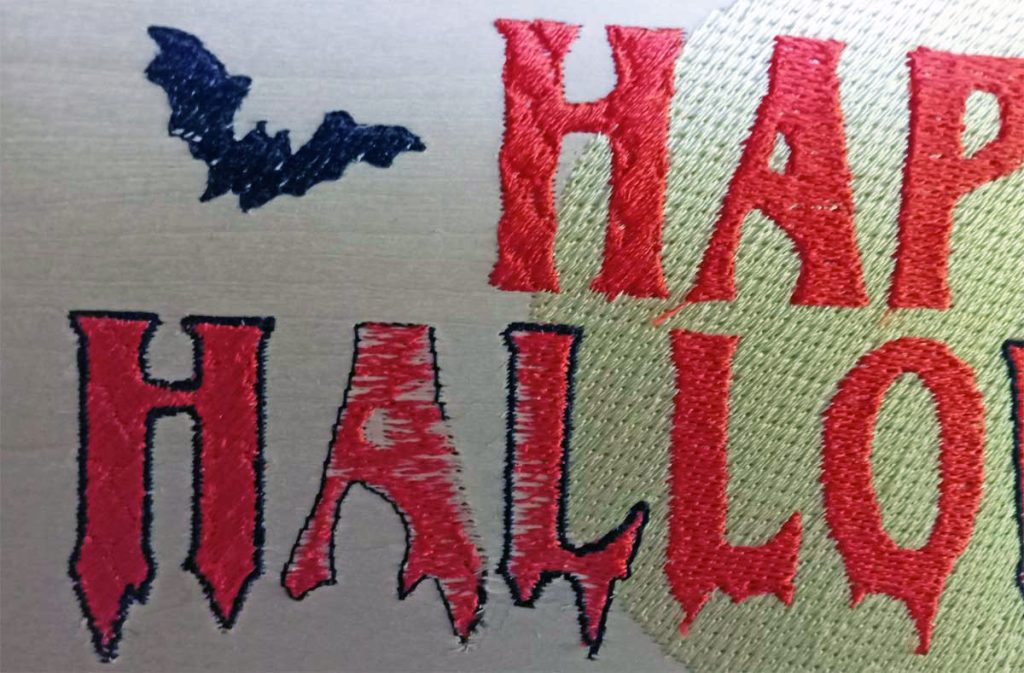
Halloween embroidery on wood

In the Halloween design pictured, most of the letters were digitized with the stitches at a slight angle. However, the *A* and the *L* fell on the grain line and the orange thread got lost in the wood. Notice the second *L* over the yellow moon. That *L* was stitched in the same direction as the first one, but the moon acted like an underlay and kept the orange threads on top of the surface, preventing them from being drawn down. No topper was used to stitch out this design.

Design Size

Another point to consider is the size of the design on the wood. When a design comes too close to the edge, the wood tends to split, especially the 1/32” thick pieces. A minimum of ¼ to ½” should be left unstitched around all sides. Be careful about simply reducing the size of the design. To decrease the size, most machines keep the same number of stitches and bring them closer together making the design more dense. Depending on the original density of the design and the amount of reduction, this could lead to too many stitches too close together, thus perforating the wood and causing sections to pop out. A design that starts out with pop-outs can be enlarged to spread out the stitches. Coverage will be less, but seeing the wood peeking through often produces a nice effect.

Why Embroider on Wood?

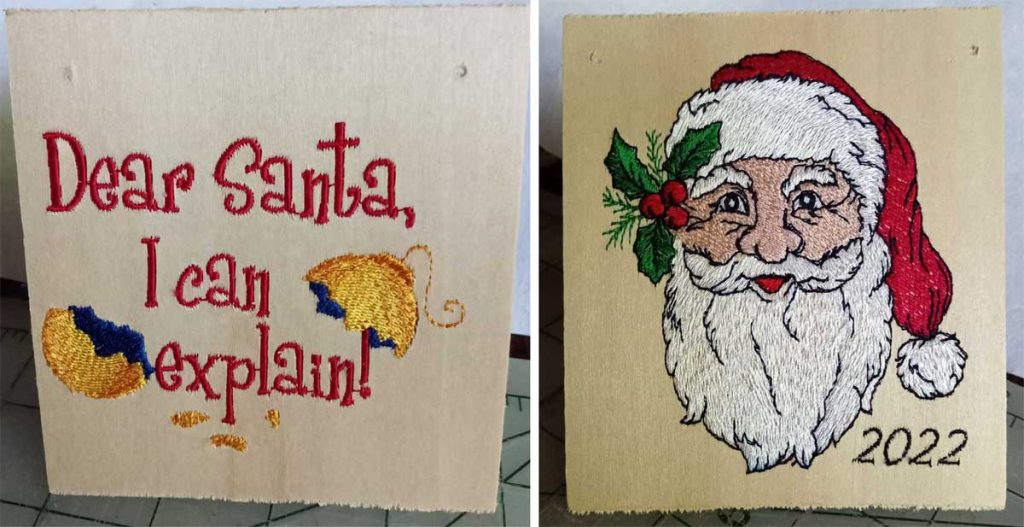
Now that you know it can be done, you may be thinking, but WHY? What could I possibly use it for? The Happy Halloween design was intended to be hung on a door for the holiday. Something of a similar size could also be stitched for inclusion in a wreath. How about a wooden front of a Christmas card? You can also back embroidered designs with felt and add to the holiday tree.

Embroidery on wood

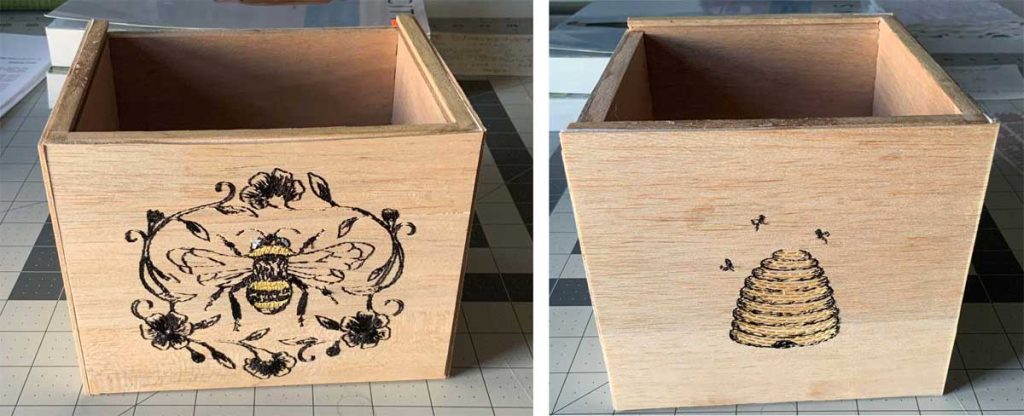
Designs can also be mounted in frames and become wall art. The designs can be coated with a decoupage medium or polyurethane (check colorfastness of thread) to protect the stitching and used to decorate boxes and other wooden craft containers. To dress up a bland serving tray, stitch out a design and place it under glass in the bottom of the tray. Christine Pillarella stitched out these designs on wood blanks, trimmed them to size, then adhered them to the sides of a cigar box for a stunning effect.
Embroidered wood box

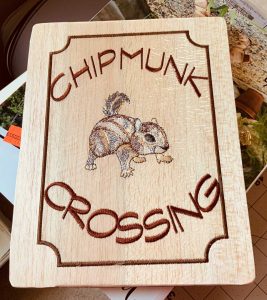
Embroidery on woodThe chipmunk crossing design was placed on the top of a box to create a shadow box. Or how about creating place cards for your holiday table? The uses are only limited by your imagination. Go ahead, give it a try, and let us know how you used your embroidery on wood.

ASG members can view a video on embroidering on wood in the Members Only area. Not a member? Join today!


~ Rosemary Fajgier and Christine Pillarella, Princeton Chapter of ASG

Did you enjoy this article?
Are you an ASG member?
This field is for validation purposes and should be left unchanged.

Tagged With: machine embroidery

July 22, 2022

Tips and Hacks for Machine Embroidery

Whenever ASG members are asked what they love about their organization, high on the list is always the willingness of fellow members to share ideas and help out with solutions. This is true, especially in neighborhood group meetings held in person or on electronic platforms.

Thought bubbles

The Princeton, NJ Chapter’s “Thread Magicians,” is an online machine embroidery group that is open to all ASG members regardless of their chapter affiliation. ASG members can complete the Group Request here. Non-members can join ASG as part of a chapter or become a member-at-large to participate in this group.

Here are just a few of the tips shared at a recent meeting:

Thread Nets

Marsha in Oregon said she rarely uses the thread nets that are supposed to be used on spools of thread to tame the feeding of thread from the spool to the machine. Instead, she places the nets on rolls of stabilizer to prevent them from unrolling while in storage as well and keeping the plastic use instructions right with the stabilizer. Since the nets are see-through, it is easy to see labels and instructions through the nets without removing them.

Storing Rolls of Stabilizer

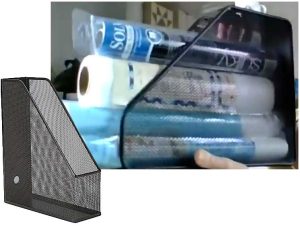
To store rolls of stabilizer, Dale from New Jersey suggested getting some magazine storage containers. The containers all have the same basic shape but can come in cardboard, plastic, metal, or wood. Turn them so they sit on their longest side and tuck the rolls of stabilizer inside. The containers allow the stabilizers to be stacked without fear of them rolling away.

Dale also added that if you have ever had thread unwind and become a massive bird’s nest right on the spool, she suggests turning the spool upside down and allowing the thread to unwind so the nest can be removed. (And yes, this one worked great!)

Thread Organizers

Beverly and Kendra, also from NJ, recycle egg cartons into thread organizers. They number the 12 or 18 compartment cartons and place thread spools into each compartment to keep colors in the order in which they will be used in a design. Even large cones can be inverted and placed in the cartons top down without any trouble. This certainly beats frantically searching for the right color only to find it rolled away during the last thread change. Kendra also suggested using a pet wrap like Coband to wrap around your hoop to prevent slippery fabrics from sliding in the hoop. It doesn’t leave a sticky residue like other tapes. Paper tape from the first aid section of the dollar store also works well for placement of pieces during appliqué or in-the-hoop projects.

thread

Speaking of organizing threads, Constance from Florida suggested cutting pieces of clingy plastic into 1” x 6” or 2” x 6” strips to wrap around thread spools to keep thread from unrolling. The plastic can be purchased from a variety of box stores or recycled from packaging like those that blankets come in. To help keep track of the strips while using the thread, Constance places a line made with a grease pen or permanent marker down the center of the strip, providing a visual reference on an otherwise clear surface. This makes the strip easier to see when not on the spool. For her bobbins, she takes a small box and lines it with double sided tape. When she places bobbins in the box, the tape holds them in place, preventing them from falling out or bouncing around in the box and unwinding and becoming tangled. To be doubly sure the bobbins don’t unwind, she also uses aquarium hose cut to the specific width of her bobbins. She then makes a slit in the hose so that she can slip it around the bobbin holding the thread in place. While many members used ponytail bands to slip around spools and bobbins, the aquarium hose is a smoother, sleeker look and allows bobbins to slip easily into store-bought bobbin holders.

Organizing Appliqué Pieces

Andi in California likes to use page protectors from the stationery store to organize her appliqué pieces. She cuts out the various parts of the appliqué and places them in the page protector along with any notes or instructions. When she is ready to work, the pieces are all together and ready to go. These are especially helpful when she is traveling to a retreat to do the work. Unlike the paper plates she used before, the protectors can be stored in a notebook and don’t slide or allow pieces to escape.

Added Work Surface

While browsing a thrift store, Christine from NJ found a bedside table like the kind that are usually found in hospitals. She said she didn’t know what she would do with it, but she purchased it anyway. Now it is her constant companion while sewing. She can wheel it up to her cutting table and adjust the height to give her extra room for her cutting tools, or even move her sewing machine around the house or outside. It is extra sturdy and can easily handle the weight of her sewing machine as well as the vibration when sewing.

Spraying Adhesives

From Arizona, Sandy suggested cutting the bottom from a gallon milk container and placing the opening over the item she wants to spray with adhesive. She then takes her spray can nozzle and sprays through the top of the container. The sides of the milk container prevent the overspray from traveling around her sewing space and getting everything sticky.

Organizing Machine Feet

To organize her machine feet, Lynda from NJ uses a pill organizer. The compartments are just the right size for most feet and are easily seen through the plastic container. She also says a toe separator used for pedicures makes a great bobbin holder. And if you run out of toppers for embroidery, Glad Press and Seal will work in a pinch. It won’t wash away, but it tears easily.

Storing Embroidery Hoops

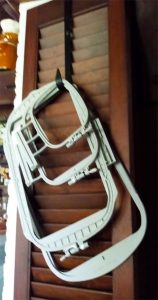
Embroidery hoop storage ideaAfter breaking one of her embroidery hoops by laying it down on a table and then placing something on top of it, Rosemary from NJ bought a wreath hanger from a dollar store. She now slips the hanger over a door near her embroidery machine and actually remembers to place the hoops on the hanger when not embroidering. No more broken hoops!
Go Green

Elaine in Massachusetts shared her “go green” ideas. The Boston Chapter made lint cleaners for attendees at the 2019 conference. Members took a coffee stirrer and half of a chenille stem. The ends of the chenille stem were looped around and inserted into the opening at one end of the stirrer, and voila, a lint brush that gets into those tight spaces around the bobbin case for the embroidery machine or the serger. Elaine also puts her Edge gum boxes to use. She labels them and places her packages of machine needles inside so that she can see at a glance her packages of needles separated by size.

There were also endorsements of a number of products that members find especially helpful.

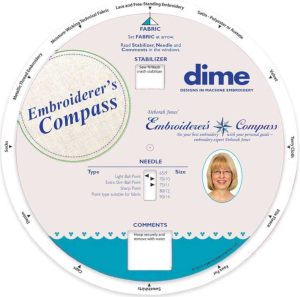
  • Tina from Oregon recommends the Embroiderer’s Compass from dime for matching up the right stabilizer with the right fabric. By simply rotating the disks, this tool gives suggestions for the stabilizer as well as toppers.
Embroiderers Compass on Amazon
Embroiderers Compass on Amazon. We may earn a small commission if you make a purchase.
  • The Perfect Box Bottom is one of Gini’s suggestions from Texas. She says it makes squaring up the bottoms of boxes or purses a breeze.
  • The Hoop Mat by dime was also noted by Beverly as a handy embroidery tool. It prevents the embroidery hoop from sliding away while trying to hoop the fabric. The lines on the mat also help with aligning items.

So, whatever part of the country you hale from, we hope you found some of these tips and hacks useful. Happy stitching!


~Rosemary Fajgier, former ASG Board Chair

Did you enjoy this article?
Are you an ASG member?
This field is for validation purposes and should be left unchanged.

Tagged With: embroidery, machine embroidery, sewing, sewing room tips

February 19, 2021

Back to Basics: Machine Embroidery

Machine embroidery is one of the hottest ways to personalize your sewing and add your unique touch to your handmade items as well as store bought purchases. It can help turn a ho-hum item into a one-of-a-kind masterpiece. We must warn you, however, this aspect of sewing is definitely addictive and, unfortunately, can be quite expensive.

Needle

To get started, you need an embroidery machine. Most of the major manufacturers have a number of models that range in price from less than $400 to, well, let’s just say more than the cost of a car. Some of the models are embroidery only, while others are combo machines that allow you to do all your sewing as well as embroidery. Which brand should you buy? There are good arguments to be made for all of them, but perhaps the best choice is to buy one from a reputable dealer in your area. A dealer can provide both lessons and regular maintenance on your machine which can be better than the few dollars you save from buying online.

Hoops

One of the features that can influence your decision is hoop size. A hoop is used to hold the fabric and moves it in the machine so the design can be stitched. Many of the entry level machines come with only 4” x 4” hoops.  That is the size of the design area that can be stitched on your item. This is a great size for over the pocket designs on t-shirts or children’s clothing, but if your intent is to embroider elaborate designs on jacket backs, then look for a machine that can accommodate larger designs. Hoop sizes are getting larger each year, with a 16” hoop currently one of the largest in the home sewing market. Machines have embroidery arms to hold the hoops and are programmed for specific movements and cannot accommodate just any size hoop.  So just because the manufacturer makes a larger size hoop doesn’t mean that a particular machine can use the larger size. Always check the specs for a particular machine.

The basic hoop is composed of an inner and outer plastic ring that generally fit together to hold the surface to be embroidered. While most of these hoops have screws to tighten the outer hoop over the inner one, in recent years more innovative hoops have come on the market. Some machines can use magnetic hoops that rely on strong magnets to hold the stitching surface in place and prevent hoop marks from being left on the surface. Others are spring loaded to make the hooping process easier.

Stabilizers

Buy on Amazon (affiliate link)

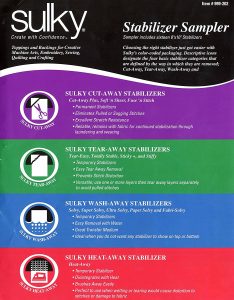
Stitching a design on a fabric adds not only weight to the fabric, but also stress as the needle  and threads continues to perforate and pull. While some heavy fabrics can handle this without any help, most would do well to have a stabilizer for added support. A stabilizer is a specially made backing that generally goes in the hoop with the fabric to help support the stitches and prevent the fabric from distorting. Choosing the perfect stabilizer can be a daunting task with so many manufacturers, weights, sizes, and styles.  Generally speaking, most experts will recommend using what’s called a “cutaway” stabilizer for most embroidery. As the name implies, the excess stabilizer that is used on the back of the fabric is cut away after the design is stitched and the remainder stays in the item. This provides the added support that is often needed not only through the stitching process but through multiple washings afterward.

While this support after the item is stitched is important, many embroiderers dislike the look and feel of the cutaway stabilizer. The extra support can hinder the smooth drape of a fabric and the leftover edges can irritate skin when the back of the design comes in contact with sensitive areas. When a lighter hand is preferred, a “tear-away” stabilizer can be used. The tear away is more loosely constructed and tears easily where the needle perforates it. This provides a cleaner look to the interior but sacrifices long term stability.

There are also stabilizers specifically designed for use on the right side of the fabric. These stabilizers are intended to prevent stitches from sinking into plush fabrics and getting lost. These “wash-aways” or water soluble ones are for temporary use only and disappear when placed in water. They are also used in free-standing lace—but that’s another discussion.

Needles & Threads

While it may be enticing to try to use regular sewing thread to embroider, for best results specially made embroidery thread gives the best results. These threads come in a multitude of colors and have an added sheen that regular sewing thread lacks. Most designs are meant to be stitched with a 40 weight thread. Using a different weight of thread can change how a design stitches out as well as how the final result will look. A thicker, heavier weight thread (30 or less) can make the design too dense and cause thread breakage or bunching up of threads while stitching. A lighter weight can cause gaps in coverage and allow fabric colors to show through the stitching. Threads can be made of cotton, polyester, rayon, and metallic. The current recommendation is a polyester thread. Changes in manufacturing methods give the new polyesters the luster of rayons but with more durability. Estimated shelf life for polyester thread is about 100 years. Rayons are beautiful, but do not hold their color when bleached; and cottons create lint that is harmful to the machine.

Most embroidery designs use a special bobbin thread instead of a matching thread in the bobbin. This thread is a lighter weight than the top thread, and can be purchased on cones or pre-wound bobbins. Always be sure to check with your manufacturer to determine if pre-wounds are recommended for your particular machine.

When using the 40 weight thread, a 75/11 needle  size is generally used.  Ball point, jersey, or stretch needles can be used on knits, while a universal or embroidery needle works well on wovens. Embroidery machines stitch at about 1,100 stitches per minute and can build up heat due to the friction of the rapid and continuous stitching. This wears out needles quickly and requires frequent changing of needles after a few hours of stitching to prevent their bending and breaking.

Embroidery Designs

Ghee’s Garden Embroidery Designs. ASG Members: get your discount code on the Special Offers page of the ASG.org Members area.

Embroidery machines require a specifically created computerized design before anything can be stitched out. Some machines come with generic designs like flowers, animals, holiday motifs, etc.  Other machines are themed with Disney, Pixar, and even Star Wars motifs.  In addition to the designs found in the machine, most manufacturers also sell designs that can be transferred to their machines through both direct and wireless computer links, flash drives, or older specialty cards. A quick search of the internet will also bring up a multitude of sites that sell these digitized designs. Before buying from an outside source, it is important to know the format, or language that your particular machine uses. ART, DST, EXP,  HUS, JEF, PCS, PES, SEW, VIP, VP3, and XXX are just some of the designations you may see. Buying the incorrect format is like speaking to someone in a foreign language. The machine won’t be able to translate to stitch out the design.

In addition to the format and size of the design, it is also important to know the stitch count. The stitch count is the number of stitches needed to produce the design. If a design is extremely dense with a high number of stitches used to create it, some of the smaller machines may not be able to handle that much data for stitching it out.

It’s also a good idea to remember that not all digitized designs are created equal. Many digitizers will offer free samples of their designs so you can test them out and see for yourself the quality of their work. You will soon learn which designers are your favorites and produce designs that meet your needs and budget. And if you are a bit of a computer geek and want a challenge, there are digitizing programs for the home embroiderer to create their own designs. You can take your drawing and turn it into your own one of a kind design.

Machine embroidery is a great way to challenge your creativity and expand the possibilities of your sewing projects. And if the embroidery bug has bitten, be sure to check out the ASG neighborhood groups that are springing up across the country. With many of them now online, these neighborhood groups welcome members from outside their normal chapter territory. They are an excellent source of inspiration and embroidery knowledge.


~Rosemary Fajgier

Did you enjoy this article?
Are you an ASG member?
This field is for validation purposes and should be left unchanged.

Tagged With: embroidery thread, hoops, machine embroidery, stabilizer

March 6, 2020

Oh, the Places Our Sewing Will Go

When my 40-something son, Todd, invited me to join him on a Mount Kilimanjaro climb, I thought about it, laughed, and then declined. I am too much of a risk, even though others my age and older have done it. When he said he would like a banner of some kind to wave when he reached the summit, I knew I had a job!

Climbing for a purpose

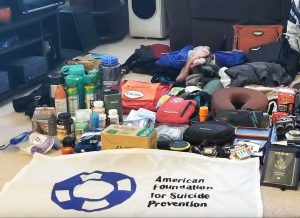
Todd was training and climbing for a purpose… suicide prevention. And yes, he had recently lost a high school classmate. He would pay all his expenses himself and was hoping he could raise money for the American Foundation for Suicide Prevention. It took me a while to realize that their logo is a life preserver. I found the logo on the ASFP web page and copied, enlarged and printed it, and used Steam-a- Seam to trace it and iron it to a piece of nylon ripstop. I wanted it to be lightweight, yet big enough to be a banner. Sewing down the letters was a bit tedious, but he was really excited about it, so that gave me energy. In the meantime, I also sent the ASFP logo to a digitizer and was able to embroider out a couple of patches, which he could put on his jacket, as did his hiking partner. He had invited several people to train with him.

“Since he was raising money for a worthy cause, I started thinking about what else I could do with my trusty sewing machine and years of sewing guild meetings, where we share skills and ideas.”

Aha! Pocket Tissue covers! I have great fun making these and giving them out! I printed out the AFSP logo, using the mailing label size, and June Tailor Colorfast Sew-In Fabric Sheets for Ink Jet Printers. Now I had the logos on cloth! So, I cut them apart and added dark blue batiks around them, in order to make pocket tissue holders (definitely from a Neighborhood Group meeting!!).

Todd Spinney (right) and Judy’s banner at the peak of Mount Kilimanjaro

I also started obsessing about a picture of the mountain… so once again I went to the computer and printed an image out on cloth, added some more grass and some sky from my stash, and made it an outside pocket on a bag which would be big enough to hold the banner.

I made about a dozen tissue holders and mailed them and the new bag to Todd in Massachusetts so he could give them to friends and co-workers who made donations to AFSP.

Time to climb

In the meantime, he was training. Every weekend was devoted to climbing somewhere, and every bite of food was recorded on an app on his phone. He used a special mask that helped him prepare for the altitude sickness that interferes with many climbers. He got his shots. He made his reservations. He chose a plan that took eight days and used a team of guides and porters, who carried the tents and food, prepared the meals and took care of the details. Todd and his partners carried their personal gear. One of his partners made a valiant try at the climb, but when they reached the high altitudes, her asthma made continuing impossible and she turned back (with one of the porters as a guide). Todd texted and even called during the climb (of course at odd hours…) and had brought along a solar-powered charger for his phone. We were able to follow along, and knew which day he would summit (who knew summit is a verb?).

He has since put together a slide show and showed it to us at a celebration party after his return. Lots of pictures of the banner! I’m so glad it is over. And so proud!


~ Judy Spinney, North Jersey Chapter

Did you enjoy this article?
Are you an ASG member?
This field is for validation purposes and should be left unchanged.

Tagged With: charitable sewing, machine embroidery

September 28, 2017

Mystery of the Shrinking Embroidery Stabilizer

I love to do embroidery and when I work with cotton fabrics, I always starch them well before hooping. The starch makes the fabric crisp and the embroidery clean. After stitching, I then press again—without starch. After pressing a couple of the quilt blocks, I noticed some wrinkles along the stitching lines that I hadn’t noticed before. I pressed the second block and the same thing occurred. So, I starched the fabric again for the next block, stitched it, pressed and the same thing—only not quite as bad. This was perplexing so I began to do some investigating. I finally discovered that the poly mesh stabilizer I was using was SHRINKING when it was being pressed! It wasn’t a lot—about ¼” all around— but was enough to distort the embroidery and make me very unhappy.

My shrinking poly mesh stabilizer

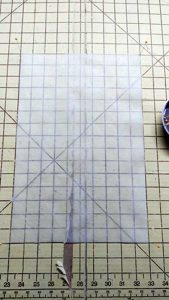
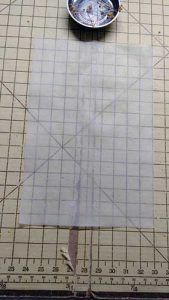
Here I cut the piece of poly mesh stabilizer, placed it on a cutting board and placed pins at the corners so you can see the original size.

Shrinking stabilizer

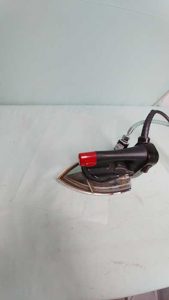
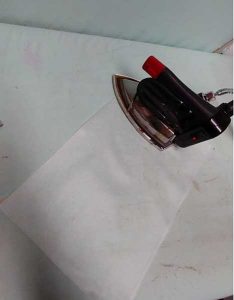
I then took the piece of stabilizer to the ironing board and pressed it well (I used lots of steam, too) leaving the pins in the board so I could check the size after pressing.

Shrinking stabilizer

The piece was flipped and pressed again. Now I must admit, I press with a hotter iron than most folks to do because I work very quickly and I work with a professional iron—but, I also tested with a household iron and basically got the same results. I pressed well in all directions and all over the stabilizer.

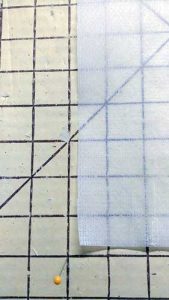
After the pressing, I let the stabilizer cool off and then I placed it back on the cutting surface, aligning the top and right sides to the original lines.

Shrinking stabilizer

You can see how much this piece of stabilizer shrunk—it is enough to make a difference in the finished piece of embroidery.

Shrinking stabilizer

If you find your pieces have wrinkles around the outer (and even sometimes inner) edges of your work, check your stabilizer by pre-shrinking it. I’ve been using this same stabilizer for years and had not had this problem before so I wonder if the production of the stabilizer has changed in some way—either the brand changed manufacturers or perhaps changed the fiber content in some manner (maybe less expensive fibers to make more profit to cut production costs?) I’ll never know unless I write to the manufacturer and chances are they will not tell me anything.

So, now every time I get a new bolt of stabilizer—any kind of stabilizer (except water soluble, of course) — I will be heat testing it to be sure it can hold up to washing and drying and pressing.

Sew ‘til next time, enjoy the journey of sewing!

~Ramona

Tagged With: embroidery, machine embroidery, sewing, stabilizer

  • 1
  • 2
  • Next Page »

Become a Member

Join the only national organization dedicated to Advancing Sewing as an Art and Life Skill.

Join Now button

Blog Article Categories

  • ASG Conference
  • Chapter Stories
  • Embroidery
  • Fitting
  • Learn to Sew
  • National Sewing Month
  • Products, Books, & Patterns
  • Projects
  • Quilting
  • Sewing
  • Sewing Techniques
  • Sewing Tips
  • Sewing Tours
  • Videos
  • Disclaimer
  • Privacy Policy

American Sewing Guild
National Headquarters
9660 Hillcroft, Suite 230
Houston TX 77096
713-729-3000 | 713-721-9230 Fax
www.ASG.org

ASG wordcloud - education, conference, discounts, videos, special offers, tours and more

Copyright © 1998–2025 · American Sewing Guild · All Rights Reserved