American Sewing Guild (ASG)

Visit our blog Visit the ASG Facebook page Visit ASG on Pinterest Visit ASG's YouTube channel Visit ASG on Instagram
  • Home
  • Join ASG
    • Join Online
    • Chapter Locations
    • Member Benefits
    • Member Brochure
    • Join by Mail
  • Education & Classes
  • Resources
    • Contests & Awards
    • Giving Back
    • Hall of Fame
    • Links
    • Travel and Tours
    • Measurement Chart
  • Shop
    • ASG Store
    • Chapter Products
    • Video Resources
  • Blog
  • About
    • About Us
    • Donate to ASG
    • ASG Sensitivity Statement
    • FAQ’s
    • Start a Chapter
  • Contact
  • Member Login
    • Login First!
    • Members Only
    • Leadership Only
    • Website FAQ’s
    • Logout
  •  

July 11, 2025

Fabric Q&A

Q. What is English Netting, and how is it different from nylon net or tulle?

A. English netting is a very soft, pliable and drapeable fabric used for bridal veils, bridal gown overlays and as a basis for machine embroidered lace. It’s most often 100% cotton or a blend of cotton/polyester. The threads are matte finish and slightly thicker than most other nettings. It’s characterized by hexagon shaped holes. The netting is sometimes used for trim on knit garments due to its slight stretch. English netting gives the look and drape of silk without the added cost.

Nylon net is much stiffer and has larger holes than either tulle or English netting. It’s available in wide widths (up to 108”) and is used to add fullness, like on a costume or tutu. Because of its crispness, nylon net isn’t very comfortable for a garment as it’s too stiff.

Netting photos

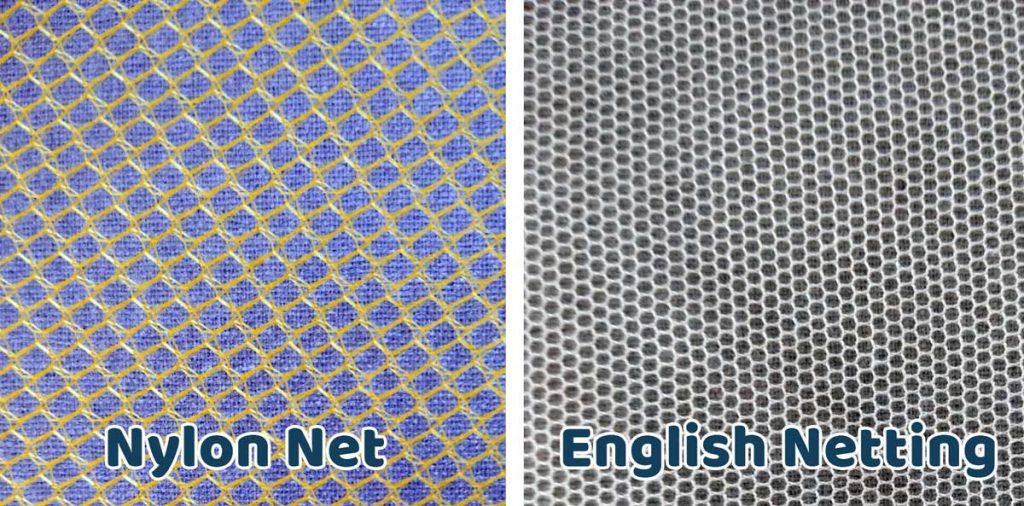
Tulle is a finer version of nylon net with smaller holes and a softer touch. Tulle is sheerer than either of the other two nettings mentioned so it’s often used most often for bridal veils.


Q. Why are some fabrics made from more than one fiber?

Fabric bolts

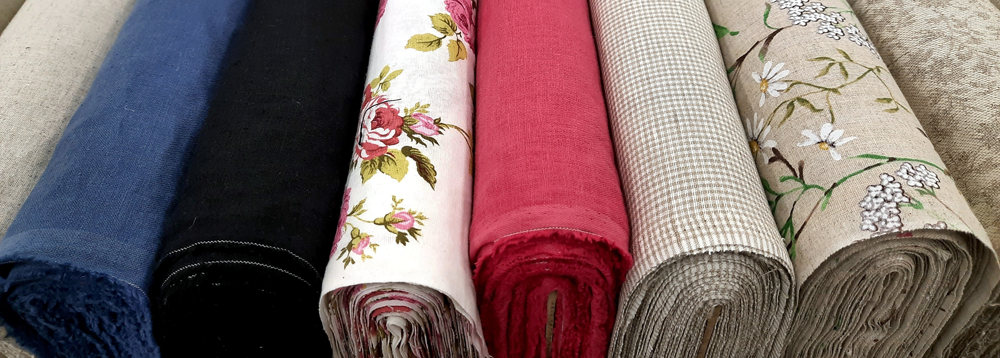
A. Fibers are often blended to take advantage of the attributes of each. For example, some fabrics have a small amount of Lycra added for stretch, or a bit of silk is sometimes added to cotton or wool for added sheen. Polyester is often blended with cotton to improve wrinkle resistance. Fibers are also blended to help with cost—luxury fibers like cashmere or alpaca can be added to wool in small amounts to create a better hand at a still reasonable price. When caring for blended fabrics, be sure to follow the bolt instructions for proper laundering/cleaning methods, and be aware of the blended fibers in choosing an iron temperature for pressing.


Q. Do I need to pre-shrink fabric before cutting out a garment?

Washing machine

A. The answer depends on the fiber content of the fabric. Look for guidance on the bolt end, but as a general rule, you should pre-treat the fabric as it will be cared for in the finished project. If the fabric is washable, send it through a wash/dry cycle before cutting. If you’re concerned about shrinking, multiple launderings may be in order. Fabrics like denim and flannel will often shrink more with each repeated washing, so it’s a good idea to purchase a little extra fabric to compensate for that. Note that fabric shrinkage amounts are often listed on the bolt end with indicators like “3-4% residual shrinkage may occur”. That amount of shrinkage can affect the fit of a garment.

For dry-clean-only fabrics, either take them to the drycleaner to be steam shrunk, or complete that process at home. If you’re working with home décor fabrics, steam-press them, but do not launder as protective finishes may be removed.


Q. I bought fabric for a jacket but after washing it, it’s way too soft to hold its shape. Is there anything I can do to salvage it?

A. The easiest way to change the fabric hand and make it firmer for your project is to fuse interfacing to the wrong side. A lightweight tricot knit interfacing can be fused to all the cut pieces to add body and support to make it more appropriate for the intended project. Some prefer to fuse the interfacing to the yardage prior to cutting instead of trying to match it up to individual cut pieces later. You’ll need a large flat surface and plenty of steam, and perhaps a press cloth, depending on the interfacing brand and application instructions. Be sure to follow the instructions for applying it and allow the fabric to cool flat before moving.


~Linda Griepentrog is the owner of G Wiz Creative Services and she does writing, editing and designing for companies in the sewing, crafting and quilting industries. In addition, she escorts fabric shopping tours to Hong Kong. She lives at the Oregon Coast with her husband Keith, and three dogs, Yohnuh, Abby, and Lizzie. Contact her at .

Tagged With: fabric, learn to sew, sewing, sewing tip

February 14, 2025

Car Bling: Sewing License Plates

Sewing enthusiasts can often be seen wearing testaments to our hobby—sewing-themed T-shirts and sweatshirts and carrying themed totes—just letting the world know of our passion. But in addition to wearables, some go further by embellishing their vehicles—with window stickers, bumper stickers, and even vanity license plates.

Vanity plates are always fun to figure out, especially if you only have a minute or two when you’re stopped behind someone at a traffic light. It’s an “aha” moment when you figure it out before the light changes and you speed off, as it’s sometimes hard to decipher those plates at 60mph. Ask me how I know…

If you’re thinking about getting a personalized license plate, be sure to check with your state department of motor vehicles for the rules before you begin to rack your brain for a phrase that’s allowable, fits the parameters, and most importantly, isn’t already taken. State rules vary considerably and you may be limited to six, seven or, if you’re lucky, eight letters and/or spaces to get your message across. Some states allow punctuation to be included, others don’t, and some allow special symbols like hearts to be part of the tag.

Bumper Sticker available from Amazon.

Check With Your State

Each state has certain words and phrases that are disallowed, as they can connote other meanings, refer to body parts, sex, drugs, or are known as swear words. States try to keep up on the latest slang so as not to let offensive combos onto the metal. So be sure to check that list first so you’re not disappointed when you come up with something you think is wonderful that might be misconstrued. If your favorite phrase is already taken, consider if there’s a way you can modify it to come up with a new variation. For example, if ISEW is already in use, consider adding a number or other letters or punctuation to make it new—like ISEW2 or I SEW IT; SEW FUN can become SEW FUN2 or SEW FUN!.

Car Window Decal available from Amazon

Also check your state regs for the use of numbers within the phrase, as often digits can take the place of whole words or be combined with letters to help fit words within the number of letters allowed. For example, GR8 takes the place of GREAT, but it’s still pronounced the same as if all the letters were used. The number two can denote to, two or too in a chosen phrase. Single letters can also rise to the occasion to sub for words—think of U, B, C, O and Y, subbing for you, be, see or sea, oh, and why, respectively.

So, what kind of sewing specialty license plate do you want? Here are a few ideas, and by no means a complete list, depending on the number of letters and spaces allowed in your state:

Idea Bank

♥♥SEW♥♥
♥2SEW
I ALTER
BOBBINS
CRAFTER
DUDESEW
FABRIC
FABRIC2
I B ASG
I MEND
I QUILT
I SEW
IBSEWN
IM ASG
IMSEWGR8
INSPIRE
ISEW4U

ITSSEWU
LIV2SEW
LUV2SEW
MAKER
MANSEW
MESEW
OH DARN
OH I SEW
PIECER
QUILT NUT
QUILTER
SCRAPPY
SEW BATTY
SEW BUSY
SEW COOL
SEW COZY
SEW EZ

SEW FUN
SEW HOT
SEW IT
SEW MAN
SEW NUT
SEW RITE
SEW SASS
SEW SMRT
SEW WHAT
SEW’N’GO
SEW’N’GRL
SEWBZY
SEWCOOL
SEWCR8V
SEWDIVA
SEWDOI
SEWER

SEWGR8
SEWGR8
SEWHAUTE
SEWING
SEWIST
SEWITUP
SEWLUV
SEWN ♥
SEWNUP
SEWRETRO
STASHER
STITCHER
USEW2?
USEWGRL
WHOSEWS
Y I SEW

Frame-ups

If paying a premium for a vanity plate isn’t in your budget, consider a sewing-themed license plate frame. Check with your state for any regulations regarding frame size and coverage before purchasing.

These plate frames are available on Amazon. Click each image to view. Note that we may receive a small commission if you make a purchase.

Whether you get a whimsical vanity plate or a more low-key messaging frame, it’s always fun to tell the world you sew and you’re proud of it!


~Linda Griepentrog is the owner of G Wiz Creative Services and she does writing, editing and designing for companies in the sewing, crafting and quilting industries. In addition, she escorts fabric shopping tours to Hong Kong. She lives at the Oregon Coast with her husband Keith, and three dogs, Yohnuh, Abby, and Lizzie. Contact her at .

Tagged With: quilting, sewing

June 23, 2023

Sew Unusual: Make Your Own Shoes or DIY an Umbrella

Chances are good that if you’ve sewn for years, there have been a few unconventional projects emerge from your sewing room—things that onlookers (and even fellow sewers) are amazed that you tackled. Maybe it was a behemoth sized project like a tent or sail, or perhaps an uncommon material for the sewing world like metal or plastic. But, as sewing enthusiasts, we always seem up for a challenge and there’s almost nothing we won’t try.

Sole Mates

A Happy Stitch Espadrille Kits

Making your own shoes may seem a bit farfetched, but hey, why not? Perhaps you’d like to make some custom quilted sneakers, leather high-tops, summery espadrilles or sandals. There are kits and components available for all of those. It takes some ingenuity and hand sewing, but you’ve got a one-of-a-kind pair sure to be admired by all your sewing friends. Soles, both rope for espadrilles, and rubberized for sneakers, are available separately, or they can be a kit component depending on how you want to purchase them.

By Fiona Johnstone, Instagram

Perhaps you can try out some new sewing skills that you don’t use regularly, especially on the sneakers. You’ll get to put in metal eyelets using a punch and/or a stiletto, sew with a curved needle, or create shoelace openings with the eyelet function on your sewing machine. You can even make your own shoelaces, complete with readymade aglets for stylin’.

Espadrilles (left) by Duana Chandler @duanastudio, using a pattern from @sewcreatebyjaime Fabriculous (right) quilted sneakers: Fabriculous Quilted Sneaker kit

DIY Shoemaking Resources

  • A Happy Stitch, espadrille kits
  • Chicago School of Shoemaking & Leather Arts, shoemaking kits and classes
  • Fabriculous, sneaker kits
  • Sneaker Kit, leather sneaker kits, soles
  • Tandy Leather, leather sneaker kits

 Under Cover

Making your own umbrella requires some serious dedication, but it’s easier than you might think. First, you need a frame. Then you need fabric. You can use laminated cotton fabrics for an all-in-one shine, a rain repellent outdoor fabric, or even a quilting cotton adding a second step for waterproofing, if needed. Keep in mind that not all brellies are used for rain protection—some are designed to keep you out of the sun, and they’re also a perfect accent to a summer wedding with parasols coordinating with bridesmaid dresses.

Images courtesy of Nancy Zieman Productions

Precision sewing and cutting is a requisite so the sections fit exactly over the umbrella ribs, otherwise things don’t work well for opening and closing. But the real fun may come as you create a cutting strategy—depending on the fabric print, you can create a literal kaleidoscope of color on the top of the parasol.

DIY Umbrella Resources

  • Nancy Zieman Productions, umbrella frames and Judy Gauthier’s book, “Umbrella”.
  • Sailrite, video tutorial for making a patio umbrella.

Specialty Notes

Whether you’re sewing shoes, an umbrella or anything unconventional, there are some basics to consider:

  • Choose a needle and thread compatible with the fabric. There’s nothing like an oversized needle hole in an umbrella seam allowing water to drip onto you to remind you of this premise.
  • Always test-sew on the fabric you’re using before starting the project. This will allow you to adjust tensions, stitch lengths and stitch choices so they all work together on what might be an unusual fabric. Sew seams and some topstitching, as the number of layers you’re sewing through can be different.
  • Test-press the fabric before you begin sewing. Some fabrics simply cannot be pressed with an iron and require finger-pressing instead so they don’t melt or mar. A flat wooden pressing stick is helpful for flattening bulky seams on non-pressable fabrics.

~Linda Griepentrog is the owner of G Wiz Creative Services and she does writing, editing and designing for companies in the sewing, crafting and quilting industries. In addition, she escorts fabric shopping tours to Hong Kong. She lives at the Oregon Coast with her husband Keith, and three dogs, Yohnuh, Abby, and Lizzie. Contact her at .

Did you enjoy this article?
Are you an ASG member?
This field is for validation purposes and should be left unchanged.

Tagged With: sewing, shoes, umbrella

December 9, 2022

Bag a Skirt in 10 Easy Steps (Preview)

Lady in a straight skirtEveryone knows that a lined skirt will look new longer, wrinkle less, hold its shape better, and be more comfortable to wear. But since it takes quite a bit longer to sew a lined skirt, it’s easy to succumb to temptation and simply make one sans the lining.

The 10-step method described here is so quick and easy, you can actually sew a lined skirt in the same amount of time you used to spend sewing an unlined one. A variation of the bagging technique for jackets is described in my book The Complete Book of Sewing Short Cuts. This method is used extensively in the fashion industry. It is called “bagging” because the garment forms a bag when the hems of the skirt and lining are joined.

The complete version of this article is available on the ASG Members Only blog and requires member login.
CLICK HERE to read the full article. Not a member? Join online!

Tagged With: sewing, skirt

November 11, 2022

Project: Advent Calendar

An Advent calendar with pockets that holds cards suggesting the day’s special activity or a special treat is a popular tradition with children of all ages. The first Advent calendars originated as early as the 19th century and was used to mark the countdown in December to Christmas. Advent calendars are 24 or 25 days beginning December 1 and ending December 24 or 25.  ASG member, Sara Scheil, shared the instructions for one she made one for her children.

Materials

  • 21″ x 36″ piece of sturdy fabric (quilted fabrics work well for this)
  • 6″ – 10″ of solid color coordinating fabric. A fabric with body will work best.
  • 21″ of 3/8″ wood doweling
  • Approximately 30″ of cord or fabric tube for a hanger
  • Card stock and fabric paint in contrasting color

Instructions

Edge finish the quilted fabric on all sides (serge with a overlock stitch or bind with a narrow bias tape).

Fold down the top edge 1″ and stitch along the edge to form a casing for the dowel rod. Include the cord or fabric tube used for the hanger in this stitching by positioning the ends at each outer edge on the underside of the calendar.

On the solid colored fabric, using a ruler and fabric marker or chalk pencil, draw lines to make the pocket rectangles 3″ high and 3 1/4″ wide. Edge finish with the serger using a narrow stitch such as a rolled hem. Pinking the edges could be a substitute. Make 25 rectangles for the pockets.

On each pocket, paint, embroider, or applique the numbers 1 through 25 for the days of the calendar.

Optional: You may wish to title your calendar. Consider painting the words “Advent Calendar” on a rectangle approximately 3″ high and at least 12″ long of the solid fabric. Edge finish and topstitch on the upper 4″ space of the calendar.

Layout the 25 pockets on the calendar using the suggested measurements as a guide. Secure with washable glue stick. Let dry. Top-stitch the 3 sides of each rectangle by stitching each row with a continuous vertical and horizontal stitching line. Day 25 will be done separately in a “U” shape, of course.

Cut card stock into pieces 2″ high and 2″ wide. On the cards, record activities that your family enjoys or that are important to you during this season. Alternatively, you can include small gifts or candies in each pocket.

Card/Pocket Ideas

  • Play Christmas music
  • Put up the Christmas tree
  • Drive around to see the lights and decorations
  • Make Christmas cookies
  • Read the Christmas story
  • Look at photos from previous Christmas seasons
  • Hang stockings
  • Visit Santa
  • Special treat
  • Craft supplies
  • Pieces of a larger toy set given in a few pieces each day (LEGO’s are great for this)
  • Chocolates
  • Small jewelry or accessory items

Sara shares that her children would race to the calendar each morning to read the card. The surprise of what the day’s activity would be was very exciting. Seeing what day of the month it was not only taught them about the calendar sequence but avoided repetitive questions about when Christmas would be here. The activities they chose encouraged family togetherness and reminders of the meaning of the holiday.


~ This project is adapted from an article by Sara Scheil published in a previous issue of Notions.

Did you enjoy this article?
Are you an ASG member?
This field is for validation purposes and should be left unchanged.


Tagged With: project, sewing

  • 1
  • 2
  • 3
  • …
  • 16
  • Next Page »

Become a Member

Join the only national organization dedicated to Advancing Sewing as an Art and Life Skill.

Join Now button

Blog Article Categories

  • ASG Conference
  • Chapter Stories
  • Embroidery
  • Fitting
  • Learn to Sew
  • National Sewing Month
  • Products, Books, & Patterns
  • Projects
  • Quilting
  • Sewing
  • Sewing Techniques
  • Sewing Tips
  • Sewing Tours
  • Videos
  • Disclaimer
  • Privacy Policy

American Sewing Guild
National Headquarters
9660 Hillcroft, Suite 230
Houston TX 77096
713-729-3000 | 713-721-9230 Fax
www.ASG.org

ASG wordcloud - education, conference, discounts, videos, special offers, tours and more

Copyright © 1998–2025 · American Sewing Guild · All Rights Reserved