American Sewing Guild (ASG)

Visit our blog Visit the ASG Facebook page Visit ASG on Pinterest Visit ASG's YouTube channel Visit ASG on Instagram
  • Home
  • Join ASG
    • Join Online
    • Chapter Locations
    • Member Benefits
    • Member Brochure
    • Join by Mail
  • Conference & Education
  • Resources
    • Contests & Awards
    • Giving Back
    • Hall of Fame
    • Links
    • Travel and Tours
    • Measurement Chart
  • Shop
    • ASG Store
    • Chapter Products
    • Video Resources
  • Blog
  • About
    • About Us
    • Donate to ASG
    • ASG Sensitivity Statement
    • FAQ’s
    • Start a Chapter
  • Contact
  • Member Login
    • Login First!
    • Members Only
    • Leadership Only
    • Website FAQ’s
    • Logout
  •  

October 8, 2021

Pressing Tools—Clapper and Sleeve Board

It doesn’t matter whether you tailor fine wool jackets or make casual everyday wear, or if you’re a quilter—getting a good press is of the utmost importance for a professional-looking project. There are tools to help with that process. Let’s take a look at two tools that work for all sewers and quilters—a clapper and a sleeve board.

Clapper
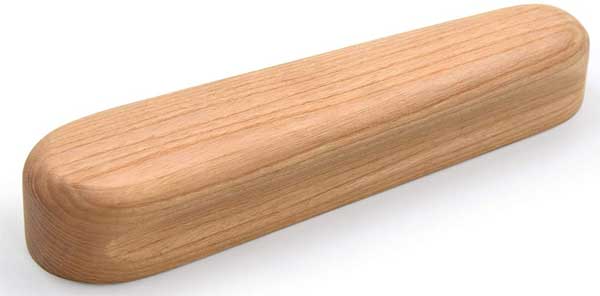
Mardili Hard Wood Tailors Clapper. The product shown is from Amazon. If you make a purchase, ASG may receive a small commission at no additional cost to you.

What is it?

A clapper is basically a long block of wood with curved edges. The block may have indentations along the side for easier holding, but the bottom surface if totally flat. Clappers come in different sizes, depending on where they’ll be used.

It’s important that the clapper is made from hardwood with a heavy, closed grain so that it holds heat and steam in whatever you’re trying to press beneath it. Maple is a common wood used for clappers. All clappers should be unfinished wood, to avoid transferring any oils or finishes to the fabrics below.

What is it for?

Fashion sewers and quilters use a clapper to flatten and compress seams, creases and hems. It’s helpful for flattening edges, like tailored collars on jackets and cuffs. Some people use a clapper to create precise creases in pant legs. Quilters use clappers to help flatten seams, whether pressed open or to one side, and to make sharp seam edges in foundation piecing projects.

How does it work?

A clapper is used in conjunction with an iron, either steam or dry. If you’re using a dry iron, spray the area with water to moisten it before pressing and clappering.

Once the area is pressed with the iron and infused with steam, press the clapper down on top of the area to trap the moisture in the area until it cools. Apply pressure if you’re pressing a thick edge like a collar, lapel or cuff.

Sleeve Board
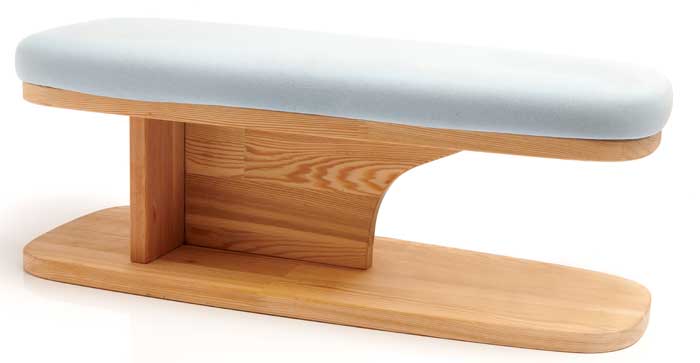
sleeve board

What is it?

A sleeve board is basically a small wooden ironing board, usually with padding on the upper surface. The wooden base usually isn’t padded, but provides an optional pressing surface should a harder surface be needed.

Some sleeve boards have metal grids under the upper padding and some have metal legs instead of being reversible flat surfaces.

What is it for?

The name doesn’t say it all, but it does note its original purpose—pressing sleeves, without getting extra creases where you don’t want them. But, it’s also handy for pressing pant legs and other tubular type sewing projects where you don’t want additional creases added to the area. For crafters, a sleeve board is handy for pressing wine bags or other narrow drawstring type bags where accessing seams can be challenging.

A sleeve board can also be used for any pressing task where a full-size ironing board might not be needed—like pressing doll clothes, or quilt blocks.

How does it work?

Sleeve board sizes vary depending on the manufacturer, and the size of the pressing surface obviously affects what can fit over it. But all sleeve boards have at least one end tapered so that it’s narrower than the opposite end attached to the base.

  • To use the sleeve board, simply slide the sewn tubular shape over the narrow end of the board and onto the padded pressing surface.
  • A sleeve can actually be pulled over the smaller curved end to lightly press the cap area during construction.
  • If you’re sewing with limited space, like at a retreat, a sleeve board can be used as your personal tabletop ironing board to save time waiting in line for the main ironing board.

~Linda Griepentrog
Linda is the owner of G Wiz Creative Services and she does writing, editing and designing for companies in the sewing, crafting and quilting industries. In addition, she escorts fabric shopping tours to Hong Kong. She lives at the Oregon Coast with her husband Keith, and two dogs, Yohnuh and Abby. Contact her at .

Did you enjoy this article?
Are you an ASG member?
This field is for validation purposes and should be left unchanged.

Tagged With: clapper, iron, quilting, sewing, sleeve board, sleeves

October 6, 2021

What I’m Sewing: Alba Jacket

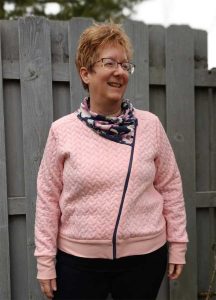
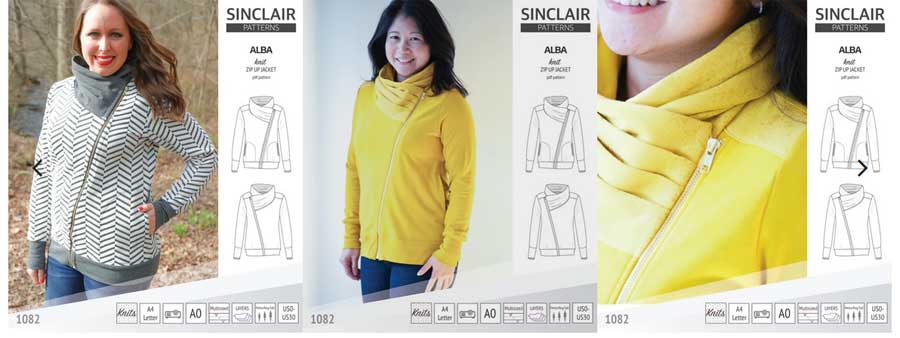
Pink jacketThank you to Kim Caywood from the Central Illinois chapter for sharing her information on working with the Alba Jacket pattern from Sinclair Patterns. We love this unique jacket. And it looks quite cozy, too!

Q. Item Created 
A. Jacket

Q. Independent Pattern Designer
A.
Sinclair Patterns

Q. Name and Number of Pattern
A.
Alba Jacket

Q. Fabric Used:
A. French Terry and Quilted Knit

Q. Special Embellishments/Notions Used
A. Zipper

Q. Skill level required?
A.
Confident Beginner

Q. Are the instructions easy to follow?
A.
Instructions are easy to follow and have step by step pictures. They also have a Facebook group where you can ask questions if you have an issue with construction.

Q. Are you pleased with the finished result?  Did it meet your expectations?
A.
I love the way this turned out. I am always skeptical about installing zippers but this turned out great

Q. Did it look like the picture?
A.
Yes it did

Q. Did you make any modifications in the pattern?
A.
As this was a pattern test, modifications were not allowed

Q. Are there any changes you would have made?
A. I might have used a fabric with less drape for the collar

Q. Did the pattern teach you any unique or special techniques?
A.
Inserting an asymmetrical zipper

Q. Would you make this again?
A.
I would make this again

Q. Would you recommend this pattern to others?
A.
I would highly recommend Sinclair Patterns to anyone. They come in Petite, Regular and Tall sizing and in sizes from XXS to 4XL

Pattern Link: https://sinclairpatterns.com/products/alba-zip-up-knit-asymmetrical-jacket-with-a-cowl-and-side-pockets-pdf?_pos=1&_sid=3c9c05b83&_ss=r


Did you enjoy this article?
Are you an ASG member?
This field is for validation purposes and should be left unchanged.

Tagged With: alba jacket, pattern

October 1, 2021

Pinking Shears—A Cut Above

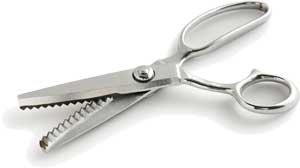
Pinking shearsChances are good that if you’re serious about your craft, you have multiple pairs of scissors and shears in your sewing tool arsenal, and that may include at least one pair of pinking shears. These specialty shears have blades that cut fabric in a mini-zigzag or sawtooth pattern instead of just a straight line like most shears. But, how do you use these funny-looking shears?

Pinking Shear Savvy

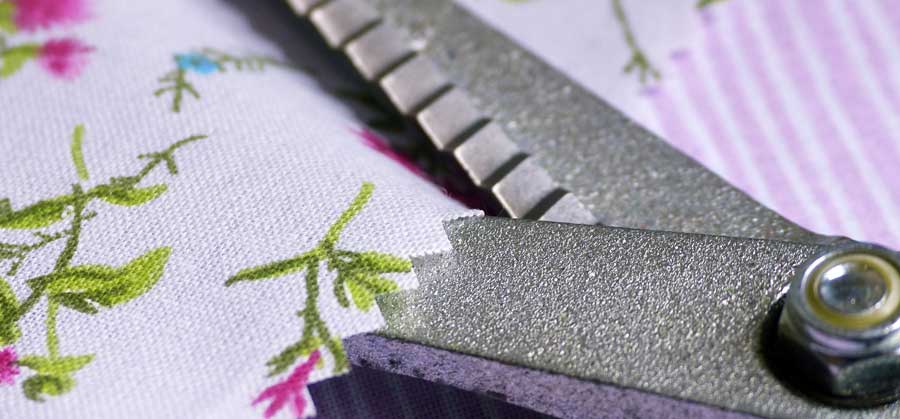
The primary purpose of these zigzag-tooth shears is to trim fabric and keep it from fraying. When you cut a straight-grain line with the shears, each of the little zigs and zags has bias edges, and bias doesn’t fray or ravel under normal conditions. So, probably the most common use is to trim seam allowances to help keep raveling in check on the inside of a garment. They can also be used on hem and facing edges. When using pinking shears as an edge finish, there is no additional bulk (like stitches or binding) so the seam edge remains flat.

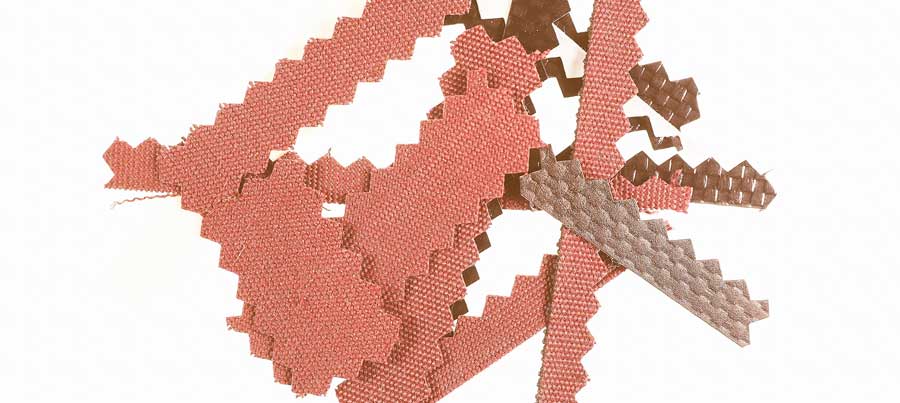
fabric cut with pinking shears

In addition to creating a less bulky seam finish, the edge configuration helps prevent imprinting on most fabrics. What’s imprinting? When you press a seam open, or press both seam allowances in the same direction, the seam allowance edges create a “drop-off” point and the difference in thickness can show on the outside of the garment. This is called imprinting, as there’s a slight indentation along the pressed edge line. Using pinking shears on the seam allowance softens it and reduced the more prominent drop-off edge.

But what if you want to sew your seam with wrong sides together instead? Yes, you can trim the seam allowances with pinking shears and have the little zigzags showcased on the outside of the garment instead (usually sewn down with a row of straight stitching). In this scenario, the wrong side of the fabric shows, so be sure it’s OK to be seen—a perfect technique for double-faced fabrics.

During construction, pinking shears can be a handy way to reduce bulk in an inside or outside curve, such as a collar or neckline. Traditional construction has us clipping outside curves, notching inside curves, and trimming seams, but using pinking shears to trim a curve seam both notches and clips in one operation allowing for a smooth curve after final pressing.

Pinking shears can also be used to create decorative edges on non-fraying fabrics. Fleece, boiled wool, non-woven faux suedes (like UltraSuede), felt, vinyl and leather are ideal candidates for a simple pinked edge finish. The pinking can also be combined with a row or two of straight stitches, or even decorative stitch accents.

edges cut with pinking shears

Pinking shears can also be used to finish appliqué edges, especially on non-ravelling fabrics. That saves turning under edges, or encasing the edges with stitches. Following that same principle, pinking both edges of a strip can create a trim band suitable for strapping a seam. The strip can be sewn on, or fusible web applied before trimming with the pinking shears yields a fusible trim band.

Guidelines

Pinking shears can be used to cut one or two layers at a time, depending on the fabric weight. So, finish seam allowances singly or together depending on how your shears work with a particular fabric—keyword: testing. If the shears tend to chew the fabric, cut only a single layer at a time.

Because these specialty shears are cutting little teeth, it’s a good idea to align the teeth as you cut for a continuous look. Note that some brands of shears have one blade longer than the other so the zigzags can’t be cut all the way to the end. In addition, the zigzags may not go all the way to the hinge point. But, either way, cut with long strokes and align subsequent cuts to form complete and continuous zigs and zags.

Care and Feeding of your Pinking Shears

  • Like most scissors and shears, pinking shears need a drop of oil occasionally in the hinge area for smooth operation. Keep the oil off the blades so that it doesn’t damage your fabric, and wipe away any excess before use.
  • Keep the blades free of lint for the sharpest cut.
  • Do not use pinking shears on paper or to actually cut out your projects. Cut the project with regular shears, then use the pinking shears for finishing.
  • Store pinking shears in a case or fabric pocket to protect the blades from damage and take care to avoid dropping them.

Look-alikes

In addition to pinking shears, other decorative-edge shears are also available with scallop or wave blades. They can be used in the same manner but are more often used for decorative edges.

Novelty rotary cutting blades are also available in pinking, scallop, or wave configurations.

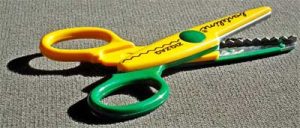
crafting scissorsIf you wander into the scrapbooking department, you may see paper edgers—these small scissors are designed for use only on paper and cardstock, not for fabric. The blades on these edge finishers may look like pinking, scallops, waves or more elaborate trim options, but they will not cut most fabrics cleanly.


~Linda Griepentrog
Linda is the owner of G Wiz Creative Services and she does writing, editing and designing for companies in the sewing, crafting and quilting industries. In addition, she escorts fabric shopping tours to Hong Kong. She lives at the Oregon Coast with her husband Keith, and two dogs, Yohnuh and Abby. Contact her at .

Did you enjoy this article?
Are you an ASG member?
This field is for validation purposes and should be left unchanged.

September 29, 2021

How to Use a Chisel to Open a Buttonhole

This short video shows you how to use a chisel to cut open a buttonhole and mark notches.


~Sheryl Belson

Did you enjoy this article?
Are you an ASG member?
This field is for validation purposes and should be left unchanged.

September 25, 2021

2021 ASG Conference Update

With deep disappointment, we share the news that the 2021 Conference in Newport Beach has been cancelled.

ASGWe all worked extremely hard to move the conference to October and could not have imagined the ongoing issues that would ultimately prevent the event from happening, including:

  • Many of our educators have been uncomfortable with the idea of participating under current circumstances.
  • Understandable member concerns with travel and gathering have resulted in low registration numbers that wouldn’t allow us to cover the cost of the event.
  • The hotel is still undergoing a remodel and remains understaffed and without an open restaurant on site.
  • Due to staffing concerns with local decorators that set up the booths, we have been unable to contract with anyone for this and were resorting to tabletop displays.
  • With limited display area, low attendance numbers, and ongoing shipping issues, many of our traditional vendors have been choosing to wait until 2022 to participate.

Registrations will be refunded and we understand most airlines are waiving change fees to allow those who have scheduled now to reschedule to next year’s event.

ASG Conference 2022
June 30-July 3 | San Antonio, TX

We are very hopeful that things will improve and our members will be able to safely and happily travel and join together at Conference again.

As with every negative, there are positives. We have now become quite proficient at pivoting to address ongoing changes. Our intentions for moving forward are to work with many of the teachers who would have taught in Newport Beach to convert their classes to virtual events over the coming months. In addition, we will look to work with virtual vendor events as well.

We give our heartfelt appreciation to everyone whose hopes were as high as ours and had planned to attend this year, along with those who were rooting for us to proceed. Sincerest thanks to everyone involved in the planning, especially the Orange County Chapter President, Geri Guerra, and Special Events Chair, Diane Jakubowski.

I wish to personally thank our staff who have struggled to meet and overcome so many challenges throughout this process, along with our Directors whose guidance and support has been so valuable. An abundance of gratitude goes out to the educators that have worked with us to provide class offerings for this year’s conference.

Finally, we send our thanks to each of you, our members, for your patience and understanding as we navigate these waters and once again begin the process of creating new plans. We will continue to keep you updated as new information is available.

Sincerely,
Margo Martin
Executive Director

Tagged With: ASG Conference, conference

  • « Previous Page
  • 1
  • …
  • 38
  • 39
  • 40
  • 41
  • 42
  • …
  • 82
  • Next Page »

Become a Member

Join the only national organization dedicated to Advancing Sewing as an Art and Life Skill.

Join Now button

Blog Article Categories

  • ASG Conference
  • Chapter Stories
  • Embroidery
  • Fitting
  • Learn to Sew
  • National Sewing Month
  • Products, Books, & Patterns
  • Projects
  • Quilting
  • Sewing
  • Sewing Techniques
  • Sewing Tips
  • Sewing Tours
  • Videos
  • Disclaimer
  • Privacy Policy

American Sewing Guild
National Headquarters
9660 Hillcroft, Suite 230
Houston TX 77096
713-729-3000 | 713-721-9230 Fax
www.ASG.org

ASG wordcloud - education, conference, discounts, videos, special offers, tours and more

Copyright © 1998–2025 · American Sewing Guild · All Rights Reserved