American Sewing Guild (ASG)

Visit our blog Visit the ASG Facebook page Visit ASG on Pinterest Visit ASG's YouTube channel Visit ASG on Instagram
  • Home
  • Join ASG
    • Join Online
    • Chapter Locations
    • Member Benefits
    • Member Brochure
    • Join by Mail
  • Education & Classes
  • Resources
    • Contests & Awards
    • Giving Back
    • Hall of Fame
    • Travel and Tours
    • Measurement Chart
  • Shop
    • ASG Store
    • Chapter Products
    • Video Resources
  • Blog
  • About
    • About Us
    • Donate to ASG
    • ASG Sensitivity Statement
    • FAQ’s
    • Start a Chapter
  • Contact
  • Member Login
    • Login First!
    • Members Only
    • Leadership Only
    • Website FAQ’s
    • Logout
  •  

August 14, 2026

Sleeve Setting

Whether you’re a beginner or an experienced sewer, sleeves can be a little intimidating—whose idea was it to try and fit a rounded curve into an armhole anyway?
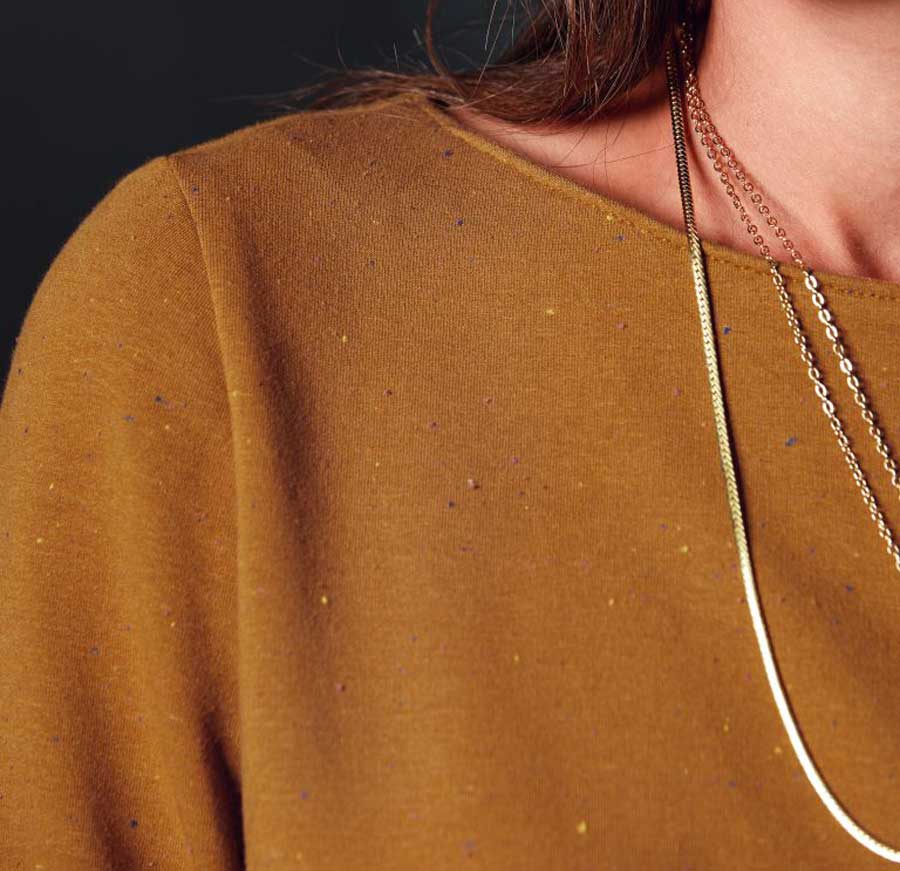
Sleeve image

No matter what type of garment you’re creating—from coat to T-shirt—you’ll likely be facing one of two types of sleeves: either one with a rounded cap or one with a flat cap. (Raglan is another type of sleeve, but requires a different insertion method.)

Rounded caps are found in more tailored and fitted garments and are commonly called set-in sleeves, while flat caps (aka shirt sleeves) are found in more sporty garments, menswear and kids’ clothes, and getting them into your garment requires different strategies.
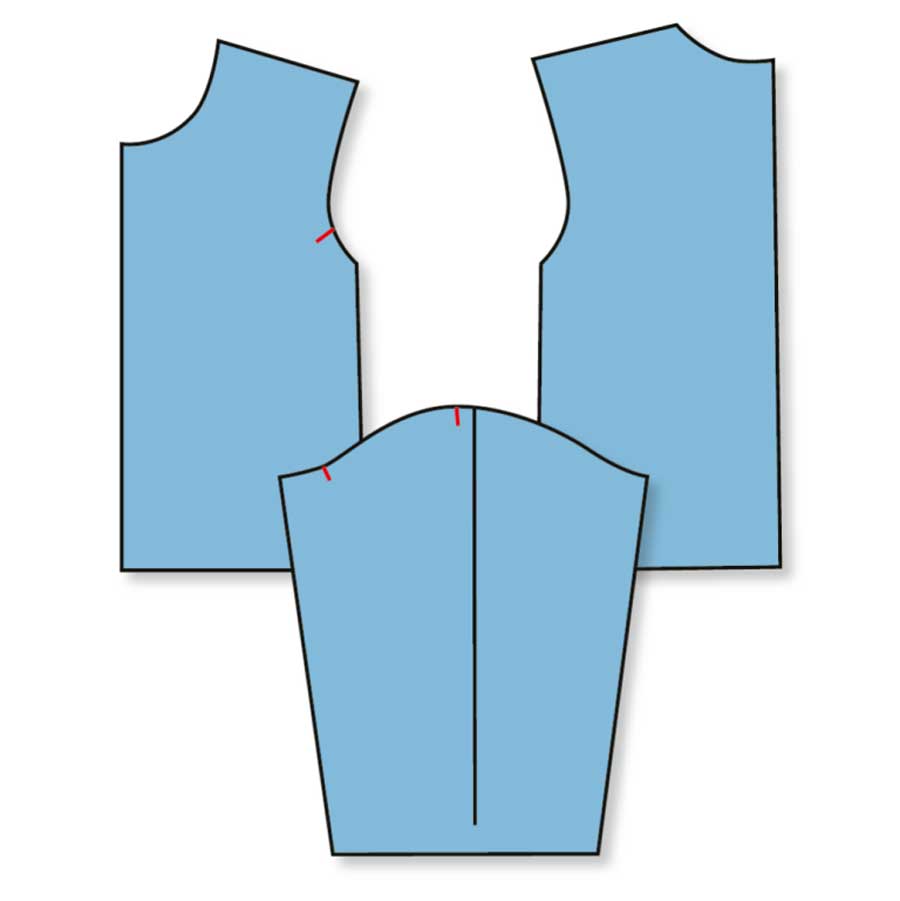
Flat cap sleeve

Set-in Sleeves

The shape of a rounded sleeve cap allows for ease to fit over the shoulder curve and upper arm area. If you measure the seamline of the garment and you measure the seamline of the upper sleeve, you’ll find that the sleeve is longer. That means you’ll need to ease the fullness into the smaller garment opening.

A rounded sleeve cap has important pattern markings—at the shoulder and part way along the sleeve cap both front and back, including placement notches. These are key for distributing the ease.
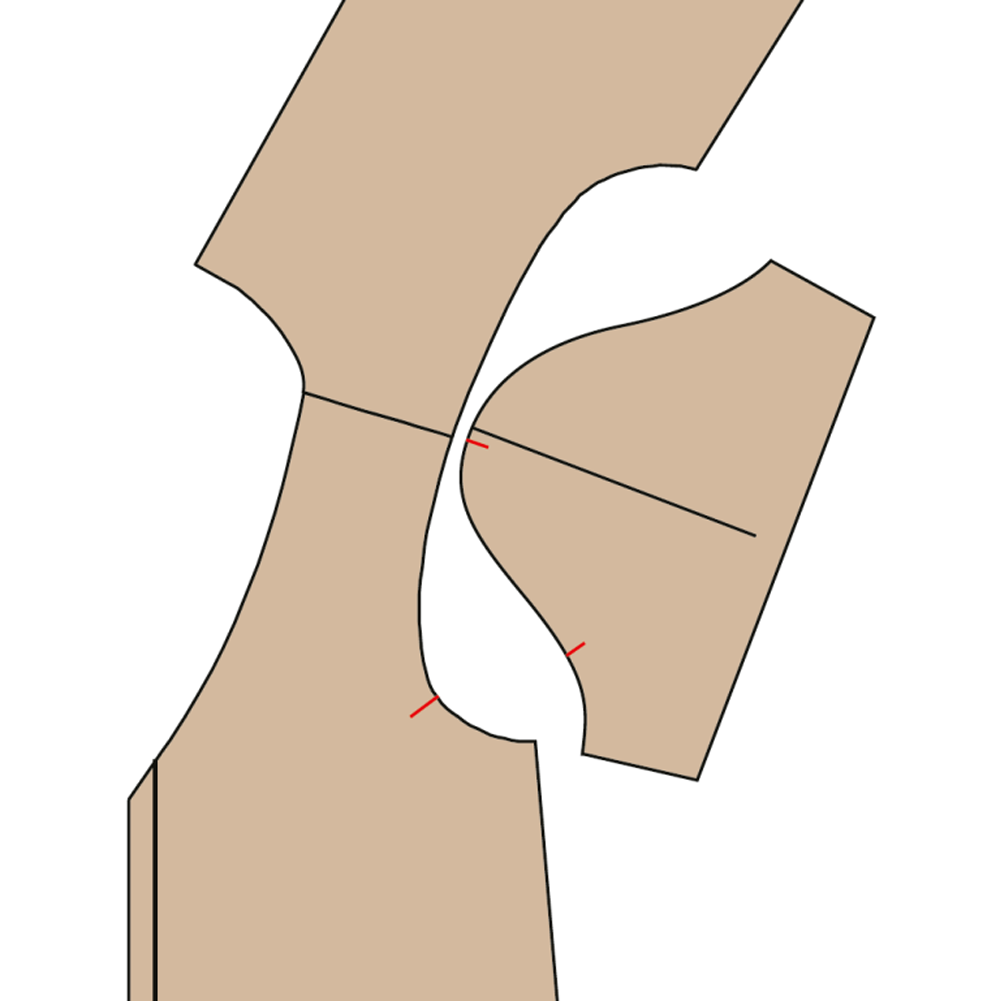
Rounded cap sleeve with markings

The area below the armhole notches on the sleeve should fit the armhole itself with no ease, as the ease area is concentrated at the top portion of the sleeve, above the notches.

To evenly distribute the sleeve cap ease, stitch a line of basting length stitches 1/8” inside and outside the seamline from notch to notch—do not backstitch, but instead leave the thread tails long enough to pull.
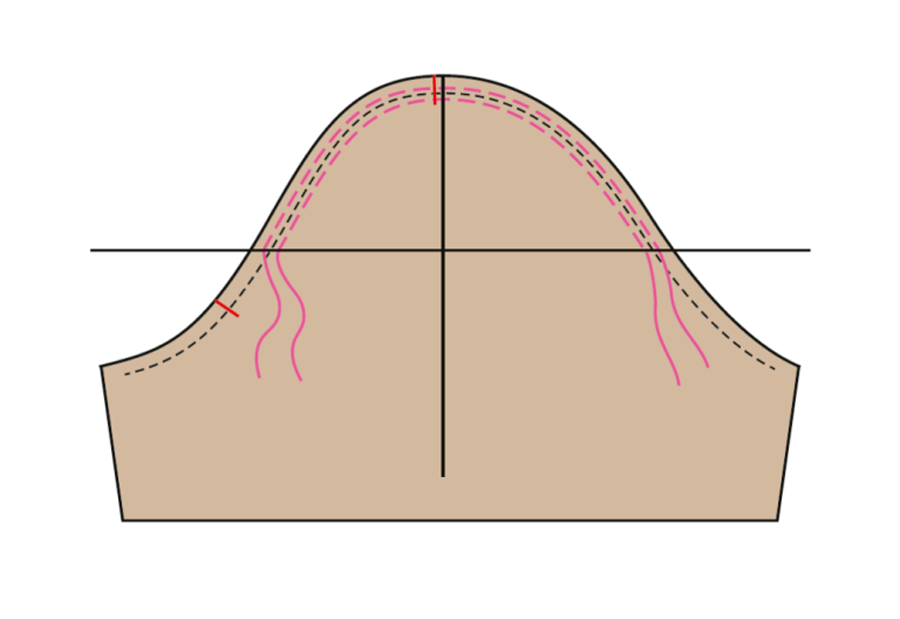
Ease lines

The first step in insertion is to sew the underarm sleeve seam and the corresponding garment shoulder and underarm seam, and press both open. With right sides together, place the sleeve inside the armhole opening and pin at the notches, seamline, shoulder point and corresponding markings on the cap. Gently pull on the bobbin threads of the ease line to fit the sleeve to the armhole size, working from the notch area to the shoulder.
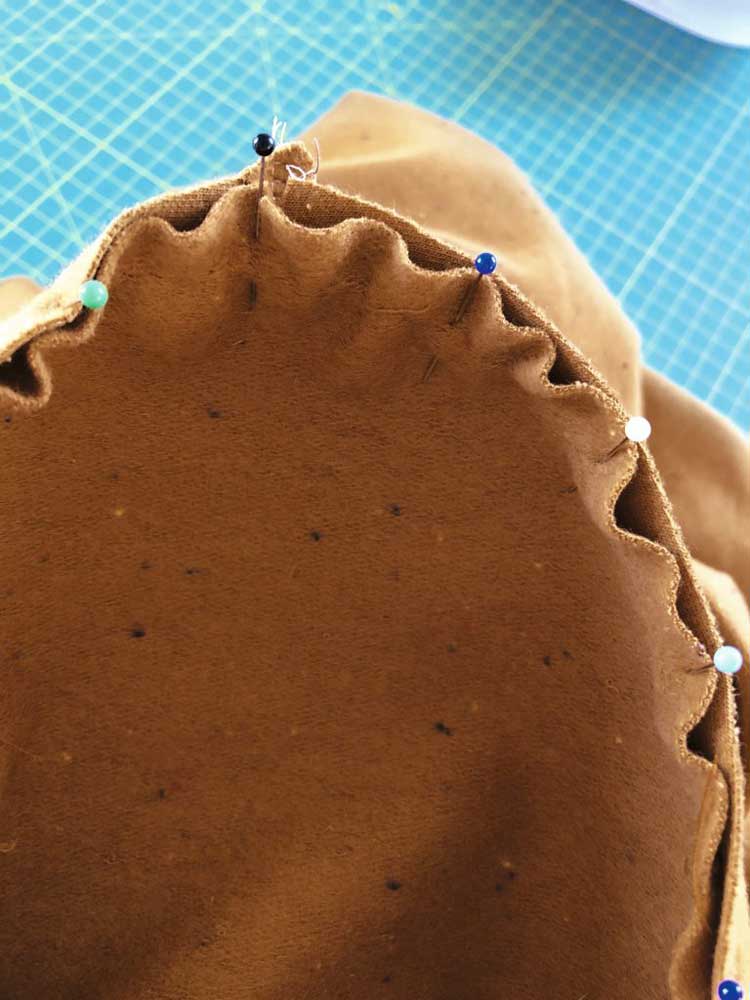
If your machine has a free-arm, this is the place to use it, as the sleeve opening can fit over it for easier access.

Beginning at the underarm seam, stitch the sleeve in place adjusting the ease as needed to fit and being careful to avoid any puckers. Sew with the sleeve side up to control the ease.

Reinforce the lower armhole with a second line of stitching ¼” inside the seamline. Trim the seam allowances below the notches, but leave the seam allowances intact in the cap area to fill out the sleeve head. Push the upper sleeve seam allowances toward the sleeve, but don’t press this area as it will flatten, eliminating the ease you just carefully created. Remove any visible basting.

If you’re working on a tailored garment with a two-piece sleeve, follow the pattern guidesheet to sew the undersleeve to the top sleeve before inserting it into the garment.

Flat Sleeve Insertion

Shirt sleeves have the same markings as their set-in cousins—notches front and back, a shoulder marking and often some intermediate marks as well. This type of sleeve is put in prior to sewing the garment side seams and sleeve underarm seam. No ease line is necessary for this type of sleeve—simply match the notches and other marks, right sides together, and stitch with the sleeve side up.
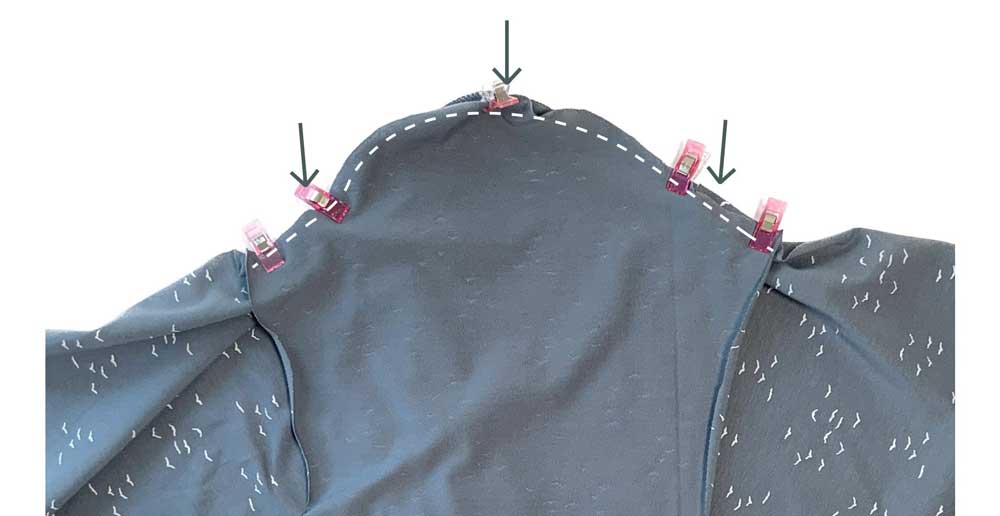
Flat cap sleeve, ready to sew

Shirt sleeves can easily be inserted with a serger or conventional machine. If you choose the latter, sew a second line of stitching, either zigzag or straight just inside the seamline and trim off the extra seam allowance.

With right sides together, match the garment underarm seams, hemline and sleeve hem, then sew the seam continuously. Finish and trim as for the sleeve cap area.
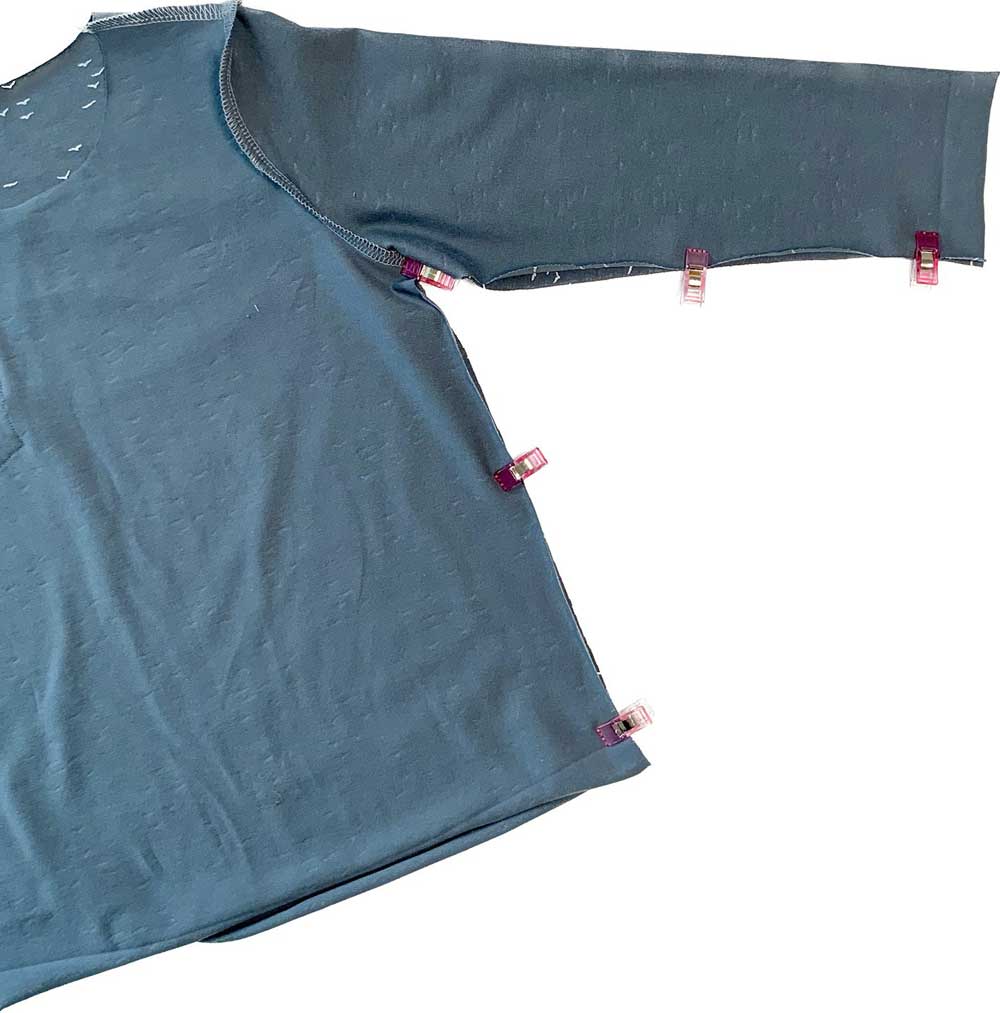
Flat cap sleeve side seam

All images provided courtesy of Bernina


~Linda Griepentrog is the owner of G Wiz Creative Services and she does writing, editing and designing for companies in the sewing, crafting and quilting industries. In addition, she escorts fabric shopping tours to Hong Kong. She lives at the Oregon Coast with her husband Keith, and three dogs, Yohnuh, Abby, and Lizzie. Contact her at gwizdesigns@aol.com.
Tagged With: garment sewing, sewing tips, sleeves

October 8, 2021

Pressing Tools—Clapper and Sleeve Board

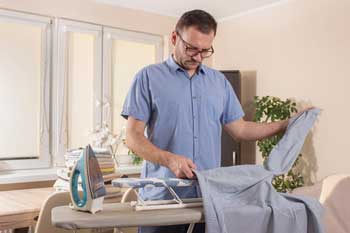
It doesn’t matter whether you tailor fine wool jackets or make casual everyday wear, or if you’re a quilter—getting a good press is of the utmost importance for a professional-looking project. There are tools to help with that process. Let’s take a look at two tools that work for all sewers and quilters—a clapper and a sleeve board.

Clapper

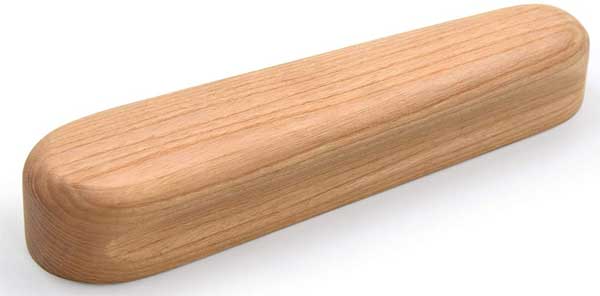
Mardili Hard Wood Tailors Clapper. The product shown is from Amazon. If you make a purchase, ASG may receive a small commission at no additional cost to you.

What is it?

A clapper is basically a long block of wood with curved edges. The block may have indentations along the side for easier holding, but the bottom surface if totally flat. Clappers come in different sizes, depending on where they’ll be used.

It’s important that the clapper is made from hardwood with a heavy, closed grain so that it holds heat and steam in whatever you’re trying to press beneath it. Maple is a common wood used for clappers. All clappers should be unfinished wood, to avoid transferring any oils or finishes to the fabrics below.

What is it for?

Fashion sewers and quilters use a clapper to flatten and compress seams, creases and hems. It’s helpful for flattening edges, like tailored collars on jackets and cuffs. Some people use a clapper to create precise creases in pant legs. Quilters use clappers to help flatten seams, whether pressed open or to one side, and to make sharp seam edges in foundation piecing projects.

How does it work?

A clapper is used in conjunction with an iron, either steam or dry. If you’re using a dry iron, spray the area with water to moisten it before pressing and clappering.

Once the area is pressed with the iron and infused with steam, press the clapper down on top of the area to trap the moisture in the area until it cools. Apply pressure if you’re pressing a thick edge like a collar, lapel or cuff.

Sleeve Board

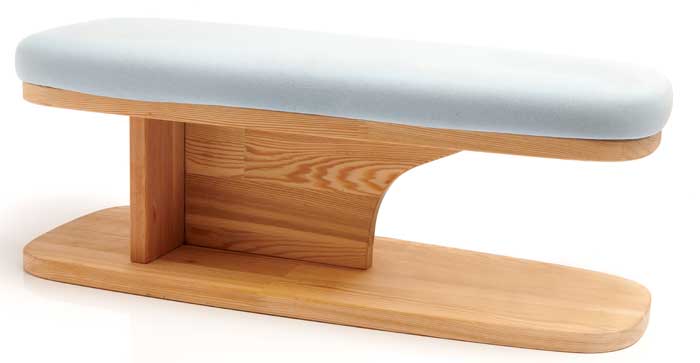
sleeve board

What is it?

A sleeve board is basically a small wooden ironing board, usually with padding on the upper surface. The wooden base usually isn’t padded, but provides an optional pressing surface should a harder surface be needed.

Some sleeve boards have metal grids under the upper padding and some have metal legs instead of being reversible flat surfaces.

What is it for?

The name doesn’t say it all, but it does note its original purpose—pressing sleeves, without getting extra creases where you don’t want them. But, it’s also handy for pressing pant legs and other tubular type sewing projects where you don’t want additional creases added to the area. For crafters, a sleeve board is handy for pressing wine bags or other narrow drawstring type bags where accessing seams can be challenging.

A sleeve board can also be used for any pressing task where a full-size ironing board might not be needed—like pressing doll clothes, or quilt blocks.

How does it work?

Sleeve board sizes vary depending on the manufacturer, and the size of the pressing surface obviously affects what can fit over it. But all sleeve boards have at least one end tapered so that it’s narrower than the opposite end attached to the base.

  • To use the sleeve board, simply slide the sewn tubular shape over the narrow end of the board and onto the padded pressing surface.
  • A sleeve can actually be pulled over the smaller curved end to lightly press the cap area during construction.
  • If you’re sewing with limited space, like at a retreat, a sleeve board can be used as your personal tabletop ironing board to save time waiting in line for the main ironing board.

~Linda Griepentrog
Linda is the owner of G Wiz Creative Services and she does writing, editing and designing for companies in the sewing, crafting and quilting industries. In addition, she escorts fabric shopping tours to Hong Kong. She lives at the Oregon Coast with her husband Keith, and two dogs, Yohnuh and Abby. Contact her at gwizdesigns@aol.com.
This field is for validation purposes and should be left unchanged.
Did you enjoy this article?
Are you an ASG member?

Tagged With: clapper, iron, quilting, sewing, sleeve board, sleeves

Become a Member

Join the only national organization dedicated to Advancing Sewing as an Art and Life Skill.

Join Now button

Blog Article Categories

  • ASG Conference
  • Chapter Stories
  • Embroidery
  • Fitting
  • Learn to Sew
  • National Sewing Month
  • Products, Books, & Patterns
  • Projects
  • Quilting
  • Sewing
  • Sewing Techniques
  • Sewing Tips
  • Sewing Tours
  • Videos
  • Disclaimer
  • Privacy Policy

American Sewing Guild
National Headquarters
9660 Hillcroft, Suite 230
Houston TX 77096
713-729-3000 | 713-721-9230 Fax
www.ASG.org

ASG wordcloud - education, conference, discounts, videos, special offers, tours and more

Copyright © 1998–2026 · American Sewing Guild · All Rights Reserved