American Sewing Guild (ASG)

Visit our blog Visit the ASG Facebook page Visit ASG on Pinterest Visit ASG's YouTube channel Visit ASG on Instagram
  • Home
  • Join ASG
    • Join Online
    • Chapter Locations
    • Member Benefits
    • Member Brochure
    • Join by Mail
  • Education & Classes
  • Resources
    • Contests & Awards
    • Giving Back
    • Hall of Fame
    • Travel and Tours
    • Measurement Chart
  • Shop
    • ASG Store
    • Chapter Products
    • Video Resources
  • Blog
  • About
    • About Us
    • Donate to ASG
    • ASG Sensitivity Statement
    • FAQ’s
    • Start a Chapter
  • Contact
  • Member Login
    • Login First!
    • Members Only
    • Leadership Only
    • Website FAQ’s
    • Logout
  •  

December 18, 2020

Sewing Basics: General Sewing Terms, Part 1

Whether it’s traveling in a foreign country or knowing the terminology for a project you are working on, being able to speak the language is important. Today’s article reviews some basic sewing language that will be helpful to new sewists while still being a great refresher and idea generator for those who are more experienced. Think of these sewing terms as a “language acquisition and refresher” resource!

Note: This is Part 1 of our General Sewing Terms series. See Part 2.

Seam Allowance

Seam allowance is the distance between the stitching line and the cut edge of the fabric.

In garment sewing, the most common seam allowance included in patterns is 5/8” but it is important to confirm this for each pattern you use. Some pattern companies use a 3/8” seam allowance as their standard while some, like Burda Style and Marfy, include no seam allowance on their patterns so you must add it when you cut the pattern pieces out. If you are quilting, you are most likely going to use a standard of 1/4” seam allowance.
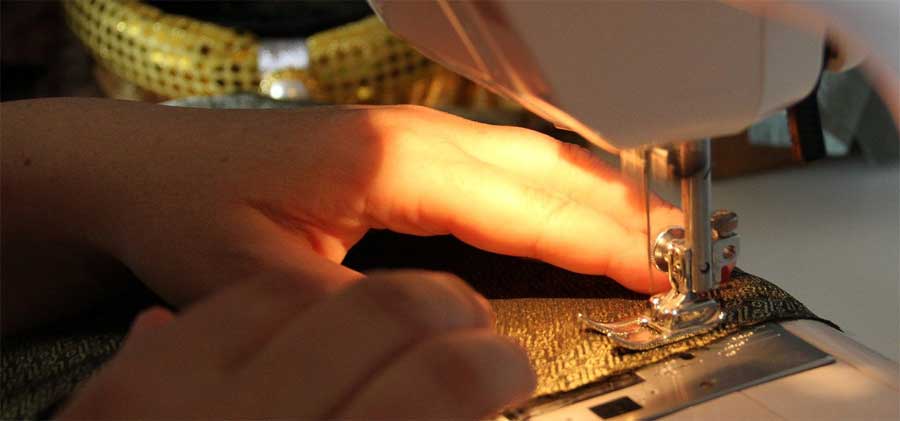
When deciding the size of seam allowance you want to use, there are a few things to consider:

  • Begin by checking your pattern details. If you sew a 5/8” seam allowance on a pattern designed with a 3/8” seam allowance, you will have downsized each seam by 1/2”. In a simple skirt with 2 side seams and a center back seam, you will have reduced the circumference by 1-1/2.”  Might be a bit too small to squeeze into now!
  • The amount of stress that will be placed on a seam is an important factor. A 1/4” seam on a quilt that will not be stressed may be fine, but a 1/4” seam on an center back seam in pants you will apply stress to as you bend and sit might not be enough to prevent pulling through the fabric and splitting that seam open. Watch for clothing malfunctions!
  • The type of fabric being used is also important. Sturdier fabric like denim can handle a smaller seam allowance at stress points that a finer fabric.
  • The shape of the seam line will dictate the best size of your seam allowance. Curved seams, like princess seams and collar stands will turn much more smoothly with a smaller seam allowance than a larger one.

Back Stitch

Backstitching is something you do at the beginning and end of each seam to secure it and prevent unstitching.

The desired outcome — seams not pulling apart at either end — can be accomplished in a few ways.
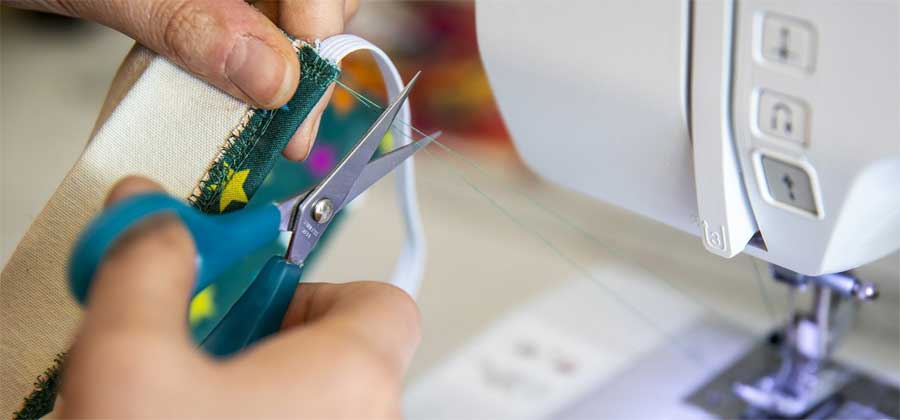
  • Backstitching is exactly what it sounds like. At the beginning of a seam, start a few stitch lengths inside the cut edge of the fabric and stitch backward to the edge, then stitch forward the length of the seam.
  • Leave long thread tails at the beginning and end of each seam then tie them off with a double knot before trimming.
  • If your machine has a “fix stitch”, start each seam with this as it will make a few stitches in place before continuing the seam. At the end of each seam, use a “stop stitch” if you machine has this option. It does the same thing as the fix stitch but without continuing the seam. This is a less secure choice than a back stitch or tying threads off.

Seam Finish

The primary purpose of finishing seams is to protect the cut edge of the fabric from raveling during wear and laundering.

There are many options to choose from but, remember knit fabrics do not ravel, so this task is specific to when you are sewing with wovens.
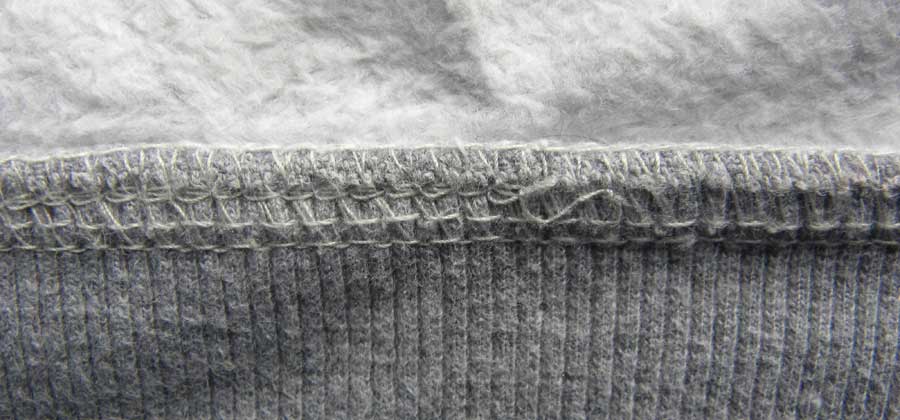
The secondary purpose is to provide a nice, clean look on the inside of the garment. Some sewists will say they want the inside of the garment to look as beautiful as the outside. Here are a few options you can consider:

  • Pinking – One of the simplest things you can do is trim your seams with pinking shears. As with any sewing tool, you can get budget friendly Fiskar pinking shears for as low as about $15 or higher quality Gingher shears for around $50. The end result may not provide the most finished look, but it will reduce the ravel effect during laundering.
  • Serger – Using a serger for seam finishes is quick and provides a more ready-to-wear look on the inside of the garment. After stitching the seam in place, your serger can both trim the seam and overcast the cut edge all at once.
  • French Seam – This method requires two steps, sewing two seams. The first seam is sewn with WRONG sides together, usually with a 1/4” seam. Trim that small seam closely, them flip to the RIGHT sides together, enclosing the initial seam, and stich again at a scant 3/8”, resulting in a total of a 5/ 8” seam allowance. Obviously, you need to adjust these two widths to result in the final seam allowance width desired. The result is a nice clean finish as well as the double strength of the two seams. It is often used with sheer fabrics like chiffon since the inner seam is frequently a bit visible through the sheer fabric.
  • Hong Kong Finish – This method is particularly popular in garments like unlined jackets. It is accomplished by taking bias strips of fabric and first stitching them to the right side of the seam allowance cut edge. Next press the bias strip away from the seam, extending over the cut edge, then wrap it to the wrong side of the seam allowance. Stich in the ditch to fix the wrapped bias strip in place then trim close to the stitching line, removing the excess fabric on the wrong side. This take a bit more time, but with a fun print can create some fun interest on the inside of the garment.

Grading Seams

Grading seams is something you do to reduce bulk.

It refers to the practice of trimming seam allowance layers to different widths. Typically, the “public side” of the seam, meaning the side that is closest to the outer layer of the garment, maintains the greatest width with each layer toward the interior of the garment being trimmed slightly shorter. The innermost seam allowance may be trimmed as narrow as 1/8”. The result of grading is a smoother transition, avoiding a bulky ridge of sandwiched seam allowances showing through to the right side.

Basting

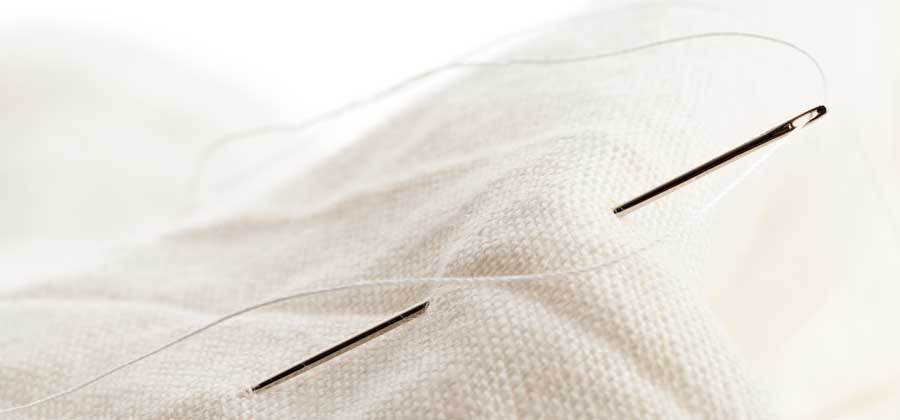
Basting is sewing long, easily removable stitches by machine or by hand.

It is also sometimes called tacking. Basting stitches temporarily join fabric for several reasons, such as:
  • Test the fit on placement of things like pockets or darts before sewing more permanent stitches.
  • Hold slippery fabrics together while you sew the permanent stitches.
  • Replace pins and make it easier to machine sew.
  • Holding a zipper or hems on bulky jeans in place for stitching.
  • Holding two or more layers of fabric together so they can be worked as one layer, such as when basting together the layers of a quilt.

Here are a few basting tips:

  • Use a contrasting color of thread to make it easy to see when you are ready to remove your basting stitches.
  • When hand basting, use a simple running stitch.
  • When machine basting, use at least 4.0 stitch length. If your machine has a longer stitch, use it for easier removal.
  • Stitch with a slightly smaller seam allowance to avoid trouble removing the basting after the permanent seam has been sewn. For example, if you are using a 5/8” seam allowance for the permanent stitch, use 1/2” to 9/16” seam allowance for your basting.

Gathering

Gathering uses long stitches to hold the fabric in place for the permanent stitching with the additional purpose of scrunching a longer length of fabric together into ruffles so it can be attached to a shorter piece of fabric.

There are several ways to accomplish this:
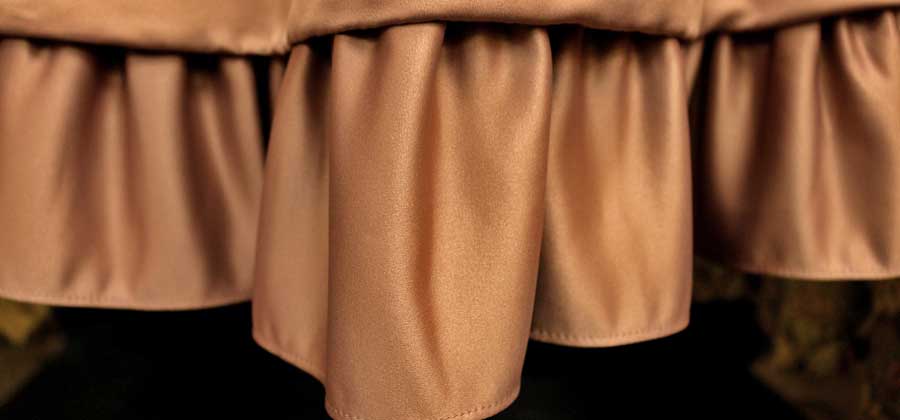
 

  • Using the same long machine stitch used for basting, stitch two parallel rows on either side of the seam line. Holding the bobbin thread from both rows, pull the fabric together into evenly distributed gathers, matching the length of the fabric it will be sewn to.
  • Sew a long and wide zig zag stitch over a heavy thread, being careful not to stitch through the heavy thread. Pull the heavy thread to accomplish the gathering. The heavy thread can be things like dental floss, topstitching thread, thin yarn, etc. Choose something that is strong enough to pull the fabric together without breaking.
  • With both gathering options, leave a long thread tail at each end. Secure one end by wrapping the thread tails around a straight pin in figure eight style to prevent pulling your gathering threads out when gathering.
  • This last option will secure the gathering thread automatically. Leave long thread tails at the beginning and end, just like in the previous methods. Using the same long stitch length, stitch about 1/ 4” from the edge of the fabric to be gathered. Stop, with needle down, at the end of the gathering location. At this point, you are basically going to make a U-turn on your fabric. With the needle down, lift the presser foot and pivot 90 degrees then take a couple of stitches. The number of stitches you take will depend on whether you prefer to gather on either side of where your permanent stitching line will be or only inside the seam allowance. Now drop the needle again, raise the presser foot and pivot another 90 degrees. You have now made the full U-turn and can stitch back down the length of the fabric again to your starting point. When you pull your thread to gather the fabric it will not pull out the threads!

Now you have added, or maybe refreshed, some basic sewing terms. We hope this has been a helpful experience in your sewing “language acquisition” journey as well as given you a few helpful tips on how to accomplish them in your real sewing life. And so, for now, ciao and arrivederci and the happiest of sewing to you all!


~Sheryl Belson
This field is for validation purposes and should be left unchanged.
Did you enjoy this article?
Are you an ASG member?

Tagged With: basting stitches, gathering stitches, seams, sewing terms, stitching

November 27, 2020

Fast and Easy Fringed Edge Finishes

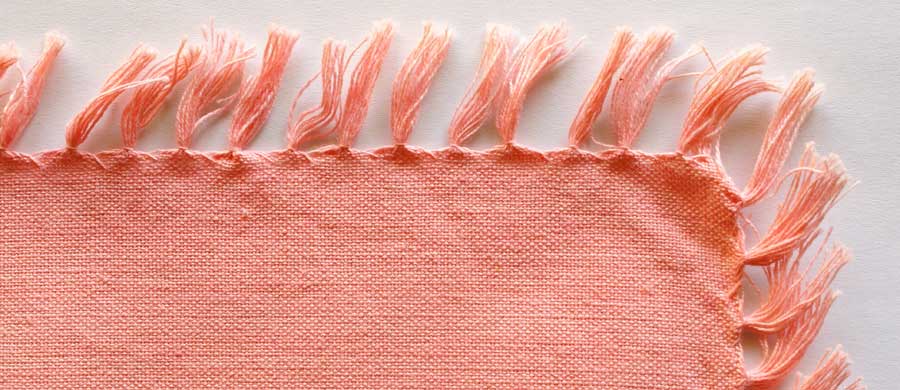
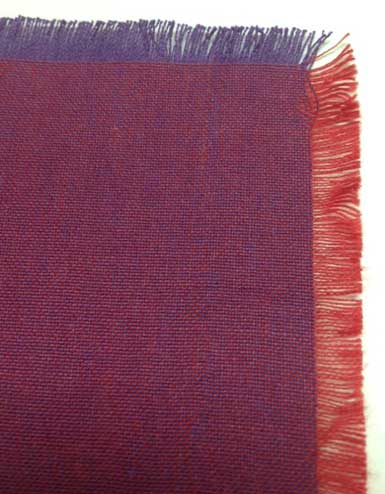
If you’re looking for a fast and easy edge finish, there’s nothing easier than fringe! It works on single-layer placemats, scarves, patches and pockets, or with a little more effort, you can insert fringe into a seam or hem.

The results of fringing are not always what you expect, as some fabrics are woven with different color threads going lengthwise and crosswise, so you get totally different colors in one direction from the other. Denim is a good example, as white threads are usually used one way and indigo the other.

The Basics

Select a woven fabric (knits cannot be fringed using this technique). Fabrics like linen, burlap, gauze, wools and bouclés are ideal candidates. The looser the weave, the easier the fringing process.

  • To create a simple fringe, be sure your project edge is cut parallel to the fabric grain. Sew a line of stitching where you want the fringe to stop, then start pulling threads up to the stitching line. The stitching thread can match the fabric or contrast with it.
  • For easier removal, use a needle or a large pin to help separate the fabric threads and gently pull them across the fringed area. Note that if your project has a right-angle corner (like a scarf), there will be a gap in the thread fringe at the corners.
  • If you want to knot the fringe, either singly or with thread groups, allow extra length for that process. Test-fringe a sample to see how much length you need for either a square knot or an overhand knot.
  • For a top-fringed pocket, cut the pocket top on the straight grain and extend it the desired fringe length (no hem). For a fringed sleeve hem, determine the sleeve length, then extend the lower edge the desired fringe length, being sure to keep a straight grain edge.
  • Single-layer scarves can be fringe-finished on all edges or just the ends, like on a muffler.

Inset Fringe

  • Inserting fringe into a seam allows for more placement flexibility and allows for placing it on a curve as well.
  • To make a fringe strip, cut a straight grain strip the desired width of the fringe, plus the requisite seam allowance. Stitch and fringe as noted above. On very loosely woven fabrics, layer two strips for a denser fringe.
  • Use the fringe strip as you would a piping, basting it along one layer of the seamline with the fringe facing the bulk of the project. Then top with the second layer of the project, and sew just inside the basting line. When you turn the project right side out, the fringe will extend beyond the seamed edge.
  • For long fringe strips, simply abut the ends of multiple fabric strips as needed. If you need a bulkier fringe, layer two strips atop each other and treat as one layer.

Design Tip: inset fringe can be made from matching or contrasting fabric.

Trim Tactics

If desired, you can add a ribbon or trim along the stitched edge of fringe as an accent, whether it’s single layer or inserted into a seam.

Don’t forget to check the selvage of your fabric, as some have fun fringes that can be used as is, and they already match!


~Linda Griepentrog
Linda is the owner of G Wiz Creative Services and she does writing, editing and designing for companies in the sewing, crafting and quilting industries. In addition, she escorts fabric shopping tours to Hong Kong. She lives at the Oregon Coast with her husband Keith, and two dogs, Yohnuh and Abby. Contact her at gwizdesigns@aol.com.

This field is for validation purposes and should be left unchanged.
Did you enjoy this article?
Are you an ASG member?

Tagged With: fringe, fringed edges, jacket, jeans, knotted fringe, learn to sew, placemats, scarves, sewing tip

November 20, 2020

Sewing Basics: Fabric Terms

What is the one item that you absolutely must have for every sewing project you will ever do? It’s fabric, of course! Since the fabric you choose will have a significant impact on how your finished project turns out, it can help to have an understanding of how fabric is woven so that you can meet the expectations of your finished project. While weaving is a skill all on its own, understanding weaving principles can open our eyes to a greater depth of our understanding of fabric. Let’s start by watching this 7-minute video as we see cotton and hemp woven into fabric.

Fabric Terms

Now that we have a visual of the process, let’s look at fabric terms:

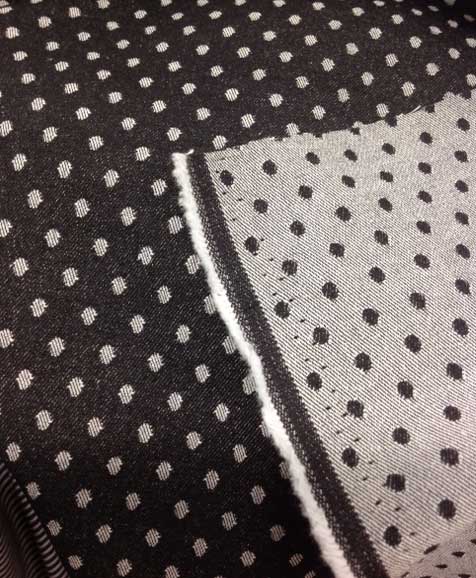
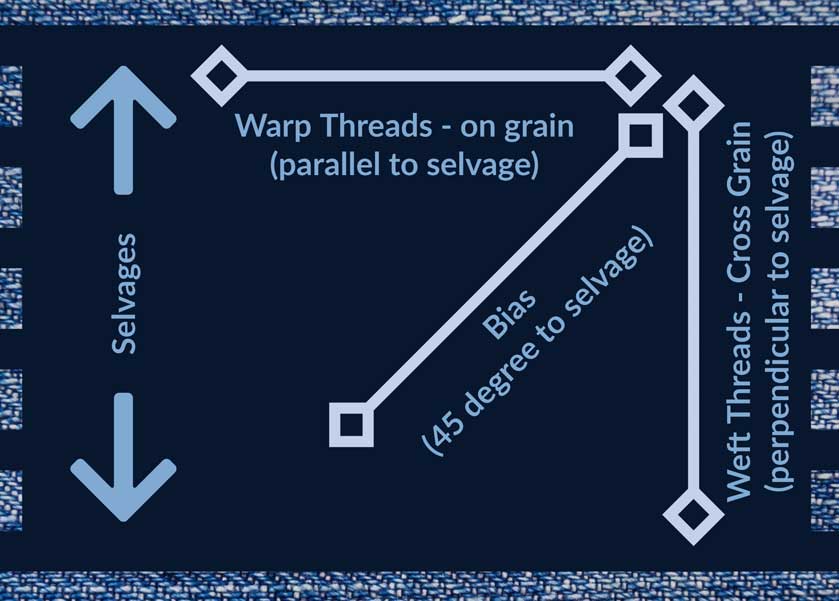
Selvage: The video provides a great visual representation of selvage and why it exists. The process of shuttling the weft threads back and forth is what creates the finished edge. Now, as you think about how that thread if shuttled from one direction then the other, wrapping the edge as you turn to the other direction, selvage makes a lot more sense. No wonder it doesn’t ravel! And since it is created by wrapping those vertical warp threads, it now makes sense why the selvage is so vital to determining the grainline, as well as the most stable part of the fabric. The selvage can be included when cutting a waistband to help reduce the stretch factor that is sometimes experienced while wearing a garment. Using the finished edge of the selvage in a waistband can add strength and may eliminate the need to turn another layer of fabric inside, thus reducing a layer of bulk.

Warp: As shown in the video, warp threads are the first to be set up and run the length of the fabric. Warp threads provide the structure for the weft threads to weave through and give the fabric stability. Warp thread and grainline go together — the grainline equals the direction of the warp thread. Doesn’t it make more sense now that the grainline is the most stable direction of the fabric?

Weft: Remember the threads being shuttled from the left to the right in the video? Those vertical threads are the weft, which also defines the cross grain of the fabric. The cross grain is the second most stable direction of your fabric but since they are not held tightly in place like the warp thread, they have a bit more “give” to them. However, since they are in a straight line, they have more stability than the bias, which we will talk about next.

Bias: Think of bias as a tic-tac-toe grid and draw a line from one corner to the opposite diagonal corner. That 45-degree angle is the bias. This has the most give and the least stability of any direction in your fabric. With an understanding now of how threads are woven, you can probably visualize the tiny gap between the threads. When you pull those threads at a diagonal, there is no straight thread to pull against, thus you are pulling across that tiny open gap between the threads. Sometimes we use the property of bias to the advantage of a project. For example, a garment made with bias-cut pieces will have a greater amount of drape and will skim the body much more than the same garment made of the same fabric that was cut on the grain.

Grain: By now, just by talking about warp and weft, we have already addressed grainline. But to see a little bit more focus on the grainline, watch this 6-minute video we published in January of 2020. It addresses some of the things already discussed here with a little more information about how to identify and use the grainline when cutting out your projects.

Hand: The final term in this discussion is hand. The “hand” of a fabric refers to the “feel” of the fabric against your skin. There are many adjectives that can be used to describe the hand, or feel, of a fabric. Words like cool, slick, smooth, loose, stiff, heavy and stretchy can all be used to tell someone about the hand of a fabric.

  • Hand and drape are terms that are very closely related. The drape of a fabric is the way it flows over things. Stiff fabrics have less drape while fluid fabrics have more. You can feel the weight of a fabric easily by the thickness when you feel the fabric in your hand  — it will feel either light or heavy.
  • Think back to what you saw in the weaving video about the threads used in weaving the fabric. The characteristics of those threads play a vital role in the hand and drape of the fabric. The thicker and more stable the threads, the stiffer, and more stable the fabric. Delicate silk threads will weave together to create a much different hand and drape than heftier linen or cotton threads.
  • Special treatments of the fabric after it is woven can also impact the hand or drape of the fabric. For example, the dying process can create a stiffer, less drapey hand based of the amount of mordant. A mordant or dye fixative is a substance used to set (i.e. bind) dyes on fabrics. Some mordants can create a stiffer hand and less drape in the final product.

We hope that diving into the art of weaving has given you a new perspective on fabric and has helped to explain the importance of understand the relationship between the fabric you’ve chosen for your project and your desired outcome.


~Sheryl Belson

This field is for validation purposes and should be left unchanged.
Did you enjoy this article?
Are you an ASG member?

Tagged With: fabric, selvadge, sewing basics, video, weave, weaving

October 16, 2020

Sewing Basics: Snips, Rippers, Turners, and Stilettos

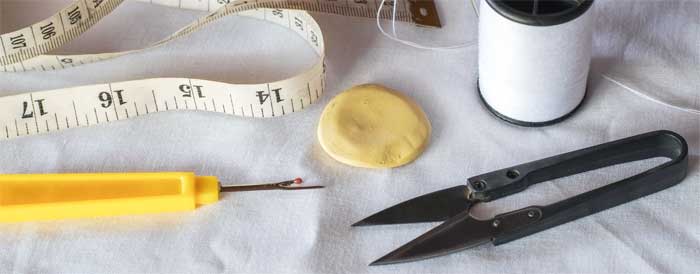
In this article, we review a catch-all “Other” category of basic sewing tools that includes thread snips, seam rippers, point turners and stilettos:

Thread Snips

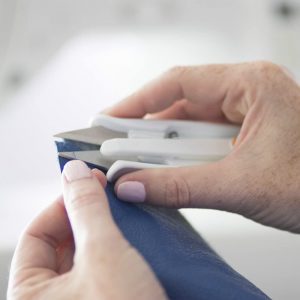
Thread snips, also called thread nippers, thread clippers, and thread cutters—are small, often spring-loaded, scissors used for trimming threads and are easy to keep close to your sewing machine for quick access to trim at the end of each seam. Some varieties are more heavy duty and can even be used for notching fabric.

Thread snips come in various designs, sharpness, and price points.

  • Designs
    Fiskars Crafts Premier Ultra-Sharp Thread Snip with blade guard (on Amazon)
    • Thread snips generally have a pointed tip, but you can find them with a blunt tip as well.
    • Some have a metal handle and some handles are covered in rubber to make for a more non-slip handling.
    • The Gingher G-TNKE and Sharp Point Quick Clip both have a special design in the handle where you grip it with your index finger which can reduce the “slip factor”.
    • Fiskars offers one that includes a blade guard for added safety.
    • Generally, they are about 4” long making them easy to hold in your hand
  • Price Points
    • As with everything, you can find nippers at various price points. Depending on your desires, you can spend as little as $12 for 12 nippers with the idea you will toss them when they dull or you can pay $28 for a single nipper with the idea you will sharpen them and use them for life.
  • Sharpness
    • Some are limited to thread snipping but others are touted for their ability to cut through tougher materials, like small twigs, fishing line and fabric. Choose based on what you plan to cut!
    • Nippers that have been hot forged and/or made of stainless steel or double-plated chrome will have the longest life and most durable sharpness.

Seam Rippers

Seam rippers are a small tool used for removing stitches. There are two primary styles:

  • The forked style tapers to a sharp point on the longer side making it easy to slip under the stitches while the other side often has a plastic ball covering the end. The sharp cutting edge is in the center of the fork. There are many options in this style. In fact, Dritz even sells one with the “extra” of a magnifying glass and LED light to help us see those little stitches. Some reviews indicate using those extras are a bit fiddly, but with practice, can be useful. Oliver + S created a 2-minute tutorial on two methods to use this style of seam ripper that you may find helpful.

  • The curved blade style looks a bit like a scalpel with the sharp edge is along one side.  This style often has replaceable blades, much like a rotary cutter. It can also be gentler on the fabric than other types of conventional seam rippers, as the razor-sharp curve glides through any kind of stitching. Embroidery stitching is more easily removed with these seam rippers. Just pay close attention when unstitching because these blades are very sharp.
  • A third, less common version, is battery operated. An example of this style is the Galaxy Notions Electric Seam Ripper. It goes down the seam between each of the fabric layers to remove the stitches without cutting into the fabric. It is reportedly durable and sharp but does require frequent battery replacement.

No matter which style you choose, it is always important to use care not to slice your fabric as you pick out your stitches.

Point Turners

Point turners are usually made from either plastic or bamboo. They are a great tool for creating sharp corners and can also be used to crease or mark fabric temporarily. Be careful not to poke the pointed end through your fabric as you turn out your corners. Simply insert the pointed end inside the corner and pull the fabric over the end. If you have trimmed your seams well, you should have a beautiful sharp point.

Here’s a 1-minute video tutorial that will give you some quick tips on how to use your point turner. You may be surprised about some extra functions you can get out of this handy little tool!

Stilettos

Stilettos, sometimes called awls, are a great help at the sewing machine to help move fabric under the presser foot as well as several other functions. They come in a variety of styles and materials such as metal, bone, and wood. Regardless of style, they will have at least one, and sometimes two, pointed ends and a handle to hold onto. The sharp point can ride along close to your presser foot and act like a safe extra finger to help you hold fabric in place while sewing. They can be useful when picking out stitches or turning under small edges of fabric. They can also hep you to safely secure your fabric while pressing without getting too close to a dangerously hot iron.

Many stiletto options are available in sewing shops but for the non-traditionalist, you can improvise with things like a bamboo skewer (think shish-kabobs), a porcupine quill or even an ice pick.

We hope you found something new or were reminded of something old as you read through this list of sewing tools. And if you decide to try a new tool or replace an old one, don’t forget to take advantage of your member discount as you do.

See our full series of Sewing Basics/Learn to Sew articles.


~Sheryl Belson

This field is for validation purposes and should be left unchanged.
Did you enjoy this article?
Are you an ASG member?

Tagged With: nippers, point turners, seam ripper, sewing basics, stilettos, thread snips

September 18, 2020

Sewing Basics: Measuring Tools

Measure Twice, Cut Once

We’ve all done it.  You cut that precious fabric, and you cut it wrong. Once you’ve made that cut, you can’t undo it. And now you don’t have enough to recover from your mistake. ARGH! Whether taking body measurements, marking seam allowances, or cutting quilt squares, when we sew, we need to measure accurately every time if we want our project to come out correctly.
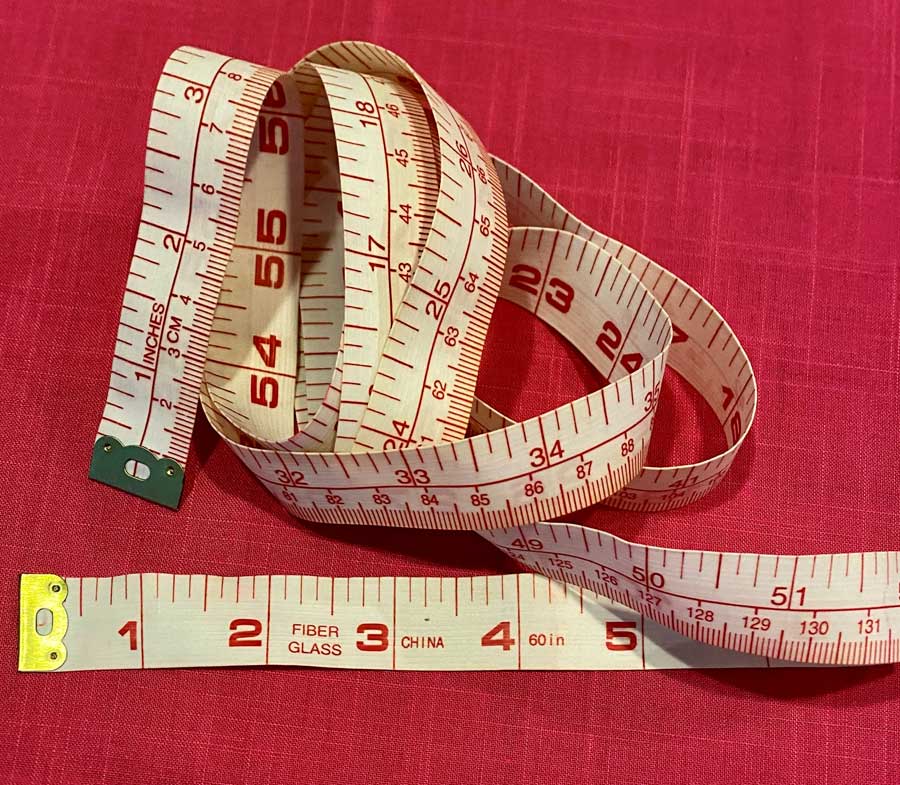
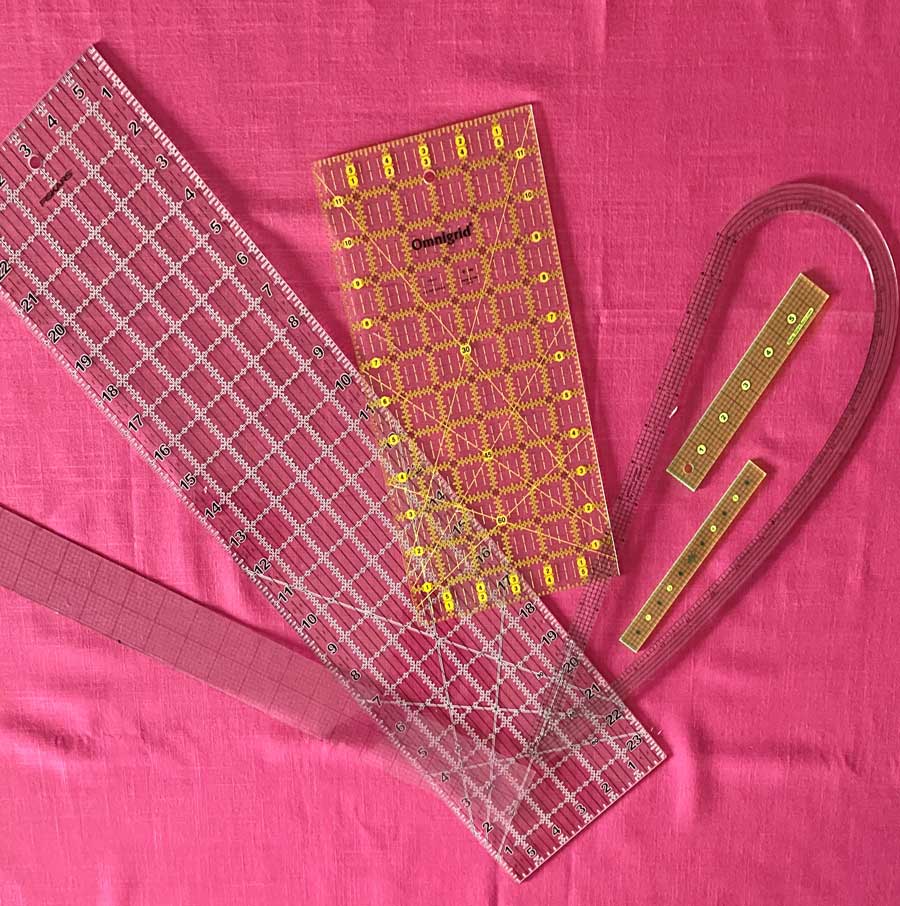

Accurate measurements help to ensure a proper fit in garments, desired proportions in home dec, beautifully square and align quilt pieces and more. We definitely need to pay close attention to what we are doing, but making a small investment in a few helpful measuring tools can help. These are your must-haves:

  • Tape Measure
  • Clear ruler
  • Seam Gauge

So let’s take a look at these three tools in more depth…

Tape Measure

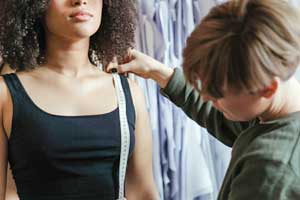
Also called a measuring tape, it’s a flexible strip of cloth, plastic or other pliable material with measurement markings. They usually measure about 60” long and 5/8” wide. It is generally reversible with inches on one side and centimeters on the other to help take a more accurate measurements, and can easily be rolled up when not in use.

Pro Tip: Since a tape measure is usually 5/8” wide, you can use it to check the accuracy or placement of your 5/8 seam allowances.

Tape measures can be used for just about everything when it comes to sewing. Use it to:

  • Measure your body to make the right size in garment patterns
  • Determine the length of a skirt or shirt, the size of a home dec or accessory project, etc.
  • Measure pattern pieces
  • Measure seam lines to make sure they match
  • Confirm a pattern piece is positioned accurately on the grain line

Many resources suggest that the flexible material that tape measures are made of will not stretch. However, that is not always the case. It’s a good idea to check the accuracy of your tape measure every few months just to be sure an inch is still an inch. Many are made of fabric and then coated, which helps to make them last longer and discourages stretching.  You can look for a non-stretch fiberglass model instead of fabric to solve the stretching issue. Choosing one with metal tips can also prevent fraying.

Clear Rulers

Clear rulers are extremely helpful when measuring and drawing seamlines and cutting lines. They are made of sturdy transparent plastic or acrylic and have easy-to-read measurement markings. They also come in a variety of sizes and shapes, such as square, rectangle and even a French curve.

Sometimes, they are also marked with helpful 30, 45 and 60 degree angled lines which makes them great for marking straight edges and parallel lines, buttonholes, tucks and pleats. It can also be used to check the grainline of the fabric. The best thing about this type of ruler is that since you can see through them, it makes it so much easier to align the marking and cutting lines perfectly with the designs on the fabric.

Many sewists like having both a large ruler (15 x 60 cm or 6” x 24”) for long straight lines, and a small one (3 x 30 cm or 1” x 12.5”) for the details. Another favorite is a 5/8” curve ruler that can be used to mark seam allowances or add that extra ¼” to a pattern piece to give a little extra ease in the final garment.

Pro Tip: Clear rulers can be slippery on fabric. Try adding a strip of Dritz Omnigris Invisi-Grip or a few TrueCut TrueGrips non-slip adhesive rings to give it some gripping power. Alternatively, choose a no-slip ruler like the Quilter’s Select Rulers.

There is one additional measurement tool in this category to share. While not necessarily a ruler by the truest definition, templates like the welt pocket template and the fly zipper template found on Stitch Buzz are extremely useful. Watch the interview with Claire Cochran, owner/inventor to learn about the Stitchbuzz rulers and templates. ASG members can also get a 20% ASG discount by using the discount code in the ASG Member’s Only Special Offers section!

Seam Gauge

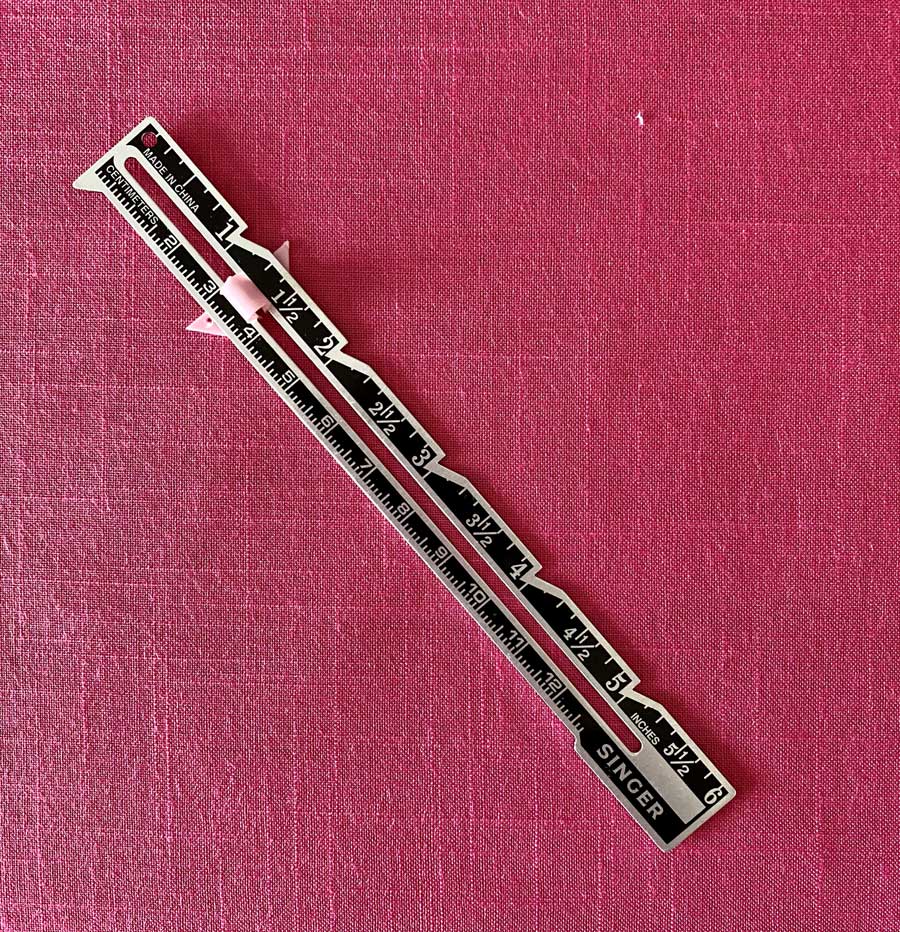
Seam gauges are rulers, usually 6” long with a sliding pointer that can be used sort of like a caliper. They are often marked in both inches and centimeters and are great tools for marking buttonholes, pleats, hems, etc. because they aren’t flexible and, thus, allow for more accurate measurements.

Though the most common length for a Seam gauge is 6”, you can also find them in longer lengths. Dritz makes one that is 7” long with a point turner on one end, making it a multi-purpose tool.  Clover makes one called a 5-in-1 that can be found not only in the 6” length, but also in an 11” length.

Summary

These tools will get you off to a great start. As your sewing skills become more advanced, you may want to invest and experiment with other more specialized measuring tools to help you do the job more efficiently. There are many measuring tools with different shapes, measurements, sizes and neat gadgets to choose from.

If you do choose to add some new tools to your sewing box, don’t forget to check the Member’s Only Special Offers. Many of these tools are available to members at a discount. The table in this blog article summarizes just of few of the discounts available .


~Sheryl Belson

This field is for validation purposes and should be left unchanged.
Did you enjoy this article?
Are you an ASG member?

Tagged With: rulers, sewing, sewing basics, sewing tools

  • « Previous Page
  • 1
  • …
  • 4
  • 5
  • 6
  • 7
  • 8
  • …
  • 15
  • Next Page »

Become a Member

Join the only national organization dedicated to Advancing Sewing as an Art and Life Skill.

Join Now button

Blog Article Categories

  • ASG Conference
  • Chapter Stories
  • Embroidery
  • Fitting
  • Learn to Sew
  • National Sewing Month
  • Products, Books, & Patterns
  • Projects
  • Quilting
  • Sewing
  • Sewing Techniques
  • Sewing Tips
  • Sewing Tours
  • Videos
  • Disclaimer
  • Privacy Policy

American Sewing Guild
National Headquarters
9660 Hillcroft, Suite 230
Houston TX 77096
713-729-3000 | 713-721-9230 Fax
www.ASG.org

ASG wordcloud - education, conference, discounts, videos, special offers, tours and more

Copyright © 1998–2026 · American Sewing Guild · All Rights Reserved