American Sewing Guild (ASG)

Visit our blog Visit the ASG Facebook page Visit ASG on Pinterest Visit ASG's YouTube channel Visit ASG on Instagram
  • Home
  • Join ASG
    • Join Online
    • Chapter Locations
    • Member Benefits
    • Member Brochure
    • Join by Mail
  • Education & Classes
  • Resources
    • Contests & Awards
    • Giving Back
    • Hall of Fame
    • Travel and Tours
    • Measurement Chart
  • Shop
    • ASG Store
    • Chapter Products
    • Video Resources
  • Blog
  • About
    • About Us
    • Donate to ASG
    • ASG Sensitivity Statement
    • FAQ’s
    • Start a Chapter
  • Contact
  • Member Login
    • Login First!
    • Members Only
    • Leadership Only
    • Website FAQ’s
    • Logout
  •  

July 24, 2020

Sewing Basics: Getting to the Point of Pins

Do you know the different types of pins?
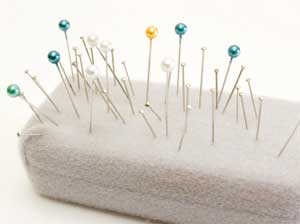
Various styles of pins on cushionPins may not be the most exciting item in your sewing box, but they are a vital tool to anchor your fabric when you are sewing. When choosing the type of pin to use, there are several elements that should be considered as each type of pin is made with unique characteristics that target a specific purpose, depending on the type of project, the fabric used, or even how it’s going to be sewn. We will look at:

  • Head style
  • Length
  • Thickness
  • Point style

After a review of the characteristic of each, we’ll suggest four common pins you may want to keep in your sewing box to be prepared for almost any type of project.

Head Style

Pins come in three basic head styles, each with a different purpose. The choice comes down primarily to your need for visibility and ironing.

  • Flat/No Head: This type of head can be difficult to see but has the advantage of working well when you need to iron the project with pins in place since there is no head to melt. It is also a good choice for hand sewing as there isn’t a head for your thread to catch on.
  • Glass: Like flat head pins, glass pins are good for projects which need to be ironed with pins in place because the glass heads will not melt on the fabric. They also have the advantage of better visibility since there is a colored head that shows more prominently than flat/no head pins.
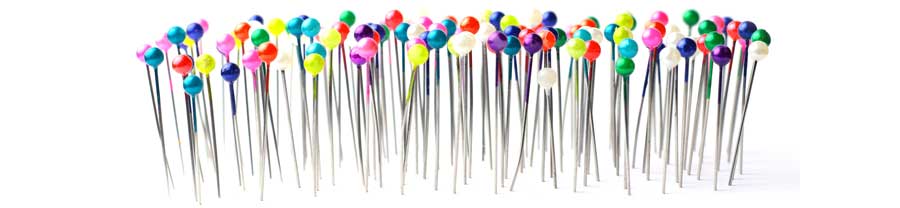
  • Plastic: These pins come in all sorts of brightly colored ball or flower shaped heads and are the easiest to spot on your project. If you keep that hot iron away from those plastic heads, they can be a great choice.

Length

Pin length is tied to the thickness and layers of fabric you are working with. The thicker the fabric and the more layers you are working with, the longer length pin you should choose.

  • Short and stubby: The shortest pins are about ¾” long. These work best for small delicate projects. Due to their short length, they are not well suited for anything other than the sheerest of fabrics.
  • Universal/dressmaker length: This is one of the most common lengths and will work well on most fabric types and thicknesses. They are 1 – 1 ½” long which is long enough to pierce through most fabric types but short enough to avoid bending too much as you pin through the layers.
  • Quilting length: These pins are longer since they need to handle multiple layers of fabric, as well as batting. They are usually 1 ½ – 2” long which can easily manage all those thicknesses.
Thickness

Pin thickness choice will be impacted by the delicacy of the fabric you are working with. Pins make holes so your fabric’s ability to recover from those holes drives your choice. The general rule is the finer the fabric, the finer the pin.

  • .4mm: This size passes beautifully through the finest of sheers.
  • .5mm: These may be called extra-fine, super-fine, silk, or satin. They are recommended for fine, lightweight fabrics, including some sheers.
  • .6mm: Most all-purpose pins are labeled fine and are best paired with medium-weight fabrics.
  • .7mm or .8mm: These may be harder to find, but the diameter is great for thicker fabrics like heavy wools, denim, and quilted layers. Just remember that they will make larger holes.

Point Style

The point style choice is directly impacted by the fabric you are working with, in particular woven vs. knit. Think about how you choose your sewing machine needle — one type for knits and other types for different wovens. The same logic applies in choosing the right pin.

  • Sharp: These all-purpose points work well with most woven fabrics in all but the more delicate weights.
  • Extra-sharp: These have a more defined, tapered point that will pass cleanly through the more delicate fabrics.
  • Ball point: Ball point pins are intended only for use with knits. The point is rounded so it slips between the loops of the fabric and does not pierce or pull the yarns.

What should you have?
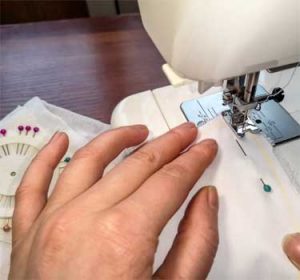
Now that we know about the various elements of pins, let’s get to the point for what is a good mix to have in your stash of pins. With this variety, you will be well prepared to handle almost any project.

We suggest:

  • Glass Head: Keep a stash of universal glass head pins on hand. They will probably be about 1.5” long and .6mm thick which is a great choice for most projects and won’t melt if you touch them with a hot iron.
  • Ball Point: Keep a stash of these for your knit projects. They are likely to be about the same length as your glass head pins but are likely to have a plastic head since knits are much less likely to be ironed with a hot iron.
  • Silk: If silk or similar delicate fabrics frequent your projects, this is a good pin to include in your stash. In addition to having a delicate shaft, they usually have a flat head or no head so ironing over them is not a problem. Always test your pin on a scrap to see how the fabric recovers and keep pins within your seam allowance to help avoid unwanted holes.
  • Quilting: Even if you are not a quilter, these are good pins to include in your stash. They usually have plastic ball heads, but melting isn’t usually a concern since most ironing on quilt projects happens before and after pinning. And because quilts are usually made with a sturdy cotton, your fabric should be able to handle the heavier weight of the pins.

Now that you know the point of pins, you should be able to choose the right type of pin to use for your project.


~Sheryl Belson, ASG
This field is for validation purposes and should be left unchanged.
Did you enjoy this article?
Are you an ASG member?

Tagged With: ball point pins, glass head pins, pin style, pins, quilting pins

July 10, 2020

Using Striped Fabric to Bind an Edge

It’s Stripe Hype!

Whether you’re binding a jacket front, collar or a quilt, using a striped fabric for the binding is a great way to accent the edge.

Stripes come in varying forms—from simple two-color versions to multi-color patterning, wide to narrow—but one thing’s for sure: they’re fun!

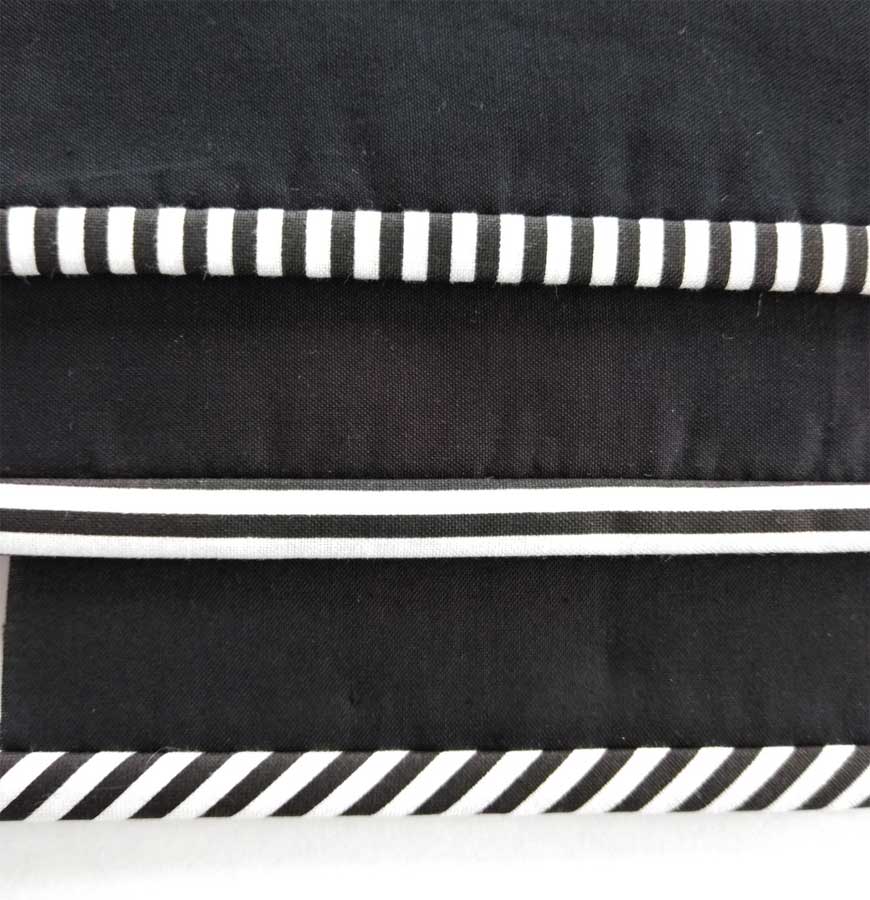
From the top: crosswise; lengthwise; bias

Stripes can be used three different ways for binding an edge: lengthwise, crosswise or on the bias. The choice depends on the desired finished look.

Using a stripe lengthwise on a binding showcases only about ¼” of the patterning, so for wide stripes, this use really isn’t a good option as you’ll likely see only one color. However, for tiny stripes, you can showcase three or four lines. Using a stripe lengthwise requires more yardage than cutting crosswise and/or more frequent seaming. You can use the entire fabric width and less yardage, but that strategy requires more seaming and matching end to end. The fun part—you can decide which stripes to showcase, but remember you’ll need to allow for seam allowances, so place the featured stripes accordingly.

Cutting binding crosswise is another option that showcases stripe repeats at right angles to the project edge. It allows for more visibility of stripe patterning and fewer seams are required with less yardage.

Many stripe aficionados prefer to cut striped binding on the bias (a true 45° angle) for some diagonal interest. The amount of yardage required depends on how frequently you want to piece the strips, matching the stripes. Cutting striped binding on the bias allows it go smoothly around curves, which is not the case with the horizontal or crosswise cutting, as those grains are suitable only for straight edges (like most quilts) rather than curves.

Piecing

In almost all instances, unless you have a short edge to cover, binding needs to be pieced to make enough length for the project. It can be pieced in two ways: with diagonal or horizontal seams.

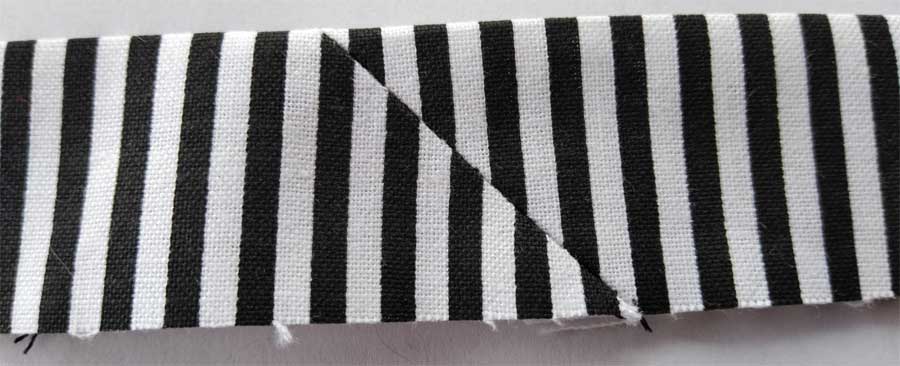
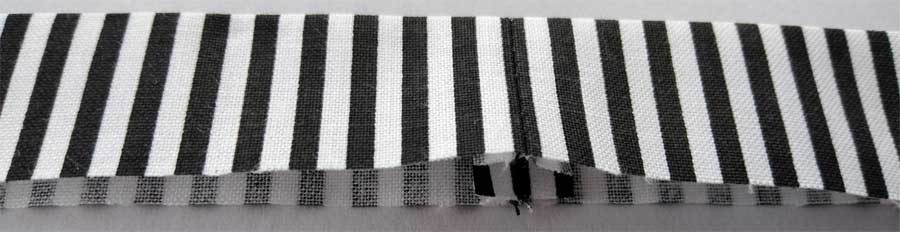
Diagonal Seaming: While diagonal seaming makes for flatter binding because seam allowances are offset and not on top of themselves with multiple layers, it can be more difficult to align stripes with this bias seaming.

Crosswise Seaming: For crosswise stripe fabric strips, it’s easier to get a more invisible seam if you use horizontal piecing, sewing strips end to end. This technique also allows for a regular repeat of the stripe. To create a horizontal seam, place strips right sides together matching the same stripe on both layers. Stitch down the center of the stripe, trim the seam allowances to ¼” and press open. If you stitched accurately, the seam should be almost invisible and show a continuous stripe pattern along the binding.

Finishing

Once you’ve pressed your binding in half and sewn it the edge, first press it toward the edge you’re covering. Then fold it to the underside and hand-stitch the folded edge of the binding to the back side of the garment, quilt, etc.

For a quicker finish, fold the binding to the underside, pin or clip securely so that the underlayer is slightly wider than the top binding, and stitch in the ditch of the seamline where you initially attached the binding. Because the binding underside is slightly wider than the top, your stitching should easily catch the folded edge to secure it. Using transparent thread (either smoke or clear) works well for this, especially if your project is multi-color.


~Linda Griepentrog
Linda is the owner of G Wiz Creative Services and she does writing, editing and designing for companies in the sewing, crafting and quilting industries. In addition, she escorts fabric shopping tours to Hong Kong. She lives at the Oregon Coast with her husband Keith, and two dogs, Yohnuh and Abby. Contact her at gwizdesigns@aol.com.

This field is for validation purposes and should be left unchanged.
Did you enjoy this article?
Are you an ASG member?

Tagged With: binding, garment sewing, quilt, sewing

July 3, 2020

Serger Piping

Pipe it Right

Perhaps you’ve never looked beyond the standard foot on your serger to see the other possibilities of this mighty little overlocker. Did you know you can actually make and install foolproof piping?

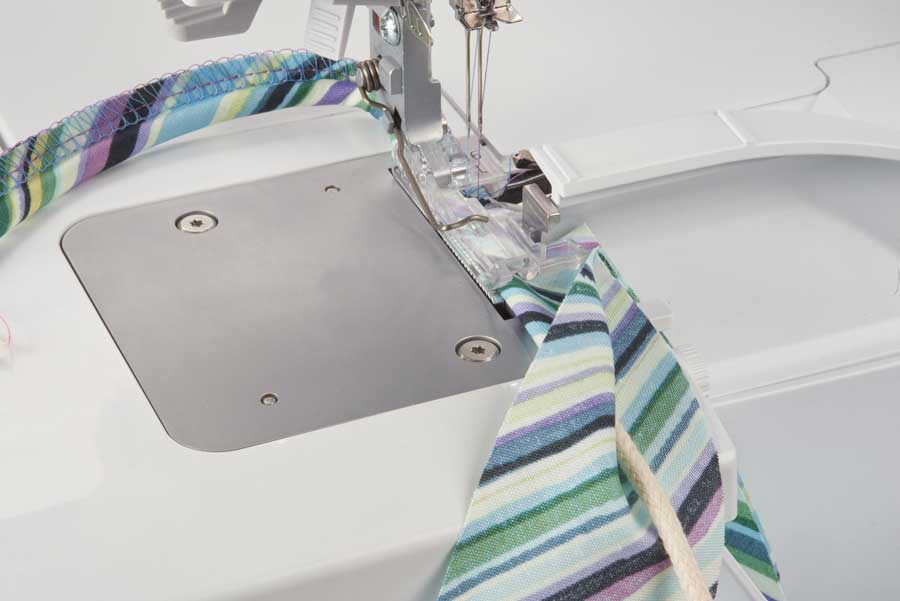
Check your instruction manual or with your dealer to see about getting a piping or cording foot for your model of machine. It’s either a metal or plastic foot with a groove on the underside, which is the secret to the process. Depending on your serger brand, you may be able to get different sizes of the grooved feet, like 3mm and 5mm (referring to the diameter of the cord that will go into the piping).

The piping foot can also insert ready-made piping if you prefer not to make your own.

Check your serger’s instruction manual for specific setting for your machine. The following are general instructions.

Making Piping

  1. Determine the length of cording needed for your project and add 6”. Cut the fabric strips the same length.
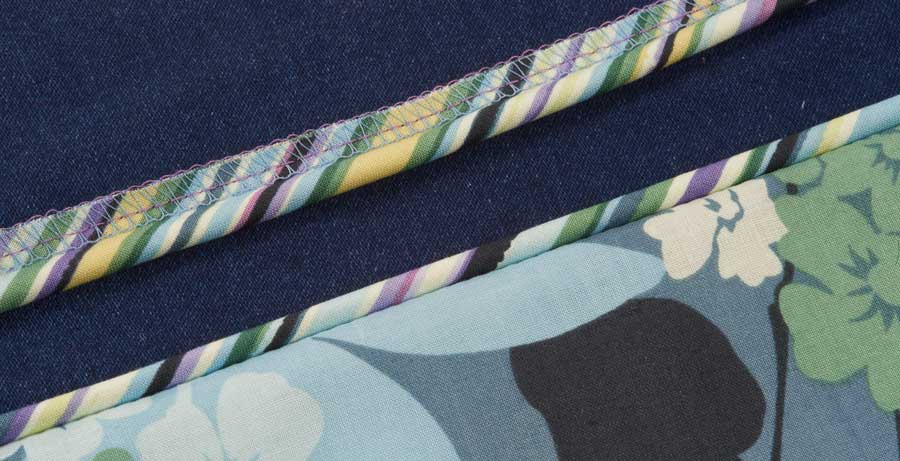
  2. Cut a strip of fabric about 2” wide and on the bias grain if your piping will be going around a curve or a corner. Plaids and stripes look great cut on the bias as well. If the piping is simply being applied to a straight edge, cut the strip on the crosswise grain. Piece the strips together with a diagonal seam to achieve the final length needed and press the joining seams open.
  3. Center the cord length in the center of the strip wrong side and fold over the upper fabric so the raw edges meet. Leave about a 3” tail of cord extending from the initial end of the mix, so you can hang onto it behind the foot.
  4. Set the serger for either a 3-thread or 4-thread stitch, with a fairly open length.
  5. Slide the cord end under the foot and nestle it into the groove, then pull the end behind the foot until you get to the wrapped fabric portion. Put the foot down and stitch! The groove guides the cord with precision, the blades trim off the fabric edges and give you an even seam allowance. Voila!

Inserting piping

  1. Set the serger stitch length to a standard length (about 2.5mm).
  2. Place the piping between the two layers of project fabric, either matching the seam allowance edges, or with the cord along the seam allowance. Slide the layers under the foot and again place the piping tail extending behind the foot. Start stitching about 1” from the covered piping end if you need to finish the end upon completion. If the piping end goes into a seam, then start at the end.
  3. Keeping the layer edges together and the piping in the foot groove, sew the seam, encasing the piping between the layers.
  4. If your project has a corner, stop serging about 2” before the corner and clip into the piping seam allowance (only) at the exact corner location. Shape the piping around the corner, but continue to serge straight off the end of the seam area. Remove the item from the serger, shape the piping around the corner, and reinsert the project into the serger at a right angle to the previously serged seam. Start serging again on the next side, and repeat at each corner.
  5. If your piping project is continuous, like a rectangular pillow, stop serging about 2” before the place you began and finish the joining using your conventional machine.

PHOTO CREDITS: All photos courtesy of Bernina, used with permission


~Linda Griepentrog
Linda is the owner of G Wiz Creative Services and she does writing, editing and designing for companies in the sewing, crafting and quilting industries. In addition, she escorts fabric shopping tours to Hong Kong. She lives at the Oregon Coast with her husband Keith, and two dogs, Yohnuh and Abby. Contact her at gwizdesigns@aol.com.

This field is for validation purposes and should be left unchanged.
Did you enjoy this article?
Are you an ASG member?

Tagged With: overlock, piping, serger

June 26, 2020

Quilting Quandary

You’ve spent hours, days or weeks (OK, maybe years) tediously piecing your quilt top. It’s layered, basted and ready to go. It doesn’t matter if it’s a traditional look or totally mod, the next step toward the finish line—how to quilt it.

You can, of course, hire a longarm quilter to do it for you. You can free-motion quilt it from edge to edge. Or, you can use your walking foot to quilt it. Let’s take a look at a few walking-foot options.

Stitch-in-the-Ditch Quilting

When you constructed your blocks, you probably pressed the seam allowances in one direction, perhaps so they could nest with adjoining seams and because it makes a stronger seam than pressing them open. With the seam allowances pressed in one direction, it creates a “well” in the seam—a small indentation. That’s the perfect location to stitch through the three layers of your quilt (top, batting, backing).

Stitch-in-the-ditch quilting can be done with transparent thread, either smoke or clear, or with a thread color to coordinate with adjacent pieces. Choose a bobbin color that coordinates with the quilt backing. This type of quilting is an ideal way to hold the layers together without creating new design lines and it lets you highlight the piecing itself. Stitch slowly and stay in the ditch.

Sample of stitching in the ditch
Example of stitching in the ditch

If you have a machine with an adjustable needle position, try moving the needle to exactly sit in the ditch of the seam for invisible stitching.

Echo Quilting

If stitching in the ditch seems a bit scary, think about echo quilting. This process uses the presser foot width to keep your quilting lines an even distance from the piecing seams—it’s akin to topstitching on a garment. This simple method allows you to highlight the shapes you’ve intricately pieced, and it’s a great way to hold the layers together.

Sample of echo quilting
Example of echo quilting

ANCHORING THREADS: If you’re doing either stitch-in-the-ditch or echo quilting, it’s likely that you won’t be starting and finishing your stitching in a place where you can simply cut the threads. You can start and end your stitching sections by shortening the stitch length to near zero to anchor the threads. If you opt not to do that, then simply pull the top threads to the underside, knot them, thread the ends into a needle and bury them in the quilt layers.

Channel Quilting

Some designs work well with overall quilting parallel rows of stitches. It’s fun, easy and pretty quick to complete. The channels can be spaced as desired, but a simple way is to use the presser foot width as a guide for the row spacing. Mark the first stitching line in the center of the quilt, then work outward from the center to the left and the right. For a more artsy look, vary the spacing of the stitching rows. If you want them further apart than the presser foot width, use a quilting guide for spacing.

Sample of channel quilting
Example of channel quilting

Tape Tricks

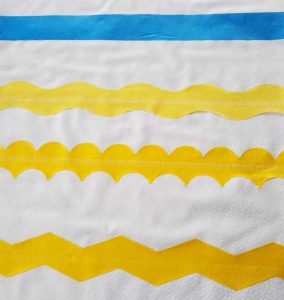
3 tape shapes
Painter’s tape

If you’re looking for a quick and easy, no-mark method to prep your quilt, look no further than the paint aisle of your favorite home improvement store. Painter’s tape is designed to mask edges and trim when changing the color of a room, but quilters have taken it to another level. The low-tack tape is available in several widths, and some shapes (scallops, zigzag and waves) and it’s perfect for “marking” quilting lines on your quilt sandwich.

Adhere the tape strips in the pattern you’d like to quilt—parallel lines, diverging lines, crisscross patterning or even diamonds or triangles. Finger-press the tape in place and you’ve got a perfect edge to follow with your stitching. Stitch your first line along the tape edge or a presser foot width away, and subsequent stitching lines using either the presser foot width for spacing, or a quilting guide for wider spacing. You can stitch on either the inside of the tape, outside or both.

When you’re done stitching, simply pull off the tape—there’s no residue. If your lines go edge to edge, there’s no need to secure the threads, as they’ll be caught under the binding. If shapes are within the quilt, tie off the threads as noted above.


~Linda Griepentrog
Linda is the owner of G Wiz Creative Services and she does writing, editing and designing for companies in the sewing, crafting and quilting industries. In addition, she escorts fabric shopping tours to Hong Kong. She lives at the Oregon Coast with her husband Keith, and two dogs, Yohnuh and Abby. Contact her at gwizdesigns@aol.com.

This field is for validation purposes and should be left unchanged.
Did you enjoy this article?
Are you an ASG member?

Tagged With: channel, echo, quilting, stitch in the ditch

June 19, 2020

Sewing Basics: Scissors vs. Rotary Cutters

The great cutting debate

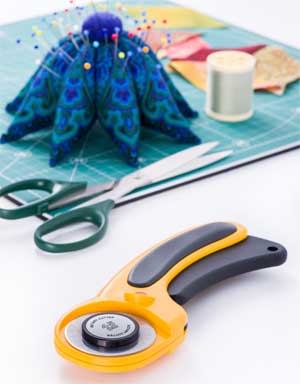
When it comes time to cut out your project, which do you choose, scissors or rotary cutters? Ask this question in any online forum or neighborhood group meeting and you will hear strong opinions on both sides. And those opinions often line up by what they sew: quilts or garments.

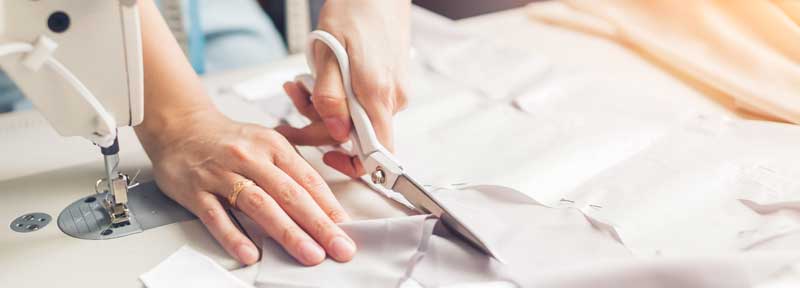
My mother was a garment sew’r and I was raised to use proper sewing scissors for the project. Scissors were the short blade (less than 8” long) cutting devices used for threads or short clips in fabrics. Shears had longer blades and were used for cutting fabrics. And heaven forbid that I should use the shears to cut threads and dull the tips of the blades! With more experience, I added pinking shears for finished seams, duck bill or applique scissors for maneuvering around small areas, and clippers which worked especially well for cutting threads close to the fabric.

I often see the beginning sew’r try to save money on scissors and shears, not understanding that a good quality cutting tool makes the job go much easier. While a new pair can be purchased from the dollar store, they simply don’t do the job that specially manufactured fabric shears do. Some reputable manufacturers are Fiskars, Gingher, Kai, and Wiss. Prices vary from as $8 to $130 or more.

What Options Do I Have?

While most scissors are designed for right hand use, manufacturers have become more accommodating to the left handers among us and have designed ones contoured for the left hand.

  • Those with arthritis or who do a great deal of cutting may choose the spring action feature that opens the blades after each cut and greatly reduces the effort required.
  • A contoured handle with soft grip touchpoints is another great feature which provides a secure, comfortable grip, while an easy-open lock helps protect the blades during transport and storage.
  • Some come with special carrying cases that sharpen the blades when scissors are placed inside.
  • Electric scissors allow you to cut the way they do in ready-to-wear and they take away the fatigue of opening and closing the blades entirely.
  • Some shears come with a laser pointer to ensure cutting in a straight line. Now, how is that for technology?

Whether using pins or pattern weights, shears are easy to use. Sometimes, however, especially for the new sew’r or in the case of slippery fabrics, shears lift the fabric off the surface and distort the cut. To combat this effect, manufacturers have redesigned the shape of the scissor and have raised and angled the handles so that blades can ride along the table more easily. To further insure a good cut, blades should also be sharpened frequently to prevent the tearing action of a dull blade. There are tools on the market to help with this, but a qualified professional will keep those scissors and shears sharp and smooth and ready to use. And the number one rule: NEVER use fabric scissors or shears on paper, even pattern tissue.

But if this is a debate, what about rotary cutters?

I got my first rotary cutter as a freebie in the mail. At the time, I knew nothing about them and tried cutting on a table. OOPS! I cut right through to the top of the table. First lesson: always put something underneath. I remember trying magazines and even pieces of wood under the fabric before giving up and tucking the cutter away. It may have come with instructions, but I certainly hadn’t read them, so I returned to my scissors. Thinking back, my attitude could be likened to Guy I Am from the Dr. Seuss book, Green Eggs and Ham. I indeed “did not like them, Sam I Am.”

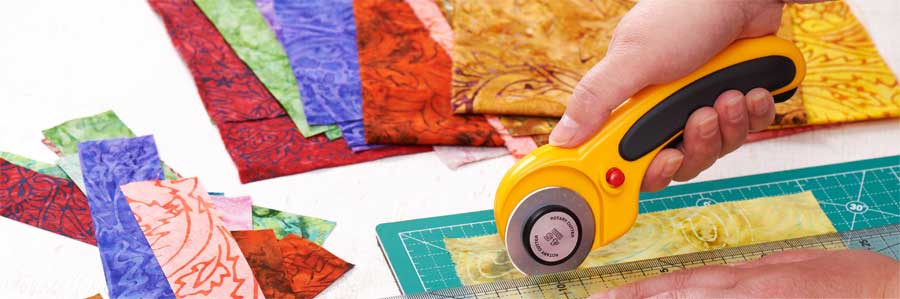
By the time I purchased my first fold-up cutting table that came with a large cutting mat, I understood more about rotary cutters and how they should be used. Helping a friend in her craft business, she suggested using a rotary cutter to produce the long, even-width strips she needed for ruffling. Armed with a tool, mat, and plastic ruler, it was easy to work with the yards and yards of fabric and cut them into 6″ strips. This ease-of-use is the reason that rotary cutters have won the admiration of quilters. Since I often worked with knits, transferring this technique into cutting the ribbing for neck and waist bands was a natural jump.

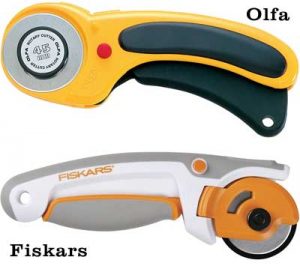
The first cutters had a straight handle and a 28 mm blade. However, just as scissors have evolved, so too has the rotary cutter. Today they come in various ergonomically designed shapes that help reduce the fatigue and stress on the hand when doing large amounts of cutting.

Super Size Me!

Rotary cutters now come in 14, 28, 45, and 60 mm sizes. Why so many? Just like scissors, the smaller cutter makes it easier to maneuver around smaller shapes. The larger size is better suited for long, straight edges or thicker fabrics. Specialty cutters even come with blades that can produce a pinked or wavy edges. There is even a rotary cutter with its own mat-like feature attached that allows it to run between rows of stitches on multiple layers of fabric and make the cuts needed to create chenille.

Buy on Amazon

Olfa and Fiskars are the two most common brands of sewing rotary cutters, but others can be found on the market. The lower end models start around $8 and go up from there depending on their size and features. The electric ones come in around $40, and large ones that look like paper cutters used mainly in quilt shops for cutting quantities of fabric can go above $170. Because these cutters can handle up to 10 layers at a time, they make fast work of the tedious job of multiple cuts. And, yes, they are also available for the left hander.

Rotary cutters are not without some down sides. While they work great when cutting straight edges that can be aligned with a quilting ruler, it takes some practice to go around curves in both quilting and garment sewing. With practice and the right size blade, however, this obstacle can be overcome. What is a bit more cumbersome is using the cutter in conjunction with pattern pieces. Putting pins in the pattern creates an uneven surface for the ruler to be placed upon, and weights, if used, always seem to be in the way. I have even seen some brave souls use the rotary cutter instead of a seam ripper for taking out stitches, This requires some practice, but a sharp blade easily snips the threads that a seam ripper might otherwise just pull.

Quilting cottons are a natural for the rotary cutter, but even slippery fabrics can be tamed because the proper use of the ruler holds the fabric in place and allows for an accurate cut.  Of course some of this is dependent upon having a sharp blade in the cutter. While there are tools available to sharpen blades, I have found it best to simply change the blade which is easily done with the turn of a screw that holds it in place.

Perhaps the biggest drawback for this tool is the fear of cutting oneself on the blade. Today they are designed with retractable blades or covers to help prevent accidents from occurring; however, most users will admit to being nicked at one time or another by a sharp blade being in the wrong place at the wrong time.

So where do I stand in the great cutting debate? Like Guy I Am, I must say, I like them. I like them both, and “I would use them here and there, I would use them everywhere!”


~Rosemary Fajgier

This field is for validation purposes and should be left unchanged.
Did you enjoy this article?
Are you an ASG member?

Tagged With: cutting, rotary cutter, scissors, sewing

  • « Previous Page
  • 1
  • …
  • 6
  • 7
  • 8
  • 9
  • 10
  • …
  • 15
  • Next Page »

Become a Member

Join the only national organization dedicated to Advancing Sewing as an Art and Life Skill.

Join Now button

Blog Article Categories

  • ASG Conference
  • Chapter Stories
  • Embroidery
  • Fitting
  • Learn to Sew
  • National Sewing Month
  • Products, Books, & Patterns
  • Projects
  • Quilting
  • Sewing
  • Sewing Techniques
  • Sewing Tips
  • Sewing Tours
  • Videos
  • Disclaimer
  • Privacy Policy

American Sewing Guild
National Headquarters
9660 Hillcroft, Suite 230
Houston TX 77096
713-729-3000 | 713-721-9230 Fax
www.ASG.org

ASG wordcloud - education, conference, discounts, videos, special offers, tours and more

Copyright © 1998–2026 · American Sewing Guild · All Rights Reserved