American Sewing Guild (ASG)

Visit our blog Visit the ASG Facebook page Visit ASG on Pinterest Visit ASG's YouTube channel Visit ASG on Instagram
  • Home
  • Join ASG
    • Join Online
    • Chapter Locations
    • Member Benefits
    • Member Brochure
    • Join by Mail
  • Education & Classes
  • Resources
    • Contests & Awards
    • Giving Back
    • Hall of Fame
    • Travel and Tours
    • Measurement Chart
  • Shop
    • ASG Store
    • Chapter Products
    • Video Resources
  • Blog
  • About
    • About Us
    • Donate to ASG
    • ASG Sensitivity Statement
    • FAQ’s
    • Start a Chapter
  • Contact
  • Member Login
    • Login First!
    • Members Only
    • Leadership Only
    • Website FAQ’s
    • Logout
  •  

August 21, 2026

Why Two People Wearing the Same Pattern Get Different Results

Have you ever admired a garment someone made, bought the exact same pattern, and wondered why yours looked completely different? Or perhaps you and a sewing friend made the same pattern in the same size, yet the finished garments hardly looked like they came from the same envelope.

That isn’t necessarily a sign that one person sewed it “better.” A sewing pattern is really only the starting point. Fabric, body shape, fit preferences, construction choices, and even the way a garment is worn all influence the final result. Understanding these variables can help you predict how a pattern will work for you rather than expecting your garment to duplicate the photograph on the pattern cover.

The Body Changes the Garment

Patterns are drafted using a particular set of body measurements and proportions, but few of us match those measurements exactly.

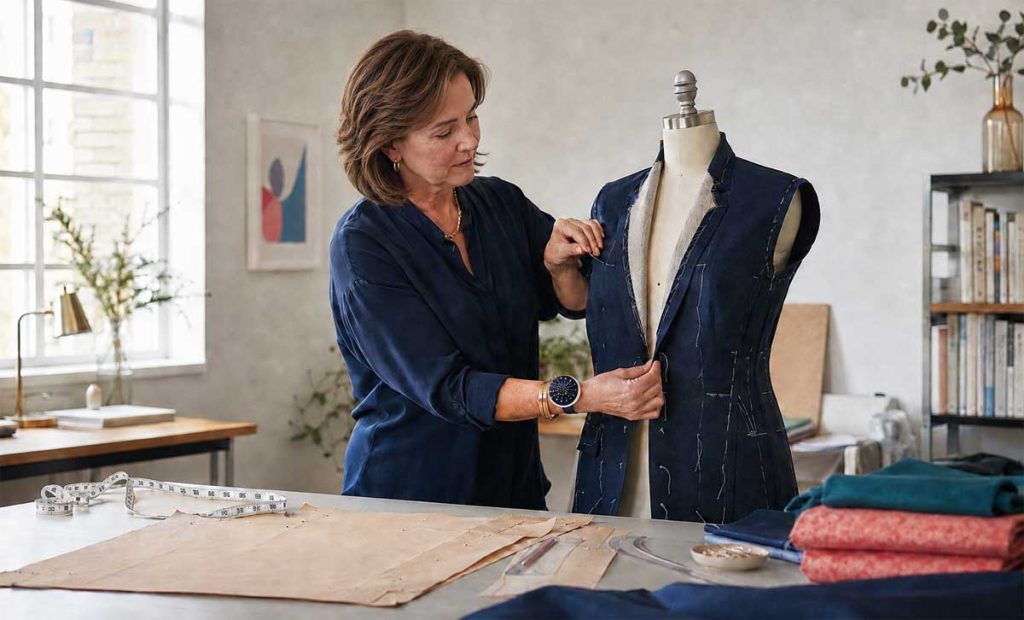
The body changes the garment

Two people may have identical bust, waist, and hip measurements while carrying those measurements very differently. One may have broader shoulders, a fuller bust, and relatively narrow rib cage; another may have a smaller bust but broader back. Hip circumference can be distributed toward the sides, back, or abdomen.

Posture matters, too. Forward shoulders, an erect posture, a rounded upper back, or a tilted pelvis can change how fabric hangs from the body.

That’s why choosing the correct pattern size is only the beginning. Circumference tells you how much space the body occupies; shape determines where that space is needed.

Fabric Can Practically Redesign a Pattern

Few things transform a pattern as dramatically as fabric. Imagine making the same wide-leg trouser pattern in crisp linen, fluid rayon challis, and stretch ponte. The pattern pieces haven’t changed, but the resulting garments certainly will.

Fabric can redesign a pattern

In addition, the scale of the print matters. A large print can swallow a small frame, while a tiny print can look busy on a larger frame. The background color of the pattern sets the mood and can make the skin look bright or washed out.

Fabric weight, drape, stretch, recovery, thickness, and surface texture all affect silhouette. A structured fabric may hold a sleeve away from the arm or exaggerate the fullness of a skirt. A fluid fabric may collapse closer to the body and make the same design appear slimmer.

Even fabrics with similar fiber content can behave differently. Two cottons might have completely different weights and drape. This is one reason experienced sewers pay close attention to the fabric recommendations on a pattern. They aren’t simply shopping suggestions—they’re clues to the silhouette the designer intended.

Ease Isn’t Experienced Equally

Pattern ease is another reason two garments can look different. Four inches of total positive ease on a bust is a standard baseline in commercial sewing patterns and slopers for a classic, comfortable fit in woven garments with sleeves. This provides about 2 inches of functional breathing/movement room, plus 2 inches of relaxed style ease. However, on one body, that ease may appear relaxed and balanced. On another, the fabric may be pulled forward by a fuller bust, leaving less apparent ease across the front and more fabric pooling at the back.

Ease can look and feel different on different bodies

Personal preference also matters. One sewist may happily wear a jacket with several inches of ease, while another prefers a closer silhouette and automatically takes in the side seams. Neither is wrong. Fit isn’t simply a measurement; it’s also a preference.

Small Adjustments Have Big Consequences

Experienced garment creators rarely make every pattern straight from the envelope. One person may shorten the bodice, lower a dart, narrow the shoulders, or perform a full-bust adjustment. Another might lengthen the torso and raise the waistline. Individually, these alterations can seem minor, but together they change the garment’s proportions.

Even adjustments that aren’t technically “fit alterations” matter. Shortening a skirt three inches changes its visual relationship to the body. Narrowing a sleeve can make an entire jacket look sleeker. Changing button placement can alter where the eye travels.

Pattern changes can have a big impact on the final look

The more you sew, the more a commercial pattern becomes a framework rather than a set of unquestionable instructions.

Construction and Pressing Leave Their Fingerprints

Two sewists can cut identical pieces from identical fabric and still produce noticeably different garments.

Construction and pressing affect the final product

Seam accuracy matters. A seemingly insignificant 1/8-inch difference repeated across several seams can change finished circumference. Stretching a neckline during construction can alter how it sits. Slightly easing one sleeve differently from another affects its shape.

Then there’s pressing—one of garment sewing’s quiet superpowers. Proper pressing shapes darts, sets seams, molds collars, flattens hems, and gives a garment definition. The difference between “homemade” and beautifully handmade often has less to do with an expensive sewing machine than with what happened at the ironing board.

Styling Changes What We See

Finally, remember that you’re rarely comparing garments in isolation. A blouse tucked into high-waisted trousers looks different from the same blouse worn loose over jeans. A dress photographed with heels creates different proportions than one worn with flats. Undergarments can change bust position and garment fit. Even sleeve position, posture, and accessories affect our perception.

Styling changes the outfit

So the next time another sewist’s version of a pattern looks different from yours, don’t immediately reach for the seam ripper. Instead, study the differences. Look at body proportions, fabric behavior, ease, alterations, construction, and styling. Ask why the garments look different. That’s where some of the most useful sewing lessons are hiding.

Because ultimately, the goal isn’t to make your garment look exactly like someone else’s. It’s to understand the pattern well enough to make it look as though it was always intended for you. Your garment should be a reflection of you and your personal style.


~The ASG Sewing Room

August 14, 2026

Sleeve Setting

Whether you’re a beginner or an experienced sewer, sleeves can be a little intimidating—whose idea was it to try and fit a rounded curve into an armhole anyway?

Sleeve image

No matter what type of garment you’re creating—from coat to T-shirt—you’ll likely be facing one of two types of sleeves: either one with a rounded cap or one with a flat cap. (Raglan is another type of sleeve, but requires a different insertion method.)

Rounded caps are found in more tailored and fitted garments and are commonly called set-in sleeves, while flat caps (aka shirt sleeves) are found in more sporty garments, menswear and kids’ clothes, and getting them into your garment requires different strategies.

Flat cap sleeve

Set-in Sleeves

The shape of a rounded sleeve cap allows for ease to fit over the shoulder curve and upper arm area. If you measure the seamline of the garment and you measure the seamline of the upper sleeve, you’ll find that the sleeve is longer. That means you’ll need to ease the fullness into the smaller garment opening.

A rounded sleeve cap has important pattern markings—at the shoulder and part way along the sleeve cap both front and back, including placement notches. These are key for distributing the ease.

Rounded cap sleeve with markings

The area below the armhole notches on the sleeve should fit the armhole itself with no ease, as the ease area is concentrated at the top portion of the sleeve, above the notches.

To evenly distribute the sleeve cap ease, stitch a line of basting length stitches 1/8” inside and outside the seamline from notch to notch—do not backstitch, but instead leave the thread tails long enough to pull.

Ease lines

The first step in insertion is to sew the underarm sleeve seam and the corresponding garment shoulder and underarm seam, and press both open. With right sides together, place the sleeve inside the armhole opening and pin at the notches, seamline, shoulder point and corresponding markings on the cap. Gently pull on the bobbin threads of the ease line to fit the sleeve to the armhole size, working from the notch area to the shoulder.

If your machine has a free-arm, this is the place to use it, as the sleeve opening can fit over it for easier access.

Beginning at the underarm seam, stitch the sleeve in place adjusting the ease as needed to fit and being careful to avoid any puckers. Sew with the sleeve side up to control the ease.

Reinforce the lower armhole with a second line of stitching ¼” inside the seamline. Trim the seam allowances below the notches, but leave the seam allowances intact in the cap area to fill out the sleeve head. Push the upper sleeve seam allowances toward the sleeve, but don’t press this area as it will flatten, eliminating the ease you just carefully created. Remove any visible basting.

If you’re working on a tailored garment with a two-piece sleeve, follow the pattern guidesheet to sew the undersleeve to the top sleeve before inserting it into the garment.

Flat Sleeve Insertion

Shirt sleeves have the same markings as their set-in cousins—notches front and back, a shoulder marking and often some intermediate marks as well. This type of sleeve is put in prior to sewing the garment side seams and sleeve underarm seam. No ease line is necessary for this type of sleeve—simply match the notches and other marks, right sides together, and stitch with the sleeve side up.

Flat cap sleeve, ready to sew

Shirt sleeves can easily be inserted with a serger or conventional machine. If you choose the latter, sew a second line of stitching, either zigzag or straight just inside the seamline and trim off the extra seam allowance.

With right sides together, match the garment underarm seams, hemline and sleeve hem, then sew the seam continuously. Finish and trim as for the sleeve cap area.

Flat cap sleeve side seam

All images provided courtesy of Bernina


~Linda Griepentrog is the owner of G Wiz Creative Services and she does writing, editing and designing for companies in the sewing, crafting and quilting industries. In addition, she escorts fabric shopping tours to Hong Kong. She lives at the Oregon Coast with her husband Keith, and three dogs, Yohnuh, Abby, and Lizzie. Contact her at gwizdesigns@aol.com.

Tagged With: garment sewing, sewing tips, sleeves

August 7, 2026

Mixing Knits and Wovens Successfully

Walk through any clothing store, and you’ll notice that many of today’s garments combine knit and woven fabrics. A jacket may feature knit side panels for comfort, a blouse might pair a woven front with a knit back, or a dress could use stretch knit sleeves with a woven bodice. These thoughtful combinations offer the best of both worlds—structure where you want it and flexibility where you need it.

Using knit and woven fabric

For home garment sewers, however, combining fabrics with different characteristics can sometimes be intimidating especially when one fabric stretches while the other doesn’t. One may drape fluidly while the other holds its shape. The secret to success isn’t avoiding these pairings—it’s understanding how each fabric behaves and designing your project so they work together rather than against each other.

Start with Compatible Fabrics

Knit and woven fabric side by side

The biggest mistake you can make is choosing fabrics based solely on color or print. Instead, evaluate how the fabrics behave.

  • Begin by comparing their weight. A lightweight rayon challis paired with a heavyweight ponte knit will likely pull out of balance, while a cotton lawn and a lightweight jersey may complement each other beautifully.
  • Next, consider drape. Fabrics should move in a similar way. If one fabric flows softly while the other stands away from the body, the garment may twist, sag, or feel awkward when worn.
  • Finally, pay attention to texture. A smooth woven linen and a textured sweater knit may technically work together, but the contrast should be intentional rather than accidental.

Before cutting your project, hold both fabrics together, let them hang over your hand, and observe how they move. If they seem comfortable together, chances are they’ll sew together well, too.

Let Each Fabric Do What It Does Best

Successful mixed-fabric garments take advantage of each material’s strengths. Use woven fabrics where structure matters. Shirt collars, cuffs, waistbands, button plackets, and tailored bodices all benefit from the stability of woven fabric. Reserve knits for areas where comfort and movement are important. Side panels, sleeves, backs, neckbands, and fitted waist sections can all benefit from the stretch that knit fabrics provide.

Think about how your body moves throughout the day. Placing knit panels where you bend, reach, or sit can make a garment noticeably more comfortable without sacrificing the crisp appearance of woven fabric.

Stabilize Seams Between Fabric Types

Stabilizing seams

Joining a knit to a woven is where many projects begin to misbehave. Because the knit naturally stretches while the woven does not, the seam can become wavy or distorted during construction. The solution is stabilization.

A strip of lightweight fusible stay tape, clear elastic, twill tape, or even a narrow strip of lightweight interfacing can help keep the seam from stretching out of shape. The appropriate stabilizer depends on the garment and fabric, but the goal is always the same: preserve the intended shape while allowing the garment to remain comfortable.

As always, test your chosen stabilizer on fabric scraps before using it on your garment.

Choose the Right Needle and Stitch

One garment may require more than one sewing setup.

  • For sections sewn entirely in woven fabric, a universal or sharp needle and a standard straight stitch often work perfectly.
  • When sewing knit sections, switch to a ballpoint or stretch needle to prevent skipped stitches and fabric damage. Depending on your machine and fabric, a narrow zigzag or stretch stitch may produce seams that retain flexibility.
  • If you’re sewing across a seam that joins both fabric types, test your stitch settings first. A small sample can reveal puckering, tunneling, or skipped stitches before they become part of your project.

Consider the Direction of Stretch

Whenever knit fabric is part of a design, think carefully about where the stretch belongs. A knit side panel should stretch around the body, while a knit waistband may need more recovery than a knit sleeve. Pay attention to the greatest direction of stretch as you lay out your pattern pieces.

Likewise, remember that woven fabrics generally control the fit of the garment. If a woven front is paired with a knit back, the woven piece usually determines the finished size. Simply adding a stretchy panel won’t automatically create a looser fit if the woven sections remain restrictive.

Press with Care

Pressing becomes even more important when different fabric types meet.

  • Use the temperature appropriate for the most delicate fabric, and always test first. Excessive heat can flatten textured knits, create shine on synthetic fibers, or distort stretch fabrics.
  • A press cloth is particularly helpful when working with mixed fabrics, allowing you to press seams thoroughly without damaging the surface.
  • Take your time pressing seam allowances so they lie flat before moving on to the next construction step. This small habit helps different fabrics blend together visually.

Sample Before You Commit

Perhaps the best habit when mixing knits and wovens is making a test sample. Sew several inches of the actual seam using the same fabrics, thread, stabilizer, needle, stitch length, and pressing method you intend to use on the garment. Stretch it gently, press it, and evaluate how it behaves.

A five-minute sample can answer questions that might otherwise lead to frustration halfway through a project.

A Creative Way to Expand Your Sewing

Combining knit and woven fabrics opens the door to endless design possibilities. It allows you to add comfort to tailored garments, introduce structure to relaxed styles, and make creative use of fabric already in your stash.

With thoughtful fabric selection, careful stabilization, and a willingness to test before sewing, you’ll discover that mixing fabric types isn’t something to avoid—it’s another skill that expands your creative toolbox. Once you become comfortable pairing the strengths of both knits and wovens, you’ll start seeing opportunities for custom details and designer-inspired garments everywhere.


~The ASG Sewing Room

Tagged With: fabric, garment sewing, knit, woven

July 31, 2026

Getting to the Point

A perfectly placed straight pin will hold fabrics together, keeps seams aligned, and help you transform flat pieces into finished projects. But those tiny metal helpers have a way of disappearing at the worst possible moment—slipping into cushions, rolling onto the floor, or hiding beneath layers of fabric. Keeping your pins close at hand and stored safely isn’t just a matter of convenience; it can save time, protect your work, and prevent painful surprises for you, your family, and even your pets. With a few smart storage solutions and good sewing habits, you’ll always know exactly where your pins are when you need them.

Round pincushions available on Amazon

 Ripe for the Picking

Perhaps you have a classic tomato pincushion, the lore of which goes back to the Middle Ages when tomatoes were considered to ward off evil spirits and placed on the home’s mantel. When real tomatoes were out of season, a sawdust filled one took its place, making a handy spot to store needles and pins of the resident stitchers.

Tomato pincushions are divided into sections by heavy thread, making them ideal for separating different types of pins and needles. Most have a small, attached strawberry filled with emery to help keep pin-points sharp. Today, the classic red has given way to some fashion colors as well and fabrication in velvet, felt and cotton.

Magnetic appeal

Euro-Notions Grabbit
Euro Notions Grabbit

If you prefer magnetic attraction, look for all kinds of shapes and styles with grab. Magnetic pin holders exist for wrists, table tops and even to adhere to your sewing machine. But, be sure to read your owner’s manual before adhering any magnetic device to your machine, as some brands don’t recommend it. Magnetic pin holders also come in wand and bowl shapes and some even keep the pins aligned for easier retrieval.

Clover magnetic pin caddy
Magnetic Wrist Sewing Pincushion available on Amazon

Keeping a lid on it

Box of pins

If you like to take your pin stash to classes or move it from place to place, look for a small container with a snap-on lid for safekeeping. Often you’ll find something suitable in the kitchen section of a dollar store. If you have multiple types of pins, like silk, appliqué, etc., label separate containers to avoid a mix-up.

Stuffed options

You can find all kinds of fabric pincushions, either singly or incorporated into other sewing tools, like chatelains or rings. Look for ornate pincushions nestled in Victorian teacups, ice cream sundae dishes or small wooden bowls.

Honeysew Hedgehog Pin Cushions available on Amazon
  • Let’s not forget the over-the-arm sewing organizers that drape conveniently over your sofa arm and usually offer multiple pockets for storing other sewing tools besides pins and needles.
  • Timeless felted pincushions are also handy and they’re actually good for the pin and needle points as the lanolin in the wool felt help protect the tips. Look for dome shapes and slab shapes of felt pin holders.
  • Stuffed fabric pincushions offer up multiple stuffings—from emery (the most costly) to sawdust, sand, rice and walnut shells. Avoid those filled with plastic pellets as they can damage pin points. Compressed steel wool can also be used as a filler and it’s great for sharpening pins and needles.

So, if you’re making your own pincushions, do a bit of research on fillers first and if you’re using something like sawdust or sand for stuffing, be sure they’re sterile to avoid any pesty issues.

Who knew there were so many options for the simple task of storing your pins?


~Linda Griepentrog is the owner of G Wiz Creative Services and she does writing, editing and designing for companies in the sewing, crafting and quilting industries. In addition, she escorts fabric shopping tours to Hong Kong. She lives at the Oregon Coast with her husband Keith, and three dogs, Yohnuh, Abby, and Lizzie. Contact her at gwizdesigns@aol.com.
Tagged With: sewing, sewing tools

July 24, 2026

The Psychology of Garment Sewing: Why Making Clothes Makes Us Feel So Good

Picture of a brain

There is something deeply satisfying about wearing a garment you’ve made yourself. It isn’t just the compliments you receive or the pride of saying, “Thanks, I made it.” The act of garment sewing offers powerful psychological benefits that can boost confidence, reduce stress, and even change how we see ourselves.

While sewing is often viewed as a practical skill or creative hobby, psychologists have long recognized that activities requiring creativity, problem-solving, and focused attention can significantly improve emotional well-being. Garment sewing combines all of these elements in one rewarding pursuit.

Sewing Creates a State of Flow

Have you ever sat down at your sewing machine planning to work for an hour, only to discover that three hours have passed? You’ve likely experienced what psychologists call flow—a mental state in which you’re completely immersed in an activity.

Flow occurs when the challenge of a task matches your skill level. Garment sewing offers this balance beautifully. Reading patterns, selecting fabrics, adjusting fit, and mastering new techniques require concentration without being overwhelming. During these periods, everyday worries fade into the background as your attention focuses entirely on the project in front of you.

Woman sewing

Many sewists describe these sessions as mentally refreshing. Instead of draining energy, sewing often restores it.

Building Confidence One Seam at a Time

Modern life doesn’t always provide opportunities to see tangible results from our efforts. Many jobs involve digital work, meetings, or tasks that disappear as quickly as they’re completed.

Garment sewing is wonderfully different. Every step reveals visible progress. A pile of fabric becomes cut pieces. Those pieces become a bodice, sleeves, and eventually a finished garment. Each completed seam reinforces the belief that you are capable of learning, improving, and creating something meaningful.

Even mistakes become valuable teachers. Learning to unpick stitches, adjust a pattern, or solve fitting problems develops resilience—the confidence that challenges can be overcome with patience and persistence. That confidence often extends beyond the sewing room.

Clothing That Reflects Who You Are

Psychologists have found that what we wear influences not only how others perceive us but also how we perceive ourselves. This idea, sometimes called “enclothed cognition,” suggests that clothing can affect confidence, mood, and even performance.

Garment sewing takes this one step further.

Instead of choosing from what stores offer, sewists create clothing that reflects their personality, lifestyle, and preferences. Whether someone loves bold prints, timeless classics, dramatic silhouettes, or practical everyday wear, handmade garments become expressions of identity.

Seamstress pinning a dress

Rather than asking, “What can I buy?” sewists ask, “What do I want to create?” That shift gives sewists greater ownership over their personal style.

A Healthy Break from Technology

Today’s world constantly competes for our attention. Phones buzz, emails arrive, and social media feeds never end. Sewing provides a welcome contrast.

Working with fabric engages the senses in ways screens cannot. The feel of linen, the sound of scissors cutting cloth, the rhythm of a sewing machine, and the satisfaction of pressing crisp seams all encourage mindfulness—remaining present in the moment.

Many sewists find that even a short sewing session helps quiet mental clutter and reduce stress after a busy day.

Problem Solving That Feels Rewarding

Garment sewing is like solving an enjoyable puzzle. Perhaps the sleeve doesn’t fit quite right. Maybe the waistband needs adjusting, or the pattern requires a full bust adjustment. Each challenge invites experimentation rather than frustration.

Research suggests that successfully overcoming manageable challenges stimulates the brain’s reward system. Every fitting correction, successful zipper installation, or perfectly matched seam provides a small sense of accomplishment that keeps motivation high.

These moments remind us that progress—not perfection—is what makes sewing enjoyable.

Creativity Without Comparison

Unlike many creative pursuits that encourage constant comparison, garment sewing naturally emphasizes personal growth. Your latest project doesn’t need to resemble someone else’s. It only needs to fit your goals, your body, and your style.

Over time, sewists begin comparing today’s work with garments they completed years earlier rather than measuring themselves against others. This mindset encourages continuous learning while reducing the pressure to be perfect.

Each finished garment becomes evidence of how much you’ve learned.

The Joy of Handmade

In a world filled with mass-produced clothing, creating a handmade garment carries special meaning. You chose the pattern. You selected the fabric. You matched the thread, pressed every seam, and invested hours of care into every detail.

That investment creates a stronger emotional connection to the finished garment. Many sewists report wearing handmade clothing longer, caring for it more carefully, and valuing it more than ready-to-wear purchases.

The garment becomes more than clothing—it becomes a story of creativity, patience, and craftsmanship.

More Than Just Sewing

Garment sewing is often described as a hobby, but its benefits reach much further. It encourages patience in an impatient world. It rewards persistence over perfection. It transforms mistakes into learning opportunities and gives us permission to slow down and focus on creating something beautiful.

Every project strengthens technical skills while quietly building confidence, resilience, and emotional well-being.

Perhaps that’s why so many people return to their sewing rooms again and again. They’re not simply making clothes. They’re creating confidence, expressing creativity, and stitching together a little more joy with every seam.


~The ASG Sewing Room

  • 1
  • 2
  • 3
  • …
  • 73
  • Next Page »

Become a Member

Join the only national organization dedicated to Advancing Sewing as an Art and Life Skill.

Join Now button

Blog Article Categories

  • ASG Conference
  • Chapter Stories
  • Embroidery
  • Fitting
  • Learn to Sew
  • National Sewing Month
  • Products, Books, & Patterns
  • Projects
  • Quilting
  • Sewing
  • Sewing Techniques
  • Sewing Tips
  • Sewing Tours
  • Videos
  • Disclaimer
  • Privacy Policy

American Sewing Guild
National Headquarters
9660 Hillcroft, Suite 230
Houston TX 77096
713-729-3000 | 713-721-9230 Fax
www.ASG.org

ASG wordcloud - education, conference, discounts, videos, special offers, tours and more

Copyright © 1998–2026 · American Sewing Guild · All Rights Reserved