American Sewing Guild (ASG)

Visit our blog Visit the ASG Facebook page Visit ASG on Pinterest Visit ASG's YouTube channel Visit ASG on Instagram
  • Home
  • Join ASG
    • Join Online
    • Chapter Locations
    • Member Benefits
    • Member Brochure
    • Join by Mail
  • Education & Classes
  • Resources
    • Contests & Awards
    • Giving Back
    • Hall of Fame
    • Travel and Tours
    • Measurement Chart
  • Shop
    • ASG Store
    • Chapter Products
    • Video Resources
  • Blog
  • About
    • About Us
    • Donate to ASG
    • ASG Sensitivity Statement
    • FAQ’s
    • Start a Chapter
  • Contact
  • Member Login
    • Login First!
    • Members Only
    • Leadership Only
    • Website FAQ’s
    • Logout
  •  

June 26, 2026

Sew Twice the Style with Reversible Garments

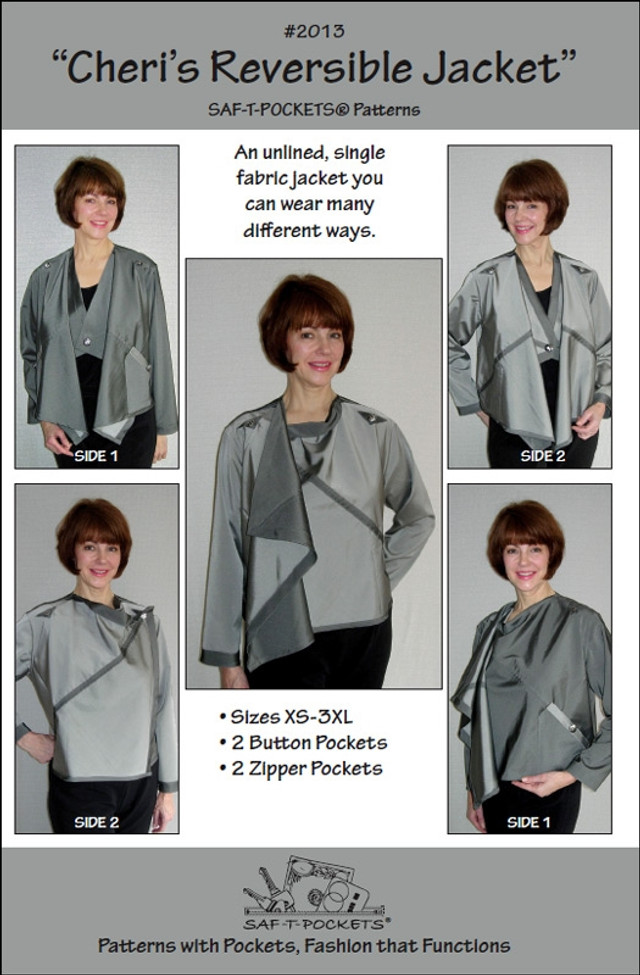
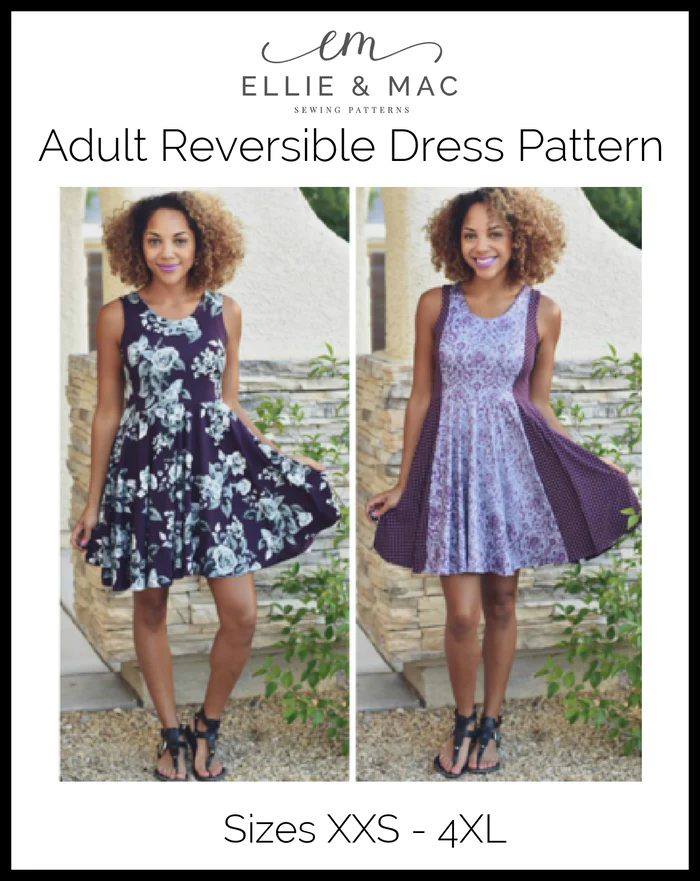
Sewing reversible garments is a practical, sustainable, and creative way to add versatility to your handmade wardrobe. With one project, you essentially create two different looks, making reversible clothing perfect for travel, capsule wardrobes, and anyone looking to get more wear from every garment they sew.

Whether you’re making a lightweight summer top or a cozy jacket, reversible garments allow you to showcase coordinating fabrics while stretching your sewing skills.

Making Choices

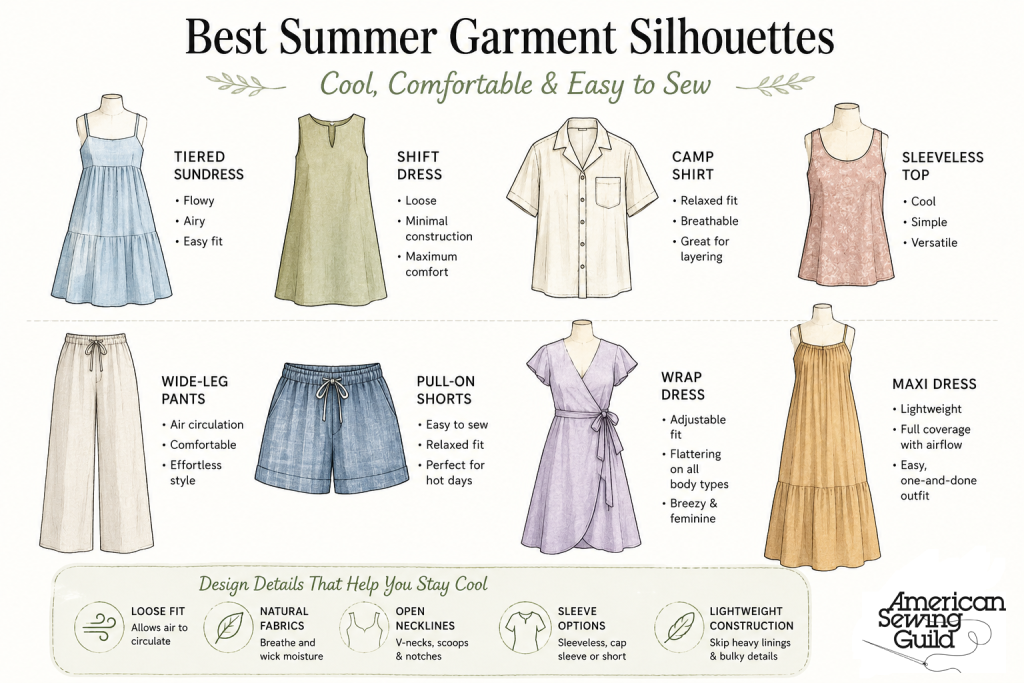
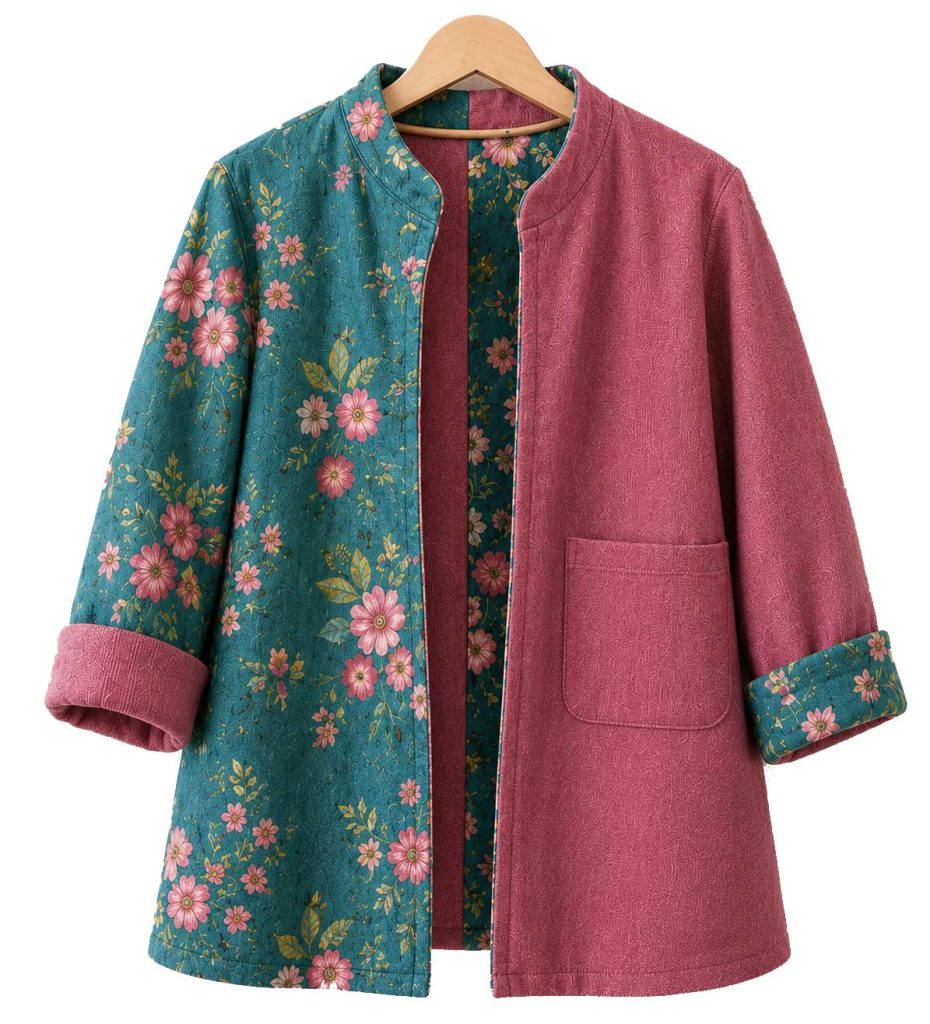
Coats and jackets are logical choices because collars, lapels, cuffs, and hoods naturally highlight the contrasting fabric. Vests are another excellent option since they have relatively simple construction and few fitting challenges. For warmer weather, simple dresses, skirts, tunics, and sleeveless tops are ideal candidates.

Look for patterns specifically designed to be reversible whenever possible. These patterns usually eliminate facings and include construction methods that produce attractive finishes on both sides. If you can’t find a reversible pattern, choose one with clean lines, minimal seams, and few design details. Avoid garments with complex collars, intricate pockets, or heavily tailored construction unless you’re comfortable modifying the pattern.

Cheri's Reversible Jacket - SafT Pockets

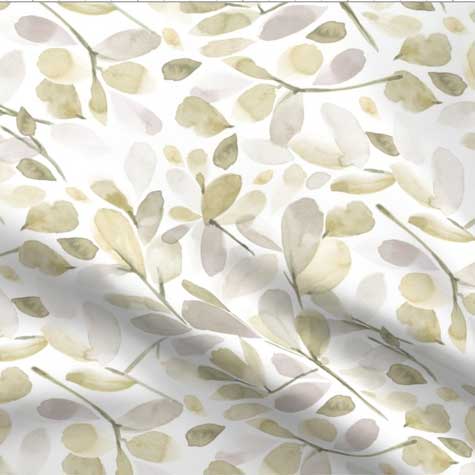
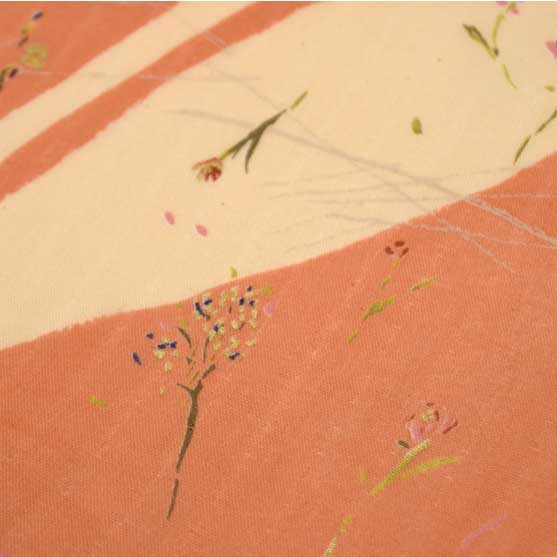
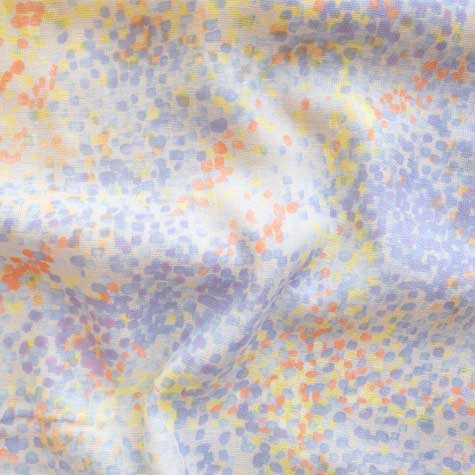
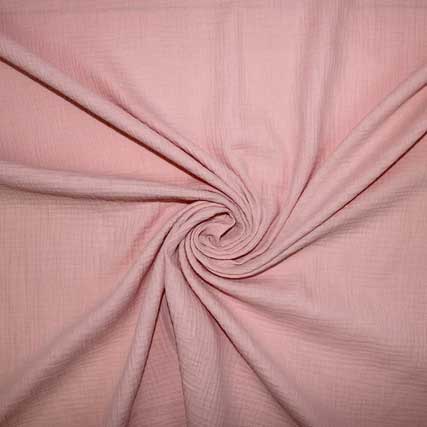
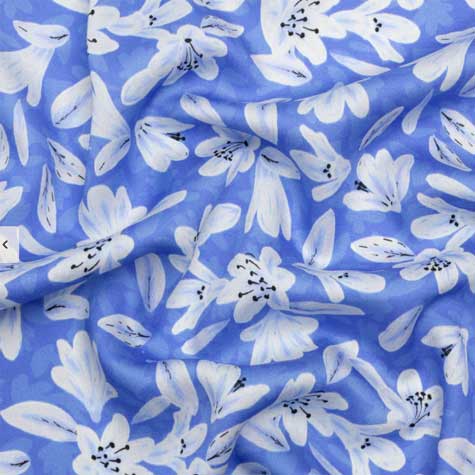
When selecting fabrics, choose two with similar weight, drape, stretch, and care requirements. Pairing fabrics with dramatically different characteristics can cause the garment to twist, pull, or hang unevenly. Before purchasing, drape both fabrics over your hand to compare how they fall. Lightweight cotton lawns, linens, rayon blends, chambrays, stable knits, and double gauze all make excellent combinations.

Don’t limit yourself to two solid colors. A solid paired with a coordinating print creates endless styling possibilities. Two complementary prints can also make a striking statement, while combining different textures—such as linen with cotton or denim with chambray—adds visual interest without sacrificing comfort.

Plan Before You Cut

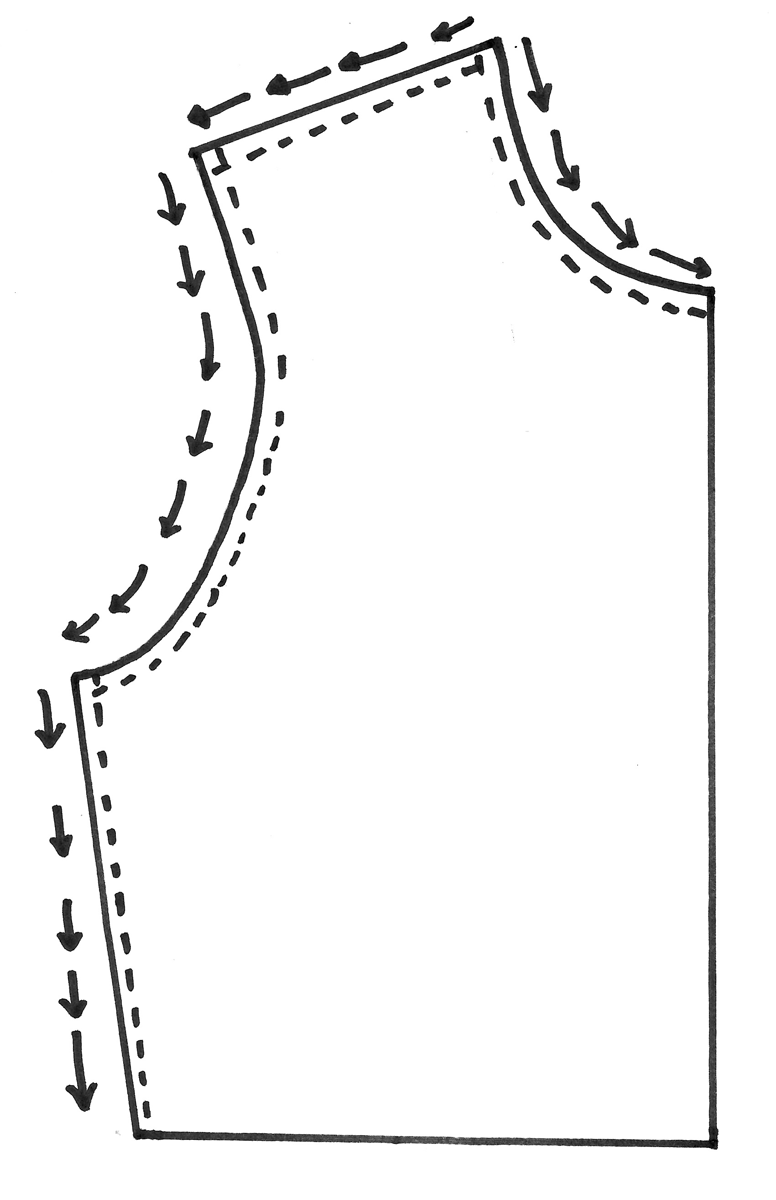
Accuracy is essential when sewing reversible garments. Cut both fabrics using the same pattern pieces, ensuring every notch and marking matches perfectly. If your pattern wasn’t designed to be reversible, consider shortening deep hems to approximately 5/8 inch to reduce bulk.

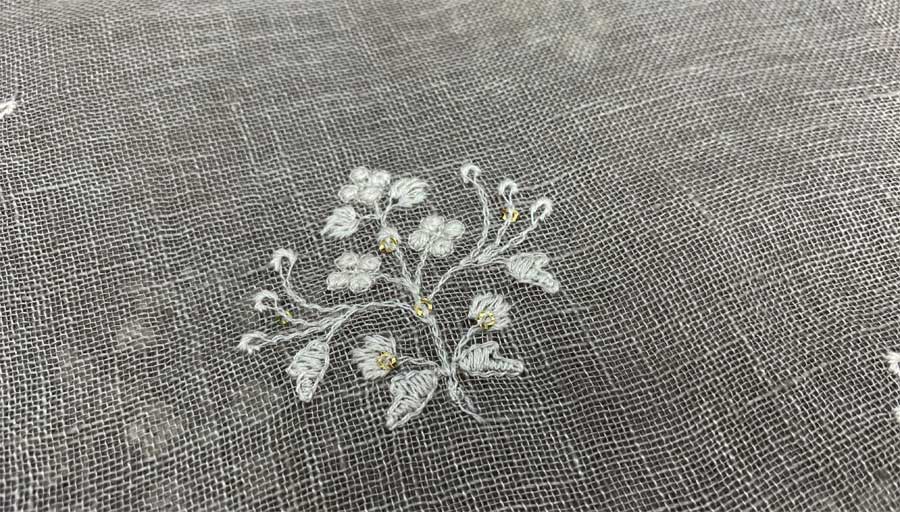
Complete any embellishments, embroidery, decorative stitching, or patch pockets before assembling the garment. This keeps stitching hidden between the layers whenever possible.

Take time to think through the construction sequence before sewing the first seam. Ask yourself:

  • Which side will be worn most often?
  • Where will closures be located?
  • How will seam finishes look from both sides?
  • Can labels or size tags be omitted or placed inside a pocket?

A little planning prevents surprises later.

Seam Finishes Matter

Since both sides will be visible, every seam should look as attractive inside as outside. Some of the best finishing techniques include:

  • French seams for lightweight woven fabrics
  • Flat-felled seams for shirts, jackets, and casual garments
  • Hong Kong finishes for garments where layers aren’t fully enclosed
  • Bias-bound seam allowances for decorative contrast
  • Clean-finished edges using self-fabric or coordinating bias binding

For knit garments, consider using a narrow serger stitch with decorative thread or coverstitching where appropriate.

Construction Options

There are two primary methods for constructing reversible garments.

Ellie and Mac Reversible Dress Pattern

Method One: Right Sides Together

Place the fabrics with right sides together, carefully matching all raw edges. Stitch around the garment, leaving an opening about 8 inches long in a side seam or lower hem. Grade and trim seam allowances to reduce bulk, especially around curves and corners.

Turn the garment right side out through the opening and gently shape corners using a point turner or chopstick. Press carefully using the appropriate temperature for both fabrics. Close the opening with a slipstitch or ladder stitch, then topstitch around the garment for crisp edges and added stability.

Method Two: Wrong Sides Together

Place the fabrics wrong sides together and treat them as one layer. Finish the outer edges with bias binding, fold-over elastic, decorative braid, or other attractive edge finishes. Complete interior seams using French or flat-felled seams for a professional appearance.

This technique works especially well for casual jackets, vests, children’s clothing, and lightweight outerwear.

Closures That Work Both Ways

Traditional buttonholes often reveal which side was intended as the “right” side. Instead, consider:

  • Button-and-loop closures
  • Reversible or double-pull zippers
  • Snaps hidden between the layers
  • Magnetic sew-in closures for lightweight garments
  • Ties or belts that can be worn from either side

If using buttons, choose attractive styles that complement both fabrics or use different decorative buttons on each side for added personality.

Reduce Bulk

One challenge with reversible garments is managing thickness. Grade seam allowances whenever possible, clip curves carefully, and avoid bulky interfacing. Instead, use lightweight fusible interfacing only where needed or substitute sew-in interfacing to maintain a softer drape.

Think Sustainably

Reversible jacket

Reversible garments are a wonderful example of sustainable sewing. Because each garment offers two distinct looks, you’ll often wear it more frequently, reducing the need for additional clothing. They’re also ideal for showcasing treasured fabrics or combining smaller yardage pieces into one highly functional garment.

Enjoy Two Looks in One

Sewing reversible garments requires a bit more planning than traditional sewing, but the results are well worth the extra effort. With thoughtful fabric choices, careful construction, and beautiful seam finishes, you’ll create garments that are attractive from every angle. Best of all, you’ll have two stylish looks in one handmade piece—perfect for travel, everyday wear, or simply getting twice the enjoyment from your sewing.


 ~American Sewing Guild

June 19, 2026

Lace Without Limits

If you’ve got an embroidery machine, chances are good that you’ve played around with it for hours embellishing every towel, denim shirt and potholder in the house. But, maybe you haven’t tried making lace yet. Let’s take a look at the process. Note that we’re talking about freestanding lace with no fabric underneath it.

From Emblibrary: Maple Leaves Collar

This is the kind of motif you might use for a collar, cuffs, pocket toppers, etc. or a whole host of dimensionally shaped items like ornaments, bookmarks, jewelry, etc. This type of lace can be open and airy looking, or it can be more dense with a crocheted look, but the key word you need to look for in choosing the design is “freestanding.” There are other lace designs that are digitized to be stitched onto base fabric, but freestanding lace supports itself without fabric underneath.

Under it all

From Anita Goodesign: Puzzle Lace

Freestanding lace is sewn on a removable stabilizer and it needs to be heavy enough to support the complexity of the stitches without tearing during the process. A removable stabilizer is key to the stability of the finished design and to giving it an open, airy look.

Water-soluble stabilizer works well for this process—whether the clear film version or the type that looks more like non-woven interfacing. These types remove cleanly from the stitches. Tear-away versions tend to leave a raggedy edge, unbecoming of any lace project.

Before you settle on a stabilizer, be sure to test-stitch the design to test for the stitch quality and tension and make any adjustments before beginning the real stitch-out process.

The right stuff

Embroidery thread for lace making affects the finished look, so note the digitizer’s instructions when choosing. For a bit of sheen, rayon works well; for a matte finish, cotton is ideal. If you want a bit of sparkle, check out metallics.

From Emblibrary: Fancy Fall Sunflower Drawstring Bag

Because the lace is openwork, match the bobbin thread to the top thread, at the very least in color, but it can be a lighter weight if you’re using a heavier top thread.

Even though traditional laces are usually white or off-white, when you create the lace yourself, you can make it any color you want. That’s the benefit of DIY.

From OESD: Lace Rose

A new small, sharp or embroidery needle is a must—look for size 75/11 if you’re using 40-weight thread.

Choose the smallest hoop that your lace motif will fit in. Because of the high stitch count, it’s imperative that there’s no slippage during stitching or the stitches will be misaligned. If there is any issue during your test-stitching, try taping the stabilizer into the hoop around the edges for a firmer hold.

Having small, sharp pointed scissors is helpful for trimming threads and any jump stitches. If they have curved blades, it’s even easier to get a close cut.

Stitching sagas

Hold the threads as your lace begins stitching, then stop and trim the ends so they don’t get caught up in the design. Because of the large number of stitches in freestanding lace designs, they take a long time to stitch out, so grab a cup of coffee for the show. You’ll see base stitches first, top stitches, and outline stitches play out. If the lace is a three-dimensional project, there may also be loops or buttonhole-like openings where sections are joined together.

At the end

Once the design is completely stitched out, trim around the motif about ½” outside the outline stitches. Follow the stabilizer manufacturer’s instructions for removal, paying attention to the water temperature and soaking duration guidelines. You may need to repeatedly soak and rinse to remove all the stabilizer.

From Anita Goodesign: Anita’s Lace

If your project is dimensional, you may want to leave some stabilizer in the stitching to create a slight stiffness so the project stands up or hangs well. If you’re putting the lace on a garment or using it on a home décor project, rinse thoroughly for a softer feel.

Attachments

To attach freestanding lace to a garment, simply sew along the outline stitches either by hand or machine. If desired and considering the location, you can carefully trim away the garment fabric under the lace design for a see-through look.


~Linda Griepentrog is the owner of G Wiz Creative Services and she does writing, editing and designing for companies in the sewing, crafting and quilting industries. In addition, she escorts fabric shopping tours to Hong Kong. She lives at the Oregon Coast with her husband Keith, and three dogs, Yohnuh, Abby, and Lizzie. Contact her at gwizdesigns@aol.com.


June 12, 2026

Sewing for Good: A Legacy of Service, Stitch by Stitch

For most ASG members, charitable sewing is nothing new. Long before “giving back” became a popular phrase, sewists were quietly using their skills to help neighbors, support communities, and provide comfort to those in need. Across decades of service, ASG members have sewn quilts, clothing, blankets, tote bags, walker caddies, adaptive garments, and countless other items that have touched lives in ways both large and small.

While the finished projects are often the focus, the true story of charitable sewing is about something much deeper. It is about connection. It is about purpose. And it is about the unique ability of sewing to transform fabric and thread into an expression of care.

Charitable sewing gives purpose to my creativity and reminds me that even small acts can make a difference.”

The Gift of Time and Talent

In today’s fast-paced world, time may be our most valuable resource. Every charitable project represents hours spent selecting fabrics, cutting pieces, pressing seams, troubleshooting challenges, and adding thoughtful finishing touches. Those hours are a gift.

Unlike a purchased item, a handmade donation carries something personal from its maker. Whether it is a quilt for a child entering foster care, a pillowcase for a hospitalized patient, or a memory bear created from a loved one’s clothing, each project reflects the care and attention of the person who made it.

ASG members understand this better than most. Experienced sewists know that every stitch requires intention. When those stitches are made for someone else, the project becomes more than an object—it becomes an act of kindness.

I may never meet the person who receives my quilt, but I hope they feel the love stitched into every seam.”

A Tradition That Continues to Inspire

One of the most remarkable aspects of charitable sewing is its ability to bring generations together. Many sewists learned not only sewing skills from parents, grandparents, and mentors, but also the belief that those skills should be used to help others.

Today, ASG members continue that tradition. Chapter service projects introduce newer sewists to the satisfaction of creating for a cause. Longtime members share techniques, encourage beginners, and demonstrate that sewing can be both a creative outlet and a powerful form of community service. In this way, charitable sewing becomes part of a larger legacy. The knowledge is passed along, but so are the values of generosity, compassion, and service.

The Benefits Flow Both Ways

It is easy to focus on the recipients of charitable sewing projects, but the benefits extend to the makers as well. Many describe a deep sense of fulfillment when working on projects intended for others. There is satisfaction in knowing that a skill developed over years of practice can bring comfort to someone facing a difficult circumstance.

Some projects provide a tangible connection to a recipient. A cancer patient receives a quilt. A child receives a handmade backpack. A veteran receives a patriotic lap blanket. Even when the recipient remains anonymous, sewists often feel a meaningful connection to the person who will ultimately use the item. That sense of purpose can be especially rewarding. Studies have shown that volunteering and helping others can contribute to increased happiness, reduced stress, and a greater sense of well-being. Sewers often experience these benefits firsthand. Time spent creating for others combines the calming, meditative qualities of sewing with the emotional rewards of generosity. The result is a unique form of fulfillment that extends beyond the sewing room.

Building Friendships Along the Way

For many ASG members, charitable sewing has also strengthened friendships and built lasting connections. Service projects often bring members together around a common goal. Fabric is shared. Techniques are exchanged. Stories are told. Laughter fills the room while hands remain busy. These gatherings remind us that sewing has always been about more than the finished project. It is also about community.

Many lifelong friendships have begun around cutting tables, sewing machines, and chapter service events. Working together toward a meaningful purpose creates bonds that extend far beyond the project itself. In a world where genuine connection can sometimes feel increasingly rare, charitable sewing continues to provide opportunities for fellowship, encouragement, and shared accomplishment.

I’ve made lifelong friends through ASG service projects. We come together to help others, but we receive so much in return.”

Every Stitch Leaves a Mark

The true impact of charitable sewing is often impossible to measure. We may never know how a quilt comforted a frightened child, how an adaptive garment restored someone’s independence, or how a handmade gift brightened a difficult day. Yet those impacts are real.

For decades, ASG members have quietly improved lives through their generosity and skill. Their work demonstrates that sewing is more than a hobby. It is a means of serving others, strengthening communities, and creating meaningful connections. As new generations discover the joy of sewing, they also inherit this tradition of giving. The projects may change, and the needs may evolve, but the spirit remains the same.

One stitch. One project. One act of kindness at a time.

And that is a legacy worth celebrating! 


~American Sewing Guild

June 5, 2026

Staystitching

Staystitching is a term we don’t often hear in the world of fast fashion sewing, but its importance can’t be overrated. And it’s essential for quality construction.

Staystitching image provided by Bernina

What is it?

Staystitching is a row of regular length or slightly shorter (2mm) straight stitches done just within a seamline help stabilize the area. On conventional 5/8” seams, staystitching is done ½” from the cut edge. It’s done on woven fabrics, not usually on knits. Matching thread should be used for all staystitching.

Typically, it’s done on curved areas like necklines, armholes, shoulder seams, curved pockets and curved waistlines, but it can also be used in other places on unstable fabrics. These areas generally have some bias grain to them and the fabric can easily distort.

Staystitching can also be done on straight seams when they’re on a loosely woven or stretchy fabric that can stretch out of shape during handling. It’s a permanent line of stitching that stays in for the life of the garment, so no need to remove it after construction.

When to staystitch

Staystitching is done on individual (single layer) pieces of the garment immediately after cutting them out. It’s important to staystitch before the pattern pieces are handled a lot, in order to keep them in shape. Do it on the main garment pieces and also on facings and collars. Linings can also be staystitched in the same areas as the outer garment. No backstitching is needed for staystitch rows.

Direction matters

The direction you stitch definitely matters. The general rule is to sew from wide to narrow. For bodices, stitching is done from shoulder to underarm for armholes, shoulder to center for round necklines and shoulder to armhole along shoulder seams. For V-necks, sew from the high point to low point. Neckline facings, again shoulder to center. It’s important not to try to sew continuously from one shoulder neckline edge to the other—instead, break the stitching at the center front/back and begin stitching again at the opposite shoulder. Any seams that are cut on grain, or close to it do not require staystitching. For skirts, stitching is done from hipline to waistline along the side seams.

As you staystitch it’s important not to distort the fabric edges—just let them feed gently into the machine without any pushing or pulling, as that can lead to stretching out of shape.

After stitching

On loosely woven fabrics, it’s a good idea to lay the staystitched pattern piece over the paper pattern to be sure they match. If the fabric piece has distorted, use a pin to gently pull on the stitches in the affected area and ease it back into shape. If the staystitching pulled up the pattern piece, clip every 4 stitches to release the tension and get it back in shape.

Staystitching can also be used as a guide during construction. For example, on a curved neckline use the staystitching as a guide so you don’t clip into the seam allowances too close to the actual construction stitching.

One word or two? You may see this term as stay stitching or staystitching, depending on the reference. Doesn’t matter…it’s the same function.

Knit Wits

While it’s generally not necessary to staystitch knits, you may find it helpful in some instances like these:

  • Use on necklines to keep them from gaping and stretching out.
  • If the fabric is very loosely constructed and/or very stretchy.
  • If you’re not going to be sewing the project up in the near future or you’re traveling with it.
  • If your project has uniquely shaped pieces that can stretch out of shape—like wrapped fronts.

~Linda Griepentrog is the owner of G Wiz Creative Services and she does writing, editing and designing for companies in the sewing, crafting and quilting industries. In addition, she escorts fabric shopping tours to Hong Kong. She lives at the Oregon Coast with her husband Keith, and three dogs, Yohnuh, Abby, and Lizzie. Contact her at gwizdesigns@aol.com.

May 29, 2026

Sew Cool: The Best Summer Garments and Fabrics for Beating the Heat

When temperatures climb and humidity settles in, sewing enthusiasts are able to create garments specifically designed for comfort. Store-bought summer clothing often prioritizes trends over practicality, leaving wearers stuck in clingy synthetics or stiff fabrics that trap heat. Sewing your own warm-weather wardrobe allows you to choose breathable fabrics, relaxed silhouettes, and thoughtful details that help you stay cool while still looking stylish.

From breezy linen dresses to feather-light cotton tops, the right combination of fabric and garment design can make all the difference during the hottest months of the year.

Why Fabric Matters in Summer

The secret to comfortable summer clothing begins with fiber content. Natural fibers tend to outperform synthetics in hot weather because they breathe better and allow moisture to evaporate more easily. Fabric weave and weight also play an important role. Lightweight, loosely woven fabrics encourage airflow and prevent clothing from sticking to the skin.

Best Summer Fabrics

Linen

Linen is often considered the gold standard for summer sewing. Made from flax fibers, it is exceptionally breathable, moisture-wicking, and cool against the skin. Linen garments also develop a relaxed softness over time that many sewists adore.

One of linen’s greatest strengths is its ability to dry quickly, making it ideal for humid climates. Yes, it wrinkles easily, but many sewists embrace those wrinkles as part of linen’s effortless charm.

Essex Linen
Essex Linen from Spoonflower

While traditional linen is made entirely from the fibers of the flax plant, Essex linen is a popular fabric line created by Robert Kaufman that blends 55% linen and 45% cotton. The addition of cotton makes Essex linen different from standard 100% linen:

  • Wrinkle Resistance: The cotton blend helps reduce the heavy wrinkling characteristic of traditional linen.
  • Texture & Feel: It retains the rustic look and subtle texture of linen but has a softer hand-feel thanks to the cotton.
  • Handling: Pure linen can be stiff, sheer, and prone to severe wrinkling. Essex linen is more flexible, slightly thicker, and drapes beautifully.

Cotton Lawn and Voile

For lightweight blouses, sundresses, and flowing skirts, cotton lawn and cotton voile are summer favorites. These fabrics feel airy and soft while remaining easy to sew.

Cotton lawn has a smooth, slightly crisp finish, while voile is softer and more sheer. Both fabrics are excellent for layered garments that still feel cool and comfortable.

FeatureCotton LawnCotton Voile
TextureCrisp, smooth, and slightly lustrous.Soft, silky, and airy.
Weave / WeightTightly woven, slightly heavier than voile.Looser, open weave, extremely thin and lightweight.
OpacityMostly opaque; rarely requires a lining.Highly sheer; often requires a slip or lining for garments.

Read this article from Threads Magazine on How to Sew Finely Woven Batiste, Lawn, and Voile

Double Gauze

Double gauze has become increasingly popular among garment sewists because of its cloud-like softness and breathability. This lightly crinkled cotton fabric traps tiny pockets of air between its layers, helping regulate temperature naturally.

It works beautifully for relaxed tops, casual dresses, beach cover-ups, and loose-fitting shorts. Double gauze garments often feel like wearing pajamas in the best possible way.

Organic Cotton Double GauzeDouble gauze from StoneMountain & Daughter FabricsDouble Gauze from Gorgeous Fabrics
nani IRO Sanga Organic Cotton Double Gauze – Orange
Kokka Fabrics
Nani Iro – Open Weave Cotton Double Gauze – Waterfall – Purple
StoneMountain Fabrics
Italian Cotton Gauze Double Cloth – Peachy
Gorgeous Fabrics

Rayon and Viscose

Rayon Challis
Rayon Challis- Blue Floral, Daybreak Bloom Print
Mood Fabrics

While technically semi-synthetic, rayon and viscose are derived from plant fibers and are beloved for their drape and cool touch. These fabrics flow beautifully and work especially well for loose summer garments with movement.

Rayon challis is especially popular for wide-leg pants, wrap dresses, and breezy tops. The downside is that rayon can be slippery to sew and may wrinkle easily, but many sewists find the comfort worth the extra effort.

The Best Garments for Hot Weather

Choosing the right garment style matters just as much as selecting the right fabric. Loose silhouettes allow air circulation, while fitted garments can trap heat and moisture against the body.

Linen Pants and Wide-Leg Trousers

Many people swear by loose linen pants for summer comfort. Wide-leg styles allow airflow while still protecting skin from direct sun exposure. Elastic waistbands, cropped lengths, and pull-on styles add practicality and ease.

Pairing lightweight linen pants with a simple tank or sleeveless blouse creates an outfit that feels polished without overheating.

Shift Dresses and Sundresses

Simple summer dresses are sewing staples because they require minimal layering and offer maximum airflow. A-line dresses, tiered sundresses, and loose shift silhouettes work especially well in extreme heat.

Look for designs with:

  • Sleeveless or cap sleeve construction
  • Loose waists
  • Open necklines
  • Minimal lining
  • Breathable facings instead of heavy interfacing

Garments that skim rather than cling to the body often feel dramatically cooler during summer months.

And don’t miss an opportunity to add some pizazz. Soft, embroidered touches add elegance to linen.

Embroidery on linen

Camp Shirts and Oversized Button-Ups

Relaxed woven tops are another warm-weather essential. Camp shirts made from linen, cotton lawn, or rayon can be worn open over tanks or buttoned on their own.

Oversized silhouettes not only feel cooler but also create that relaxed summer aesthetic many sewists love.

Easy Pull-On Shorts

Loose-fitting shorts with elastic waistbands are practical, comfortable, and quick to sew. Linen blends, cotton chambray, and lightweight twill all work well for casual summer bottoms.

Many sewists also love pajama-inspired sets with coordinating shorts and tops because they feel elevated while remaining incredibly comfortable.

Construction Tips for Summer Sewing

Summer garments benefit from thoughtful construction techniques that reduce bulk and increase breathability.

French seams, bias-bound edges, and lightweight facings can help garments feel softer and less heavy against the skin. Many sewists also skip unnecessary linings or substitute partial linings to avoid extra layers.

Choosing lighter-colored fabrics can also make a surprising difference. Pale shades reflect sunlight better than dark colors, helping garments feel cooler outdoors.

Another smart detail is ease. Summer clothing should have slightly more wearing ease than fitted winter garments. Extra room improves airflow and allows fabric to move away from the skin rather than cling to it.

Sewing a Wardrobe You’ll Actually Wear

One of the joys of summer sewing is that warm-weather garments are often beginner-friendly. Loose silhouettes, simple construction, and forgiving fits make summer projects approachable and satisfying.

More importantly, handmade summer clothing can be customized for genuine comfort. Sewists can adjust sleeve length, neckline depth, inseam measurements, and fabric choices to suit their climate and lifestyle perfectly.

The result is a wardrobe filled with garments that feel as good as they look — pieces designed not just for style, but for surviving scorching afternoons, humid evenings, and everything summer brings.


~American Sewing Guild

  • 1
  • 2
  • 3
  • …
  • 71
  • Next Page »

Become a Member

Join the only national organization dedicated to Advancing Sewing as an Art and Life Skill.

Join Now button

Blog Article Categories

  • ASG Conference
  • Chapter Stories
  • Embroidery
  • Fitting
  • Learn to Sew
  • National Sewing Month
  • Products, Books, & Patterns
  • Projects
  • Quilting
  • Sewing
  • Sewing Techniques
  • Sewing Tips
  • Sewing Tours
  • Videos
  • Disclaimer
  • Privacy Policy

American Sewing Guild
National Headquarters
9660 Hillcroft, Suite 230
Houston TX 77096
713-729-3000 | 713-721-9230 Fax
www.ASG.org

ASG wordcloud - education, conference, discounts, videos, special offers, tours and more

Copyright © 1998–2026 · American Sewing Guild · All Rights Reserved