American Sewing Guild (ASG)

Visit our blog Visit the ASG Facebook page Visit ASG on Pinterest Visit ASG's YouTube channel Visit ASG on Instagram
  • Home
  • Join ASG
    • Join Online
    • Chapter Locations
    • Member Benefits
    • Member Brochure
    • Join by Mail
  • Education & Classes
  • Resources
    • Contests & Awards
    • Giving Back
    • Hall of Fame
    • Travel and Tours
    • Measurement Chart
  • Shop
    • ASG Store
    • Chapter Products
    • Video Resources
  • Blog
  • About
    • About Us
    • Donate to ASG
    • ASG Sensitivity Statement
    • FAQ’s
    • Start a Chapter
  • Contact
  • Member Login
    • Login First!
    • Members Only
    • Leadership Only
    • Website FAQ’s
    • Logout
  •  

May 1, 2020

Uncommon Threads: Fusible, Invisible & Water-Soluble

Into every sewer’s life, a little novelty must fall, and such is the case with threads—those ones you don’t use every day, but when you need them, they serve a specific purpose.

Fusible Thread
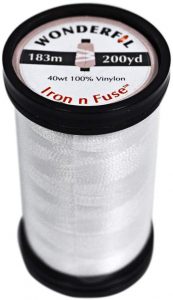
Wonderfil Iron n Fuse Thread
Wonderfil Iron n Fuse Thread on Amazon

Fusible thread, as its name suggests, is heat sensitive and melts when needed. Much like its notion cousin, fusible web, the thread can provide a thin and targeted line of adhesive. But, where would you use that?

Fusible thread is ideal for matching plaid and stripes at a seamline, as it can hold the design pattern in place while you sew the seam—just align adjacent pieces, fuse and sew. It’s also ideal to keep zippers from moving while stitching a centered application and for holding trims in position. Making a narrow hem? Use it in the bobbin (or serger lower looper) and fuse the hem in place. Need a crisp edge on a pleat or pants crease? Place a strand inside the fold line and fuse. Use it in the bobbin for understitching a facing—then press to help keep it in place.

Fusible thread can be used in the bobbin, in the serger loopers or through a large-eye needle. Test-stitch first to check tension. Use it on the side of the fabric where fusing will be needed for the final application.

A niche product akin to fusible thread is Secura by Coats (members, don’t forget to use your Nancy’s Notions discount!). It’s not a traditional fusible thread, but made specifically for sewing on buttons. When you’re done stitching the button on, touch the thread with the tip of the iron and it fuses to itself for a secure hold.

Invisible Thread
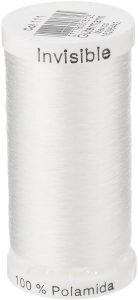
Gutermann Invisible Thread on Amazon

Made from either nylon or polyester, this no-see-um monofilament thread is available in clear and smoke. Usable in the needle and/or bobbin, it’s ideal for appliquéing, sewing on trims, quilting and couching, as the stitches virtually disappear. It’s ideal for allover quilting where stitching crosses multiple colors in a single print, and for stitching in the ditch on garments or trim applications.

If your machine has issues feeding invisible thread, use a thread net or a thread stand for more consistent feeding.

Note that nylon can be stiffer and melts at a lower temperature than its polyester counterpart. It can also discolor and become brittle with age.

Water-soluble Thread
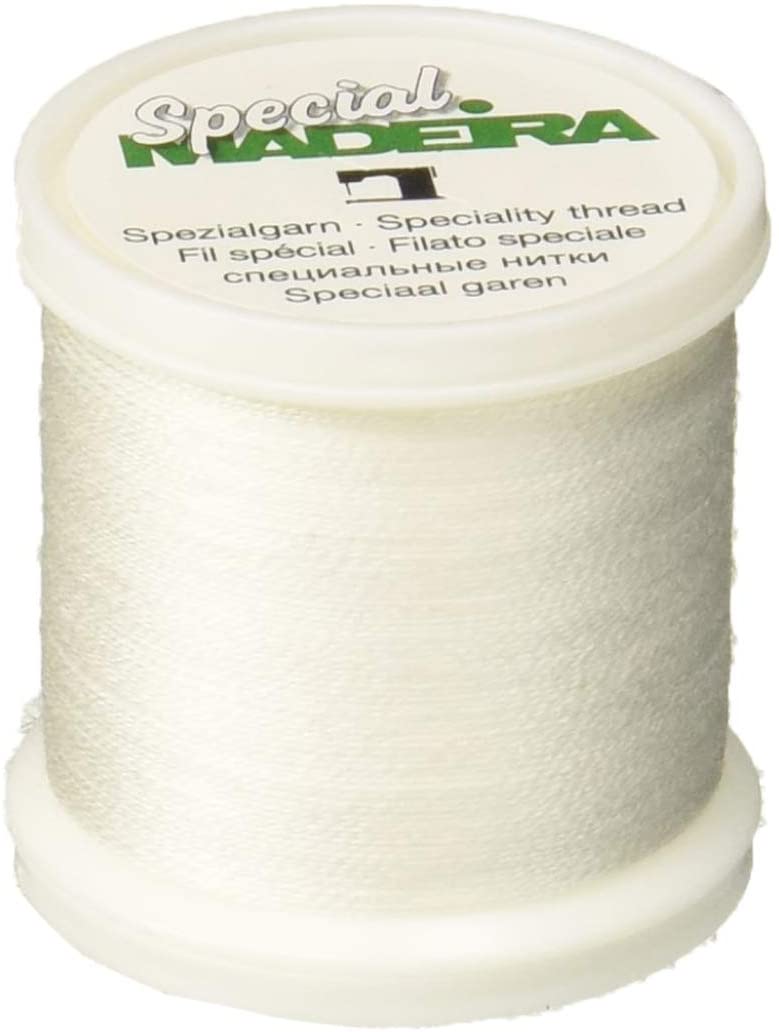
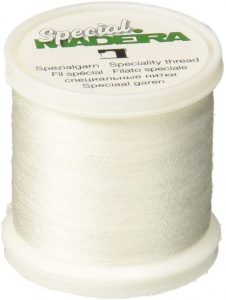
Madeira Water Soluble Thread on Amazon

A favorite of quilters, water-soluble thread can be used in the needle, bobbin or lower looper on a serger. It does require a bit of special care—firstly, don’t lick the ends to thread a needle as it will dissolve. Keep it in a sealed bag, especially if you live in a humid climate, and mark it so it doesn’t get mixed up with regular sewing thread.

Water-soluble thread is ideal for basting quilt layers together, then after quilting, it can be removed by washing or simply wetting and brushing, depending on the brand. It can also be used anywhere a temporary hold is needed until more permanent construction can be completed—think basting a garment together for fitting.


~Linda Griepentrog
Linda is the owner of G Wiz Creative Services and she does writing, editing and designing for companies in the sewing, crafting and quilting industries. In addition, she escorts fabric shopping tours to Hong Kong. She lives at the Oregon Coast with her husband Keith, and two dogs, Yohnuh and Abby. Contact her at gwizdesigns@aol.com.
This field is for validation purposes and should be left unchanged.
Did you enjoy this article?
Are you an ASG member?

Tagged With: sewing, specialty thread, thread

March 27, 2020

What’s a Lining to Do? (Part 2)

In Part 2 of this article on linings, we’ll be reviewing Interlining and Underlining and why you might choose each one for your project. (Review Part 1)

While you can find all sorts of various definitions for these terms, for the purpose of this article we will define them as follows:

  • Underlining is cut from the same pattern pieces as the garment fabric. The two are then sewn to one another so the two layers act as one piece, reducing opacity or adding body/stability to the fashion fabric.
  • Interlining refers to material added between the outer fabric and the lining of a garment. You would typically use it to add extra warmth, but it can also ramp up the body or change the drape of a piece.

Underlining

When do you choose it?

Example of underlining a garmentChoose underlining when you want to add body or stability to your fashion fabric or when you fashion fabric is thin and needs more opacity. If an underlined garment is also lined, you have basically moved to interlining instead of underlining. I personally use this technique as a quick and easy replacement to both traditional lining and flat lining. I don’t like the feel of a free hanging lining as I wear a garment. By underlining with Bemberg or China Silk, I get the feel and garment protection of lining without that pesky lining crawl each time I stop at the restroom.

What fabrics work best?

  • Choose a fabric with a similar or lighter hand to the fashion fabric unless you want to change it.
  • If underlining a thin knit fabric or stretch lace, consider using nude swimsuit lining

How does it get constructed?

The construction method for underlining mirrors the information already described for interlining.  The primary difference is that when underlining you seldom trim the underlining fabric out of the seam allowance since it is rarely a bulkier fabric.  Plus, since underlining in the context of this article is not covered with lining, you will want to serge or otherwise finish the seams.

No matter which lining process you use, always remember to pre-treat and press both your fashion fabric and your lining fabric in the manner you plan to launder it after construction to be sure you don’t have shrinkage, especially uneven shrinkage, which would cause distortion in the shape of your garment.

And when hemming your garment, take advantage of the extra fabric layer to hide your hemming stitches in the lining fabric instead of the fashion fabric.

Interlining

When do you choose it?

Choose interlining when you need to add warmth or stability to your garment. This method is in essence a third layer of lining as the garment usually also has a traditional lining that covers the interlining.

What fabrics work best?

  • Add warmth by using Primaloft, Thinsulate, batting, flannel or fleece.
  • Add body and prevent fabric stretch with Silk organza
  • Prevent creasing with light nylon net
  • Add drape with thin fabrics made with acetate fibers
  • Add density with cotton lawn
  • Change shade with light weight cotton lawn in a contrast or darker color

Consider using different interlining fabrics in different parts of a garment. For example, flannel in the jacket front and back, but a batiste or lightweight broadcloth in the sleeves to maintain drape and movement in a silk jacket.

How does it get constructed?

Simply cut the interlining fabric using the same pattern pieces and baste to the wrong side of the fashion fabric or the lining fabric inside the seam allowance then proceed with the construction treating the two fabrics as one. It is advisable to not only baste the outer edges of each pattern piece, but also the center of any darts to prevent them from shifting when sewn.

Tip for basting around corners: When you come to a corner, back stitch and clip your thread. Then start your basting on the next side with a new thread. Continuing around the corners with a single thread can cause distortion and make it harder to remove your basting later.

The decision of whether to attach the interlining to the fashion fabric or the lining depends on the garment type. For a fitted or semi-fitted garment, attach the interlining to the fashion fabric, especially if it needs more body or stability. For a loosely fitted garment, you may prefer to attach the interlining to the lining which will still add the warmth without reducing the fluidity of the fashion fabric.

While the basting can be done with a sewing machine, this sometimes results in a fabric “bubble” due to fabric creep as it travels through the feed dogs. Hand basting will often be more effective in achieving a truly flat alignment of the two fabrics. You may find it helpful to pin the pieces together not only along the edge but also down the center and along the darts. And it is important to baste these together while lying on a flat surface, not holding them in your lap. These tips can help prevent distortion and a potential “bubble” effect in either the fashion fabric or the lining.

Once your basting is complete, give the pieces a good press with plenty of steam to assure they are joined nice and smooth without bubbling. If you find any bubbling, now is the time to remove some basting stitches and correct it before you move forward with the construction process.

Trim interlining seam allowance close to the stitching line to reduce bulk. Depending on the garment and the interlining fabric; you may also want to trim the interlining away from facings and hems as well.

Enjoy your newly lined garment!


~Sheryl Belson

This field is for validation purposes and should be left unchanged.
Did you enjoy this article?
Are you an ASG member?

Tagged With: garment construction, interlining, lining, sewing, underlining

March 17, 2020

Sewing with Vinyl

This quick video has 3 tips for sewing with vinyl.


This field is for validation purposes and should be left unchanged.
Did you enjoy this article?
Are you an ASG member?

Tagged With: sewing, sewing tip, vinyl

February 28, 2020

Ending it All (serger stitching, that is)

We all love sergers for stitching and finishing our seams all in one operation. Those loopers and needles just seem to zing along the edges, but what happens at the ends is something to note. You can’t backstitch with a serger like a conventional machine. Do you just cut off the threads and hope for the best, or do you plan a neat finish for the threads that would make your home ec teacher proud?

There are several options for finishing the ends of serger seams, depending on the location and actual type of seam you’re using.

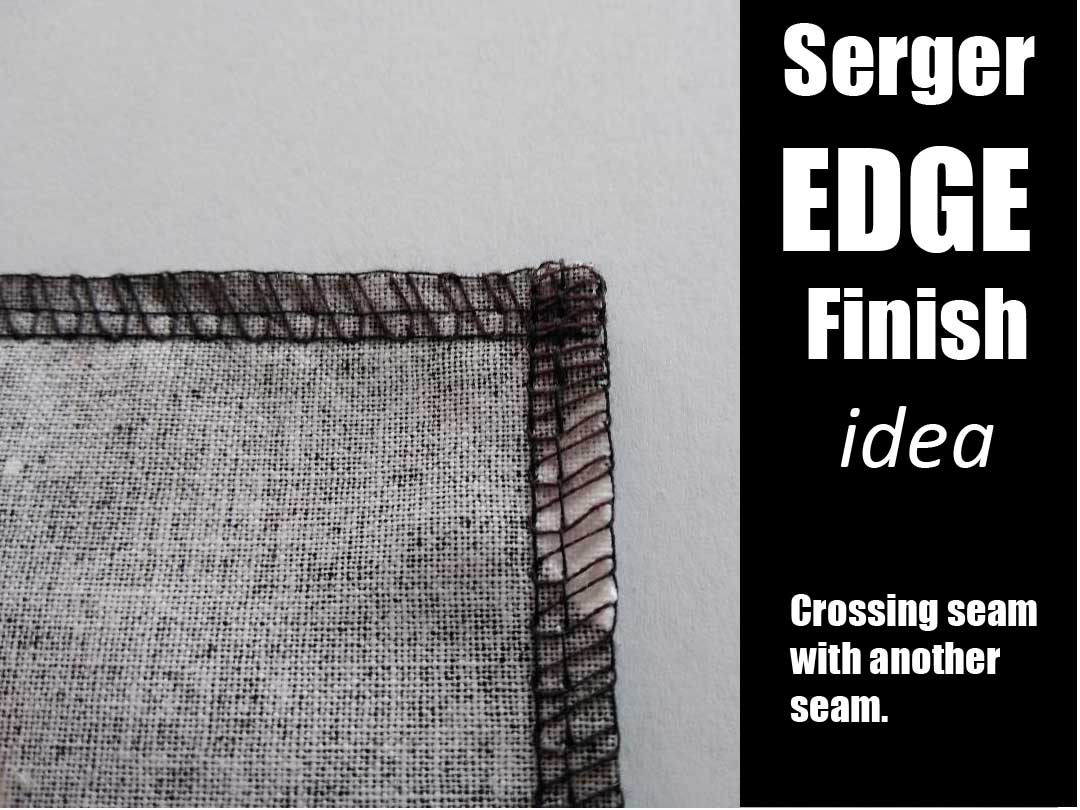
The easiest way to anchor serger threads is to cross them with another line of stitching. For example, if you’ve serged seams in a skirt, you’ll be crossing them with a waistband or facing and a hem finish. The perpendicular stitching is enough to hold the serger threads in place and keep them from raveling.

Another way to finish serger seams is to apply seam sealant to the threads, let it dry, then trim the threads close to the fabric. This is a great option for rolled hems or places where you don’t want other visible fastening of the threads. The down side of this method is that seam sealant can make the threads a bit stiff (depending on the product brand), it can be a bit messy to apply so best to do so with a pin to avoid getting it on the adjacent fabric, and you have to wait for it to dry before moving on in the construction process. (You can speed up the drying process by sandwiching the area between paper towels and pressing.)

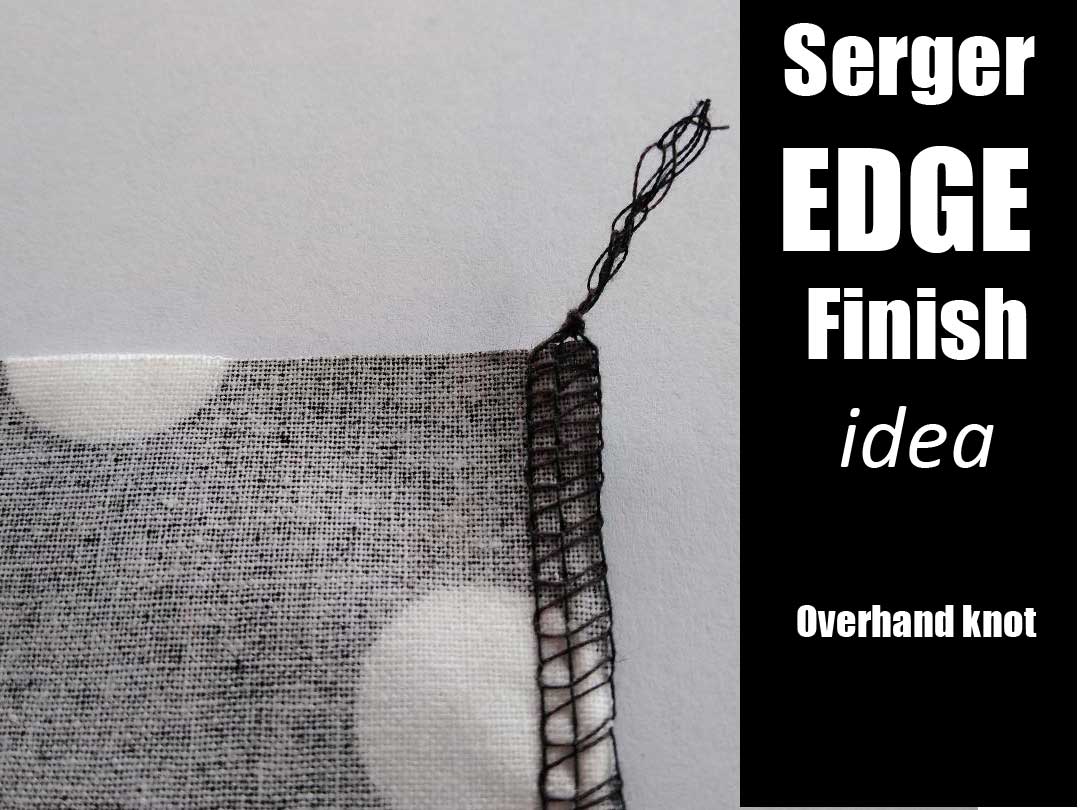
How about knotting the threads? Good idea, and it can be done two ways. First, simply tie the serger chain in a loose overhand knot, use a pin to push it down to the fabric edge and tighten the knot to secure. Cut off the thread ends close to the knot. Depending on the thread and location, this can make a highly visible fastening. Another knotting option is to separate the threads from the serger chain so that you have them paired—one looper and one needle together, and tie a small knot with the two close to the fabric, then clip the ends. This makes a more discreet knot than the overhand version, and is great for decorative threads or outside stitching.

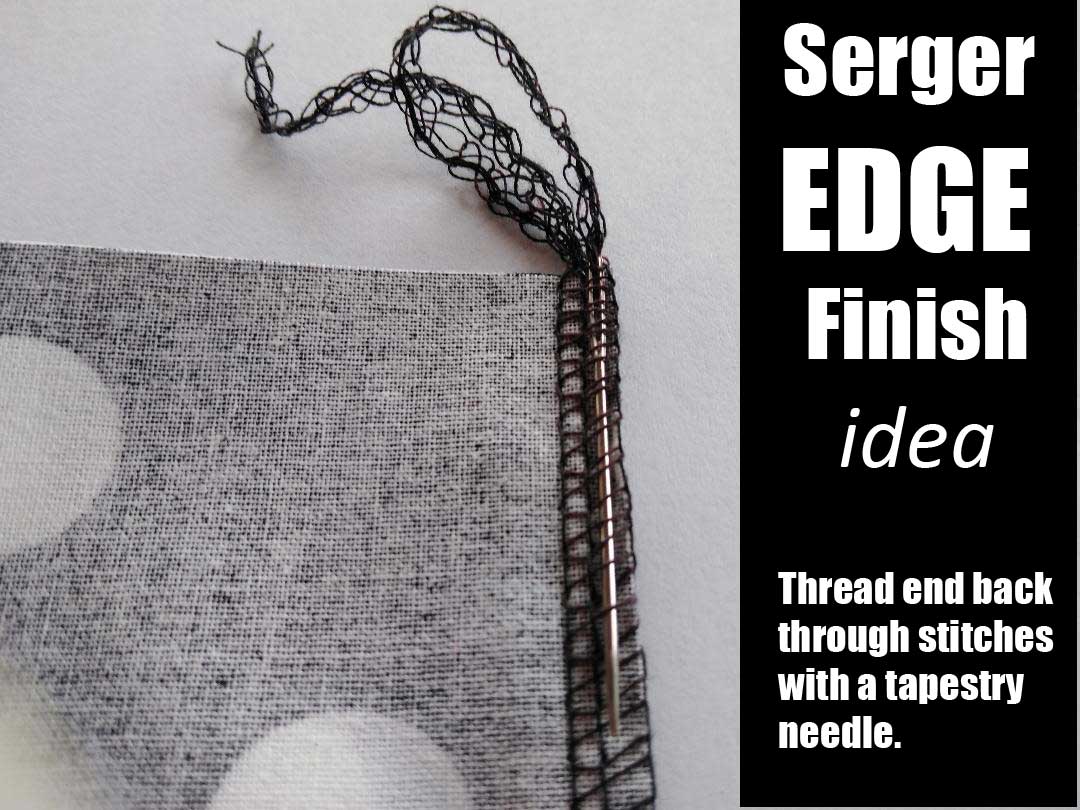
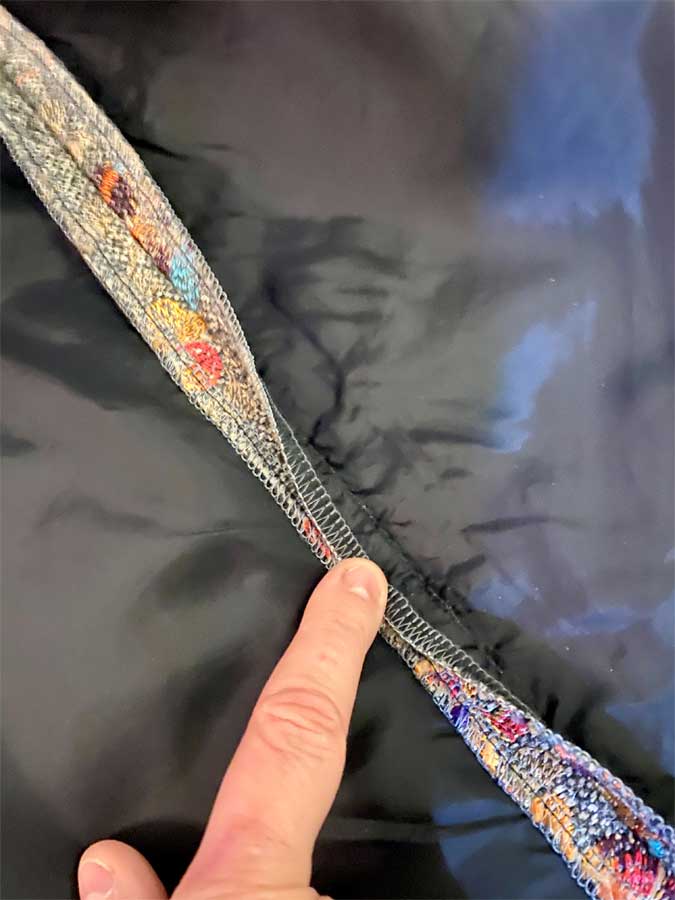
Yet another option is to thread the serger chain ends back through the serger stitch itself. You can use a tapestry needle or loop puller to slide the chain ends back about an inch through the looper stitches before trimming the ends. A needle threader can be helpful for getting the chain into the needle eye and corralling multiple threads together. {photo}

As you begin to sew a line of serger stitches, it’s easy to secure the tail at the same time, by simply lifting the presser foot and bringing it around to the top surface of the fabric. Lay it on the fabric where the looper stitches will encase it as you serge the seam. It’s important that the chain lies between the needle and the blade to avoid cutting it.

Wrapping it up

Choosing the right method for ending it all depends primarily on the location of the area you’re securing. For outside and decorative stitching, choose a method that’s as unobtrusive as possible. Inside, select a method that gives a secure finish without too much bulk for your project.


~Linda Griepentrog
Linda is the owner of G Wiz Creative Services and she does writing, editing and designing for companies in the sewing, crafting and quilting industries. In addition, she escorts fabric shopping tours to Hong Kong. She lives at the Oregon Coast with her husband Keith, and two dogs, Yohnuh and Abby. Contact her at gwizdesigns@aol.com.
Tagged With: serger, sewing, sewing tips

February 21, 2020

Adding Ease to Your Garment

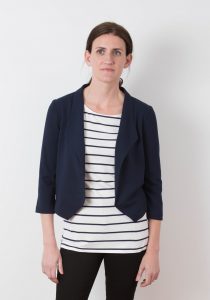
Grainline Studios “Morris” Blazer

A few years ago, I adapted my knit Grainline Studio Morris blazer pattern so I could make it with some luscious silk matka. I knew I had to adjust the pattern since my fabric of choice had absolutely no stretch in it. I decided to take a tried-and-true (TNT) pattern designed for a woven fabric and “frankenpattern” the knit blazer into a woven blazer. I took some of the pattern pieces from the Archer Buttonup pattern (also designed by Grainline) and came up with new cutting lines for the Morris. I used the Archer upper back, arm scythe, and upper sleeve to redraft the blazer pattern and was just sure I had made all the pattern adjustments to shift from a zero-ease design that works with the stretch of a knit to a design that would work with a non-stretch woven. I finished the blazer and couldn’t wait to put it on only to discover it was a bit too tight across the upper back. I hadn’t added enough EASE! I know I am not the only person who has experienced this.

Can We Put Your Mind at Ease?

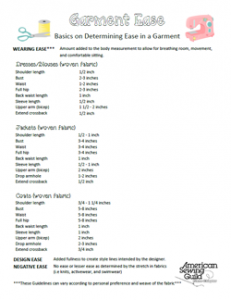
We’d like to put your mind at ease with some information and a free garment ease template created by members of the Plano, TX chapter that shows the minimum amount of ease you’ll need to add in your garment for a comfortable fit. Identifying the correct amount to include is vital to avoid an outcome like the one in my blazer story.  We hope this ease cheat-sheet helps you!

What is ease?

In its simplest form, ease is the additional room in a garment in excess of the actual body measurement. There is much more to ease than this simple definition though — there is wearing ease, design ease and negative ease. Each of these impacts the finished measurement of a garment in different ways.

  • Wearing ease provides ease of movement. It is the difference between the actual body measurement and the finished garment measurement. The template will help you understand this kind of ease. It gives you guidelines that will help you be sure you have at least enough room in your garment for comfortable movement as you wear it.
  • Design ease provides the style. It is also referred to as style ease or fashion ease. It is additional ease added beyond what is needed for movement to create specific styles ranging from close fitting to very loose-fitting garments. It also comes into play when the design of the garment includes things like pleats, gathers, or tucks.
  • Negative ease is associated with fabrics that stretch (such as knits or woven fabrics with lycra added) or are cut on the bias, producing a certain degree of stretch. In this case, the finished garment measures the same as the actual body measurements, or more often, even smaller. The degree of stretch produced in each fabric plays a big role in how much negative ease a garment will need for good fit. Negative ease is used in garments like activewear and swimwear.

How do I calculate the right amount of wearing ease?

When choosing the size you will make in a pattern, look not only at the body measurements, but also the finished garment measurements. Many patterns will include this information for at least the 3 primary measurements – bust, waist and hips. If your pattern does not include this information on the pattern, you can calculate it yourself by simply measuring the pattern pieces in those locations and removing the amount included for seam allowances. Compare the finished garment size to your personal body measurements to be sure you will have a comfortable fit before you start cutting.

More about Negative Ease

As already stated, negative ease simply means that your finished garment measurements will be the same or smaller than your actual body measurements. When sewing with knits or stretch woven fabrics, the same accommodation for wearing ease is not required since the fabric will stretch as the body moves. Just because your finished garment is smaller than your actual body measurement doesn’t mean you won’t be able to get it over your head. The more negative ease you incorporate just means you will get a more fitted look in the final garment. In most cases, you will probably target no more than 1”-3” negative ease in your design. More than that and you may wander into that “Incredible Hulk” look that has people wondering if you will burst through the seams at any moment.

Of course, the percentage of stretch in your fabric choice and whether it has 2-way or multi-directional stretch play a huge role in determining the right amount of negative ease. The higher the percentage of stretch built into the fabric you have chosen for your project, the higher the percentage of negative ease you are likely to need in your pattern.

There are lots of “rules” out there for how to calculate the right amount of negative ease for a given fabric, but here is a good starting point:

  • Cut a 6”x3” piece of fabric.
  • Stretch the fabric to its comfortable maximum length.
  • Calculate the percentage of stretch
    • Addition stretch length/original length = percentage of stretch
    • Examples:
      • If the 6” piece stretches to 9”, the fabric has 50% stretch.
      • If the 6” piece stretches to 7”, the fabric has 15% stretch
    • For a comfortable fit, try starting with the same amount of negative ease at the percentage of stretch in your fabric, up to but not exceeding that 1”-3” guideline mentioned earlier.
    • Thinner fabrics do best with less negative ease to avoid a see-through effect. Thicker fabrics can handle more negative ease and give a more acceptable form-fitting look.

Remember, these are starting point rules and you will develop your own that best fit your own personal taste and adapt with each fabric you choose to work with.

Don’t forget Design Ease

With all this talk about negative ease, let’s not leave this discussion without going back to the concept of design ease. Even with stretch fabrics, design ease has a role to play. It is perfectly acceptable to decide to add design ease into a garment made with a very stretchy fabric. It will take your garment from form-fitting to soft, graceful drape and still have a beautiful look. You are the designer and you are in charge!

Now it’s you turn!

We hope this gets you started on your journey of understanding ease and fit. This is a topic often discussed in ASG monthly group meetings around the country. Many groups focus on this kind of topic frequently and would love to meet you. Talk to someone in your local chapter to find out what is happening there. ASG loves to walk alongside fellow sewing friends in their sewing journey!


~Debby Bowles and Sheryl Belson, ASG Plano Chapter

Tagged With: Fashion, fitting, sewing

  • « Previous Page
  • 1
  • …
  • 8
  • 9
  • 10
  • 11
  • 12
  • …
  • 16
  • Next Page »

Become a Member

Join the only national organization dedicated to Advancing Sewing as an Art and Life Skill.

Join Now button

Blog Article Categories

  • ASG Conference
  • Chapter Stories
  • Embroidery
  • Fitting
  • Learn to Sew
  • National Sewing Month
  • Products, Books, & Patterns
  • Projects
  • Quilting
  • Sewing
  • Sewing Techniques
  • Sewing Tips
  • Sewing Tours
  • Videos
  • Disclaimer
  • Privacy Policy

American Sewing Guild
National Headquarters
9660 Hillcroft, Suite 230
Houston TX 77096
713-729-3000 | 713-721-9230 Fax
www.ASG.org

ASG wordcloud - education, conference, discounts, videos, special offers, tours and more

Copyright © 1998–2026 · American Sewing Guild · All Rights Reserved