American Sewing Guild (ASG)

Visit our blog Visit the ASG Facebook page Visit ASG on Pinterest Visit ASG's YouTube channel Visit ASG on Instagram
  • Home
  • Join ASG
    • Join Online
    • Chapter Locations
    • Member Benefits
    • Member Brochure
    • Join by Mail
  • Conference & Education
  • Resources
    • Contests & Awards
    • Giving Back
    • Hall of Fame
    • Links
    • Travel and Tours
    • Measurement Chart
  • Shop
    • ASG Store
    • Chapter Products
    • Video Resources
  • Blog
  • About
    • About Us
    • Donate to ASG
    • ASG Sensitivity Statement
    • FAQ’s
    • Start a Chapter
  • Contact
  • Member Login
    • Login First!
    • Members Only
    • Leadership Only
    • Website FAQ’s
    • Logout
  •  

August 26, 2022

Suit-ability: Repurposing Suits for Other Projects

Not all fabric we use in our projects comes from the fabric store—some comes from our own closets or from the closets of others near and dear.

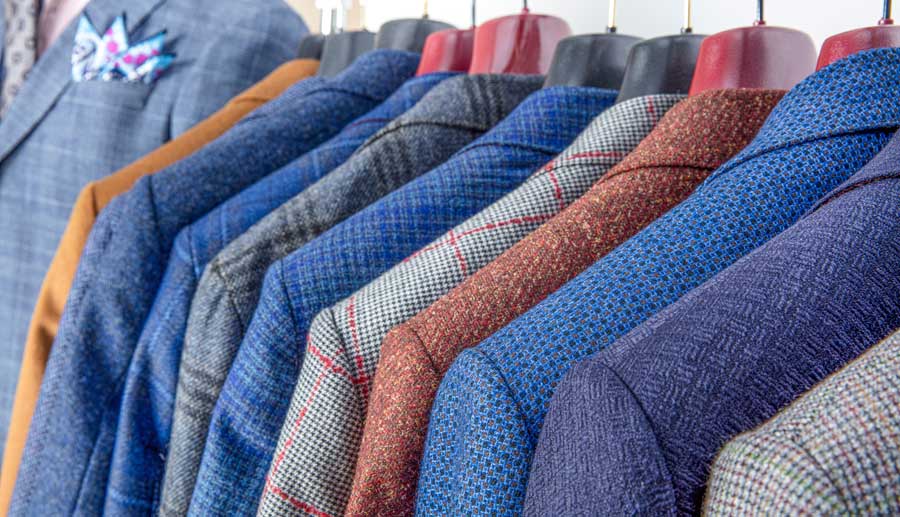
Have you noticed in the past few years that there are fewer and fewer men wearing suits? Blame it on the popular work-from-home phenomena or simply the trend toward more casual dressing. But, that trend can create a gold mine, as suit jackets are relegated to the back of the closet, or shipped off to the local thrift store for retrieval by savvy sewers.

men's suits

Why, you might say? Suit jackets offer a lot of quality fabric that can be repurposed for other projects. In particular, some ready-made construction details that you may think are beyond your skill level to create, like welt pockets and keyhole buttonholes are already done. So why not “harvest” those niceties for another project or two, or three, or four, depending on the size of the jacket.

What to look for

If you’re shopping thrift stores for men’s suit jackets, look for the largest size to garner more fabric. Choose a worsted weight, as it’s not as bulky as the woolen cousins. Be sure to inspect the item for any stains, moth holes or other damage and look for name brand labels and quality fabrics. In many cases, the suit coat may be almost new and worn only on one or two occasions before discard.

Thrift stores often have sales, so shop smartly. If you qualify, check for senior discount day with savings up to 50%. Or for similar discounts, check the tag color of the day. If you’re shopping for suit coats at rummage sales, ask if there’s a half-off-the-tag-price day or a sale where everything you can fit into a bag is only $1. These usually happen on the last day of the sale and it’s a great time to go crazy for suits and sport jackets.

Deconstruction

Watching the news or listening to podcasts is a great time to disassemble a suit jacket. First, decide which parts you might like to keep for other projects—patch pockets, welt pockets, front buttons/buttonholes, lapels, sleeve plackets, labels, etc.–and take apart the seams leaving those areas intact. Lining can be separated or left with its original construction detail, depending on how the area will be reused. While you’re taking apart the suit, note the inner construction details—the process can be a major tailoring learning experience, especially on high-end jackets. If you’re into tailoring, you may even be able to harvest some of the jacket’s structural materials like sleeve heads, hair canvas chest pieces, shoulder pads, etc. for reuse.

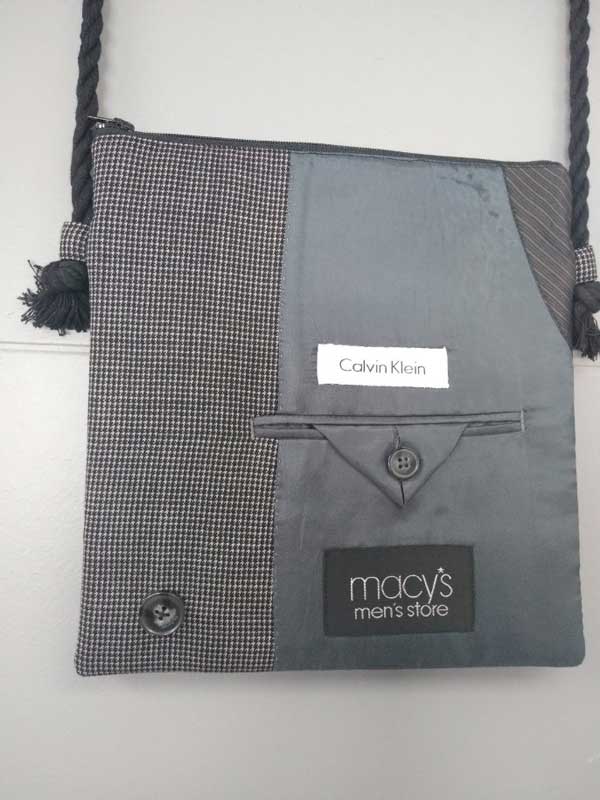
Don’t forget that the inside of the suit jacket can offer some fun details, like bold labels, lining welt pockets and tabs, and accent stitching, so put those to work on the outside of your project.

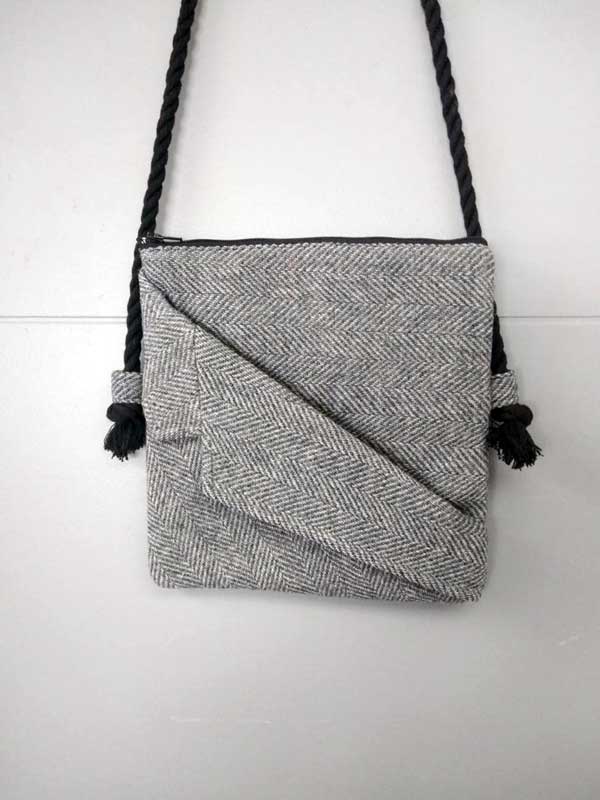
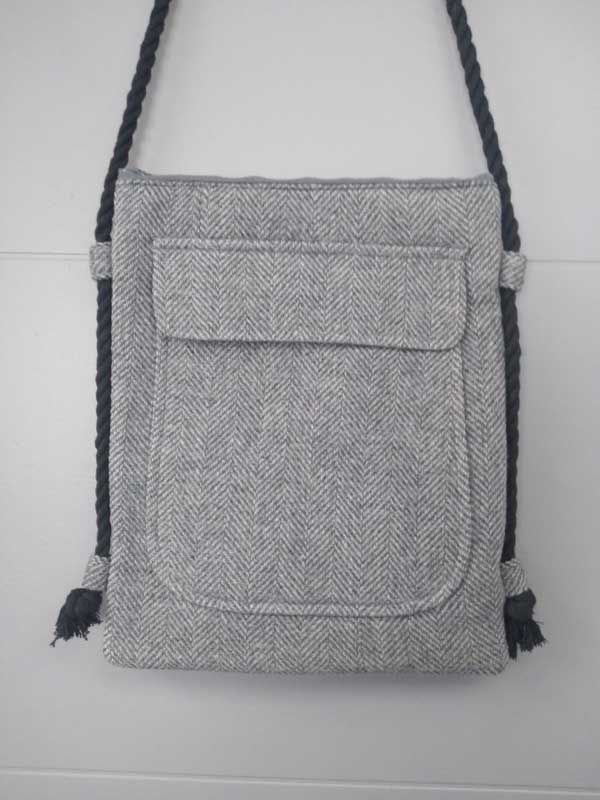
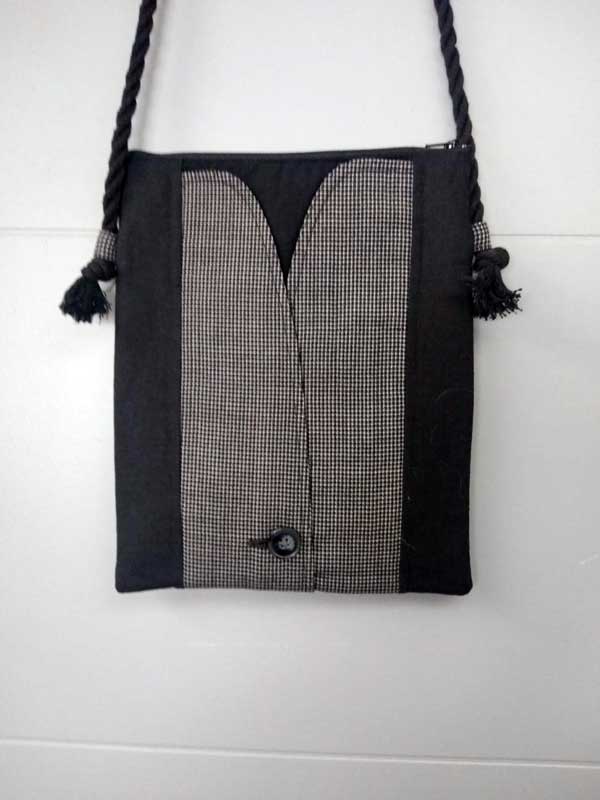
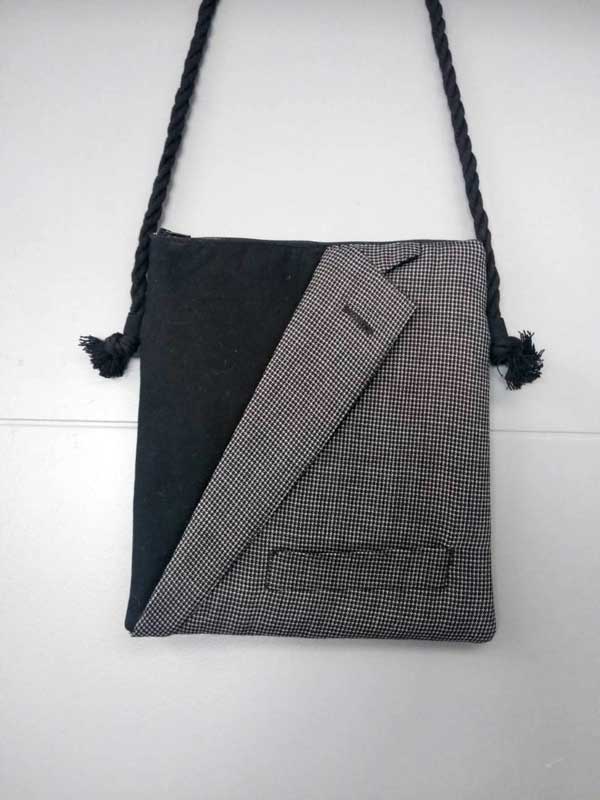
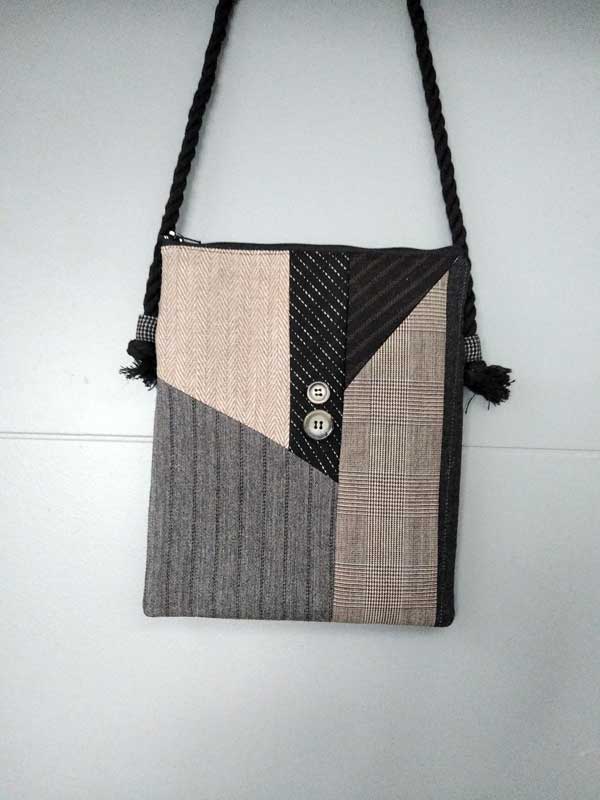
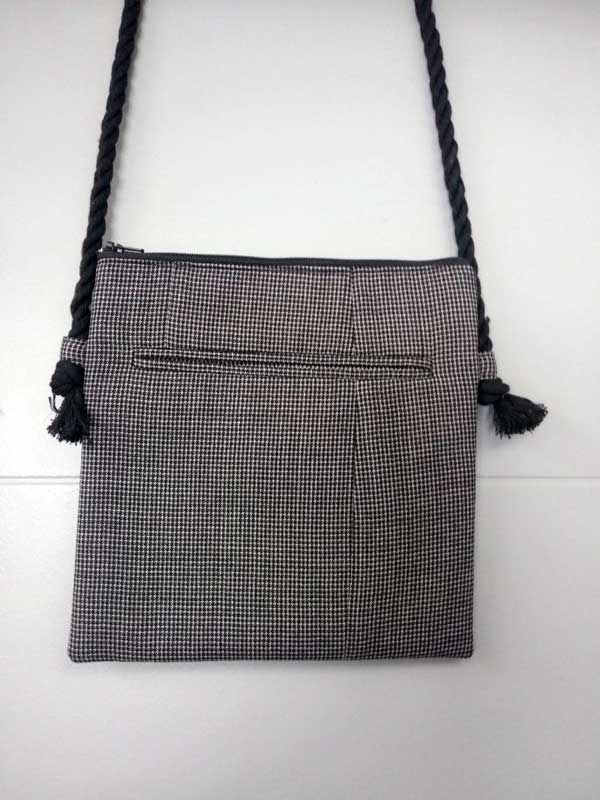
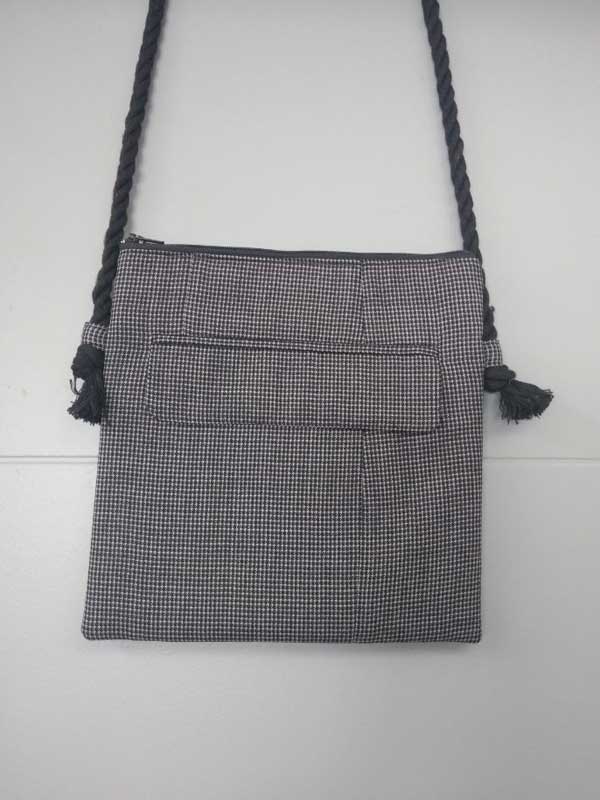
Small projects, like bags, allow for utilizing many details from one jacket and it’s fun to figure out how to make them work to maximize the fun. Check out our featured bags using several different suit details.

Herringbone Lapel
Herringbone Patch Pocket
Jacket Closure
Lapel
Lining
Pieced Wools
Welt Pocket
Welt Pocket with Flap

Tie Tactics

Not far from suit jackets, you may also find some wonderful ties being discarded. Whether they’re silk, polyester or wool, there’s yardage to be garnered. If you’re thrifting or repurposing ties from a loved one, creative options abound.

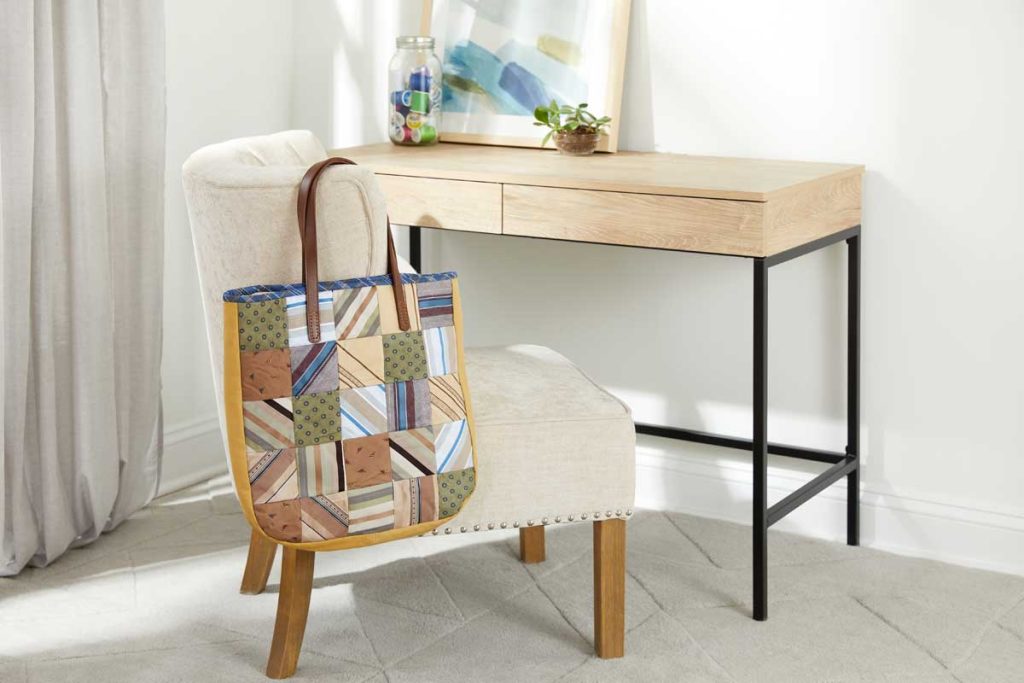
One idea—this pieced tote made is not only a great project to reuse old or discarded ties, but also can be a wonderful way to remember a special person whose ties you may have inherited. Get the instructions and free pattern from Yarspirations.

Make a tote with ties
Image compliments of Coats & Clark

~Linda Griepentrog Linda is the owner of G Wiz Creative Services and she does writing, editing and designing for companies in the sewing, crafting and quilting industries. In addition, she escorts fabric shopping tours to Hong Kong. She lives at the Oregon Coast with her husband Keith, and two dogs, Yohnuh and Abby. Contact her at .
Did you enjoy this article?
Are you an ASG member?
This field is for validation purposes and should be left unchanged.

Tagged With: fabric, recycle, remake, reuse, sewing, textiles, thrift store sewing

July 29, 2022

Make It With Wool Contest Entry: Coat & Dress

I joined ASG during Covid, having been motivated by a rediscovered ASG flyer. I had been given the flyer some years prior at the ASG booth at the Sewing and Stitchery Expo in Puyallup, WA where I had been wearing my WA State winning Make it With Wool (MIWW) garment and was approached by the chapter President who strongly recommended I join. Covid’s isolation gave me the impetus to seek out an avenue to engage with others sharing a common interest. The Silverdale, WA chapter was the perfect fit and I joined 3 Neighborhood Groups and soon was Zoom meeting with a fabulous and talented community of sewists.

It Started With Wool

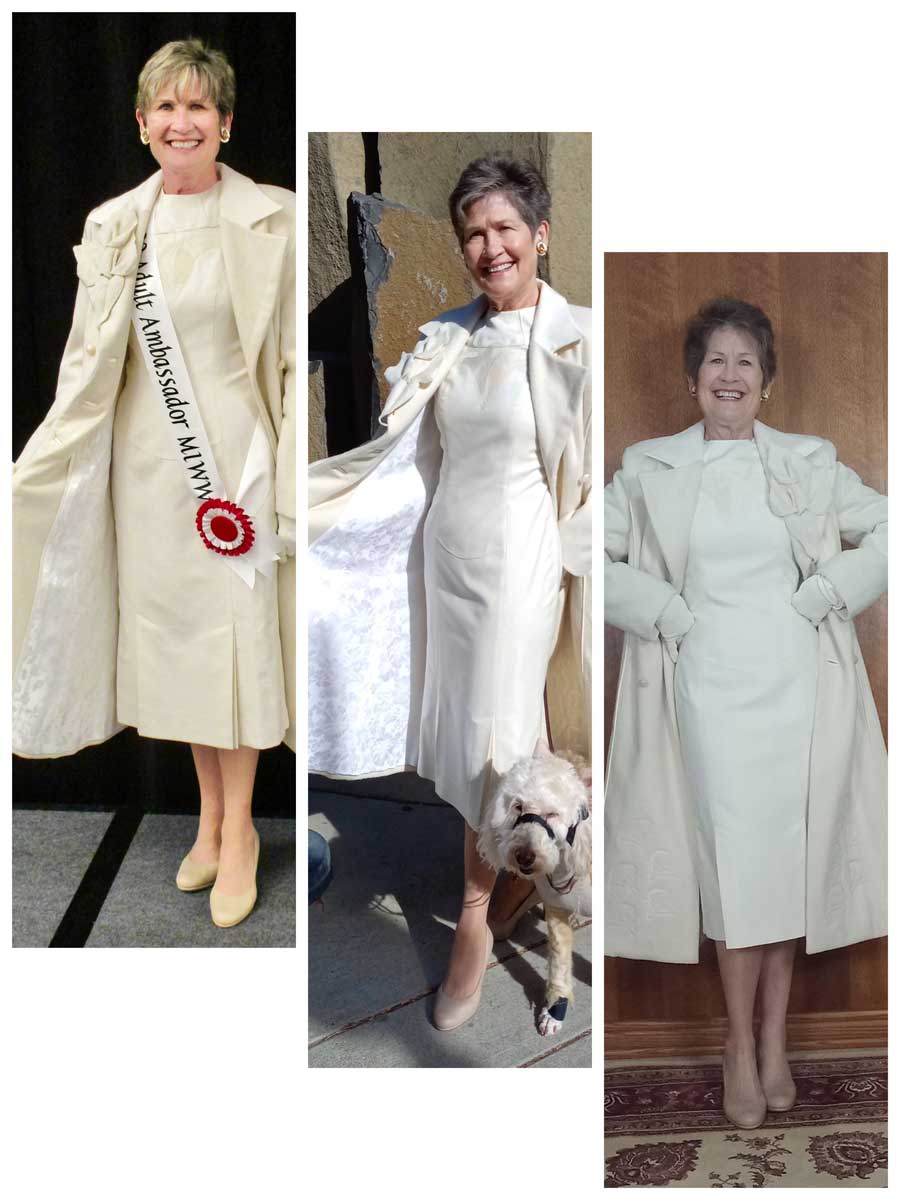
Make it With Wool entryMy primary interest is garment sewing, especially with wool fabric and fibers. Wool is a wonderful fabric and fiber to create with. I crochet, knit, felt, needle felt and sew with wool. The wool coat and dress described in this article were specifically made for this year’s Make it With Wool contest, an annual competition that promotes the beauty and versatility of wool by showcasing wool’s unique qualities in a variety of garment designs and details.

Inspiration: A tribute

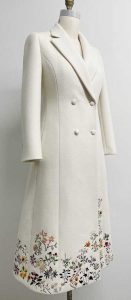
The inspiration for the coat came from the beautiful coat created by designer Gabriela Hearst and worn by Jill Biden at the inaugural ball. The classic double breasted princess seam design, color, and theme set the foundation for the vision of the coat. Taking this example, a Vogue pattern (7144) was selected with a similar design.

The coat and dress feature varying design details and a variety of calla lily embellishments, a symbol of both sympathy and promise. The garments hoped to recognize and give tribute to the loss of so many to Covid and the promise of recovery by all the heroic efforts of our first responders, medical personnel and caregivers.

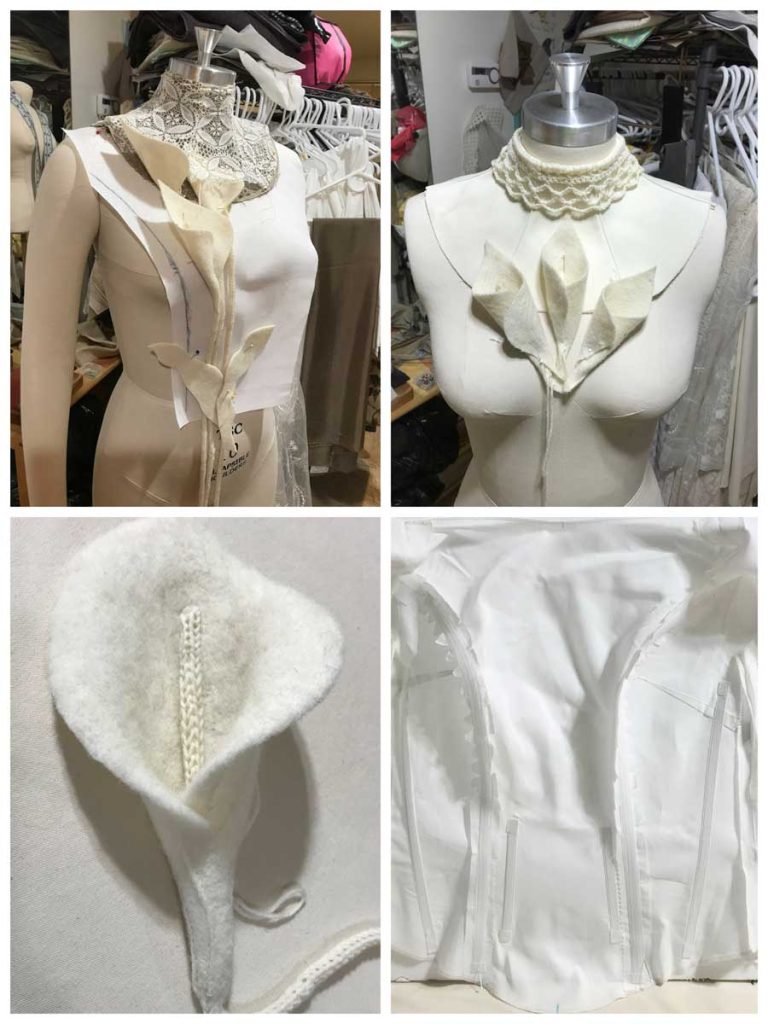
The decisions in bringing those details together into a coordinated and cohesive ensemble required exploring and experimenting with possible options. The process started with inspiration, settling on a detail, and then producing samples to determine their appropriate application in the garment. Many samples were prepared that never made their way into the final garment: boned interfaced bodice support, a lace collar, crocheted collar, a beaded crochet collar, felted calla lily, knitted cording, bobbin embroidery to name a few.

Making the Coat

Felting the Wool

The inspiration
The inspiration

The calla lilies embroidered on the coat are an original graphic, digitized, and designed to repeat the pattern along the hem and upper back. The calla lilies on the coat’s lapel were created from felted worsted wool, sewn, shaped and hardened to closely match the specie’s flowers and leaf. The spadix, the center detail, was knitted with wool yarn, it’s stable shape made possible by utilizing feather quills from my geese. The 100% wool coat fabric was machine felted in several 2 yard batches. To lessen the fabric’s distortion and stretch during the machine felting (top loader only), the 2 yard fabric pieces are zig-zag stitched along the cut edge into a cylinder. Several pairs of flip flops aid the agitation. The smallest hot water setting is selected and a very small amount of wool fabric soap as well as baking soda is added to the tub. Three cycles are generally required to get the desired thickness and degree of felting. The spin cycle is stopped each time to again lessen distorting the fabric. The fabric was then air dried and shaped to accept the pattern layout.

Decorative Elements

The silk piping accents the princess seams and aids in the shaping and fit of the coat. The brocade lining is edged with a binding of the same silk fabric adding interest and detailing to the coat. A calla lily silver charm was added at the inside collar to further the theme of the coat. The coat hem was weighted at the front opening and at the back vent to result in a better hang at these openings. Bound button holes were used to add interest and a favored technique for quality garments. Vintage dome shank buttons adorn the double breasted closure. A valuable couture technique outlined in Claire Shaeffer’s new book, Couture Tailoring, A Construction Guide to Women’s Jackets was used to secure the non-buttoning shank buttons, resulting in their holding firmly and not flopping. The upper lapel fabric matches the fabric of the accompanying dress. The many details and embellishments are subtle, requiring closer examination and appreciation for their added value to the harmony and cohesion of the coat.

Making the Dress

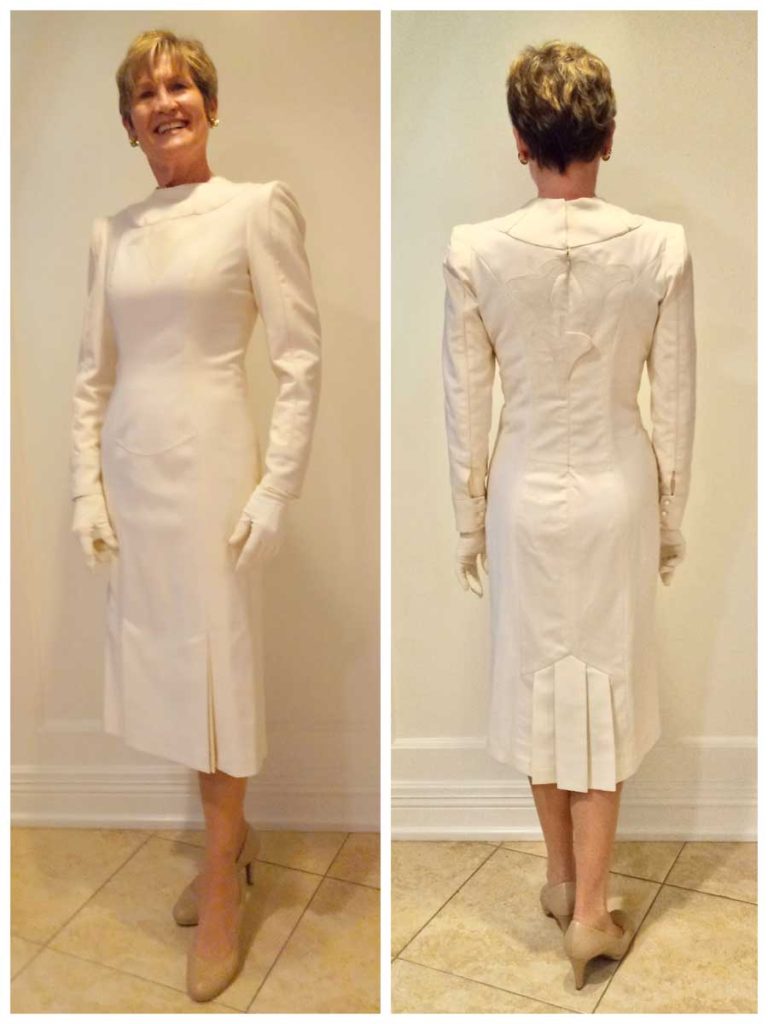
The dress is my original design. The coat required a fitted dress to comfortably adhere to its silhouette. The bodice was the starting point. I find that for my body type, princess seams to be more conducive to a good fit. The bodice has a dropped waist to promote a more vertical line. I envisioned a simple but elegant silhouette with subtle intricate embellishments and design details. The dress is 100% Italian Super 150 Double Faced wool. In a self drafted design that required repeated fittings and numerous handlings, the off-white color of the fabric proved challenging to keep from soiling.

Sleeves

The extended cap sleeves were a new detail I wanted to incorporate into the original design. They required precise drafting and fitting to the bodice, since nearly no ease is offered in the sleeve cap. The grain and hang of the sleeve and their precise rotation in the armscye was critical for a proper fit. The 2-piece sleeve seams are also piped, accentuating the detail and adding structural support. A sleeve head was used between the sleeve cap and the extension.

Pleats

The front reverse pleats and the back “skirt pleats” were added to allow more movement while still maintaining the dress silhouette. They provided a subtle interest and animation in the carry of the dress.

Appliqué

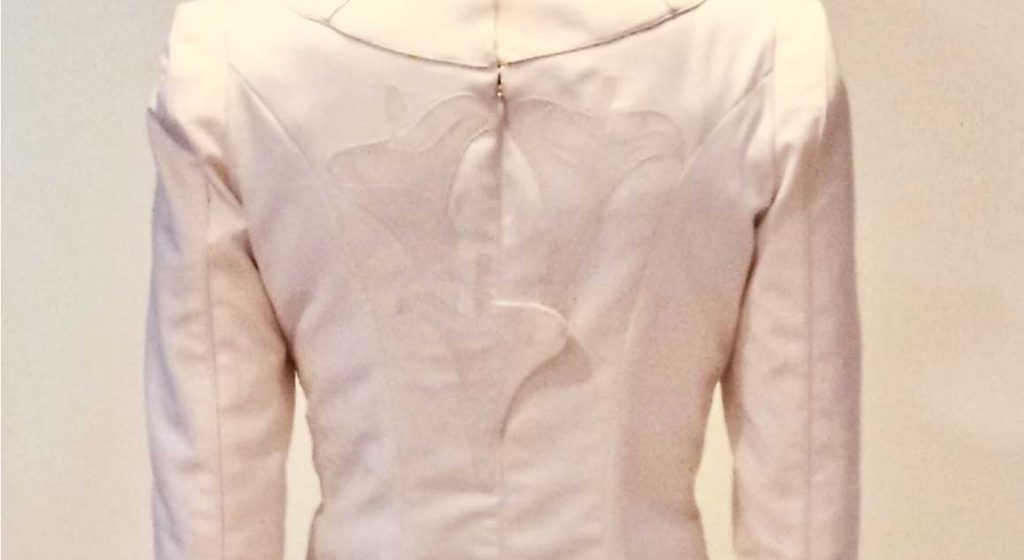
The piped and 7-piece collar brings attention to the neck line and invites inspection of the subtly appliquéd 4-piece calla lilies below. The 4 piece appliqué is fashioned after a stained glass design. The appliqués are layered and applied on both the front and back bodice. The calla lilies appliquéd on the back bodice span the invisible zipper, requiring both sides of the exposed appliqué be finished. A clear plastic snap securely holds the tip of the calla lily in place once the zipper is closed.

Underlining

The dress is underlined with cotton voile. BIG MISTAKE! Normally, I use silk organza as an underlining but because the fashion fabric was so lightweight, I wanted more structure to support the bodice and front and back panels. Both the cotton and wool fabrics were washed prior to their laying out and cutting. The issue was the added shrinkage of the cotton underlining when the dress seams were pressed. It resulted in the wool fabric hanging or bagging between the vertical seams. The fix required removing all vertical seams, lessening the cotton voile seam allowances to remove the pull and bagging of the wool fabric. Removing all attachments of the cotton voile to the dress hem resulted in a smoother panel and seam. It was a major remake while being major lesson learned. The dress is now fully lined with silk charmeuse. The lining has a 3″ hem and is attached with thread chains to the same seam in the dress.

The final dress design was a progression and evolution of its details. The individual details, the piping, the extended cap sleeves, the front inverted and back skirt pleats, the pieced and piped collar, the buttoned cuffs, the calla lily appliqués and their extension over the invisible zipper all coalesced into a cohesive and harmonious well fitting dress.

The Contest

The coat and dress ensemble won at the Make It With Wool National Adult Division competition that was held January 20-23, 2022 in San Diego, CA. Twenty one state contestants competed in the contest. The top 6 placings were:

Adult Winner – Kim Vogley, Washington
Adult 2nd place – Becky Piette, Wisconsin
Adult 3rd place – Kelsey Clear, Michigan
Adult 4th place – Brenda Richardson, Arizona
Adult 5th place – Erin Hyde, Florida
Adult 6th place – Diane Spain, Oregon

Learn more about Make It with Wool at https://makeitwithwool.com/welcome


~Kim Vogley, ASG Silverdale, WA Chapter

Did you enjoy this article?
Are you an ASG member?
This field is for validation purposes and should be left unchanged.

Tagged With: Make It With Wool, sewing, wool

July 22, 2022

Tips and Hacks for Machine Embroidery

Whenever ASG members are asked what they love about their organization, high on the list is always the willingness of fellow members to share ideas and help out with solutions. This is true, especially in neighborhood group meetings held in person or on electronic platforms.

Thought bubbles

The Princeton, NJ Chapter’s “Thread Magicians,” is an online machine embroidery group that is open to all ASG members regardless of their chapter affiliation. ASG members can complete the Group Request here. Non-members can join ASG as part of a chapter or become a member-at-large to participate in this group.

Here are just a few of the tips shared at a recent meeting:

Thread Nets

Marsha in Oregon said she rarely uses the thread nets that are supposed to be used on spools of thread to tame the feeding of thread from the spool to the machine. Instead, she places the nets on rolls of stabilizer to prevent them from unrolling while in storage as well and keeping the plastic use instructions right with the stabilizer. Since the nets are see-through, it is easy to see labels and instructions through the nets without removing them.

Storing Rolls of Stabilizer

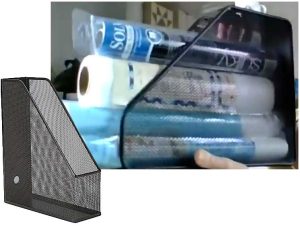
To store rolls of stabilizer, Dale from New Jersey suggested getting some magazine storage containers. The containers all have the same basic shape but can come in cardboard, plastic, metal, or wood. Turn them so they sit on their longest side and tuck the rolls of stabilizer inside. The containers allow the stabilizers to be stacked without fear of them rolling away.

Dale also added that if you have ever had thread unwind and become a massive bird’s nest right on the spool, she suggests turning the spool upside down and allowing the thread to unwind so the nest can be removed. (And yes, this one worked great!)

Thread Organizers

Beverly and Kendra, also from NJ, recycle egg cartons into thread organizers. They number the 12 or 18 compartment cartons and place thread spools into each compartment to keep colors in the order in which they will be used in a design. Even large cones can be inverted and placed in the cartons top down without any trouble. This certainly beats frantically searching for the right color only to find it rolled away during the last thread change. Kendra also suggested using a pet wrap like Coband to wrap around your hoop to prevent slippery fabrics from sliding in the hoop. It doesn’t leave a sticky residue like other tapes. Paper tape from the first aid section of the dollar store also works well for placement of pieces during appliqué or in-the-hoop projects.

thread

Speaking of organizing threads, Constance from Florida suggested cutting pieces of clingy plastic into 1” x 6” or 2” x 6” strips to wrap around thread spools to keep thread from unrolling. The plastic can be purchased from a variety of box stores or recycled from packaging like those that blankets come in. To help keep track of the strips while using the thread, Constance places a line made with a grease pen or permanent marker down the center of the strip, providing a visual reference on an otherwise clear surface. This makes the strip easier to see when not on the spool. For her bobbins, she takes a small box and lines it with double sided tape. When she places bobbins in the box, the tape holds them in place, preventing them from falling out or bouncing around in the box and unwinding and becoming tangled. To be doubly sure the bobbins don’t unwind, she also uses aquarium hose cut to the specific width of her bobbins. She then makes a slit in the hose so that she can slip it around the bobbin holding the thread in place. While many members used ponytail bands to slip around spools and bobbins, the aquarium hose is a smoother, sleeker look and allows bobbins to slip easily into store-bought bobbin holders.

Organizing Appliqué Pieces

Andi in California likes to use page protectors from the stationery store to organize her appliqué pieces. She cuts out the various parts of the appliqué and places them in the page protector along with any notes or instructions. When she is ready to work, the pieces are all together and ready to go. These are especially helpful when she is traveling to a retreat to do the work. Unlike the paper plates she used before, the protectors can be stored in a notebook and don’t slide or allow pieces to escape.

Added Work Surface

While browsing a thrift store, Christine from NJ found a bedside table like the kind that are usually found in hospitals. She said she didn’t know what she would do with it, but she purchased it anyway. Now it is her constant companion while sewing. She can wheel it up to her cutting table and adjust the height to give her extra room for her cutting tools, or even move her sewing machine around the house or outside. It is extra sturdy and can easily handle the weight of her sewing machine as well as the vibration when sewing.

Spraying Adhesives

From Arizona, Sandy suggested cutting the bottom from a gallon milk container and placing the opening over the item she wants to spray with adhesive. She then takes her spray can nozzle and sprays through the top of the container. The sides of the milk container prevent the overspray from traveling around her sewing space and getting everything sticky.

Organizing Machine Feet

To organize her machine feet, Lynda from NJ uses a pill organizer. The compartments are just the right size for most feet and are easily seen through the plastic container. She also says a toe separator used for pedicures makes a great bobbin holder. And if you run out of toppers for embroidery, Glad Press and Seal will work in a pinch. It won’t wash away, but it tears easily.

Storing Embroidery Hoops

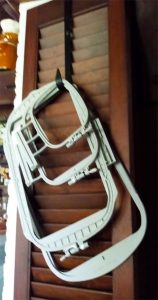
Embroidery hoop storage ideaAfter breaking one of her embroidery hoops by laying it down on a table and then placing something on top of it, Rosemary from NJ bought a wreath hanger from a dollar store. She now slips the hanger over a door near her embroidery machine and actually remembers to place the hoops on the hanger when not embroidering. No more broken hoops!
Go Green

Elaine in Massachusetts shared her “go green” ideas. The Boston Chapter made lint cleaners for attendees at the 2019 conference. Members took a coffee stirrer and half of a chenille stem. The ends of the chenille stem were looped around and inserted into the opening at one end of the stirrer, and voila, a lint brush that gets into those tight spaces around the bobbin case for the embroidery machine or the serger. Elaine also puts her Edge gum boxes to use. She labels them and places her packages of machine needles inside so that she can see at a glance her packages of needles separated by size.

There were also endorsements of a number of products that members find especially helpful.

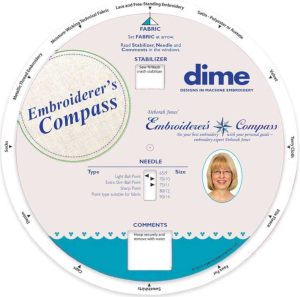
  • Tina from Oregon recommends the Embroiderer’s Compass from dime for matching up the right stabilizer with the right fabric. By simply rotating the disks, this tool gives suggestions for the stabilizer as well as toppers.

Embroiderers Compass on Amazon
Embroiderers Compass on Amazon. We may earn a small commission if you make a purchase.

  • The Perfect Box Bottom is one of Gini’s suggestions from Texas. She says it makes squaring up the bottoms of boxes or purses a breeze.
  • The Hoop Mat by dime was also noted by Beverly as a handy embroidery tool. It prevents the embroidery hoop from sliding away while trying to hoop the fabric. The lines on the mat also help with aligning items.

So, whatever part of the country you hale from, we hope you found some of these tips and hacks useful. Happy stitching!


~Rosemary Fajgier, former ASG Board Chair

Did you enjoy this article?
Are you an ASG member?
This field is for validation purposes and should be left unchanged.

Tagged With: embroidery, machine embroidery, sewing, sewing room tips

April 29, 2022

Zippers as Trim

Sometimes things normally found in our sewing rooms end up with surprise uses. Such is the case for zippers!

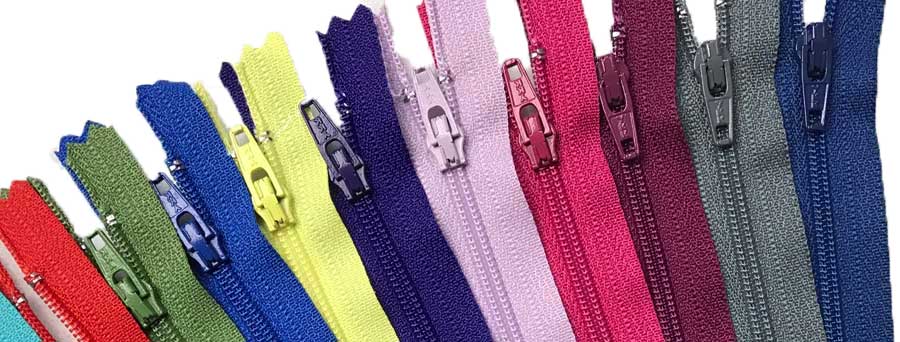
Zippers from Ghees.com
Photo courtesy of Ghees.com

With the myriad types of zippers available, they can definitely do more than close a garment. Think about them turning into jewelry or becoming piping or a surface trim. When grouped, they can also cover an entire garment section, like a cuff or collar.

Zippers are not only available individually, but you can purchase zipper by the roll or by the yard from some resources. When you purchase zipper tape by the yard, you have more flexibility to use it for many things since you’re not limited by standard lengths.

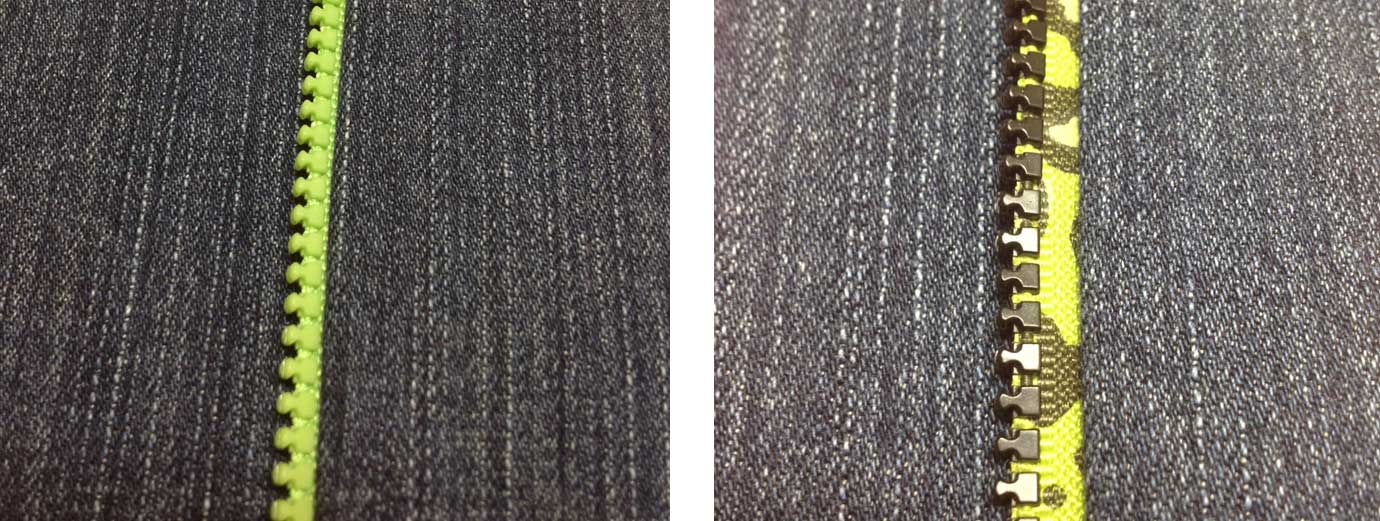
The various types of zipper teeth add to the intrigue. Look for brightly colored plastic teeth on sport-weight zippers, brassy metal teeth on jeans and utility zippers, and even multi-color teeth on some novelties. For a bit of glam, indulge some rhinestone teeth.

Zipper tapes, the woven base for the teeth, come in many types as well, from solid color basics to printed or stripes of all sorts. For a bit of bling, you can also find metallic and satin zipper tapes.

Let the zipper inspire you for alternate uses!

April 29 is National Zipper Day!

Weaving

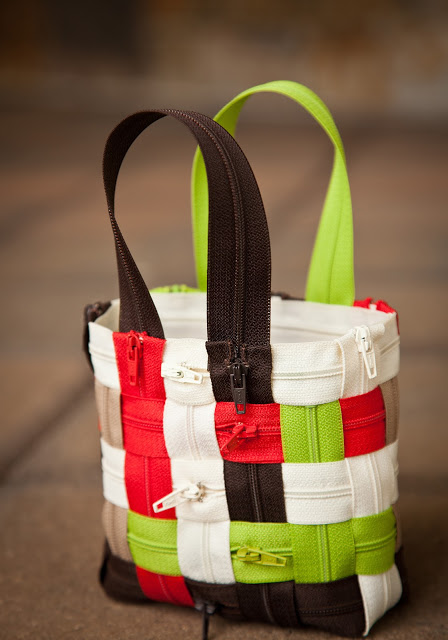
If you want to cover a large area, like for making a pillow, garment yoke, or perhaps a tote bag front, think about weaving zippers to the size you need.

A simple over-one-under-one patterning done over a pinnable surface can yield some sizeable pieces. A bit of stitching (or fabric glue) at the overlaps can secure the pieces in place and allow for cutting of the size and shape needed for the project.

Before cutting woven zippers, trace the piece shape needed and stitch just inside the cutting line so the woven strips don’t distort or pull apart. Once the piece is secure, use the woven zipper area as you would fabric, with one exception. If the zipper teeth are metal, remove those within the seam allowances to avoid breaking needles.

Looking for inspiration? Check out this cute zipper bag from Yarnspirations and visit the link to see how it’s made.

Zipper Bag from Yarnspirations
Photo courtesy of Coats & Clark. See bag instructions at Yarnspirations.

Stacking

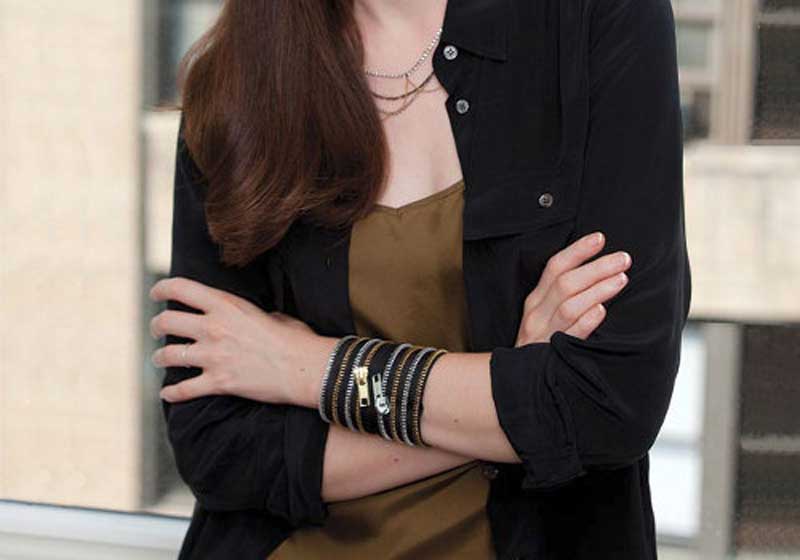
Zipper tapes can be overlapped, either closely or more widely spaced, to fill an area, such as a cuff or jacket yoke, or to make a bracelet. The easiest way to do this is to cut a lightweight background fabric in the size and shape needed, then stitch the zippers onto it. For a bracelet, a felt background is ideal since it’s comfortable against the skin, yet sturdy enough to hold the weight of multiple zippers.

Zipper tapes can be parallel to each other, or not, depending on the desired look, and zipper pulls can be incorporated for added accents.

Zipper bracelet by Coats & Clark
Photo courtesy of Coats & Clark

Shaping

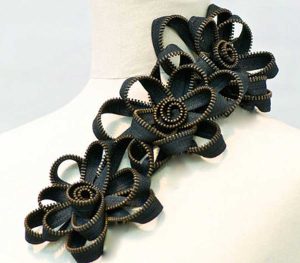
Zipper flower from Coats & Clark
Photo courtesy of Coats & Clark

Zipper tape is readily shapeable with a few hand stitches to hold it in place, so making freestanding flowers is easy. Just shape the petals to the desired size and hand-tack the center. Sew directly to the project, or add a pin back to make a jewelry accent.

To make longer lengths of trim, use hand stitches along the tape edge to shape it, either in regular or random patterning, then stitch through the zipper to hold it in place.

For even more flexibility, trim the zipper tape close to the teeth, so that those become the focal point. To prevent fraying, coat the cut edges with a fray stopping product. To hold the design shape, hand-stitch over the teeth with invisible thread.

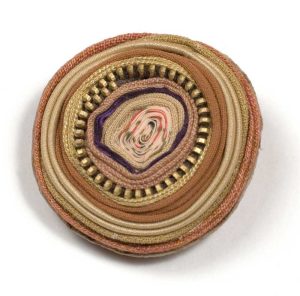
Zipper as a buttonConsider using zippers decoratively to make buttons—the glint of metal teeth works well when coiled with other fabrics. Hand-stitch the wraps together to create the desired size, or stitch them to a background circle of fabric. These types of decorative buttons are best for show, and not for use through a buttonhole, though they can work well through loops…perhaps loops made of zipper.

Piping

Who says piping has to be fabric? It can be even more interesting if it’s made from zippers. Fun teeth create the exposed trim portion for a fun pop of color when inserted into a seam or used along an edge. Insert the zipper tape as you would standard piping so that the teeth are the visible portion, or stitch further away from the teeth to show a hint of the zipper tape as well.

Zippers as piping

Do not extend heavy teeth beyond the seamline, but instead trim them off and use a fray stopping product to secure the ends.

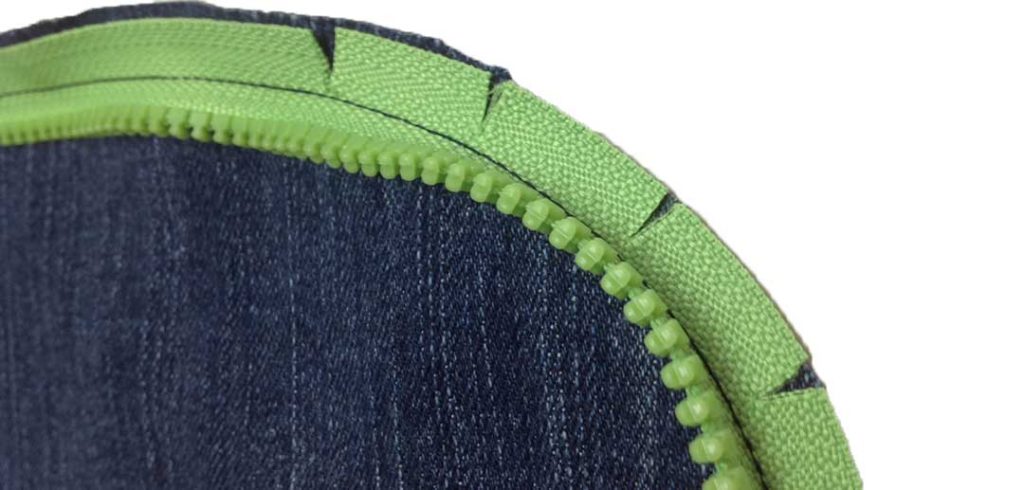
To apply edge piping to a curve, clip into the zipper tape and spread it so it lies flat against the shaped edge.

Zipper applied to a curve and clipped

One caution: Metal or large plastic zipper teeth can be an irritant to the skin when used along the edge of a garment, so keep that in mind when choosing where to use them.

So, start looking at zippers in a new light—not just hidden closures. Happy Zipper Day!


~Linda Griepentrog
Linda is the owner of G Wiz Creative Services and she does writing, editing and designing for companies in the sewing, crafting and quilting industries. In addition, she escorts fabric shopping tours to Hong Kong. She lives at the Oregon Coast with her husband Keith, and two dogs, Yohnuh and Abby. Contact her at .

Did you enjoy this article?
Are you an ASG member?
This field is for validation purposes and should be left unchanged.

Tagged With: National Zipper Day, sewing, zippers

March 4, 2022

Single Layer Construction

One Layer at a Time

Boiled wool coat
Boiled wool coat. Photo courtesy of Bernina

There are times when more than one layer of fabric really isn’t necessary or desired—think bulky hems, facings, etc. Single-layer construction techniques to the rescue!

Fabric Choices

Many types of fabrics are suitable for single-layer construction, but those that are most commonly used are sheers, laces, handwovens, fleeces, boiled wools or felted fabrics, linens and double-sided fabrics (different colors or weaves on each side). The commonality in these choices is that both sides of the fabric are presentable and can show in the finished garment without anyone saying, “The wrong side of your fabric is showing.”

Obviously, densely woven or knitted fabrics are suitable for single-layer techniques, but some loosely woven or seemingly less likely candidates can also be used.

Pattern Changes

If you plan to finish the single-layer edge of your garment, mark the original seamlines along the requisite areas. The marked line becomes the new edge, using one of the techniques below. Do not trim the seam allowances.

Edge Finishes

The one place where single-layer construction is the most obvious is along the garment edge—there are no standard hems, facings or turn-backs, that add both weight and bulk to the edge, whether it be a lower hem, sleeve hem, collar, front opening or patch pocket. So, how are those unfinished edges handled? Let’s explore some options.

Cut Edges
On some fabrics, like fleece and boiled or felted wool, a simple cut edge will suffice as an edge finish. These fabrics are usually stable and won’t distort without added finishing.

Unfinished pocket edge
Raw edge top-stitched pocket. Photo courtesy of Bernina.

Topstitching
The cut fabric edge can simply be topstitched with one or more lines of stitching. Heavier threads can provide a nice accent to this easy edge finish.

Fringe
Fringed edgeFor fabrics that are loosely woven, a great single-layer finish is fringing, assuming the edge is cut on-grain, like a center front opening or collar. Sew one or two lines of stitching along the marked seamline, then carefully remove the threads up to the stitching line to form the fringe. On double-woven fabrics, or if you’re fringing perpendicular edges, you may see two different colors of threads fringe out.

Binding
Almost any kind of fabric can be used to bind a single edge and contrast trim can form an attractive design line. On knit fabrics, bind the single edge with a knit fabric to maintain some flexibility. Use the marked seamline for attaching the binding, then trim away part of the width to create a narrower bound edge.

Bound edge on knit
Bound edge

Fold-over Elastic
This elastic has an indentation woven into it designed to make it easy to fold in half for encasing an edge. When using this specialty elastic, trim the seam allowance off the edge that’s to be bound before applying it. A straight stitch or narrow zigzag can be used for the application, as some slight stretch may be needed in some areas, like at a neckline opening. In other areas, like a center front or lapel, no stretch is required. Fold-over elastic comes in both prints and solid colors, depending on the desired look.

Narrow Hem
On lightweight fabrics, like sheers and some linens, a narrow hem is the perfect finish for a single-layer edge. A narrow hem can be just one layer, as in turn up and finish the raw edge with a decorative machine stitch, or it can be turned twice to encase the raw edge, then topstitched in place. Either way, the narrow hem uses the garment seam allowance to finish the edge. On large expanses, a narrow hemming attachment for the sewing machine can make quick work of this finish.

Narrow hemming foot. Photo courtesy of Bernina.

Serging

Serged edge with heavy thread
Serged edge with heavy thread. Photo courtesy of Bernina.

One of the most common finishes for single-layer construction is a serged edge. This finish encases the raw edge and trims off the seam allowances at the same time. The stitching can be narrow or wide, depending on the desired look, and can be sewn with regular thread or one of the specialty threads like rayon for a bit of sheen. For a denser edge finish, use Woolly Nylon or Polyester thread to create a matte finish, almost braid-like look, to the edge. If both sides of the fabric will show, like on a turn-back lapel or hood lining, be sure the thread tension is adjusted so both sides of the stitching look the same.

Narrow hem
Narrow serged hem. Photo courtesy of Bernina

To keep edges from stretching while serge-finishing, fuse a very narrow strip of water-soluble stabilizer to the wrong side of the fabric before sewing. After the serging is complete, dissolve the stabilizer following the manufacturer’s instructions. Note that this technique works only on fabrics that can tolerate water. On other fabrics, sew a line of straight stitching along the seamline to stabilize the area, then serge over it, hiding the stitching.


~Linda Griepentrog

Linda is the owner of G Wiz Creative Services and she does writing, editing and designing for companies in the sewing, crafting and quilting industries. In addition, she escorts fabric shopping tours to Hong Kong. She lives at the Oregon Coast with her husband Keith, and two dogs, Yohnuh and Abby. Contact her at .

Did you enjoy this article?
Are you an ASG member?
This field is for validation purposes and should be left unchanged.

Tagged With: coat, sewing, single layer construction

  • « Previous Page
  • 1
  • 2
  • 3
  • 4
  • …
  • 16
  • Next Page »

Become a Member

Join the only national organization dedicated to Advancing Sewing as an Art and Life Skill.

Join Now button

Blog Article Categories

  • ASG Conference
  • Chapter Stories
  • Embroidery
  • Fitting
  • Learn to Sew
  • National Sewing Month
  • Products, Books, & Patterns
  • Projects
  • Quilting
  • Sewing
  • Sewing Techniques
  • Sewing Tips
  • Sewing Tours
  • Videos
  • Disclaimer
  • Privacy Policy

American Sewing Guild
National Headquarters
9660 Hillcroft, Suite 230
Houston TX 77096
713-729-3000 | 713-721-9230 Fax
www.ASG.org

ASG wordcloud - education, conference, discounts, videos, special offers, tours and more

Copyright © 1998–2025 · American Sewing Guild · All Rights Reserved