American Sewing Guild (ASG)

Visit our blog Visit the ASG Facebook page Visit ASG on Pinterest Visit ASG's YouTube channel Visit ASG on Instagram
  • Home
  • Join ASG
    • Join Online
    • Chapter Locations
    • Member Benefits
    • Member Brochure
    • Join by Mail
  • Education & Classes
  • Resources
    • Contests & Awards
    • Giving Back
    • Hall of Fame
    • Travel and Tours
    • Measurement Chart
  • Shop
    • ASG Store
    • Chapter Products
    • Video Resources
  • Blog
  • About
    • About Us
    • Donate to ASG
    • ASG Sensitivity Statement
    • FAQ’s
    • Start a Chapter
  • Contact
  • Member Login
    • Login First!
    • Members Only
    • Leadership Only
    • Website FAQ’s
    • Logout
  •  

January 29, 2021

Slick Tricks: Working with Laminated Fabrics

If you’re looking to make that perfect raincoat, try one of the great laminated fabrics on the market today. Colorful cottons with a clear coating are ideal for rainy weather attire, and a host of other projects from cosmetic bags to totes and aprons.

And you have options—laminated cottons come with either a matte finish or a glossy finish, depending on the brand and the desired look. In many instances, the same print is available in a non-laminated version, so that you can use it for facings, hood linings, binding, etc.

Although they do require some care when sewing, there’s nothing off-putting about these fun fabrics. Just be sure to purchase a laminated cotton, as opposed to traditional oilcloth fabric which has a heavier mesh base and is best suited for home décor items.

The coating on laminates makes them water resistant (not waterproof), and it keeps seam allowances from fraying. Some coatings are lightweight and others a bit heavier, so select the fabric by the intended use. Softer coatings are ideal for garments, as they’re more flexible than heavier ones.

Preparation

Photo courtesy of Cloud9 Fabrics

When choosing a pattern, look for simple lines and few seams, as well as raglan sleeves vs. set-in. There’s no room for error with laminates, so be sure the pattern fits you.

When you cut out your project, opt for pattern weights instead of pins, unless you keep them only within the seamlines as the marks are permanent.

Mark with chalk or soap slivers and never a tracing wheel, as that can damage the coating.

Sewing

There are some helpful notions for stitching these sticky fabrics. Spring clips, such as Wonder Clips, help hold layers in place without pinning, as do coated paperclips.

If sticking is an issue, opt for a non-stick presser foot, or put tape on the bottom of a regular foot to keep it moving. Sticking becomes an issue usually only if you’re sewing with the right side up, otherwise, the fabric should move smoothly under the foot.

Adjust the stitch length to slightly longer than normal and use a small needle to avoid large holes in the fabric.

Pressing isn’t an option for most laminates, so keep the iron away. To keep the seams flat, finger-press, then topstitch, either open or with seam allowances to one side. Topstitching is also recommended for all edges to keep them flat.
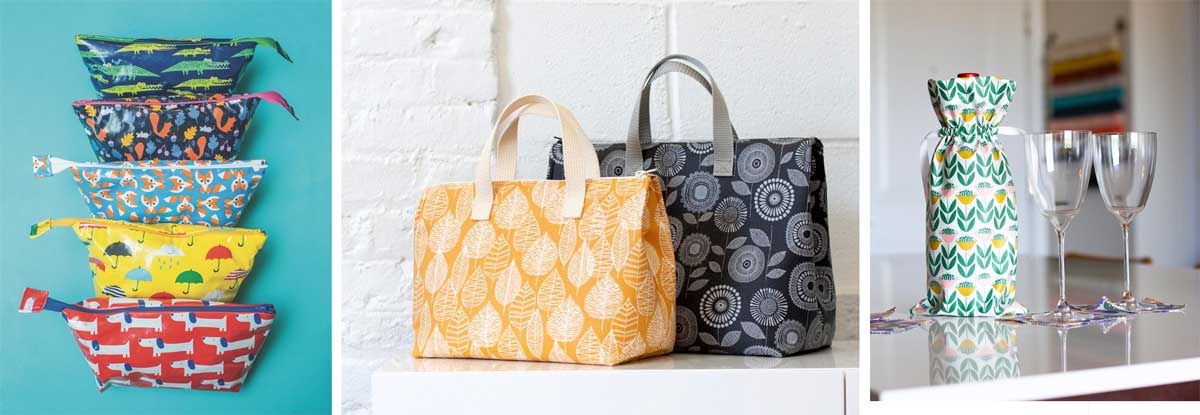
Photos courtesy of Cloud9 Fabrics

Finishing

If your raincoat requires buttonholes, interface the area with a sew-in interfacing (not fusible) and use the setting on your machine that produces a buttonhole with simply straight stitching around the slit. Any dense satin stitching can damage the fabric.

For hems, there’s no need to finish the edge as the lamination keeps the fabric from fraying—just turn up the hem evenly, clip it in place and sew one or two rows of stitching evenly from the folded edge.

On a tote, bound edges work perfectly—not only are they easy to do, but they also reduce the bulk of multiple laminate layers on turned-and-stitched edges.


~Linda Griepentrog
Linda is the owner of G Wiz Creative Services and she does writing, editing and designing for companies in the sewing, crafting and quilting industries. In addition, she escorts fabric shopping tours to Hong Kong. She lives at the Oregon Coast with her husband Keith, and two dogs, Yohnuh and Abby. Contact her at gwizdesigns@aol.com.
This field is for validation purposes and should be left unchanged.
Did you enjoy this article?
Are you an ASG member?

Tagged With: laminated fabric, learn to sew, raincoat, sewing, sewing tip

January 15, 2021

Sewing Basics: General Sewing Terms, Part 2

The projects we want to sew can range from quilts to embroidery, handbags to pillows, and everything in between. This article focuses on sewing terms that are most often associated with garment sewing, but may be used or called for in other projects as well.

Note: This is Part 2 of our General Sewing Terms series. See Part 1.


Clipping

Clipping curvesClipping (the twin sibling to notching) is the practice of cutting fabric in the seam allowance of outside corners and curves and inside corners and curves. As with most practices, there are different schools of thought. Let’s take these one at a time.

Outside corners, like the corner on a collar or the edge of a waistband, need special attention if you want to achieve a nice sharp corner once they have been turned. There are generally two camps on this:

  1. Clip off the corner point seam allowance close to the stitching line. Perhaps the seam allowance at either side of the point as well. This will reduce the bulk and allow the point to turn more sharply.
  2. Leave the seam allowance as is and fold it inward along the seam allowance. Turn to the right side leaving the fabric in place. Those who prefer this method will say that close clipping weakens the fabric at the turn point too much while the folding method maintains the strength of the garment piece at the corner.

Inside corners, like those found on a square neckline, need to be clipped close into the corner, up to (not through) the stitching line. This can be a bit nerve-wracking, but if you don’t get very close to the stitching line, the corner with not turn smoothly. So, take a deep breath, and clip right to that line before you turn to get a sharp, smooth corner.

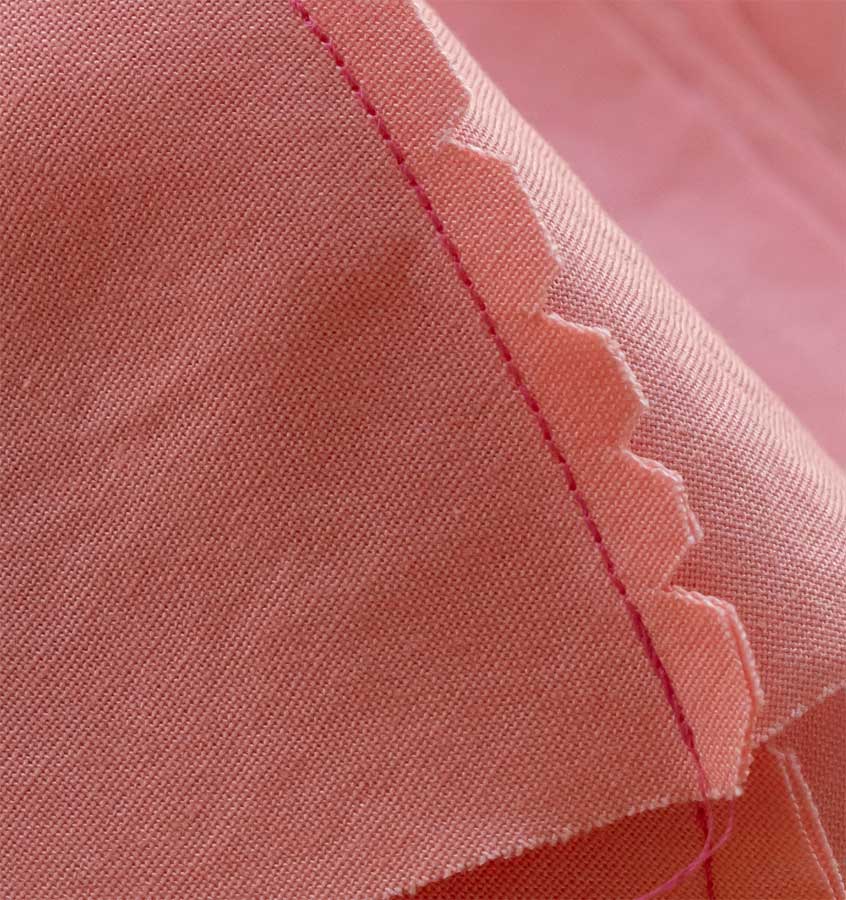
Outside curves, such as the curve of a scalloped edge, need fabric in the seam allowance removed to allow the fabric to curve and lay flat once it is turned. An outer curve will turn much more smoothly if the seam allowance is clipped with notches. This provides a gap of fabric that can collapse without bunching on the inside.

Inside Curves, like a curved jewel neckline, will turn best if you clip into the fabric close to the stitching line. As with outside corners, there are multiple camps on how to do this:

  1. Clip through both layers of the seam allowance about every 1/2” the entire length of the curve. Tighter curves will turn more smoothly if the distance is closer to 1/ 4” apart so make the clips as close together as needed to achieve a smooth result.
  2. Clip through one seam allowance at a time. The distance between clips is the same as option 1. However, the location of the clips on each side of the seam allowance alternates, never making the clips on one side of the seam allowance in the same location as the opposing side. Those who prefer this method will say that it results in a smoother transition and less show through on the right side of the garment.

Heather Handmade created this short video to that hat this clipping process might look like:


Darts

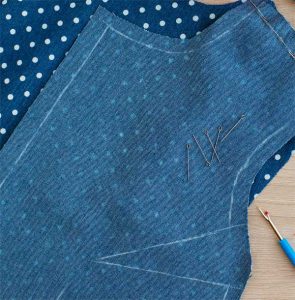
Darts are triangular stitched pinches of fabric that help turn the 2-D nature of fabric into 3-D. You find them at the chest line to create space for your bust, at the waist to create the shape of your hips, and in the bottom of purses and bags to create space for the things you will store inside. Any place in your project that needs to be shaped instead of flat, you just might need to add a dart.

Darts can be straight or curved. They may be open ended and terminate into the seam allowance or they may be inside the body of the project with a point at both ends, referred to as a fish-eye dart.
Here are a few tips that may be helpful as you increase your understanding of how to sew them:

  • It is important to secure the ends of a dart. That can be done in various ways such as:
    • Leave a long thread tail and tie a double knot before trimming the thread.
    • Reduce the stitch length to 1.0 at the beginning and end of the dart.
  • Make a small clip into the seam allowance at the termination of each leg of the dart. When making the dart fold, simply align the two clips.
  • If the dart has straight legs, mark the points of the dart then using your ruler connect the dots to mark the dart location.
  • Align the dart lines and secure them with pins or basting to be sure they stay in alignment when sewing the permanent stitching. On way to do this is with a ladder stitch. Watch this “How To” video to see what we mean.

  • And finally, be intentional about pressing your darts once they are sewn. Avoid pressing beyond the point of the dart. If you press a fold into your fabric beyond the point, that fold might not disappear, leaving a permanent line that you don’t want.

Ease

In its simplest form, ease is the additional room in a garment in excess of the actual body measurement. There is much more to ease than this simple definition though — there is wearing ease, design ease and negative ease. Each of these impacts the finished measurement of a garment in different ways.
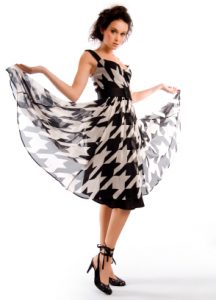
  • Wearing ease provides ease of movement. It is the difference between the actual body measurement and the finished garment measurement.
  • Design ease provides the style. It is also referred to as style ease or fashion ease. It is additional ease added beyond what is needed for movement to create specific styles ranging from close fitting to very loose-fitting garments. It also comes into play when the design of the garment includes things like pleats, gathers, or tucks.
  • Negative ease is associated with fabrics that stretch (such as knits or woven fabrics with lycra added) or are cut on the bias, producing a certain degree of stretch. In this case, the finished garment measures the same as the actual body measurements, or more often, even smaller. The degree of stretch produced in each fabric plays a big role in how much negative ease a garment will need for good fit. Negative ease is used in garments like activewear and swimwear.

To read more about ease, check out this article we published on the topic.


Facing

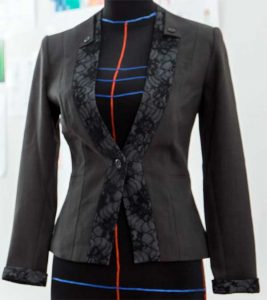
A facing is a piece of fabric used to finish the raw edges of a garment at open areas, such as the neck and armholes. A facing may be a separate pattern piece to be added to the garment or an extension of the pattern piece itself.

Here are a few tips for applying them:

  • Cut your facing on the same grainline as the edge to be faced.
  • Grade the seam allowances to reduce bulk and show through on the right side of the garment.
  • Don’t forget to finish the outer edges of the facing. The finish can be as simple as a turned-under edge, a zigzag, or a serged edge. If you are working with a fabric like knit that does not ravel, or with a garment that will be lined, you can skip this step.
  • To hold the seam allowance in place on the inside of the garment, stitch the facing to the seam allowance at about 1/8 in. from the seam line. This is called understitching.
  • Tacking the facing down at the seams will prevent them from flipping to the outside. Just hand stitch or stitch in the ditch of outer seams to accomplish this.
  • Be sure to apply the appropriate interfacing to the facing fabric to give it the stability and structure needed for a smooth look.

Interfacing

Interfacing is used to add extra body or strength to the fabric it is applied to. It is used in garment pieces like button bands, collars, waistbands, cuffs, and most facings. If you are sewing with knit, you might use interfacing to keep the fabric from stretching out of shape in a particular area of the garment.
A few decisions you will make when choosing the right interfacing for your project include:

  1. Fusible vs. Non-Fusible
    1. Fusible interfacings use glue and are applied to the wrong side of the fabric with steam and an iron whereas a non-fusible interfacing is sewn into place. If your fabric doesn’t like heat or is woven so loosely that the glue might show through, you will want to want to use a non-fusible interfacing
  2. Light, Medium, or Heavyweight
    1. Your goal is usually to stabilize, not change, the fabric, so go with a weight that is equal to, or a bit lighter than, your fabric.
  3. Non-woven, Woven or Knit
    1. Non-woven interfacing doesn’t have a grain and works for most projects. It tends to be less expensive and can be cut in any direction. However, it can create a slightly “stiffer” outcome than woven interfacing as it does not have grain like the fabric does.
    2. Woven interfacing has a grain, much like fabric. It must be cut on grain the same way you cut your fabric. It tends to result in a drape and hand more like the fabric.
    3. Knit interfacing has a bit of stretch and is usually the best choice for knit fabrics.

In every case, it is important that you test your interfacing choice on a test swatch to be sure you achieve the look and feel you want.


Stay Stitching

Stay stitching is a single line of stitching through one layer of fabric slightly inside the seam allowance. Unlike basting, these stitches will not be removed so be careful not to stray beyond the seam allowance. Its purpose is to stabilize the fabric and prevent it from becoming stretched or distorted. It is usually called for on the edge of a piece of fabric that has a bias cut, which occurs on curves, such as necklines and arm holes, and on diagonals, such as v-necks.

Stay stitching should be done directionally to keep the shape of the fabric the same as it was when you cut it out. For example, when stay stitching a neckline, you should stitch from each shoulder to the center of the neckline. If you were to sew the entire neckline in one direction, you may distort the half sewn from the center neck to the shoulder.

See this 2 ½ minute video by Professor Pincushion showing this technique:

Note that not all pattern instructions will tell you to stay stitch so use your judgment. When in doubt, stay stitch.

Now that you understand some of the basic garment sewing terms, but these terms are so foundational and can impact your results so much. We hope these explanations have helped you strengthen that foundation.


~Sheryl Belson, ASG

This field is for validation purposes and should be left unchanged.
Did you enjoy this article?
Are you an ASG member?

Tagged With: clipping curves, clipping seams, dart, garment ease, garment facing, interfacing, sewing, stay stitching

November 6, 2020

Shower Power: Sew a Fabric Shower Curtain

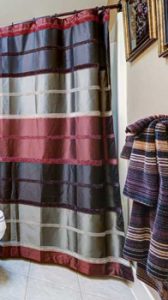
Nothing’s more fun than sprucing up your home and as sewers, a little refresh is easy to do. So, why not start in the bathroom with a fun fabric shower curtain!

  • Choose a bold print, fabulous stripe or even a luscious solid cotton or polyester fabric.
  • Decorator weights work well and often come with coordinates for window treatments.
  • A standard size shower curtain will take 5 yards of either 45” or 54” fabric; if you opt for a wider fabric (like 108” or 110”) then you’ll need only 2 ½ yards.
  • Remember that you may need extra fabric if you have a print that requires matching.

A standard shower curtain is 72” square, so be sure to measure your tub/shower before you buy fabric and adjust as needed.

Preparation

From 45” or 54” wide fabric, cut two panels 88” long, trim the selvages and seam the lengths together. Press the seam open. Trim the seamed piece to 80” wide. Use the extra fabric to trim towels or make a fabric basket for the bathroom.

Making the Curtain

Press a double 2” hem on each side of the curtain and stitch in place close to inner fold.

Press up a double 4” hem along the bottom of the curtain and stitch in place close to the upper fold. To make the shower curtain hang smoothly, include a plastic covered weight in each corner of the hem, or if your tub is metal, a plastic covered magnet for a sure hold.

To make the top hem, fuse a 4” strip of medium-weight interfacing to the wrong side of the upper edge, abutting the seams as needed for the entire width. This provides support for the buttonholes or grommet openings. Press a double 4” hem at the top and stitch close to the lower fold.

Top Treatment

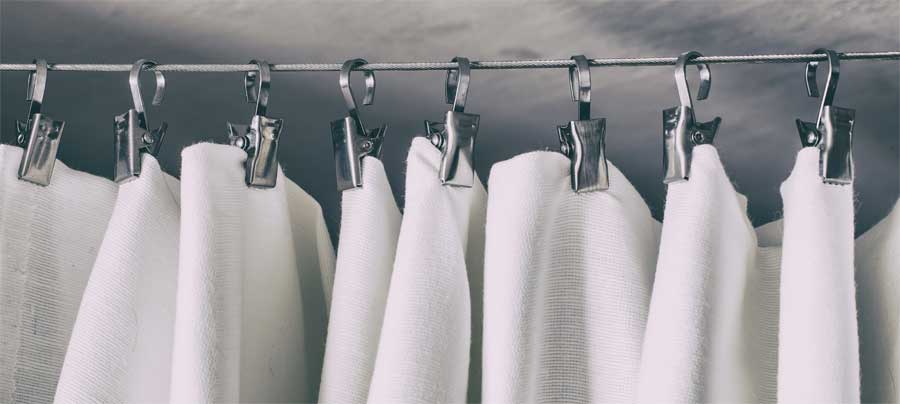
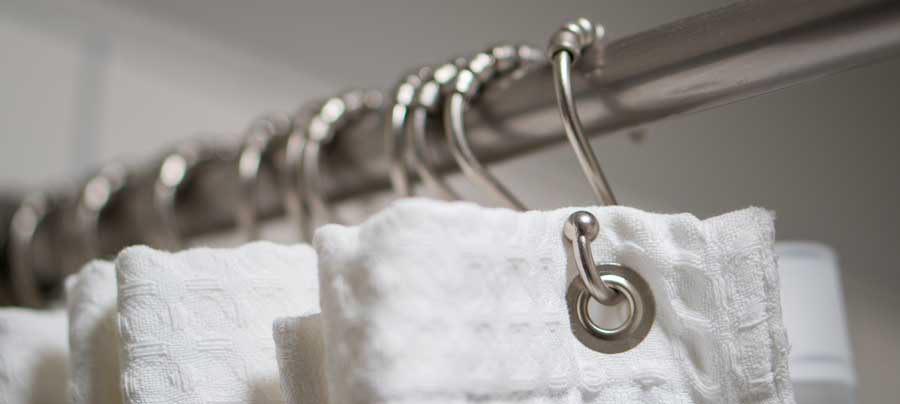
Shower curtains can have one of many options at the top, but a 72” curtain should have 12 openings for attachments of some sort, either metal or plastic hooks or rings. The openings can be stitched buttonholes, or metal or plastic grommets—either large or small–so choose your desired feature. You can even choose spring clips and avoid creating holes altogether.

If you opt for buttonholes, you can hang the vinyl liner on the same rod using the hook/loop set. If you opt for large grommets, then you’ll need a separate rod for the vinyl liner.

For buttonholes, evenly mark 12 hole placements 1” from the finished upper edge. Stitch a 1” long buttonhole at each mark. For quick and easy marking, lay your vinyl shower curtain liner on the wrong side of the fabric curtain and mark through the liner openings so they’ll align. Carefully cut open the buttonholes after stitching.

If you’re using either small or large grommets, follow the manufacturer’s instructions for insertion.

Decorating idea

As easy as it is to make a shower curtain, stitch some for different seasons and holidays to change up your décor. Or if company is coming, try a different theme they can relate to. Personally, we have friends who love everything Disney, and a Mickey print shower curtain brings a smile to their faces when they visit.


~Linda Griepentrog
Linda is the owner of G Wiz Creative Services and she does writing, editing and designing for companies in the sewing, crafting and quilting industries. In addition, she escorts fabric shopping tours to Hong Kong. She lives at the Oregon Coast with her husband Keith, and two dogs, Yohnuh and Abby. Contact her at gwizdesigns@aol.com.

This field is for validation purposes and should be left unchanged.
Did you enjoy this article?
Are you an ASG member?

Tagged With: home decor, sewing, shower curtain

October 23, 2020

Denim Dynamics

One of America’s most beloved fabrics, denim can be a delight to sew if you know the tricks.

Tools

  • Always use sharp scissors or a new rotary cutter blade to cut clean edges on this dense fabric.
  • On heavier denims, use spring clips to hold edges together for sewing, as opposed to pins which may bend.
  • If you have a walking foot, use it to help keep bulky layers from shifting.
  • A definite must—a denim/jeans needle with a sharp point for piercing the closely woven fabric.
  • For decorative topstitching, use heavy thread and a topstitching needle.

Preparation

  • No doubt about it, denim shrinks, so pre-wash and dry it at least once. Wash it alone or with similar colors to prevent dye transfer.
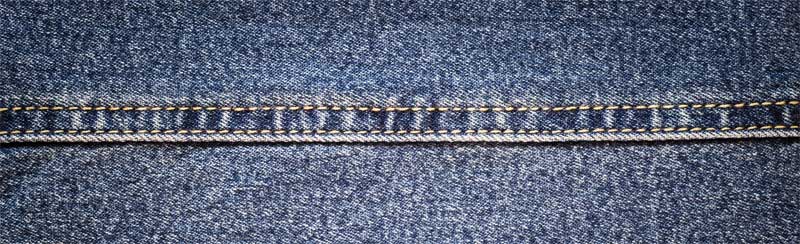
  • Use a with-nap layout for your pattern to avoid shading. Denim’s twill weave is really a one-way design.
  • Once your pieces are cut, serge or zigzag all the edges to prevent fraying.

Seaming

Standard seams are ideal for denim and pressing seam allowances open creates a flat finish. Other options include pressing the seam allowances to one side and topstitching, or creating a real flat felled seam aka Levi’s look.

Topstitching denim helps to keep the bulk controlled. Look for matching or contrasting threads, or a blended denim thread for this purpose, and heavier weights for more prominence. Topstitch with a single, double or triple line of stitching.

A twin denim needle with 6mm spacing will create two parallel rows of topstitching in a single pass.

Hemming

A single-layer topstitched hem is easy to do in denim—just serge or zigzag the hem edge and topstitch in place. A double hem is also an option for lighter weight denims, but may be too bulky for heavier ones.

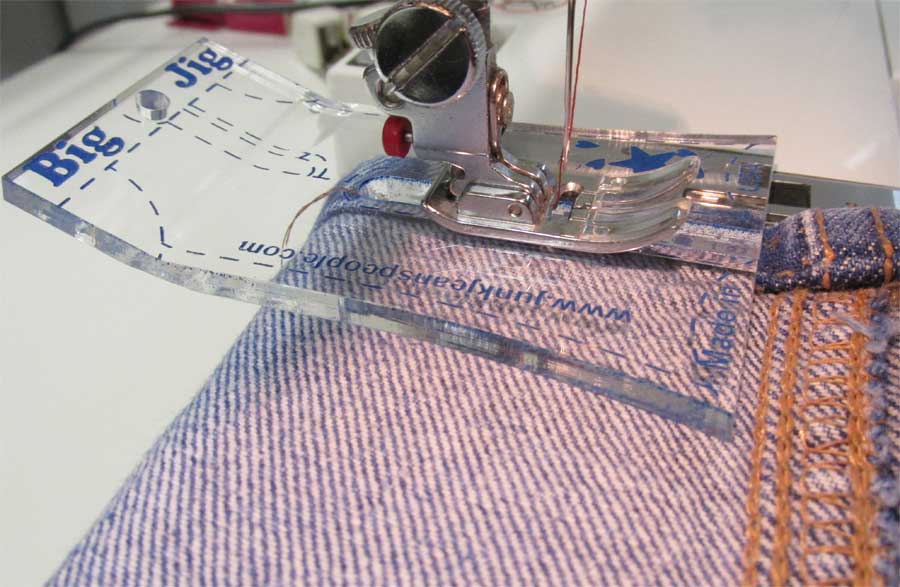
Photo compliments of Junk Jeans People

The biggest issue with hemming denim is crossing perpendicular seams, as there are multiple denim layers to contend with—feeding may not be even and stitching may become uneven due to the bulk. However, clever sewers have a tool to help with that situation, like the Big Jig. These are small plastic tools designed to level out the layers when stitching across bulky pile-ups. Simply place the tool under the presser foot at the start of the bulk and when the foot is level with the highest part, move it to the front of the foot to help with the decline.

Trimming out seam bulk and even pounding layers with a rubber mallet will also help reduce the bulk of multiple denim layers.

Fun touches

As noted, denim is prone to fraying, and you can use that characteristic for fun trims and design features on a denim garment. Sew a matching or contrasting line of straight stitching at the fringe depth you want, then pull threads up to it. Most denims have white threads in one direction and colored in the other, so choose which ones you’d like to expose.

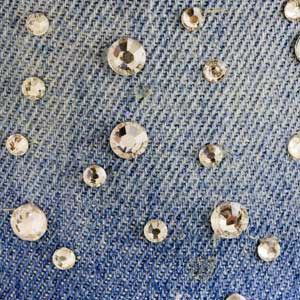
Rhinestones and nail heads make perfect embellishments to add bling to your favorite blues. Look for the easy iron-on version for quick application.

Looking to copy your favorite Calvin’s? Add bartacks to pocket corners. Simply set the machine for a dense zigzag and stitch a few stitches to make the “bar” about 1/4” long.  Check your machine: it may have a bartack setting built in.


~Linda Griepentrog
Linda is the owner of G Wiz Creative Services and she does writing, editing and designing for companies in the sewing, crafting and quilting industries. In addition, she escorts fabric shopping tours to Hong Kong. She lives at the Oregon Coast with her husband Keith, and two dogs, Yohnuh and Abby. Contact her at gwizdesigns@aol.com.

This field is for validation purposes and should be left unchanged.
Did you enjoy this article?
Are you an ASG member?

Tagged With: denim, sewing

October 9, 2020

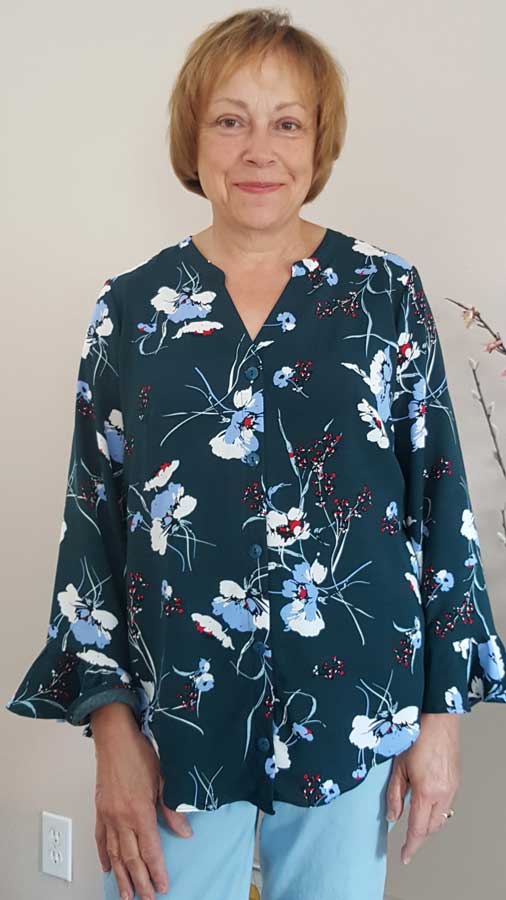
What I’m Sewing: Itch-to-Stitch Bonn Shirt

Q. Item Created 
A. Blouse

Q. Independent Pattern Designer
A.
Itch-to-Stitch

Q. Name and Number of Pattern
A.
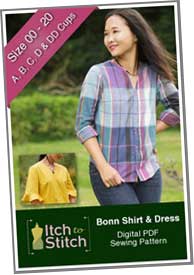
Bonn Shirt/Dress

Q. Fabric Used:
A. Picasso Rayon Poplin in teal

Q. Special Embellishments/Notions Used
A. Superior MasterPiece cotton thread

Q. Skill level required?
A.
Advanced beginner or Intermediate

Q. Are the instructions easy to follow?
A.
Yes, and they are quite thorough. There are several sleeve variations of long, short, mid-length and flare; this is the long flare. I’ve made the mid-length also, in a blue rayon print. Have not made the dress.

Q. Are you pleased with the finished result?  Did it meet your expectations?
A.
Very pleased. I had a bit of difficulty with the hem this time. I chose to use a rolled hem foot to make it simpler than trying to press 1/8″ double ironed hem with slippery rayon. The result is that the hem has a fluttery look, which mimics the flared sleeve.

Q. Did it look like the picture?
A.
Yes, it did.

Q. Did you make any modifications in the pattern?
A.
No.

Q. Are there any changes you would have made?
A. I might try it with a straight hem, rather than a curved one, and perhaps add a side slit. If I did that, I would also do the mid-length sleeve and make that hemmed rather than gathered and banded.

Q. Did the pattern teach you any unique or special techniques?
A.
This was the first flared sleeve I’ve sewn. I like the effect.

Q. Would you make this again?
A.
Yes.

Q. Would you recommend this pattern to others?
A.
Yes, I would.

Pattern Link: https://itch-to-stitch.com/pattern-release-bonn-shirt-dress/

I purchased the fabric from a store in Missoula, Montana that also has a web site, The Confident Stitch. The online store and their customer service customer are top notch.


~Joanne Jensen, Plano Chapter

This field is for validation purposes and should be left unchanged.
Did you enjoy this article?
Are you an ASG member?

Tagged With: altering sewing patterns, pattern, sewing

  • « Previous Page
  • 1
  • …
  • 4
  • 5
  • 6
  • 7
  • 8
  • …
  • 16
  • Next Page »

Become a Member

Join the only national organization dedicated to Advancing Sewing as an Art and Life Skill.

Join Now button

Blog Article Categories

  • ASG Conference
  • Chapter Stories
  • Embroidery
  • Fitting
  • Learn to Sew
  • National Sewing Month
  • Products, Books, & Patterns
  • Projects
  • Quilting
  • Sewing
  • Sewing Techniques
  • Sewing Tips
  • Sewing Tours
  • Videos
  • Disclaimer
  • Privacy Policy

American Sewing Guild
National Headquarters
9660 Hillcroft, Suite 230
Houston TX 77096
713-729-3000 | 713-721-9230 Fax
www.ASG.org

ASG wordcloud - education, conference, discounts, videos, special offers, tours and more

Copyright © 1998–2026 · American Sewing Guild · All Rights Reserved