American Sewing Guild (ASG)

Visit our blog Visit the ASG Facebook page Visit ASG on Pinterest Visit ASG's YouTube channel Visit ASG on Instagram
  • Home
  • Join ASG
    • Join Online
    • Chapter Locations
    • Member Benefits
    • Member Brochure
    • Join by Mail
  • Education & Classes
  • Resources
    • Contests & Awards
    • Giving Back
    • Hall of Fame
    • Travel and Tours
    • Measurement Chart
  • Shop
    • ASG Store
    • Chapter Products
    • Video Resources
  • Blog
  • About
    • About Us
    • Donate to ASG
    • ASG Sensitivity Statement
    • FAQ’s
    • Start a Chapter
  • Contact
  • Member Login
    • Login First!
    • Members Only
    • Leadership Only
    • Website FAQ’s
    • Logout
  •  

September 18, 2020

Sewing Basics: Measuring Tools

Measure Twice, Cut Once
We’ve all done it.  You cut that precious fabric, and you cut it wrong. Once you’ve made that cut, you can’t undo it. And now you don’t have enough to recover from your mistake. ARGH! Whether taking body measurements, marking seam allowances, or cutting quilt squares, when we sew, we need to measure accurately every time if we want our project to come out correctly.

Accurate measurements help to ensure a proper fit in garments, desired proportions in home dec, beautifully square and align quilt pieces and more. We definitely need to pay close attention to what we are doing, but making a small investment in a few helpful measuring tools can help. These are your must-haves:

  • Tape Measure
  • Clear ruler
  • Seam Gauge

So let’s take a look at these three tools in more depth…

Tape Measure

Also called a measuring tape, it’s a flexible strip of cloth, plastic or other pliable material with measurement markings. They usually measure about 60” long and 5/8” wide. It is generally reversible with inches on one side and centimeters on the other to help take a more accurate measurements, and can easily be rolled up when not in use.

Pro Tip: Since a tape measure is usually 5/8” wide, you can use it to check the accuracy or placement of your 5/8 seam allowances.
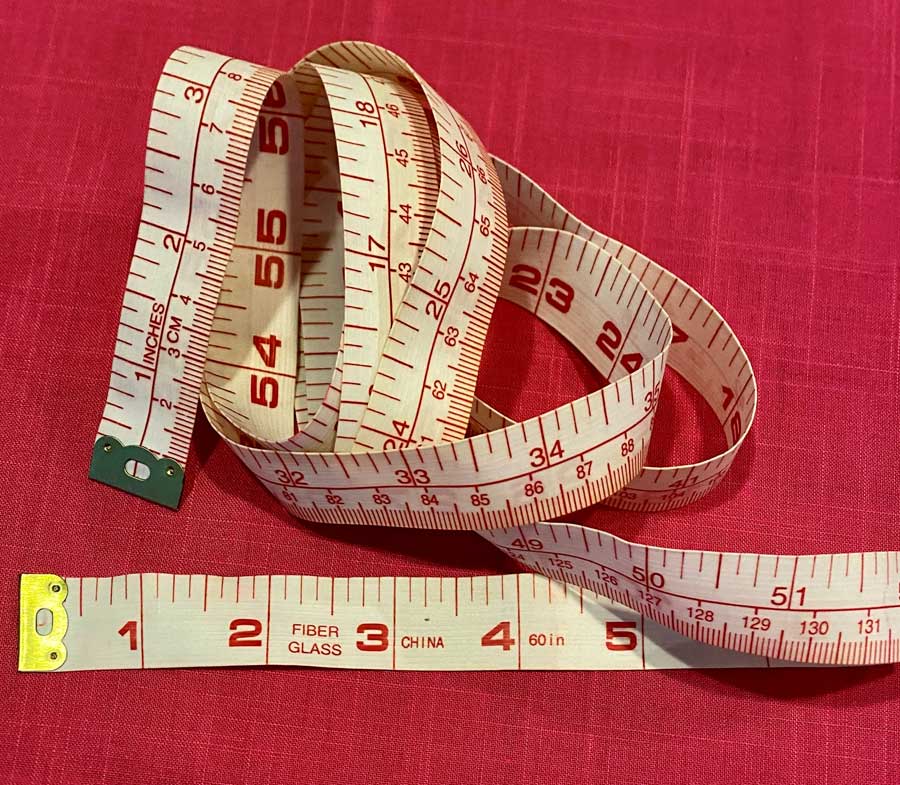
Tape measures can be used for just about everything when it comes to sewing. Use it to:

  • Measure your body to make the right size in garment patterns
  • Determine the length of a skirt or shirt, the size of a home dec or accessory project, etc.
  • Measure pattern pieces
  • Measure seam lines to make sure they match
  • Confirm a pattern piece is positioned accurately on the grain line

Many resources suggest that the flexible material that tape measures are made of will not stretch. However, that is not always the case. It’s a good idea to check the accuracy of your tape measure every few months just to be sure an inch is still an inch. Many are made of fabric and then coated, which helps to make them last longer and discourages stretching.  You can look for a non-stretch fiberglass model instead of fabric to solve the stretching issue. Choosing one with metal tips can also prevent fraying.

Clear Rulers
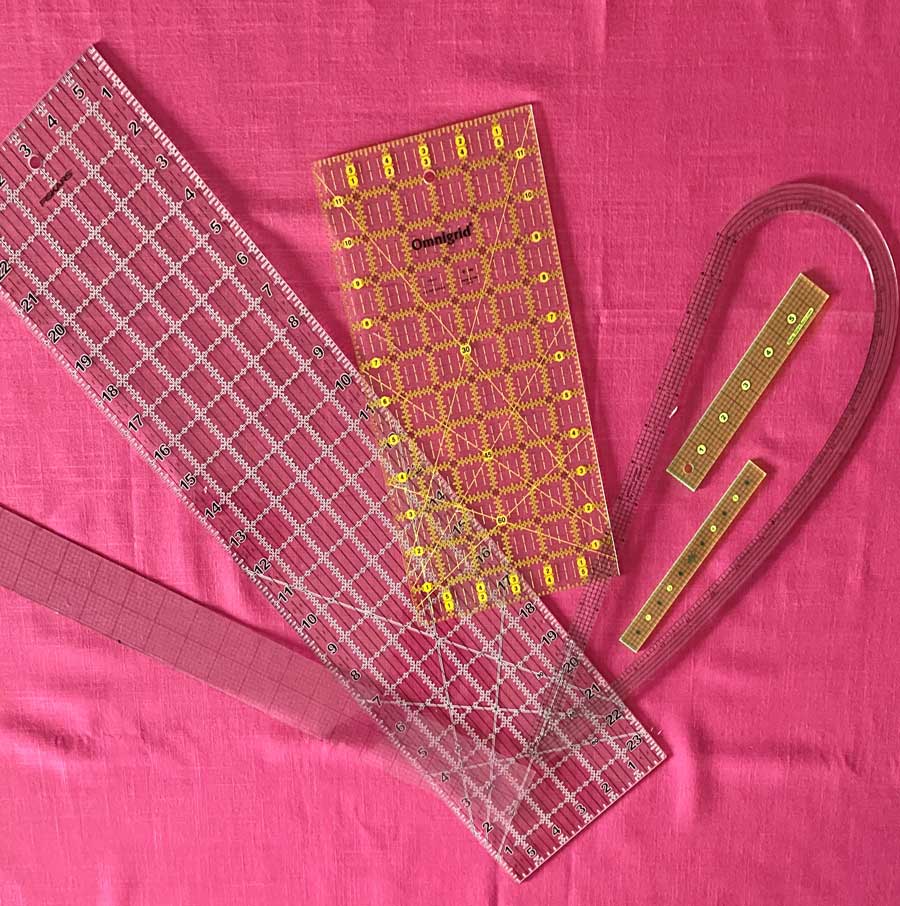
Clear rulers are extremely helpful when measuring and drawing seamlines and cutting lines. They are made of sturdy transparent plastic or acrylic and have easy-to-read measurement markings. They also come in a variety of sizes and shapes, such as square, rectangle and even a French curve.

Sometimes, they are also marked with helpful 30, 45 and 60 degree angled lines which makes them great for marking straight edges and parallel lines, buttonholes, tucks and pleats. It can also be used to check the grainline of the fabric. The best thing about this type of ruler is that since you can see through them, it makes it so much easier to align the marking and cutting lines perfectly with the designs on the fabric.

Many sewists like having both a large ruler (15 x 60 cm or 6” x 24”) for long straight lines, and a small one (3 x 30 cm or 1” x 12.5”) for the details. Another favorite is a 5/8” curve ruler that can be used to mark seam allowances or add that extra ¼” to a pattern piece to give a little extra ease in the final garment.

Pro Tip: Clear rulers can be slippery on fabric. Try adding a strip of Dritz Omnigris Invisi-Grip or a few TrueCut TrueGrips non-slip adhesive rings to give it some gripping power. Alternatively, choose a no-slip ruler like the Quilter’s Select Rulers.

There is one additional measurement tool in this category to share. While not necessarily a ruler by the truest definition, templates like the welt pocket template and the fly zipper template found on Stitch Buzz are extremely useful. Watch the interview with Claire Cochran, owner/inventor to learn about the Stitchbuzz rulers and templates. ASG members can also get a 20% ASG discount by using the discount code in the ASG Member’s Only Special Offers section!

Seam Gauge
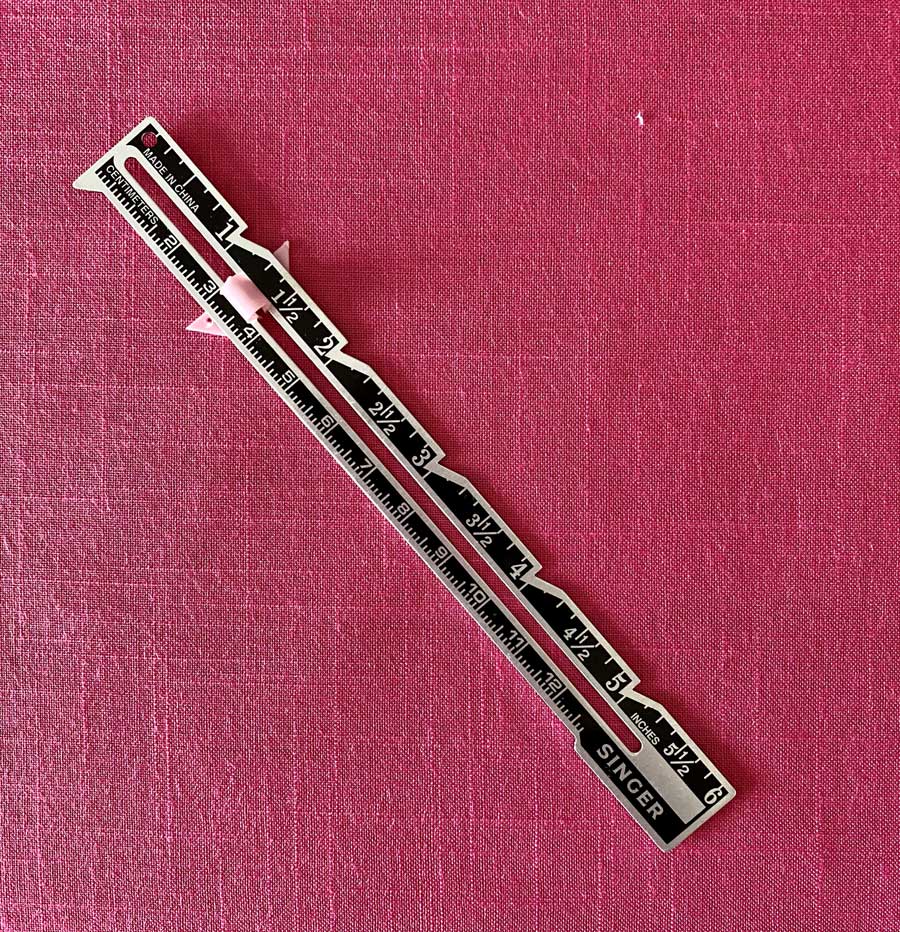
Seam gauges are rulers, usually 6” long with a sliding pointer that can be used sort of like a caliper. They are often marked in both inches and centimeters and are great tools for marking buttonholes, pleats, hems, etc. because they aren’t flexible and, thus, allow for more accurate measurements.

Though the most common length for a Seam gauge is 6”, you can also find them in longer lengths. Dritz makes one that is 7” long with a point turner on one end, making it a multi-purpose tool.  Clover makes one called a 5-in-1 that can be found not only in the 6” length, but also in an 11” length.

Summary

These tools will get you off to a great start. As your sewing skills become more advanced, you may want to invest and experiment with other more specialized measuring tools to help you do the job more efficiently. There are many measuring tools with different shapes, measurements, sizes and neat gadgets to choose from.

If you do choose to add some new tools to your sewing box, don’t forget to check the Member’s Only Special Offers. Many of these tools are available to members at a discount. The table in this blog article summarizes just of few of the discounts available .


~Sheryl Belson
This field is for validation purposes and should be left unchanged.
Did you enjoy this article?
Are you an ASG member?

Tagged With: rulers, sewing, sewing basics, sewing tools

September 16, 2020

Fireside Chat: Kimberly Jolly, Fat Quarter Shop

We recently had the pleasure of talking with Kimberly Jolly, owner of the Fat Quarter Shop and It’s Sew Emma. Between those two companies, she covers all sorts of quilting and cross stitching fabrics, supplies, and patterns. It was great fun to hear how this accountant turned creative and made her journey to where she is today. And it was especially interesting to hear about her connection to the Make a Wish campaign!  Learn about her patterns, fabrics, subscription clubs and YouTube channel in this 20 minute video.


~Sheryl Belson

This field is for validation purposes and should be left unchanged.
Did you enjoy this article?
Are you an ASG member?

Tagged With: fat quarter, quilts, sewing, video

August 28, 2020

Choosing a Fusible

When fusible products first arrived into the home sewing marketplace, they were stiff and frequently made the fabric bubble or wrinkle due to adhesion issues. Today, these new and improved heat-activated adhesive products are a boon to our sewing tasks. Let’s take a look at some of what you’ll find to expedite your sewing adventures.

Fuze News

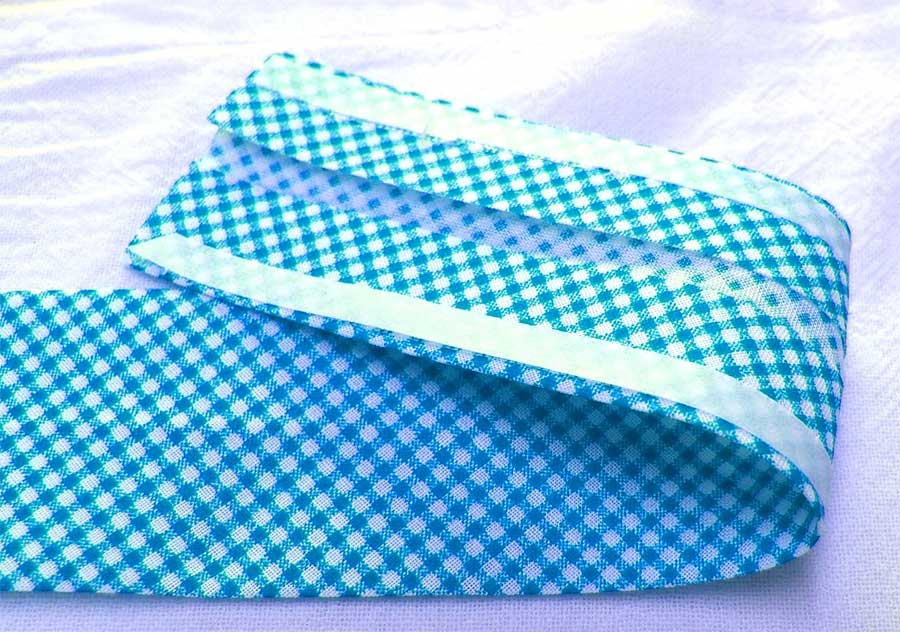
Woven, non-woven and knit interfacings in myriad weights and colors eliminate tedious basting of sew-in varieties. They add stability to collars and cuffs, buttonholes and placket openings, as well as to entire garment sections. Fusible interfacing can also be pre-cut into strips with built-in fold lines, like for a waistband or placket application.

Appliqué

For appliquérs, check out the variety of fusible webs. Note that some are very open mesh for a lighter fuse, while others are an extruded film for a more secure hold. Look for them with or without any paper backing—on one or two sides. Fusible webs are available by the yard, in pre-cut sheets or in narrow tape sizes for hemming, applying trim, etc. Some webs are repositionable, adding permanency only when they are heat activated; other web products can be inkjet printed with pattern shapes.

Machine Embroidery

For machine embroiderers, there are numerous types of fusible stabilizers—some permanent, some temporary.

Quilting

Fusible - web tape on bindingFor quilters, there’s fusible fleece, a needle-punched product, and several types of fusible battings, both single and double-sided, depending on their use. Narrow fusible web tape is ideal for adhering binding to the quilt—just position it along each edge, peel the protective paper and fuse in place for a secure hold while stitching.

Piecing

For piecing batting, look for fusible tapes designed to span the joining seamlessly.

Purses & Totes

For purse and tote aficionados, look for fusible heavy craft interfacings and fusible foams (single- or double-sided). They hold tight to keep bags in good shape.

Tailoring

If you’re a tailoring guru, there’s fusible stay tapes designed to keep shoulders and roll lines sturdy. They’re available in straight and bias grains, depending on the use. These tapes are also great for maintaining shoulder shaping in knit T-shirts, and keeping ripple-less hem shaping. For shaping jacket and coat sections, look for fusible hair canvas.

Other Fusibles and Uses

Buy on Amazon
Fusible Vinyl
  • Need to add a little protection to your project? Look for clear fusible vinyl in either matte or shiny finishes.
  • Have trouble making even piping? Look no further than Wrap ‘n Fuse Piping. Its core is surrounded by fusible web, so all you have to do is add fabric—no stitching required.
  • There are a host of fusible ribbons and trims, as well as fusible thread. The latter is used when just a hint of fusible is needed, like for a hem edge or holding a pants crease in place.
  • For a secure closure, you can use fusible hook-and-loop tape—no sewing required.
  • If you need to convert a non-fusible product into a fusible, look for spray fusibles—heat-activate after spraying for a permanent adhesive. Or check out powdered fusibles—just sprinkle over the surface, then heat to fuse.

Save your pattern!
If you have a pattern that you love and make repeatedly, fuse lightweight interfacing to the tissue pieces to keep them from tearing during repeated use.

Rules of the Game

  • Always read the instructions for your fusible product, as temperatures vary for adhesion. Some products require the use of moisture for secure fusing, while others demand dry heat. Some also require a press cloth.
  • It’s a good idea to pre-wash your project fabric, as finishes can sometimes play havoc with fusible adhesives.
  • Always test-fuse to your project fabric before committing to a product’s use. Let the swatch cool and see how you like the feel of the combined layers—is it too stiff, or too soft; does it drape like you want?
  • Keep iron cleaner nearby and cover your ironing surface, as it never fails that there’s some errant fusible adhesive finding its way off the intended course.
  • When fusing, apply firm pressure and lift the iron to the next location, slightly overlapping the first position—don’t slide it, as you can create wrinkles. Allow the fused piece to cool before moving it.

~Linda Griepentrog
Linda is the owner of G Wiz Creative Services and she does writing, editing and designing for companies in the sewing, crafting and quilting industries. In addition, she escorts fabric shopping tours to Hong Kong. She lives at the Oregon Coast with her husband Keith, and two dogs, Yohnuh and Abby. Contact her at gwizdesigns@aol.com.

This field is for validation purposes and should be left unchanged.
Did you enjoy this article?
Are you an ASG member?


Tagged With: fusible, fusible interfacing, fusible stabilizers, fusible webs, sewing

August 21, 2020

Sewing Basics: Hand Sewing Needles

Hand Sewing: Needle Knowledge

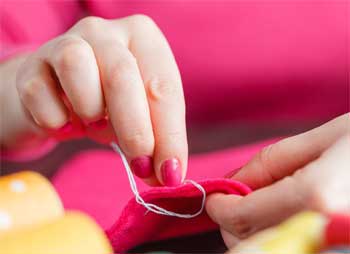
Although some sewists will do just about anything to avoid sewing something by hand, most will inevitably face times when hand sewing will be necessary to complete a project. Knowing which needle to choose for the project makes the task of hand sewing much easier. In this article, we look at the basics of hand sewing needles.

Hand sewing needles come in various sizes, lengths, shapes, points with each element focused on giving the best results with various types of projects. In all varieties, the size relates to the shaft of the needle.

  • The larger the number, the shorter and finer the shaft of the needle and the smaller the eye.
  • As a rule of thumb, the finer the fabric you are working with, the finer the needle (larger size number) you will want to use.  Here are a few needle types you may want to keep in your stash.

Sharps

SharpsIf you only have one type of needle in your stash, choose a Sharp. These are a good general-purpose needle with a nice sharp point, a round eye, and medium length. They come with either a single eye or double eye for those times when you might want to use two strands of thread. A double-eyed needle comes in a variety of sizes and allows you to carry two strands of thread without stressing the fabric with undue friction. These will be useful for several types of sewing including dressmaking, appliqué, hand piecing, and patchwork. Choose sizes 2-4 for medium to heavy weight fabrics; sizes 5-10 for medium to light weight fabrics; and sizes 11-12 for fine fabrics and for creating small, delicate stitches.

Quilting (a.k.a Betweens)

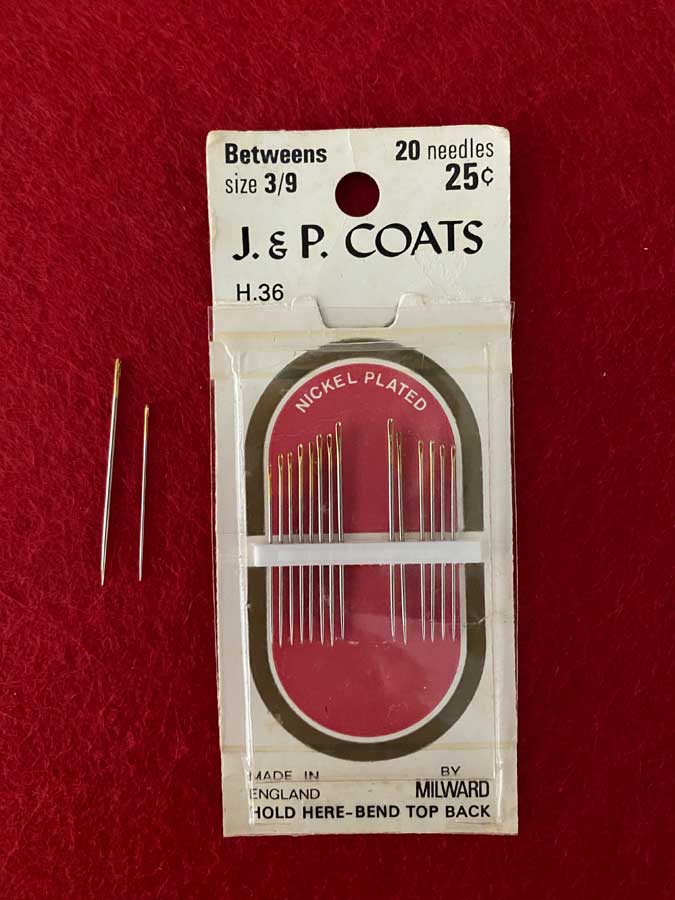
Between needlesBetweens work very well for their intended purpose, which is to assist quilters in making quick, even stitches through several layers of fabric. They are easy to control and result in very small holes in the fabric. Sizes typically range from 5 to 12, but beginners may do best with a size 7 or 8. The traditional style of quilting between needles is short and has a small, rounded eye.  However, if the smaller eye is a problem, you can also find them with a large eye for easier threading, generally available in size 10.

Ball Point

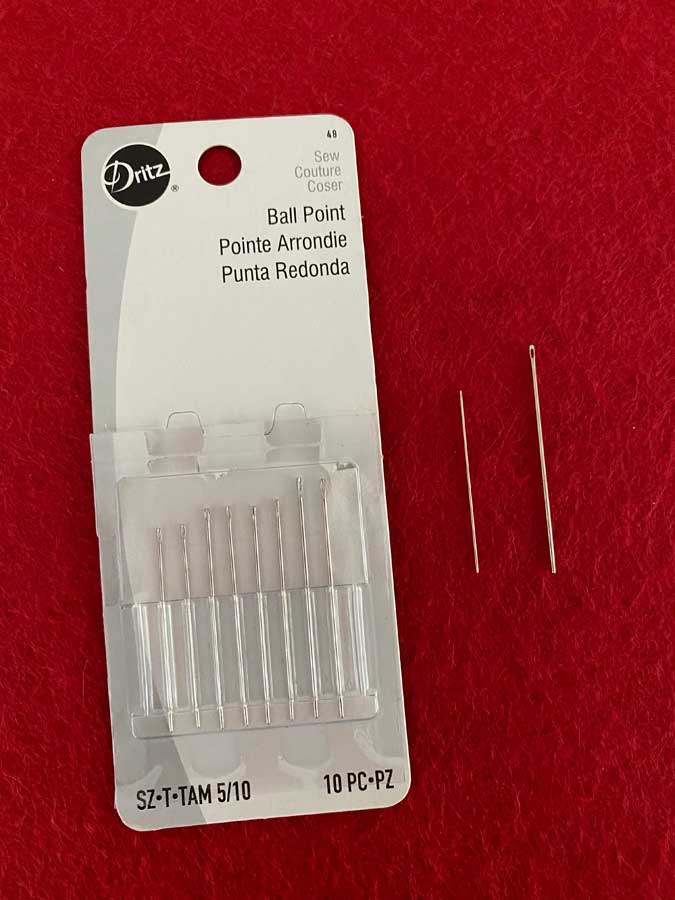
Ball point needlesBall points are designed specifically for sewing knits. They have a slightly rounded tip that glides between the yarns of knit fabric, thus making small holes and protecting against breaking the knit fibers. As opposed to a sharp point that may pierce the fabric, the rounded ends of these ball point needles push the knit loops apart, making it easy for you to sew. Ballpoint needles are generally a poor choice for woven fabrics since the rounded tip will not cleanly pierce through the weave.

Darners

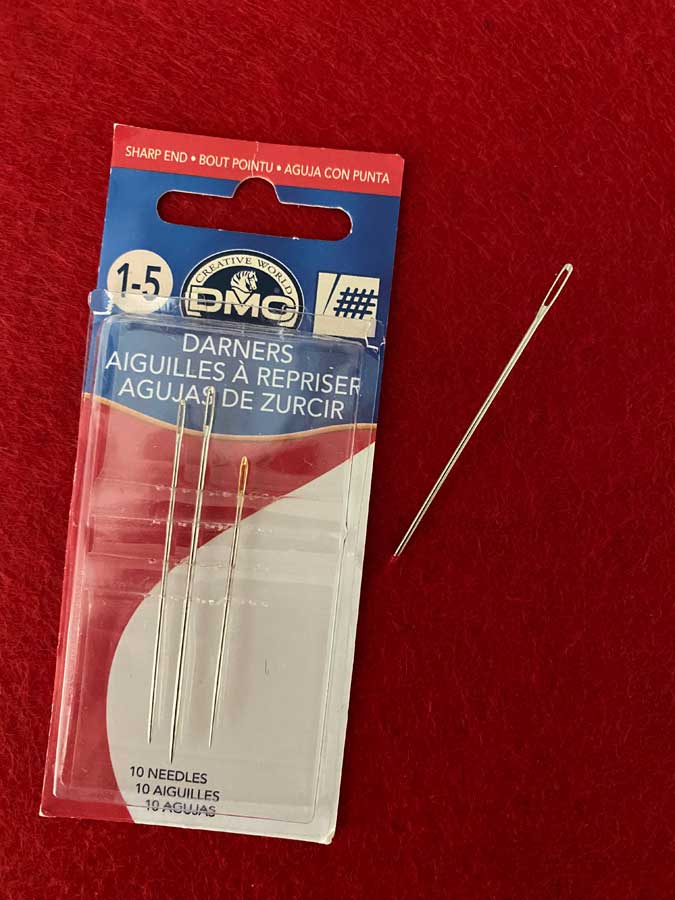
Darner needles are large, not as sharp, have a long, large eye to accommodate larger threads like yarn and embroidery floss, and come in fewer sizes than other needles. Darner styles include  short cotton darners, yarn darners, and long darning needles. They are primarily used, as the name implies, for mending and darning, but they can also be used for making long, quick basting stitches.

Embroidery

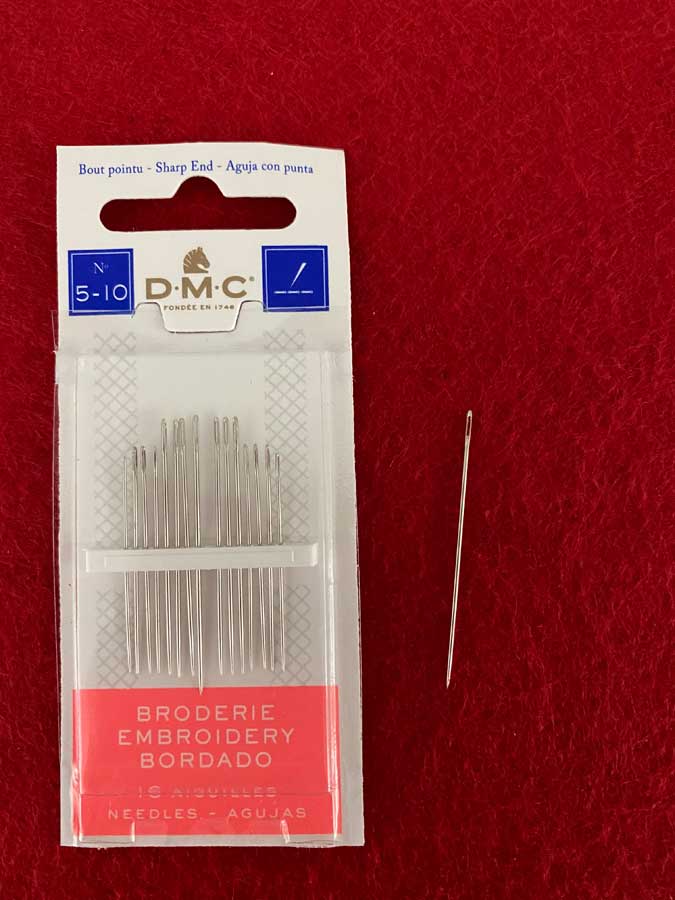
Embroidery needlesEmbroidery needles are basically a Sharps needle with a longer eye. They are designed for things like smocking, heirloom sewing and embroidery, but can also be used in every day sewing. Their longer eye can accommodate different types of thread and make threading the needle much easier. The most popular sizes for these needles are sizes 7 and 9.

Keeping Things Organized

With all the various types of needles, it can be easy to lose track of what type you have in your stash unless you have a system for keeping them organized. Here are some ideas for how to keep your needles organized:

  • Put them back into the packaging they came in.
  • Make a “needle book” from squares of labeled felt
  • Convert a multi-day pill container to a needle organizer by placing a label over the day of the week to identify the type and size of needle.
  • Purchase a needle storage pack, like the Hand Needle Pack from Colonial Needle to sort and store hand needles. The Hand Needle Pack is pre-printed with types and sizes to store up to 12 types of needles. (Tip: ASG Members can access a discount for Colonial Needle in the Special Offers section of ASG.org)
  • Purchase a tomato-shaped needle cushion like the Clover Sort & Store. Or, create one yourself by using your own tomato-style pin cushion and a sharpie to label sections for each type of needle (an ASG member idea!).

Regardless of the method you choose, now that you understand that each needle has its own purpose, you can see the importance of keeping them separate and organized.

We hope this article has helped you learn a few new things that are helpful to your hand sewing as well!


~Sheryl Belson, ASG Member

This field is for validation purposes and should be left unchanged.
Did you enjoy this article?
Are you an ASG member?

Tagged With: hand needles, sewing, stitches

August 7, 2020

Buttons: Attachment Antics

Button, Button

Whether you use them functionally to close a garment, tote or other project, or you line them up as a border or trim or even string them together for a bracelet, buttons are definitely a fun sewing notion.

You can find buttons made from plastic, metal, bone, rhinestones, wood and a host of novelty materials. They can be machine made and mass produced in a variety of shapes and sizes, or carefully handmade one at a time. And you can even make your own buttons.

Sew-through or Shank?

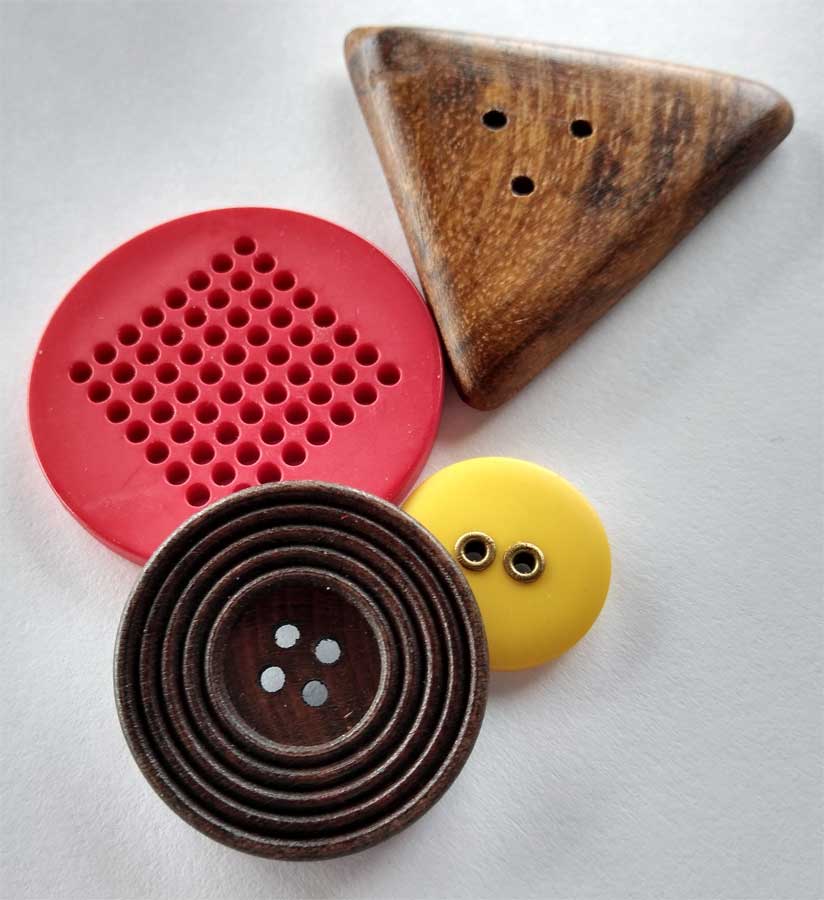
buttons with holes
Buttons with holes

When you first look at the button rack in your sewing store, you will notice two types of buttons—those with visible holes and those without. The holed buttons may sport two, three, four or more holes, offering a wide range of options for attachment.

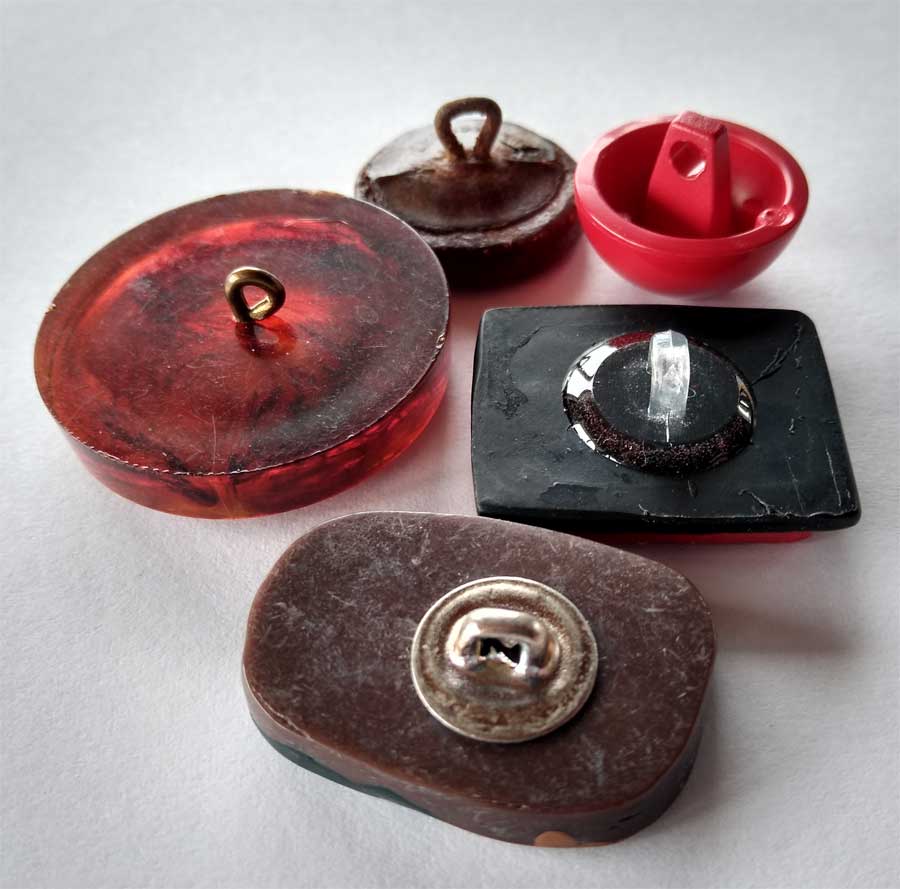
buttons with shanks
Buttons with shanks

Shank buttons don’t have a visible means of attachment on the button surface, and thus offer the opportunity for a more ornate design. The attachment loop is on the underside, either molded into the button backing, or as an attached plastic or wire loop.

While a sew-through button is flatter against the fabric surface, a shank allows the button to sit above the surface of the fabric and is ideal for thicker fabrics like coating and suiting.

Size Wise

Buttons can range from 1/8” to around 2 ½” diameter. Your project pattern should tell you what size is recommended and you can look for that measurement on the button card.

It’s a good idea not to vary the button size too much from the pattern’s suggestion, as the closure needs to fit within the allotted space on the garment. If you choose a different size, it may be necessary to re-space and/or resize buttonholes.

Attachment Antics

While you may have years of experience sewing on buttons, there are some tricks to make the process easier.

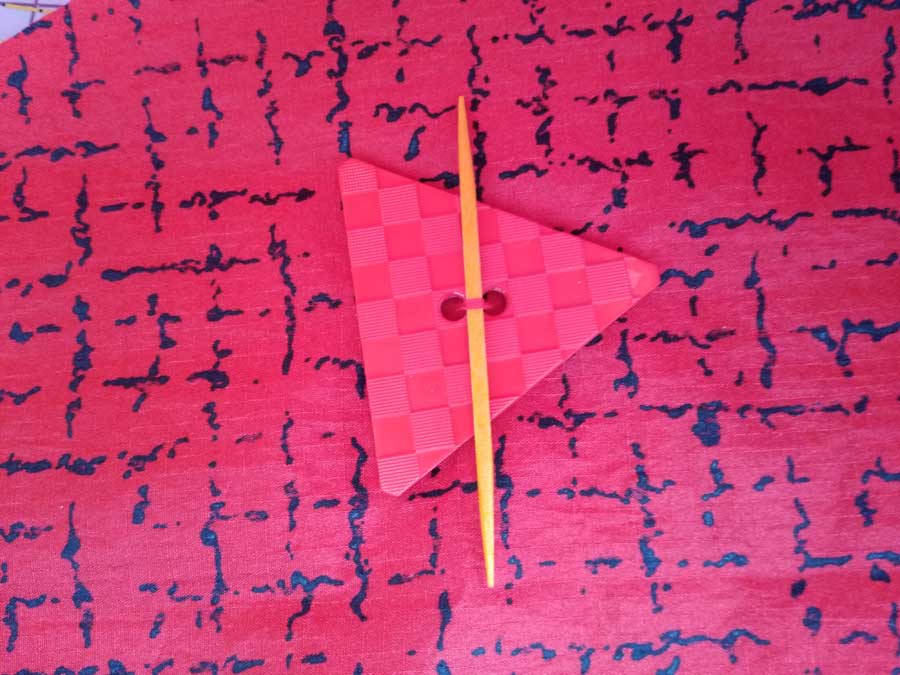
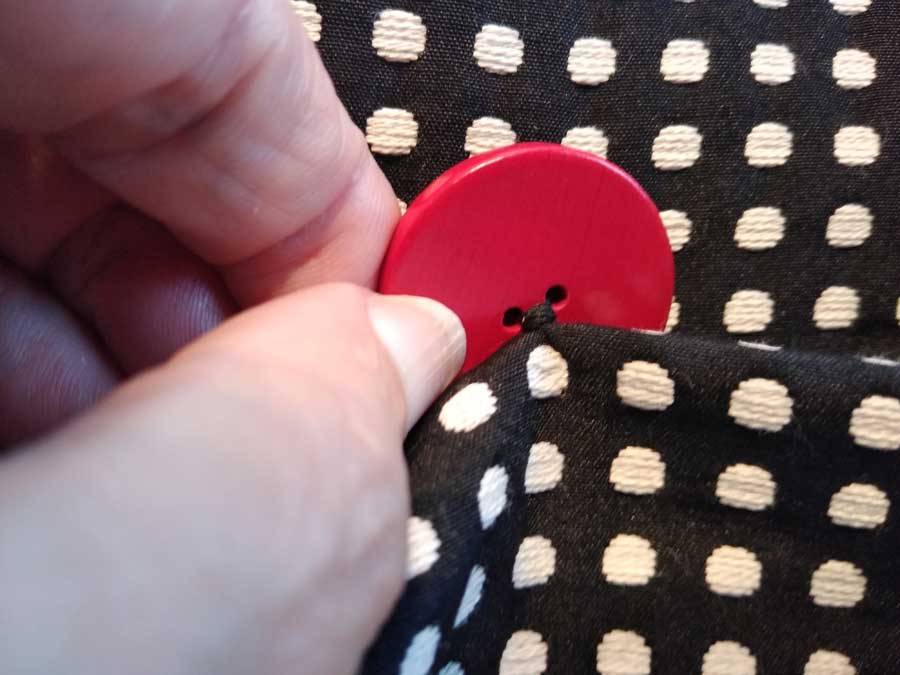
If you have a sew-though button and you’re putting it on a garment sewn from a thick fabric, consider making a thread shank to avoid having the button make an indentation in the overlapping layer. The easiest way to do this is to put a toothpick between the button holes while sewing it on. Then, pull out the toothpick when the attachment is done, leaving you extra thread length to accommodate the fabric thickness.

A second way to make room for thick fabric involves leaving extra space below the button for a thread extension, then wrapping that extension to neaten the multiple thread strands of the shank. The length of the shank should accommodate the fabric thickness.

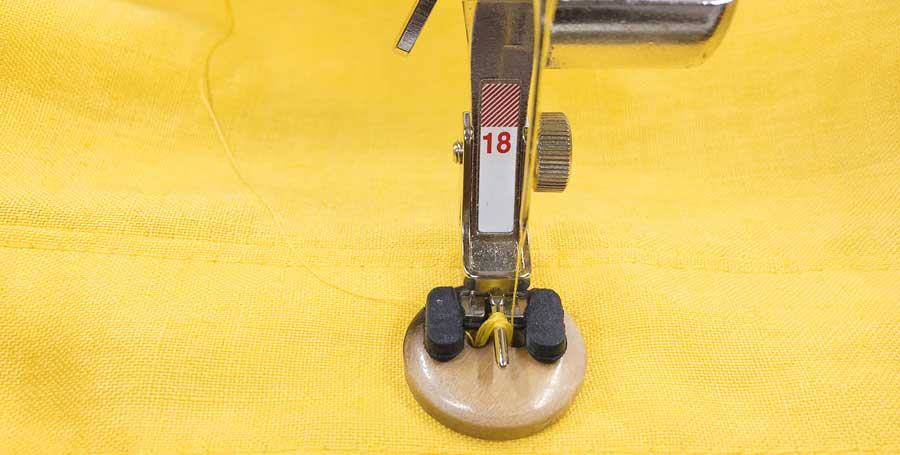
For a quick and easy button attachment for sew-through versions, use your sewing machine to secure the threads. Consult your owner’s manual for exact settings, but use an open-toe foot (some machines have special button sewing feet). Some button feet offer a metal projection to allow for making a thread shank on the button. If you need to secure the button before sewing, tape it in place, stitch through it, then peel off after sewing. Set the stitch length to zero and the adjust the stitch width to span the button holes. Then stitch back and forth between the holes about five times, and if it’s a four-hole button, move onto the next hole set and repeat. At the end of the process, lock or tie the threads on the underside.

Photo courtesy of Bernina

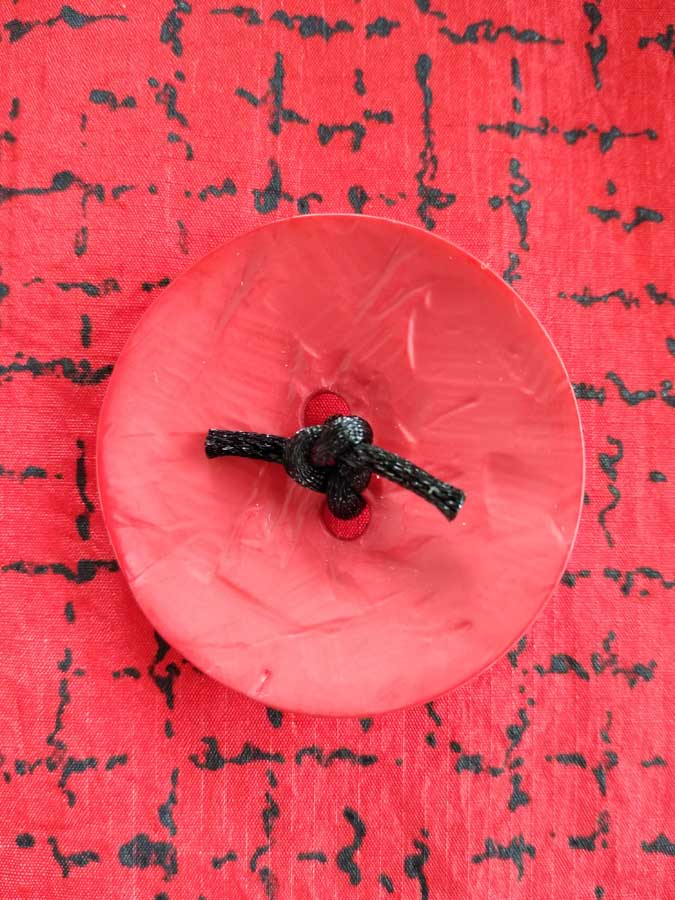
Button with a tied mountGot a novelty thread or ribbon you want to showcase, or a thin leather strip? Tie the sew-through button on. Put the strand through a large needle eye and stitch down through the hole from the right side, leaving an end long enough to tie. Bring the strand back up through the other hole(s) and tie off securely in a square knot. A bit of seam sealant can be used to secure the knot. Clip the strand ends shorter.

Fun or Funk

If you have an especially large or odd shaped button that you dearly love, but it would need a giant buttonhole to actually function, be clever and just sew it to the overlap side, either with or without an uncut buttonhole stitched under it. To make the functional closure, use snaps for an open-and-shut case without undo stress.


~Linda Griepentrog
Linda is the owner of G Wiz Creative Services and she does writing, editing and designing for companies in the sewing, crafting and quilting industries. In addition, she escorts fabric shopping tours to Hong Kong. She lives at the Oregon Coast with her husband Keith, and two dogs, Yohnuh and Abby. Contact her at gwizdesigns@aol.com.

This field is for validation purposes and should be left unchanged.
Did you enjoy this article?
Are you an ASG member?

Tagged With: buttons, sewing, shank buttons

  • « Previous Page
  • 1
  • …
  • 5
  • 6
  • 7
  • 8
  • 9
  • …
  • 16
  • Next Page »

Become a Member

Join the only national organization dedicated to Advancing Sewing as an Art and Life Skill.

Join Now button

Blog Article Categories

  • ASG Conference
  • Chapter Stories
  • Embroidery
  • Fitting
  • Learn to Sew
  • National Sewing Month
  • Products, Books, & Patterns
  • Projects
  • Quilting
  • Sewing
  • Sewing Techniques
  • Sewing Tips
  • Sewing Tours
  • Videos
  • Disclaimer
  • Privacy Policy

American Sewing Guild
National Headquarters
9660 Hillcroft, Suite 230
Houston TX 77096
713-729-3000 | 713-721-9230 Fax
www.ASG.org

ASG wordcloud - education, conference, discounts, videos, special offers, tours and more

Copyright © 1998–2026 · American Sewing Guild · All Rights Reserved