American Sewing Guild (ASG)

Visit our blog Visit the ASG Facebook page Visit ASG on Pinterest Visit ASG's YouTube channel Visit ASG on Instagram
  • Home
  • Join ASG
    • Join Online
    • Chapter Locations
    • Member Benefits
    • Member Brochure
    • Join by Mail
  • Conference & Education
  • Resources
    • Contests & Awards
    • Giving Back
    • Hall of Fame
    • Links
    • Travel and Tours
    • Measurement Chart
  • Shop
    • ASG Store
    • Chapter Products
    • Video Resources
  • Blog
  • About
    • About Us
    • Donate to ASG
    • ASG Sensitivity Statement
    • FAQ’s
    • Start a Chapter
  • Contact
  • Member Login
    • Login First!
    • Members Only
    • Leadership Only
    • Website FAQ’s
    • Logout
  •  

August 12, 2022

Triple Straight Stitch

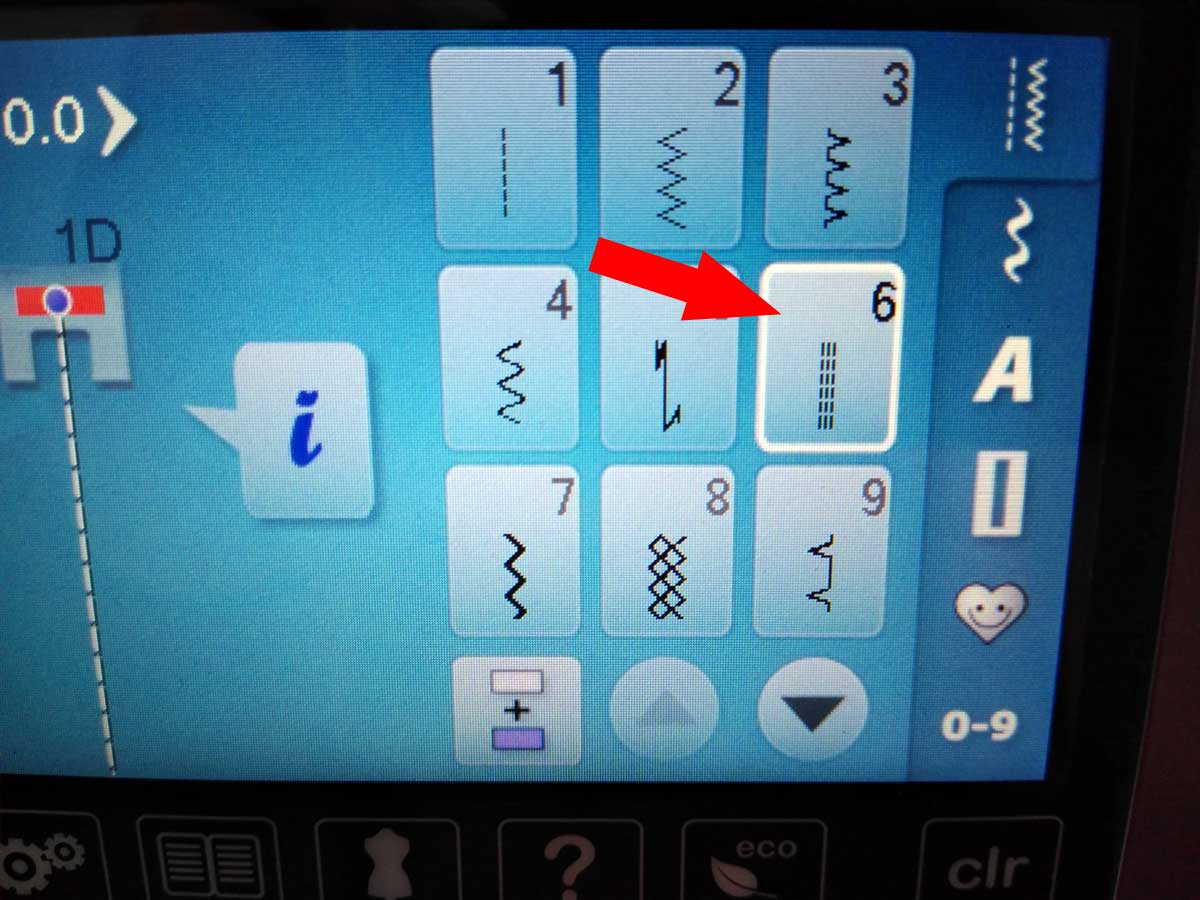
Often overlooked because the machine icon doesn’t really look like the actual stitch, the triple straight stitch is a fun one, both for utility use and for embellishments. Depending on the machine brand, the stitch may also be called a straight stretch stitch or a backstitch.

On the stitch screen or dial, it appears as three rows of straight stitching side by side. But in fact, that’s not how it sews out. Instead, it’s really three stitches on top of each other with the needle penetrating the same hole at each end of the stitch. Whether your machine sews it as two stitches forward and one back, or one stitch forward, one stitch back and another stitch forward depends on the brand, but the look is the same—a bold straight stitch.

Triple straight stitch on the machine

What’s it for?

Because the machine is sewing back and forth to create this stitch, there is some inherent stretch built into it. It’s great for sewing seams or hems in knit fabrics to maintain flexibility without popping stitches, as often happens with just a regular straight stitch. And ideal as well for use on leggings or swimwear where stretch is needed for fit.

It’s also perfect for use where there is extra reinforcement needed, like on tote bag handles, pant crotches, armhole seams, etc. Outdoor gear is another perfect place to utilize this stitch. It’s essentially three times as strong as an ordinary straight stitch.

Because the stitches are sewn on top of each other, it still allows you to press a seam allowance open and flat.

With the backward and forward motion of the machine as it sews out this stitch, it’s a good idea to slow your sewing speed, using either the speed regulator or a lighter touch on the foot pedal.

Beyond the Basics

Even though its intended purpose is for utility use, this stitch can take on a totally new persona when used decoratively.

Like most machine stitches, you can vary the look by changing the stitch length. While the default length might be ideal for sturdy seam sewing, lengthening it makes it ideal for other uses.

The triple straight stitch is ideal for topstitching. You can sew a well-defined and prominent line of stitches to accent a seam, garment edge or outline an appliqué. Because you’re getting three stitches on top of each other, the stitching line appears heavy without having to invest in a heavy weight or novelty thread and a specialty needle. You can simply sew with the same thread you used to construct the garment, or a contrast.

You can even sew this stitch with metallic thread. Or, use a shiny rayon or polyester embroidery thread for a bit of extra sheen. Opt for a variegated thread for an even more interesting look.

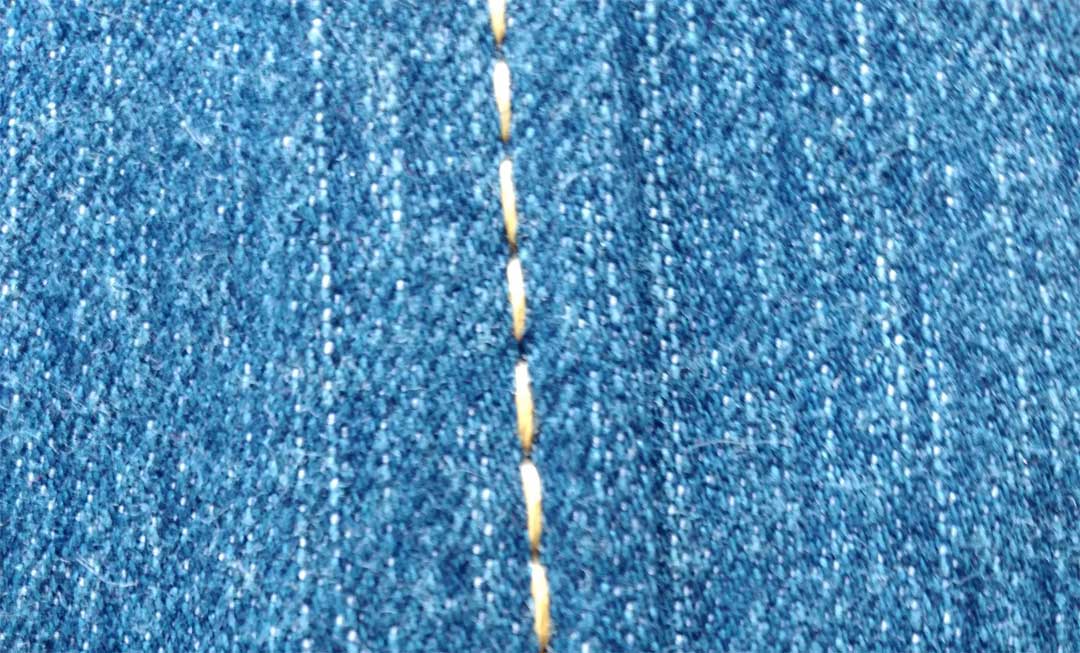
When used on denim, the triple straight stitch can mimic the topstitching found on ready-to-wear jeans.

Topstitching on jeans

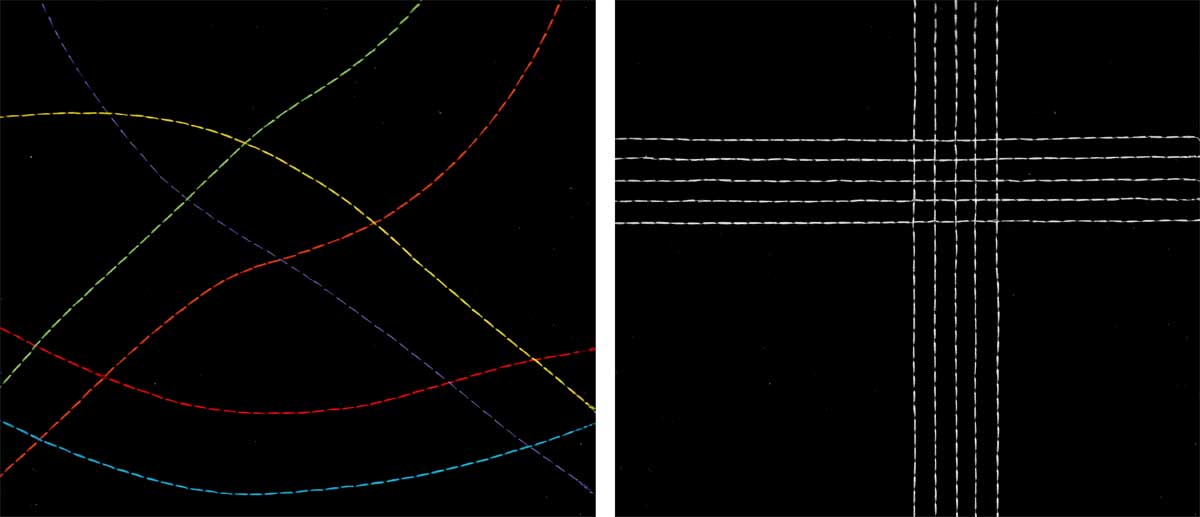
In addition to topstitching, the stitch can be used to create designs on its own—from free-flowing curves to a precise grid, as shown in the photos below.

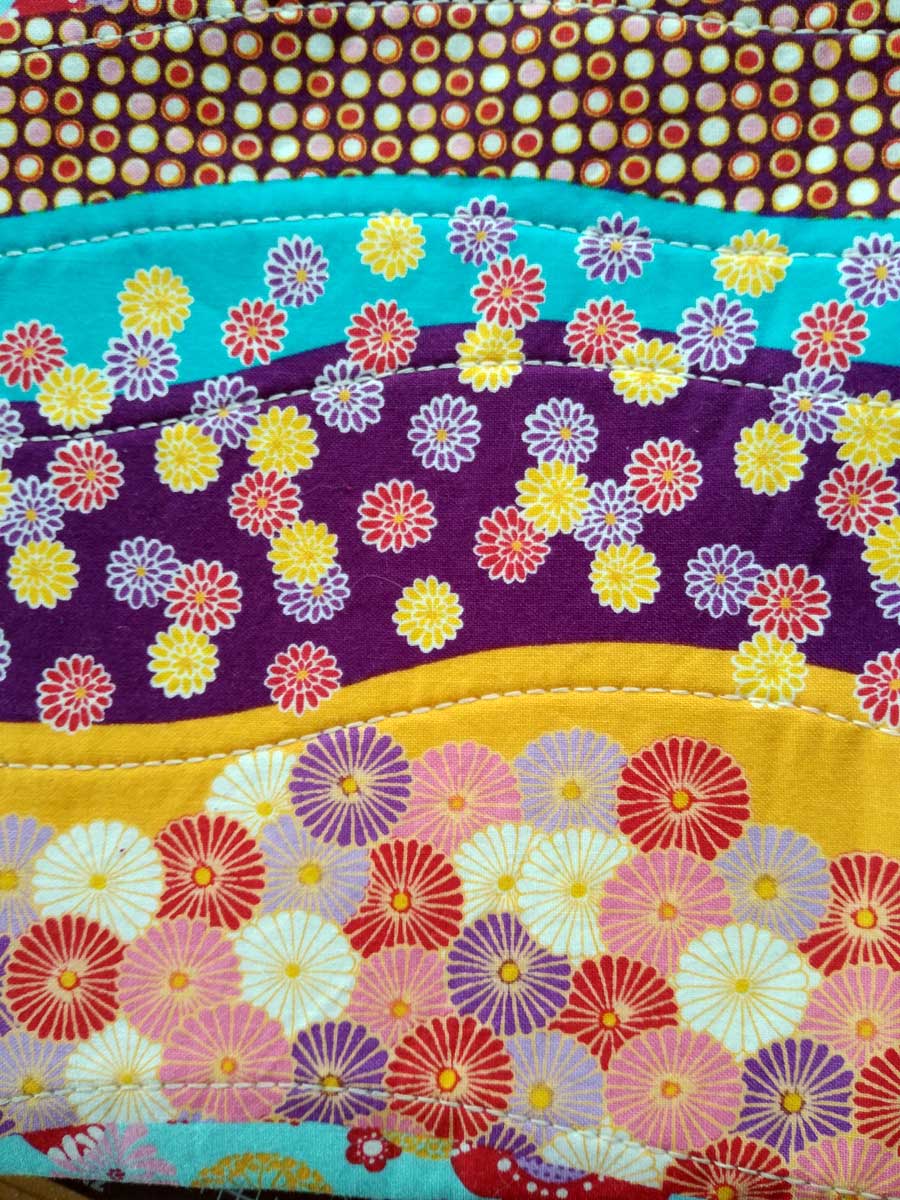
When used with white thread on a dark background, this stitch can look similar to Sashiko stitching. It’s also ideal for quilting, whether following the design in a printed fabric for accent or sewing in channels or grids. It can also be used as an outline for pieced motifs, as shown in the next image.

One note of caution: Because the fabric moves forward and backward as it forms this stitch, stick to gentle curves as opposed to tight curves which are harder to control.

And, there’s more…

You can sew the triple straight stitch with a double needle to create perfectly aligned stitch lines, or with a wing needle to leave tiny holes often used by heirloom sewers as accents and for attaching other trims. In both instances, it’s a good idea to sew slower than normal for consistent stitching.

If you add width to this stitch, you get an entirely different stitch—a triple zigzag—which is great for embellishing as well, as the three threads make the stitch much more prominent than a simple zigzag.

Think you might need a little play time with this great stitch?


~Linda Griepentrog
Linda is the owner of G Wiz Creative Services and she does writing, editing and designing for companies in the sewing, crafting and quilting industries. In addition, she escorts fabric shopping tours to Hong Kong. She lives at the Oregon Coast with her husband Keith, and two dogs, Yohnuh and Abby. Contact her at .

Did you enjoy this article?
Are you an ASG member?
This field is for validation purposes and should be left unchanged.

Tagged With: learn to sew, sewing machine, stitches, triple stitch

January 8, 2021

Creating Fuzzies and Tassels

Many sewing projects require straight, precise lines at a pre-defined width using thread that blends into smooth fabric. But when it comes to decoration, there are no rules, and fabric becomes an artist’s canvas for sewing crooked, intentional wrinkles, and wild and vibrant threads.

In her book, Creating Texture with Textiles, Linda McGehee covers topics like crinkling, beading, couching, the cameo shuffle, pintucking, lattice piecing, and more. In this article, Linda shares her technique for making fuzzies and tassels. (reprinted with permission). 


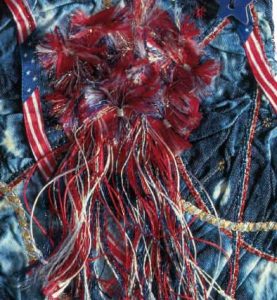
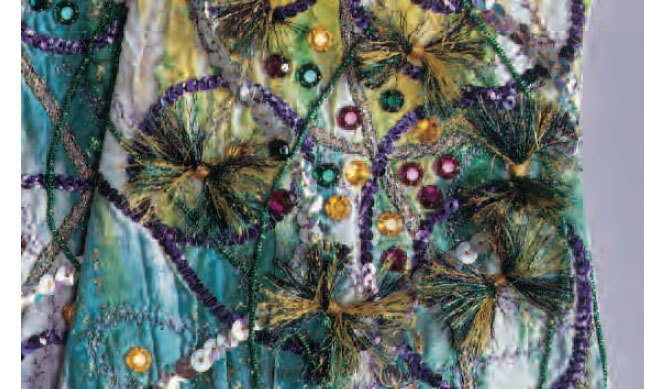
Fuzzies and tassels are simple to create and the color choices are as varied as the threads available. Threads that ravel nicely, such as heavier metallic and rayon threads for the upper and lower looper in the serger work beautifully for either technique. A combination of threads in a variety of colors produces the best design, depending on the project.

Fuzzies

Follow along for steps to make a fuzzy:

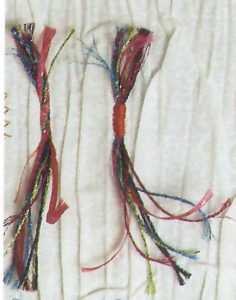
  • To make a fuzzy, twist 10 to 20 threads together to form a cord (Step 1). Begin with several long pieces of thread, fold them in half, then in half again.
Step 1

Vest Challenge: Use these techniques (or others!) to enter the Ghee’s Vest Challenge. Learn more on the Ghee’s website or download the flyer. ASG Members, don’t forget to use your ASG discount! Get it in the Special Offers section.

Step 2 (left) and Step 3 (right)
  • To prevent pulling the finished fuzzy apart, use an open-toe foot with a serpentine stitch, a short length, and width as wide as the twisted cord to stitch the distance that is intended for the satin stitch (Step 2).
  • With the presser foot down, set the machine for a perfect satin stitch the width of the cord.
  • While in reverse, stitch over the serpentine stitch to the beginning of the stitching (Step 3).
  • Set the width just a little wider and stitch forward over the previous stitches to achieve a smooth finish. Because of the bulk of the threads, you may need to help the machine during the final stitching.

Tassels

Tassels are somewhat easier because one step is omitted.

Step 4
  • Begin with twisted threads as with the fuzzies above (Step 1).
  • Zigzag over these threads about 1/4″ (Step 2).
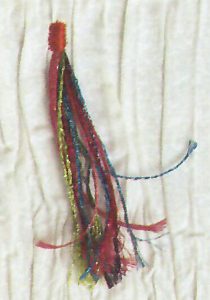
  • Sink the needle into the fabric, lift the presser foot, pull the upper twisted threads around to position them on top of the others, and satin stitch over the previous stitching (Step 4).
  •  Widen the stitch to accommodate the double layer of threads.
  • Trim to the desired length.
  • Let the threads hang naturally or use your hands to mingle and separate them.

Tassels have never been easier!

Tips

  • Any heaver serger thread or yard that ravels easily is great for fuzzies and tassels. Try metallic, rayon and ribbon floss.
  • Twist the threads tightly while stitching the serpentine stitch to make the smallest center
  • The twisted thread will be doubled in the tassel-making process. Plan accordingly and do not make the first step too large.


~Linda McGehee, Ghee’s (reprinted with permission)

Did you enjoy this article?
Are you an ASG member?
This field is for validation purposes and should be left unchanged.


Tagged With: fuzzies, sewing techniques, stitches, tassels, threadwork

October 2, 2020

Sewing with Multi-Color Threads

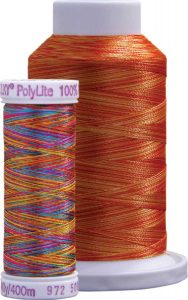
Sulky PolyLite Thread

The sewist’s crayons!

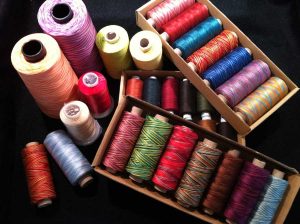
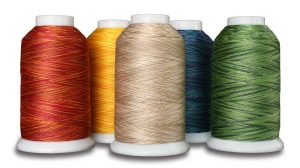
Not really designed for construction, variegated threads are multiple colors within a single strand. When you look at a spool, you may see distinct color patterns or simply a blending of similar colors, depending on the brand, how the thread is dyed and how it’s wound on the spool or cone. Stitching with these threads on your sewing machine also produces differing results. Sometimes, surprises happen unexpectedly!

The spacing and repetition of colors within the spool vary by thread type and brand. Some multi-color threads repeat colors in a regular sequence, others offer random color repeats and others may change hue every inch, or every few feet. Colors can be related by shade, such as a light, medium and dark tone of the same color, or they can be bold contrasting colors, like a mix of red, white and blue within the same strand.

Sometimes the color change is distinct, abruptly changing from one to the another, but more often the changes are gradual with a melding from one shade to the next.

How the thread is dyed determines how it stitches out, in combination with other factors like stitch length and width, and the actual stitch selection.

Look for variegated threads in multiple fiber options—cotton, polyester, rayon, metallic, silk and texturized nylon. They also come in different thread sizes, depending on the use. Heavier weights are ideal for multi-color free-motion quilting.

Stitch Subtleties

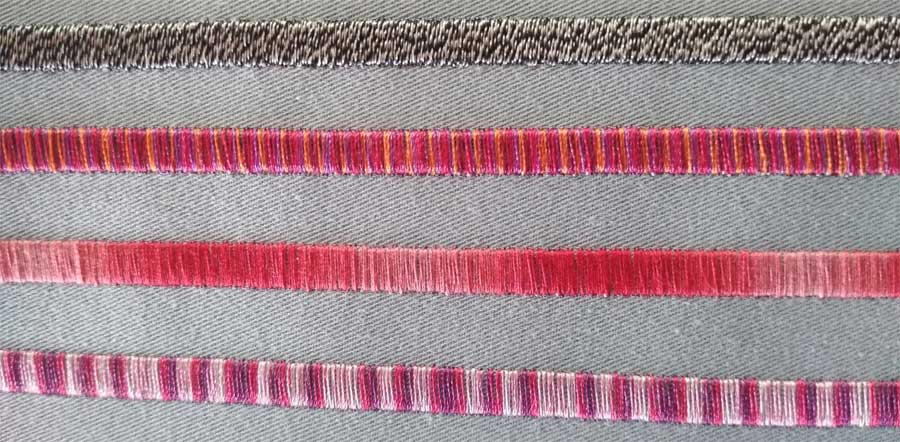
Variegated threads can be used in a number of ways. Satin stitching takes on an entirely new persona creating stripes of color—either distinct or melding.

Top to bottom: Sulky Ultratwist, Superior Rainbow, DMC Cotton, Sulky PolyLite
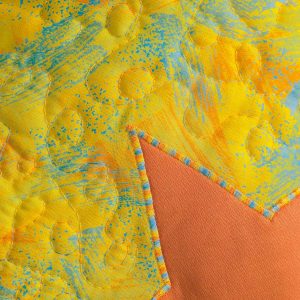
Appliqué using variegated thread; photo by Bernina

A striped appliqué edge is interesting as well. Topstitching with variegated thread is fun, free-motion quilting allows for blending colors found in fabric prints, and the world is your oyster with decorative machine stitches.

When selecting decorative stitches, look for those that are formed only with a forward motion for the best color clarity. If you choose reverse-motion stitches, you can end up with slightly different colors on top of each other as the stitch is formed.

Variegated thread also makes interesting serging stitching lines, whether used as an edge finish or for flatlocking within a garment. Unless both sides show, use the variegated thread only in the upper looper and needle, along with a coordinating solid in the lower looper.

Machine embroidery is a great place to use variegated threads for either subtle or bold shade changes. But, be aware that depending on the thread patterning, you can end up with stripes in your programmed design.

Before committing to a project, be sure to test-stitch with the variegated thread and stitch settings you plan to use to see how the color variations will actually stitch out. Or, better yet, try the same design with different variegated thread types and brands.

A New Twist

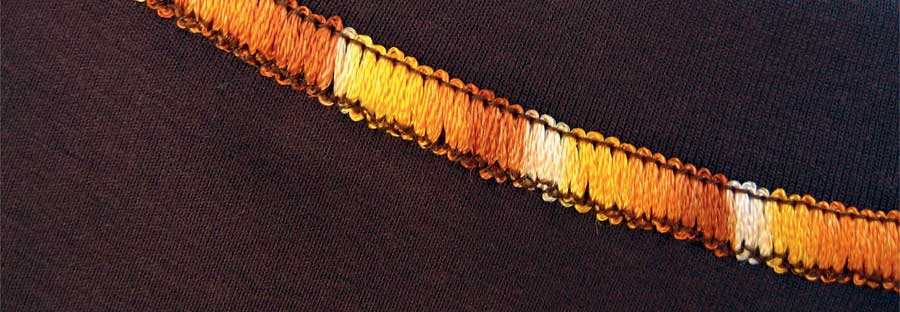
Valdani hand-dyed cotton

Another type of multi-color thread is twisted thread—two or three plies of different colors twisted together to create a heathery look. Look for analogous color shades (like light blue and dark blue) creating a denim look, or more contrast in colors for bolder effect.

Twist threads are ideal for embroidering animal motifs with fur or feathers, topstitching and decorative stitching where you don’t want stripes to be prominent.

Hand Sewing

There are several types of hand-stitching threads available with multi-coloration. Look for embroidery floss and fine wools, as well as multiple sizes of variegated pearl cottons.

Superior King Tut thread

So, add some color changing to your world!


~Linda Griepentrog
Linda is the owner of G Wiz Creative Services and she does writing, editing and designing for companies in the sewing, crafting and quilting industries. In addition, she escorts fabric shopping tours to Hong Kong. She lives at the Oregon Coast with her husband Keith, and two dogs, Yohnuh and Abby. Contact her at .

Did you enjoy this article?
Are you an ASG member?
This field is for validation purposes and should be left unchanged.

Tagged With: stitches, thread, variegated thread

August 21, 2020

Sewing Basics: Hand Sewing Needles

Hand Sewing: Needle Knowledge

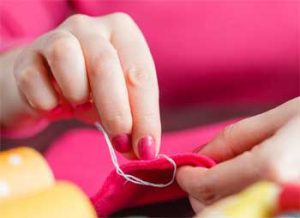
Although some sewists will do just about anything to avoid sewing something by hand, most will inevitably face times when hand sewing will be necessary to complete a project. Knowing which needle to choose for the project makes the task of hand sewing much easier. In this article, we look at the basics of hand sewing needles.

Hand sewing needles come in various sizes, lengths, shapes, points with each element focused on giving the best results with various types of projects. In all varieties, the size relates to the shaft of the needle.

  • The larger the number, the shorter and finer the shaft of the needle and the smaller the eye.
  • As a rule of thumb, the finer the fabric you are working with, the finer the needle (larger size number) you will want to use.  Here are a few needle types you may want to keep in your stash.

Sharps

SharpsIf you only have one type of needle in your stash, choose a Sharp. These are a good general-purpose needle with a nice sharp point, a round eye, and medium length. They come with either a single eye or double eye for those times when you might want to use two strands of thread. A double-eyed needle comes in a variety of sizes and allows you to carry two strands of thread without stressing the fabric with undue friction. These will be useful for several types of sewing including dressmaking, appliqué, hand piecing, and patchwork. Choose sizes 2-4 for medium to heavy weight fabrics; sizes 5-10 for medium to light weight fabrics; and sizes 11-12 for fine fabrics and for creating small, delicate stitches.

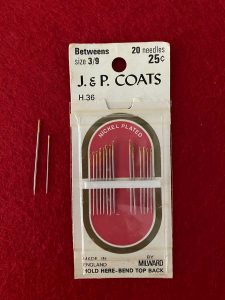
Quilting (a.k.a Betweens)

Between needlesBetweens work very well for their intended purpose, which is to assist quilters in making quick, even stitches through several layers of fabric. They are easy to control and result in very small holes in the fabric. Sizes typically range from 5 to 12, but beginners may do best with a size 7 or 8. The traditional style of quilting between needles is short and has a small, rounded eye.  However, if the smaller eye is a problem, you can also find them with a large eye for easier threading, generally available in size 10.

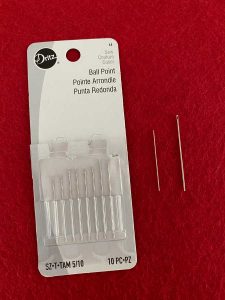
Ball Point

Ball point needlesBall points are designed specifically for sewing knits. They have a slightly rounded tip that glides between the yarns of knit fabric, thus making small holes and protecting against breaking the knit fibers. As opposed to a sharp point that may pierce the fabric, the rounded ends of these ball point needles push the knit loops apart, making it easy for you to sew. Ballpoint needles are generally a poor choice for woven fabrics since the rounded tip will not cleanly pierce through the weave.

Darners

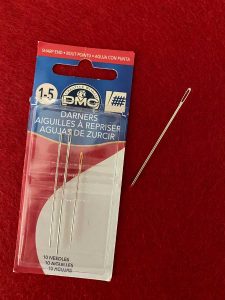
Darner needles are large, not as sharp, have a long, large eye to accommodate larger threads like yarn and embroidery floss, and come in fewer sizes than other needles. Darner styles include  short cotton darners, yarn darners, and long darning needles. They are primarily used, as the name implies, for mending and darning, but they can also be used for making long, quick basting stitches.

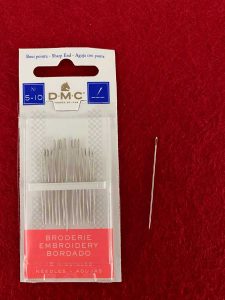
Embroidery

Embroidery needlesEmbroidery needles are basically a Sharps needle with a longer eye. They are designed for things like smocking, heirloom sewing and embroidery, but can also be used in every day sewing. Their longer eye can accommodate different types of thread and make threading the needle much easier. The most popular sizes for these needles are sizes 7 and 9.

Keeping Things Organized

With all the various types of needles, it can be easy to lose track of what type you have in your stash unless you have a system for keeping them organized. Here are some ideas for how to keep your needles organized:

  • Put them back into the packaging they came in.
  • Make a “needle book” from squares of labeled felt
  • Convert a multi-day pill container to a needle organizer by placing a label over the day of the week to identify the type and size of needle.
  • Purchase a needle storage pack, like the Hand Needle Pack from Colonial Needle to sort and store hand needles. The Hand Needle Pack is pre-printed with types and sizes to store up to 12 types of needles. (Tip: ASG Members can access a discount for Colonial Needle in the Special Offers section of ASG.org)
  • Purchase a tomato-shaped needle cushion like the Clover Sort & Store. Or, create one yourself by using your own tomato-style pin cushion and a sharpie to label sections for each type of needle (an ASG member idea!).

Regardless of the method you choose, now that you understand that each needle has its own purpose, you can see the importance of keeping them separate and organized.

We hope this article has helped you learn a few new things that are helpful to your hand sewing as well!


~Sheryl Belson, ASG Member

Did you enjoy this article?
Are you an ASG member?
This field is for validation purposes and should be left unchanged.

Tagged With: hand needles, sewing, stitches

Become a Member

Join the only national organization dedicated to Advancing Sewing as an Art and Life Skill.

Join Now button

Blog Article Categories

  • ASG Conference
  • Chapter Stories
  • Embroidery
  • Fitting
  • Learn to Sew
  • National Sewing Month
  • Products, Books, & Patterns
  • Projects
  • Quilting
  • Sewing
  • Sewing Techniques
  • Sewing Tips
  • Sewing Tours
  • Videos
  • Disclaimer
  • Privacy Policy

American Sewing Guild
National Headquarters
9660 Hillcroft, Suite 230
Houston TX 77096
713-729-3000 | 713-721-9230 Fax
www.ASG.org

ASG wordcloud - education, conference, discounts, videos, special offers, tours and more

Copyright © 1998–2025 · American Sewing Guild · All Rights Reserved