 October is National Cybersecurity Awareness Month, the perfect time to launch our new series of articles and tips to help you stay “sew” safe online!
With internet connected smartphones, computers, laptops, iPads, televisions, security systems — and even some of our sewing machines are capable of connecting to the internet — it’s more important than ever to take ongoing steps to keep ourselves protected. Here are a few tips to get started:
- Operating System Updates: Keeping your operating systems up to date, whether that’s Windows, Mac OS, iOS, Android or something else, is your first line of defense. This includes computers, laptops and mobile devices. Most of these devices will update automatically or at least alert you that an update is available. If you receive a screen that says an update is available for your operating system, smile, mash that update button and yell “LET’S DO THIS!”
- Software Updates: While the operating system is what runs your device, software is what makes your device do what you want it to do. It could be a word processing program, an email program, security software, or that game of Solitaire you love to play while drinking your morning cup of joe. If your software doesn’t update automatically, try looking for a “Check for Updates” choice (often found under the Help menu).
- Browser Updates: Browsers refer to what you use to connect to the internet, such as Chrome, Internet Explorer, Firefox, Safari, etc. An up-to-date browser will help to protect you while you surf online. It won’t hide that new pattern or notion that you’re having delivered to your home though.
- Secure your home’s Wi-Fi: You should protect your wi-fi connection as fiercely as your guard your fabric stash. Your home’s wireless router is a potential weak spot in your security. Whether you purchased your own router or you received your modem/router from your internet service provider (ISP), check to be sure that you are not using the equipment’s default username and password (which is often admin/password). If you’re not sure how to check this, it may be time to get out the manual, make a call to your ISP, or promise your favorite teen a new home-sewn item for helping you out.

- Avoid clicking on suspicious emails, even if it looks like it came from someone you know. If an email looks like a scam and quacks like a scam – I mean, duck – it probably is a scam. Or duck. Doesn’t matter. Sew a holiday outfit for the duck but don’t invite it in to your home.
- Protect your devices with antivirus software and anti-malware (or total internet security that combines both) software. This software is like a technology flu shot. Nothing can guarantee that your equipment won’t get infected, but this does a great job of slamming the door on potential problems.
- Never click and tell. Make your online friends ooh and ahh with pics of your new handcrafted outfit, but no one online needs to know what you spent on your new embroidery machine or that you are leaving the house right now to head to the fabric store (tell all about it when you get back though!). Many don’t realize that seemingly random details are all that criminals need to know to target you, your loved ones and your physical belongings—online and in the real world.
Watch for more online tips and information on how to keep your fabulous, creative self “sew” safe online!
~© Janice Blasko, ASG Webgoddess
 Janet continued, “During the years I was conducting my sewing production business, I would often accompany Margaret when she was invited to teach at trade shows and special events. Her style of teaching was enthusiastic and engaging and I always try to carry on that tradition. When Margaret retired, she asked me to continue her mission to teach home sewers that sewing can be more fun, faster and better, than they know. What an honor and a pleasure for me to share all of her special information and now some of my own, with other sewers. I am one of the lucky ones who work at what we love; and, therefore, it doesn’t even seem like work, more like play. When I share this information I can see it in the eyes of the students how excited and happy they are to know a better way to sew. I cannot imagine enjoying anything more, and I feel so blessed to be on this mission, all I can say is: I want to teach the world to sew!”
 While Janet does the sewing demonstration, Jessica is hard at work monitoring comments and questions from viewers. The excellent visual quality gives viewers a great opportunity to not only see exactly how the construction should be done, but also the ability to ask questions in real time. And if you miss the live show, don’t despair, Janet has all episodes archived on the Facebook page and there is even a searchable directory now. For the archived list of episodes, go to her website
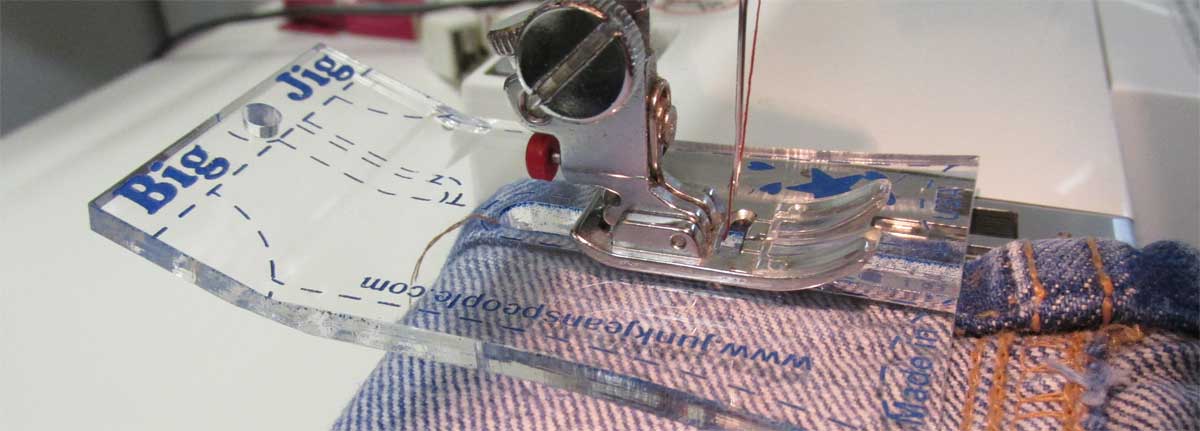