


This 1-minute video from the American Sewing Guild will show you how to apply knit binding. Sew easy!
Pressing Tools—Clapper and Sleeve Board
It doesn’t matter whether you tailor fine wool jackets or make casual everyday wear, or if you’re a quilter—getting a good press is of the utmost importance for a professional-looking project. There are tools to help with that process. Let’s take a look at two tools that work for all sewers and quilters—a clapper and a sleeve board.
Clapper
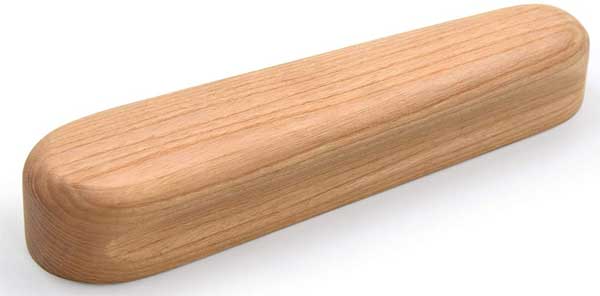
What is it?
A clapper is basically a long block of wood with curved edges. The block may have indentations along the side for easier holding, but the bottom surface if totally flat. Clappers come in different sizes, depending on where they’ll be used.
It’s important that the clapper is made from hardwood with a heavy, closed grain so that it holds heat and steam in whatever you’re trying to press beneath it. Maple is a common wood used for clappers. All clappers should be unfinished wood, to avoid transferring any oils or finishes to the fabrics below.
What is it for?
Fashion sewers and quilters use a clapper to flatten and compress seams, creases and hems. It’s helpful for flattening edges, like tailored collars on jackets and cuffs. Some people use a clapper to create precise creases in pant legs. Quilters use clappers to help flatten seams, whether pressed open or to one side, and to make sharp seam edges in foundation piecing projects.
How does it work?
A clapper is used in conjunction with an iron, either steam or dry. If you’re using a dry iron, spray the area with water to moisten it before pressing and clappering.
Once the area is pressed with the iron and infused with steam, press the clapper down on top of the area to trap the moisture in the area until it cools. Apply pressure if you’re pressing a thick edge like a collar, lapel or cuff.
Sleeve Board
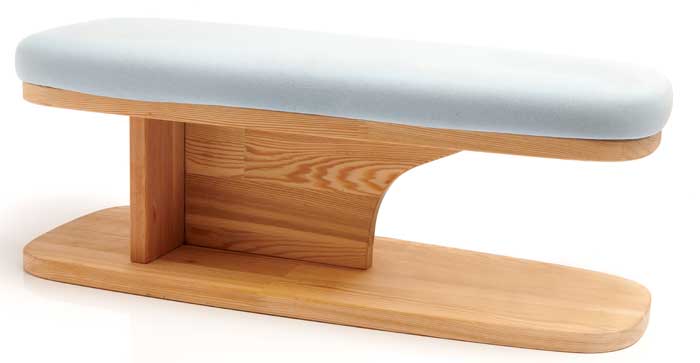
What is it?
A sleeve board is basically a small wooden ironing board, usually with padding on the upper surface. The wooden base usually isn’t padded, but provides an optional pressing surface should a harder surface be needed.
Some sleeve boards have metal grids under the upper padding and some have metal legs instead of being reversible flat surfaces.
What is it for?
The name doesn’t say it all, but it does note its original purpose—pressing sleeves, without getting extra creases where you don’t want them. But, it’s also handy for pressing pant legs and other tubular type sewing projects where you don’t want additional creases added to the area. For crafters, a sleeve board is handy for pressing wine bags or other narrow drawstring type bags where accessing seams can be challenging.
A sleeve board can also be used for any pressing task where a full-size ironing board might not be needed—like pressing doll clothes, or quilt blocks.
How does it work?
 Sleeve board sizes vary depending on the manufacturer, and the size of the pressing surface obviously affects what can fit over it. But all sleeve boards have at least one end tapered so that it’s narrower than the opposite end attached to the base.
- To use the sleeve board, simply slide the sewn tubular shape over the narrow end of the board and onto the padded pressing surface.
- A sleeve can actually be pulled over the smaller curved end to lightly press the cap area during construction.
- If you’re sewing with limited space, like at a retreat, a sleeve board can be used as your personal tabletop ironing board to save time waiting in line for the main ironing board.
~Linda Griepentrog
Linda is the owner of G Wiz Creative Services and she does writing, editing and designing for companies in the sewing, crafting and quilting industries. In addition, she escorts fabric shopping tours to Hong Kong. She lives at the Oregon Coast with her husband Keith, and two dogs, Yohnuh and Abby. Contact her at gwizdesigns@aol.com.
Matching Fabric Patterns Across Seams
Ever wondered how to line-up/match the pattern of your fabric across seams? This 1-minute tutorial is a sure fire way to get it right!
Sewing Basics: Sewing Machine Terms
It’s National Sewing Machine Day! Spend 17 minutes with us in this video and learn about 6 different parts of your sewing machine. Want to learn more? If you aren’t a member already, we hope you’ll consider joining ASG — we would love to meet and sew with you!
~Sheryl Belson
Selvages: On the Edge
What is the selvage?
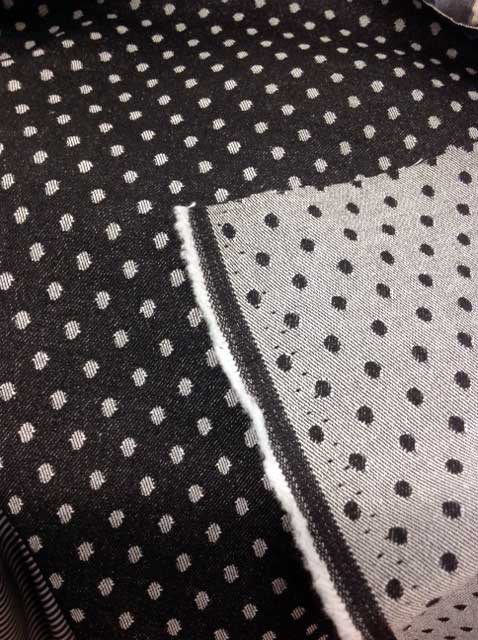
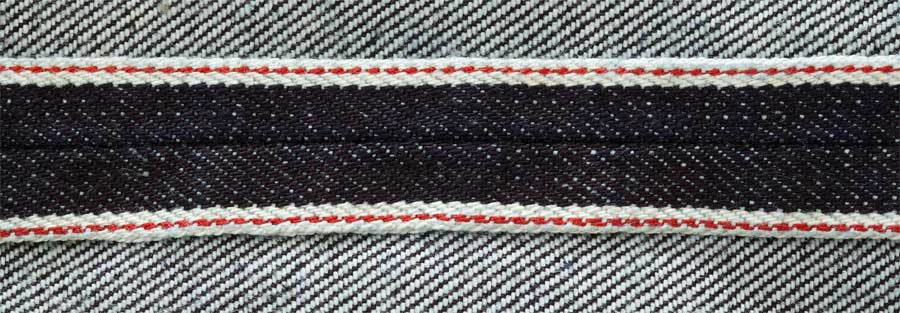
Selvages are the edges of woven fabrics—the place where the weft (crosswise) threads turn around to form the next row during the weaving process. Some selvages are thicker than the fabric itself, as often there are more threads per inch at the edges to help keep the edges straight during the weaving process.
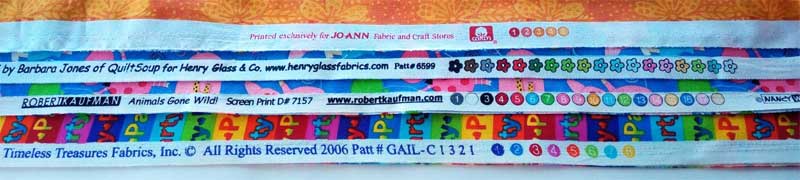
Selvages may be the same color as the fabric, or they may be a contrast. Interestingly, contrast threads are sometimes woven in the selvages. On some velvets and velveteens, you may see metallic threads along the edges.
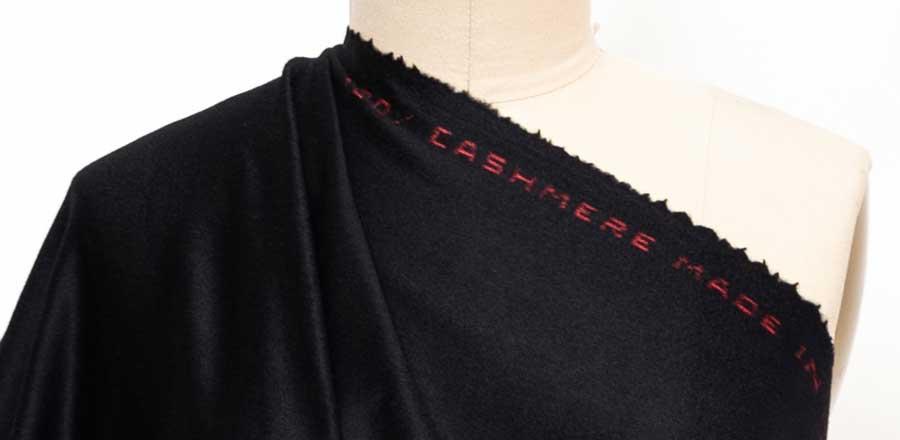
On high quality and imported fabrics, sometimes the requisite information like fiber content and country of origin is actually woven into the selvage in a contrasting thread color.
 Selvages are not always straight—they can be fringed or looped, depending on the type of loom used and the finishing processes.
On fabric like denim where the warp (lengthwise) threads are a different color than the crosswise threads, the selvages may be totally different looking than the fabric body itself.
Information, please
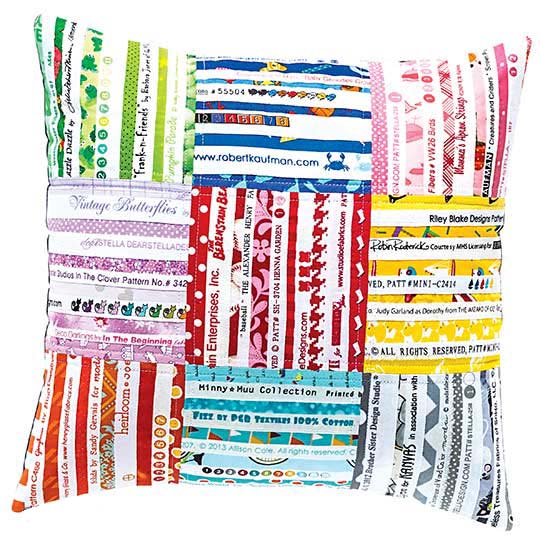
You can find a variety of information bits on most selvages, but some have none. Look for the brand name, the designer’s name and sometimes the fiber content and/or care instructions, like “dry clean only.” You may also find the date the fabric design was copyrighted, and on printed fabrics, you may see lots of colored dots or shapes along the edge. These fun indicators tell how many different color screens were used in the printing process of the particular fabric.
- Some selvage edges include the website for the fabric brand or a social media reference. Designers have even been know to add an inspirational message on the selvage.
- In addition, home décor fabrics may show an indication of the repeat of the pattern, and sometimes an arrow showing which direction is up in the patterning.
Saving Selvages
Because of their tighter weave, the selvages may shrink differently from the fabric itself, so many people just cut the selvages off before cutting out the project.
While you can certainly trim and toss them, you can also use them creatively. If your project has a straight seam edge, you can cut it on the selvage to avoid raveling and perhaps add a decorative touch to the seam edge. A pant leg seam or a loose fitting, straight-cut jacket would be two great places to cut on the selvage for pre-finished seam allowances. Selvages are also a great edge for pockets or straight hems, either exposed for interest, or just as an edge finish.
Trimmed selvages are often used to stabilize a stretchy area—like a shoulder seam in a knit T-shirt. Lightweight woven selvages, like silk organza, are ideal for this use, as they’re sheer and don’t add a lot of bulk as they span the seamline. Interesting cut-off selvages can also be “reapplied” to an area as a decorative trim, often combined with ribbons, braids or decorative stitching. Fun selvages are also great to insert as a flat piping.
Selvages (with some attached fabric width) can also be used for bindings or garment ties.
Quilting Ideas
If you’re a quilter, perhaps you keep all your cotton selvages for other projects. It’s easy to strip piece them together on a lightweight backing to make quilt blocks or other projects. When you trim the selvage, leave at least ¼” beyond the actual selvage and use that for joining. Layer the strips one edge over the other and zigzag the edges in place through the backing until you fill the space needed.
Crafting Ideas
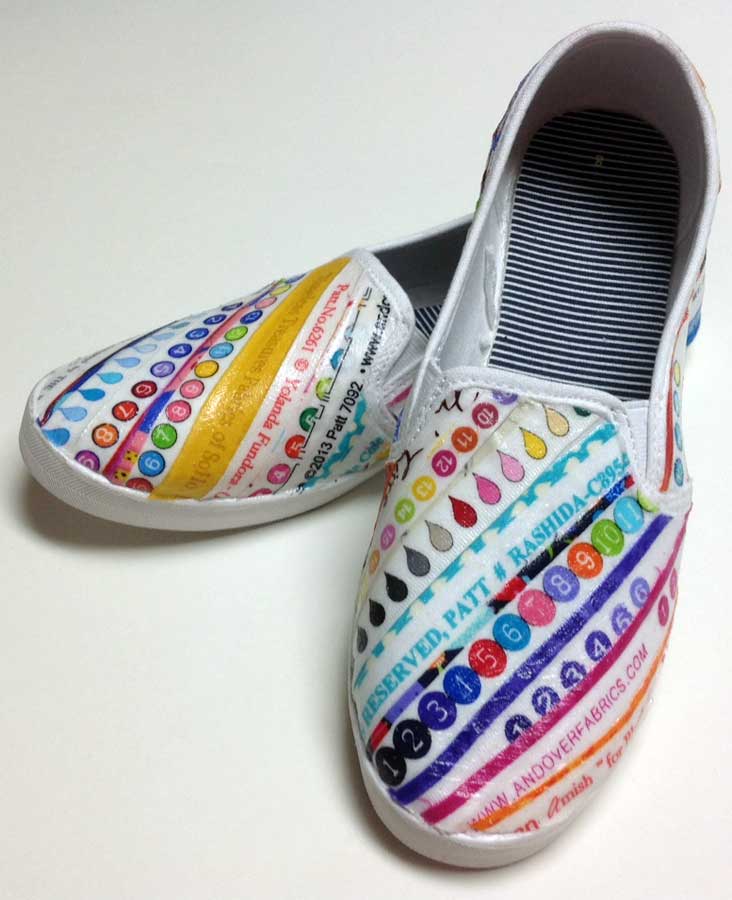
For crafting, trimmed selvages are ideal for decoupaging onto projects—like basic tennies {photo}, picture frames, boxes, vases, etc. Just overlap the raw edge portion and seal with the medium.
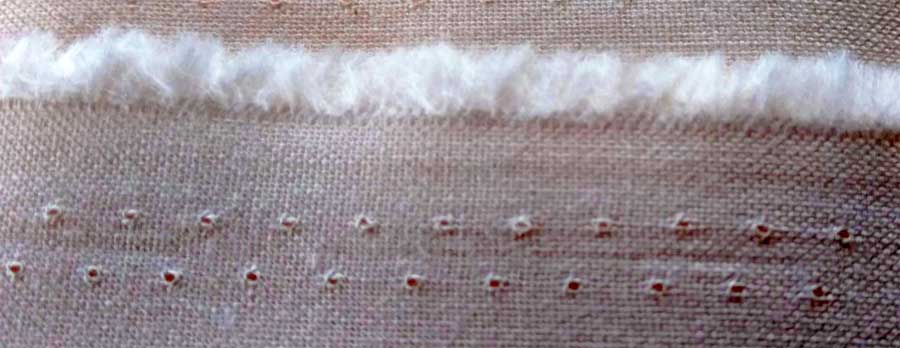
Holey Moley
What are those holes along the selvage? They’re called tenter holes and they’re used to hold the fabric to a frame during the printing and finishing processes.
~Linda Griepentrog
Linda is the owner of G Wiz Creative Services and she does writing, editing and designing for companies in the sewing, crafting and quilting industries. In addition, she escorts fabric shopping tours to Hong Kong. She lives at the Oregon Coast with her husband Keith, and two dogs, Yohnuh and Abby. Contact her at gwizdesigns@aol.com.
- « Previous Page
- 1
- 2
- 3
- 4
- 5
- 6
- …
- 15
- Next Page »
